Good day, dear users of the site! I recently tried installing Linux on my Android device. As a guinea pig, I used a smartphone called Explay Tornado. I needed a computer with an internet connection, a USB cable, a smartphone itself. Before installing a new system on a smartphone, you need to make sure that a Micro Sd card is installed on your device and that you have Root Rights. If you do not have Root rights, then you need to get them! I used a computer program called Kingo Android ROOT. There are many other programs to get.
In the Google market, you need to download the following programs: Complete Linux Installer; Terminal Emulator for Android ; VNC Viewer
First of all, we will work with the application or program Complete Linux Installer. Once again, we are not changing the Android system to Linux, we are making one system work in another. When you first launch the application, the program prompts us to install additional components for further work, of course we agree with them and start the installation. Installation will take no more than one minute with a good Internet connection. As shown in the figure, the application prompts you to install boot scripts, you are required to click on the OK button.
- Further, the application will require you to have full access to the system, for this we received Root rights. The next step is to allow the application to the system functions of your smartphone or tablet.
- Then we move on to the next step, namely the installation guide for the system. The program automatically starts checking your device for all the main factors for installing a new environment and will give you the results of the versions that you can install on your tablet or phone. In my case, the program picked up these versions of the program.
- As shown in the screenshot above, we are listed with options that our device can accurately reproduce. But as practice has shown, they work, but with departures. Departures may be due to the fact that my device is too weak, I don’t know exactly how it will work for you. And so let's take an example of installing Ubuntu 13.10.
- We click on the button labeled Ubuntu 13.10 and proceed to the next item, which we will analyze in detail with you.
The program offers to download to the system image and there are 3 versions of them, large, small, and standard, how do they differ? First of all, they differ in size (weight) of files and hence in functionality. Since everyone knows that my device does not have enough memory, so I need to install a larger memory card and choose the system that takes up less space on the flash card. Click on download image and select the file you need. The sizes are very large, so I suggest downloading via torrent from a smartphone. Hurray while put on the download, you can fulfill the rest of the requirements of the program.
Without leaving the program, click download Terminal Emulator for Android; and the VNCViewer program will immediately transfer you to Google Play to the necessary pages with applications that you need to download and install. All downloaded installed? Now, while the system image is loading, we download ES-Explorer and after downloading open it and go to the memory card. Through the explorer we create a folder with the name of our system, which means that we create a folder with the name " ubuntu"At the end of the image download, we need to unpack the archive into a new folder ( ubuntu).
- After unpacking the file into a new folder, you should have two files in it. One of them has an .img extension. This file will start our system. We return to the very beginning and press the system selection and press the change button in the additional menu. In this menu, specify the full path to the image itself, it will turn out approximately like in the screenshot.
- It seems like everything is with the setting. But at startup, you need to open the terminal and not to touch anything, the application should automatically pick up the necessary data in the background, but to execute text commands, you will need to confirm your actions through Root access. Here, of course, we allow the application to work further.
- After that, you will start a new system, and your smartphone can work like new, while you will have access to all the features of the new system, as well as in the terminal in such a full graphical environment. This is the first way to install Linux Ubuntu seems to be finished.
That's probably all, if you have any questions, ask in the comments below the material below, I will be happy to help in solving the problems that have arisen as far as possible and understanding the situation.
Most Android users know that this platform is based on the Linux operating system, but despite this, many of its programs are not available. That is why a great way out is to put a Linux shell called Ubuntu on the tablet. It runs through the Emulator and runs in parallel with Android, providing a wide range of applications that are not usually loaded on devices with this operating system.
Both operating systems can run in parallel
We will look at how to install it yourself without the help of special applications, using only an emulator and the VNC Viewer program.
Installing Ubuntu on a Tablet
What parameters are required for this shell? We need root rights, free memory in the amount of 2.5–3.5 GB. It requires a minimum clock speed of 1 GHz or more, and requires support for the Ext2 file system. As a means of facilitating the installation, we need several programs, including an emulator - it will be useful for further running the software.
What are root rights, and how to get them? They represent administrator rights. In this case, the presence of such rights will allow you to change the system parameters of the tablet, so installing Ubuntu for Android will not work without them.
You can get these rights through various applications, a large number of which you will find in the Play Market. Download one of them, activate administrator rights and then proceed to the direct installation of Ubuntu on the tablet.
To do this, do the following:
- Log in to the system settings of your tablet and in the "For Developers" section, enable USB debugging mode. If you do not have this function, go to the "About device" menu and find the line with the build number - quickly click on it 5 times in a row, after which a message will appear that you have become a developer and should appear in the list;

- Create a folder called Ubuntu in the card's memory;
- Download the script to start Linux and one of the software builds - there are only two of them. The first one is minimal, contains only separate, most popular applications and has a size of half a gigabyte, after installation it takes up 2.5 GB of free space on the memory card. The second is a complete assembly, has an extensive set of programs, respectively, has an initial size of 1.5 GB and after unpacking it will take 3.5 GB of memory;
- Next, you should download two programs: Terminal Emulator for Android and VNC Viewer;
- Open the Emulator application and run the following commands in it:
- cd /sdcard/ubuntu
- sh ubuntu.sh.
Note. Before entering commands, the emulator will require the first time you start it, and, of course, you need to give consent to this action.
- Next, you need to specify your screen resolution details and desktop environment type in the same Emulator app.
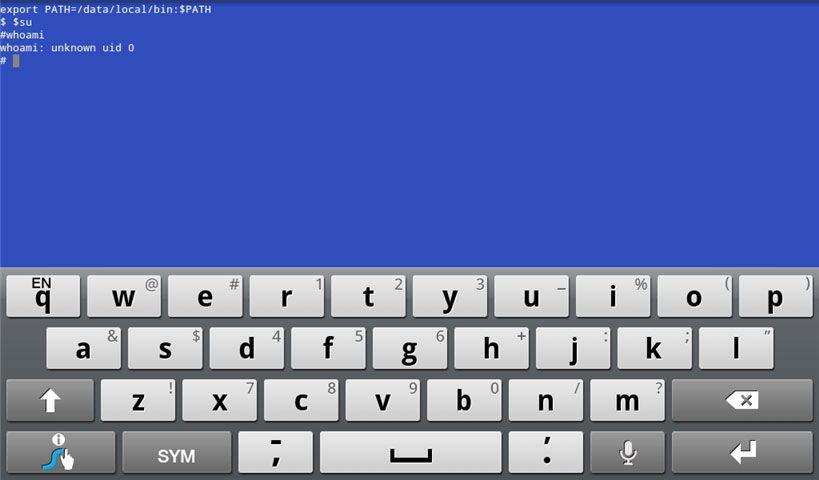
- After a few minutes, if installed correctly, a message will appear in front of you with the text [email protected]:/# - this means that the Linux shell in the emulator was successfully launched.

Today, two operating systems occupy the leading niches in the mobile segment - these are iOS and Android. Many manufacturers are closely engaged in the creation of their own mobile systems. Some attempts have been successful. Their result was, at best, a few devices that never gained success in the market. Ubuntu Touch was announced in 2013.
Phones are equipped with a mobile version of the Linux system - Ubuntu Touch.
It had some interest from users. Ubuntu Touch, which can be installed on a smartphone today, offers the user not only a new interface. It will be of interest to enthusiasts, as well as to all fans of the Linux OS. And just for those who are tired of the monotony of mobile platforms.
Mobile platform Ubuntu Touch appeared 4 years ago. She gained quite wide popularity - this was facilitated by the well-known desktop "mother" of the new mobile system. But Ubuntu did not become a popular version on the phone. The reason for this was low stability, a large number of bugs. Devices running this OS often rebooted, and the shell was not the height of design thought.
The press returned to the topic of this operating system many times. Rumors were very different - both about the freezing of the platform, and about the complete cessation of work on it. You can’t trust all of them, but as a fact, Ubuntu Touch appears quite rarely on smartphones. Recently, information has been released about significant platform updates, and this gives all fans of the mobile OS hope that Canonical has not forgotten about a promising product.

There are two separate global versions within the Ubuntu mobile version project - one for smartphones and one for tablets. They are called respectively - Phone and Tablet. They practically do not differ for the end user, and the differences are aimed rather at supporting the hardware platform.
Key Features
The desktop version of the OS uses the Unity graphical interface, which is loved by non-professional Linux users. In mobile, the manufacturer slightly moved away from it - only the side and top panels remained unchanged.
All basic actions in the new OS are performed by gestures. For example, if you swipe between the edges of the screen, the multitasking menu will appear on it. For users of the Android system, such a solution will be somewhat inconvenient, but innovative and unusual.
In addition, Ubuntu has a Terminal on a smartphone! This is still an inferior version of it, and it is still far from the functionality of the desktop. However, some functions are still there, and the tricks work.

How to install Ubuntu on Android?
To install Ubuntu on a phone instead of Android, you need to have basic skills in working with the Android system. The installation will not remove your "native" system, it will be done on top of an existing distribution.
IMPORTANT. You perform all actions at your own peril and risk.
- You will need an Android application - Linux Deploy. You can find it in the Play Market.
- Launch the program and study the help menu on the screen. You should see a suggested course of action.
- If necessary, go to "Settings" and select the Russian interface language.
- Create a new profile for the Linux account. To do this, in the main screen of the program, click on the line "Linux". It is located at the top.
- Click the OK button. It remains only to select the desired profile.
- And now you need a File Manager. Your best bet is to use ES Explorer. Open it. In the root directory, create an Ubuntu folder. It is very important to write the name in English. OS files will be installed to this folder.
- Record the path to the folder in a separate location. He'll still be useful.
- Restart the Linux Deploy program. In the options, select "Distribution" - "Ubuntu". After that, you should start downloading Ubuntu on your smartphone.
- When the installation is completed, click on the "Start" button. You will see service messages. They say that the process of deploying the OS is underway.
- Download and install the VNCViewer application. You will need it to get more information. The default account password is changeme.
- That's all! You now have a fully functional copy of Ubuntu installed on your smartphone or tablet!
Installing Ubuntu Phone
We examined the installation of a full-fledged Ubuntu on a mobile device. Installing Ubuntu Mobile on a smartphone is an easier task. It can be run from the desktop version of this operating system.
Linuxoid! my friend Yuri Geruk
The second part is about how to install Ubuntu on your Android smartphone or tablet on this platform.
Good day users of the Linuxsoid site! An article was published yesterday, with the installation of the Ubuntu Linux operating system for a smartphone or tablet, this was only the first way I could do it. I wanted to say again that I did not delete the Androd system, but launched the second one on top of the other. I wouldn't inquire further or even attempt to install it myself until my friend Yuri Geruk he gave me a good idea to install the system and only after that I became interested and I started my work.
A warning! The site administration and the author of the material do not bear any responsibility if your device stops working while performing the described manipulations! Everything that is written in the instructions, you do at your own peril and risk. There may be failures, as it was with me, then for a long time I could not turn on my smartphone. There is no hurry, we do everything carefully by reading this manual!
In the first part (Method # 1) I wrote how to install the system through a program called Complete Linux Installer. The full procedure was told when working on this program, what to download, how to install, and all the others. Today I wanted to bring to your attention the second method (Method No. 2). You and I will be installing Linux Ubuntu on a device running Androd through a mobile application called Linux Deploy. The application is also available for you in free access on the Google Play Market, where absolutely any user can download it.
In this application, you do not need to register and activate, after installing it on your device, you will need to launch it and close it again. What do we need to start the system through Linux Deploy. ?
- Smartphone and computer with Internet access (preferably using Wi-Fi), the better the connection, the faster the download will be.
- USB cable (for connecting your device to a desktop computer or laptop)
- The battery is preferably charged at 100%, but not less than 50%
- Let's get started on our mission! In order not to get very long, I will skip the points that were indicated in method number 1. The first and simple step for us is to get root rights on the device, in the previous article I showed in detail how this is done.
- Whoever has Root rights obtained can proceed to the next step, namely, enable USB debugging on their device (the last article also describes how to achieve this). We pick up our smartphone and go to the official Play Market store, where we have to download an application called Linux Deploy. If you have an account set up, you can follow the link with the name of the program and install the application using a computer. After installation, open the application and look further!
- As you can see in the screenshot above, we are shown a program with a simple and not complicated interface. When you first start the program, it shows us a little help, a list of how to start using this program. After fulfilling these requirements, we proceed to the configuration. To set up our program, you need to translate it into Russian (we make someone who has not automatically translated the program) Put the Russian language and check the box next to the item do not turn off the screen.
We look as shown in the figure below:
After setting the language and checkbox do not turn off the screen, we smoothly proceed to the next step, namely:
- Let's create a new profile for our new Linux account. To do this, you need to return to the main screen of the program, yes, exactly to the one that shows the help for further actions and click on the program header (where the penguin is drawn). After that, you will automatically be transferred to a new window, where you are required to click on the plus sign and create a profile. As a copycat of the example, I created a profile called Linuxsoid.com . You can name it whatever you like!
- When you have entered the profile name, press the OK button. After that, just select the desired profile.
- After all this, I turn off the bench and go to bed, and you, as you wish, continue on your own, of course I was joking! We turn off the application and return to the Play Market and download the Es-explorer (you don’t need to re-download from anyone and you won’t succeed :-D). Open File Explorer and create a folder called Ubuntu. After you create a folder, you need to find out the path to it. I will have a memory card like yours, I don’t know.
- When creating, click on the yellow plus sign, after that you will see a pop-up window where we stick out the creation of the folder and smoothly flows in the name of the folder (it is better to write in English, you should not tempt the fate of your smartphone, I will say one thing for good, this will not lead to verified from my own experience ). At the end, I click on the history log and look at the path to our folder with you. I got it like this: /sdcard/ubuntu/.
Was the initial setup successful? Then we proceed to download and install the distribution kit to our devices, to the newly created folder. To do this, you need to open the Linux Deploy application and click, as it were, on an arrow that looks like a download, where you should be transferred to a new window with the information we need. What do we see there? The program prompts us to install the system, but for this you need to select it. In this window, click on the distribution kit and you will see all the available selection of systems (Which may go on your device). I choose Linux Ubuntu. After I have chosen, I click on install and you should start installing (downloading), it takes about one hour. Therefore, it is better to power the smartphone to charge!
- At the end of the installation, click on the start button and you should be connected to the necessary servers. The beauty of this application is that it does not need to additionally prescribe a terminal and give commands, the application will automatically prescribe the necessary commands. At the end you will see as shown in the picture! This is in the event that everything went like clockwork for you and no other errors came out.
- After such inscriptions, you need to download and install an additional application on your device called VNCViewer as in the first installation method. In the server, we create a new connection where we write the address localhots and specify any name in the name and click connect. The application will connect and if possible ask you for a password! The password on all servers is always the same (changeme) well, if you connect via a computer, the password will be different, I can’t tell you because I don’t know it.
At the end of all this, you should end up with something like this:
That's all if you have any problems, write them in the comments, we will help you fix them as far as possible. The material was prepared by Alexander Makarenkov for Linuxsoid.com.
Running Linux on Android is possible! And you don’t need a rooted device for this: all the necessary software is available in the official Google Play store. In just 10–15 minutes, you can get an operating system that differs from Android in advanced functionality.
Note: if you follow our instructions, Linux OS will run in a virtual environment. Android will still run in the background. It would be wrong to call such a system complete. Nevertheless, it copes well with the list of standard tasks.
Before installing, close all unnecessary applications and clear the RAM of your Android device.
1. Install GNURoot Debian and XServer XSDL from the Google Play Store.
2. Before you start installing Linux, make sure your device is connected to a stable Wi-Fi network. Start GNURoot. It will begin downloading the necessary environment packages.
Installation takes from 30 seconds to several minutes depending on the speed of your Internet connection. Ignore the running lines until the following inscription appears:
Let this line not scare those familiar with the concept of "": the application will not cause any harm to the device, since it works in a "sandbox".
3. Enter the following command:
apt-get update
Wait for the packages to finish downloading. This will be indicated by the line Reading package lists…Done.
4. Now enter another line:
apt-get upgrade
To the question "Do you want to continue?" enter the English letter Y and press Enter. The package installation will begin.

This time, the installation procedure will take a little longer. Patiently wait for the installation to complete until the cherished line appears:
The Debian Linux environment is installed, and now you can proceed to deploy the graphical shell.
5. Installing all packages of a Linux distribution is done with the following command:
apt-get install lxde
There is also an option to install the system kernel using the line:
apt-get install lxde-core
Confirm the setting by re-typing Y and pressing the Enter key. The package download process will begin.
During the installation, make sure that all the files have successfully downloaded, and when unpacking, your device has not run out of free space. Otherwise, the system startup will fail.
6. Three additional utilities must be downloaded to complete the installation of the operating system:
- XTerm - for accessing the terminal from the Linux graphical shell;
- Synaptic Package Manager - for managing apt packages and downloading applications;
- Pulseaudio - for installing sound drivers.
All three utilities are installed with a single GNURoot terminal command:
apt-get install xterm synaptic pulseaudio
Approximately 260 MB of data will be downloaded to the device.
7. Now minimize the GNURoot application and open the previously installed XServer XSDL. Agree to download additional fonts. After the installation is complete, tap the screen several times (the application will prompt you to select the resolution and font size - it all depends on your preferences) until you see a splash screen with a blue background and white text.

Restart GNURoot and enter the following two commands in turn:
export DISPLAY=:0 PULSE_SERVER=tcp:127.0.0.1:4712
startlxde &
The sequence for restarting the system (when you want to reopen Linux) looks like this: start XServer XSDL and wait for the blue screen, open GNURoot and enter the above two commands, return to XServer XSDL.
If the terminal swears at an invalid command, go back to step 5 of this manual and try installing a bare kernel. Check the memory status of your Android device.
8. Now open XServer XSDL, wait a few seconds - and you have Linux ready to go.

To install applications in the lower left corner, open the Start menu and select Run. Type Synaptic and press Enter.

In the window that opens, use the search and install the necessary applications. This can be the Firefox browser, the GIMP image editor, the Libre office suite, and other Linux-compatible programs.


Of course, this option for installing Linux cannot be called a full-fledged launch of the operating system on Android. Virtual Linux has a few limitations, but when using a wireless mouse and keyboard (possibly connected using an OTG adapter and a USB hub), you can turn your smartphone or tablet into a portable computer with adult OS functionality.