KVM or Kernel Virtual Module is a virtualization module for the Linux kernel that allows you to turn your computer into a hypervisor to manage virtual machines. This module operates at the kernel level and supports hardware acceleration technologies such as Intel VT and AMD SVM.
By itself, KVM software does not virtualize anything in user space. Instead, it uses the /dev/kvm file to set up virtual address spaces for the guest machine in the kernel. Each guest machine will have its own video card, network and sound card, hard drive and other equipment.
Also, the guest system will not have access to the components of the real operating system. The virtual machine runs in a completely isolated space. You can use kvm both on a GUI system and on servers. In this article, we'll walk you through installing kvm Ubuntu 16.04.
Before proceeding to the KVM installation itself, you need to check whether your processor supports hardware virtualization acceleration from Intel-VT or AMD-V. To do this, run the following command:
egrep -c "(vmx|svm)" /proc/cpuinfo
If the result is 0, then your processor does not support hardware virtualization, if 1 or more, then you can use KVM on your machine.
Now we can move on to installing KVM, a set of programs can be obtained directly from the official repositories:
sudo apt install qemu-kvm libvirt-bin bridge-utils virt-manager cpu-checker
We installed not only the kvm utility, but also the libvirt library, as well as the virtual machine manager. After the installation is complete, you need to add your user to the libvirtd group, because only root and users of this group can use KVM virtual machines:
sudo gpasswd -a USER libvirtd
After executing this command, log out and log in again. Next, let's check if everything was installed correctly. To do this, use the kvm-ok command:
INFO: /dev/kvm exists
KVM acceleration can be used
If everything was done correctly, then you will see the same message.
Using KVM on Ubuntu 16.04
You have completed the task of installing kvm on Ubuntu, but you cannot use this virtualization environment yet, but it still needs to be configured. Next, we'll look at how Ubuntu's kvm setup is done. First you need to set up the network. We need to create a bridge with which the virtual machine will connect to the computer's network.
Bridge configuration in NetworkManager
This can be done in several ways, for example, you can use the NetworkManager network configuration program.
Click the NetworkManager icon in the panel, then select change connections, then click the button Add:

Then select connection type Bridge and press Create:

In the window that opens, click the button Add, to link our bridge to the internet connection:

Select from the list ethernet and press Create:

In the next window, select in the field device, network interface to which our bridge should be connected:

Now you will see your bridge in the list of network connections. It remains to restart the network in order to fully apply the changes, to do this, run:
Manual bridge setting
First you need to install the bridge-utils set of utilities if you haven't already:
sudo apt install bridge-utils
Then, using the brctl program, we can create the bridge we need. To do this, use the following commands:
sudo brctl addbr bridge0
$ sudo ip addr show
$ sudo addif bridge0 eth0
The first command adds the br0 bridge device, with the second you need to determine which network interface is the main connection to the external network, in my case it is eth0. And with the last command, we bind bridge br0 to eth0.
Now you need to add a few lines to the network settings so that everything rises automatically after the system starts. To do this, open the /etc/network/interfaces file and add the following lines there:
sudo gedit /etc/network/interfaces
loopback
auto lo bridge0
iface lo inet loopback
iface bridge0 inet dhcp
bridge_ports eth0
When the settings are added, restart the network:
sudo systemctl restart networking
Now the installation and configuration of KVM is complete and you can create your first virtual machine. After that, you can view the available bridges with the command:

Creating KVM virtual machines
The Ubuntu KVM setup is complete and now we can move on to using it. First, let's look at the list of already existing virtual machines:
virsh -c qemu:///system list

It's empty. You can create a virtual machine through the terminal or in the graphical interface. To build from the terminal, use the virt-install command. First, let's go to the libvirt folder:
cd /var/lib/libvirt/boot/
To install CentOS, the command will look like this:
sudo virt-install \
--virt-type=kvm \
--name centos7\
--ram 2048\
--vcpus=2 \
--os-variant=rhel7 \
--hvm\
--cdrom=/var/lib/libvirt/boot/CentOS-7-x86_64-DVD-1511.iso \
--network=bridge=br0,model=virtio \
--graphics vnc \
--disk path=/var/lib/libvirt/images/centos7.qcow2,size=40,bus=virtio,format=qcow2
Let's take a closer look at what the parameters of this command mean:
- virt-type- type of virtualization, in our case kvm;
- name- the name of the new machine;
- ram- amount of memory in megabytes;
- vcpus- number of processor cores;
- os-variant- type of operating system;
- cdrom- installation image of the system;
- network-bridge- the network bridge that we set up earlier;
- graphics- how to get access to the graphical interface;
- diskpath- address of the new hard disk for this virtual machine;
After the installation of the virtual machine is completed, you can find out the connection settings via VNC using the command:
sudo virsh vncdisplay centos7
Now you can enter the received data in your VNC client and connect to the virtual machine even remotely. For Debian, the command will be slightly different, but everything looks similar:
Go to the folder for images:
cd /var/lib/libvirt/boot/
You can download the installation image from the Internet if necessary:
sudo wget https://mirrors.kernel.org/debian-cd/current/amd64/iso-dvd/debian-8.5.0-amd64-DVD-1.iso
Then let's create a virtual machine:
sudo virt-install \
--virt-type=kvm \
--name=debina8 \
--ram=2048 \
--vcpus=2 \
--os-variant=debian8 \
--hvm\
--cdrom=/var/lib/libvirt/boot/debian-8.5.0-amd64-DVD-1.iso \
--network=bridge=bridge0,model=virtio \
--graphics vnc \
--disk path=/var/lib/libvirt/images/debian8.qcow2,size=40,bus=virtio,format=qcow2
Now let's see the list of available machines again:
virsh -c qemu:///system list
To start the virtual machine, you can use the command:
sudo virsh start hostname
To stop:
sudo virsh shutdown hostname
To put into sleep mode:
sudo virsh suspend hostname
To reboot:
sudo virsh reboot hostname
sudo virsh reset hostname
To completely remove a virtual machine:
sudo virsh destroy hostname
Creating Virtual Machines in the GUI\
If you have access to a graphical interface then there is no need to use a terminal, you can use the full graphical interface of the Virtual Manager virtual machine manager. The program can be launched from the main menu:

To create a new machine, click on the icon with the monitor icon. Next, you will need to select an ISO image of your system. You can also use a real CD/DVD drive:

On the next screen, select the amount of memory that will be available for the virtual machine, as well as the number of processor cores:

On this screen, you need to select the hard drive size that will be available in your machine:

At the last step of the wizard, you have to check the correctness of the machine settings, as well as enter its name. You also need to specify the network bridge through which the machine will connect to the network:

After that, the machine will be ready for use and will appear in the list. You can launch it using the green triangle on the manager toolbar.
findings
In this article, we looked at how the Ubuntu 16.04 KVM installation is done, how to fully prepare this environment for work, as well as how to create virtual machines and use them. If you have any questions, ask in the comments!
At the end, a lecture from Yandex about what virtualization is in Linux:
Personally, it's easiest for me to think of KVM (Kernel-based Virtual Machine) as such a level of abstraction over Intel VT-x and AMD-V hardware virtualization technologies. We take a machine with a processor that supports one of these technologies, put Linux on this machine, install KVM in Linux, and as a result we get the opportunity to create virtual machines. This is how cloud hosting services work, for example, Amazon Web Services. Along with KVM, Xen is also sometimes used, but a discussion of this technology is beyond the scope of this post. Unlike container virtualization technologies, for example, the same Docker, KVM allows you to run any OS as a guest system, but it also has about Greater overhead for virtualization.
Note: The steps below have been tested by me on Ubuntu Linux 14.04, but in theory will be largely valid for other versions of Ubuntu and other Linux distributions. Everything should work both on the desktop and on the server, which is accessed via SSH.
KVM Installation
Check if Intel VT-x or AMD-V is supported by our processor:
grep -E "(vmx|svm)" /proc/cpuinfo
If something warms up, then it is supported, and you can proceed further.
Install KVM:
sudo apt-get update
sudo apt-get install qemu-kvm libvirt-bin virtinst-bridge-utils
Where is it customary to store:
- /var/lib/libvirt/boot/ - ISO images for installing guest systems;
- /var/lib/libvirt/images/ - hard disk images of guest systems;
- /var/log/libvirt/ - here you should look for all the logs;
- /etc/libvirt/ - directory with configuration files;
Now that KVM is installed, let's create our first virtual machine.
Creation of the first virtual machine
I chose FreeBSD as the guest system. Download the ISO image of the system:
cd /var/lib/libvirt/boot/
sudo wget http:// ftp.freebsd.org/ path/ to/ some-freebsd-disk.iso
In most cases, virtual machines are managed using the virsh utility:
sudo virsh --help
Before starting the virtual machine, we need to collect some additional information.
We look at the list of available networks:
sudo virsh net-list
View information about a specific network (named default):
sudo virsh net-info default
We look at the list of available optimizations for guest OS:
sudo virt-install --os-variant list
So, now we create a virtual machine with 1 CPU, 1 GB RAM and 32 GB of disk space connected to the default network:
sudo virt-install \
--virt-type=kvm \
--name freebsd10 \
--ram 1024\
--vcpus=1 \
--os-variant=freebsd8 \
--hvm\
--cdrom=/ var/ lib/ libvirt/ boot/ FreeBSD-10.2 -RELEASE-amd64-disc1.iso \
--network network=default,model=virtio \
--graphics vnc\
--disk path =/ var/ lib/ libvirt/ images/ freebsd10.img,size=32 ,bus=virtio
You can see:
WARNING Unable to connect to graphical console: virt-viewer not
installed. Please install the "virt-viewer" package.
Domain installation still in progress. You can reconnect to the console
to complete the installation process.
It's okay, that's how it should be.
Then we look at the properties of the virtual machine in XML format:
sudo virsh dumpxml freebsd10
Here is the most complete information. Including, for example, there is also a MAC address, which we will need further. So far, we find information about VNC. In my case:
With the help of my favorite client (I personally use Rammina), we go via VNC, using SSH port forwarding if necessary. We get directly into the FreeBSD installer. Then everything is as usual - Next, Next, Next, we get the installed system.
Basic commands
Let's now look at the basic commands for working with KVM.
Getting a list of all virtual machines:
sudo virsh list --all
Getting information about a specific virtual machine:
sudo virsh dominfo freebsd10
Start virtual machine:
sudo virsh start freebsd10
Stop virtual machine:
sudo virsh shutdown freebsd10
Hard to beat the virtual machine (despite the name, this not deletion):
sudo virsh destroy freebsd10
Reboot the virtual machine:
sudo virsh reboot freebsd10
Clone virtual machine:
sudo virt-clone -o freebsd10 -n freebsd10-clone \
--file / var/ lib/ libvirt/ images/ freebsd10-clone.img
Enable/disable autorun:
sudo virsh autostart freebsd10
sudo virsh autostart --disable freebsd10
Run virsh in dialog mode (all commands in dialog mode - as described above):
sudovirsh
Editing the properties of the virtual machine in XML, including here you can change the limit on the amount of memory, etc.:
sudo virsh edit freebsd10
Important! Comments from the edited XML are unfortunately removed.
When the virtual machine is stopped, the disk can also be resized:
sudo qemu-img resize / var/ lib/ libvirt/ images/ freebsd10.img -2G
sudo qemu-img info / var/ lib/ libvirt/ images/ freebsd10.img
Important! Your guest OS will most likely not like the fact that the disk suddenly became larger or smaller. At best, it will boot in emergency mode with a suggestion to repartition the disk. You probably don't want to do this. It may be much easier to start a new virtual machine and migrate all the data to it.
Backup and restore are quite simple. It is enough to save the dumpxml output somewhere, as well as the disk image, and then restore them. On YouTube found a video with a demonstration of this process, everything is really easy.
Network settings
An interesting question is how to determine what IP address the virtual machine received after loading? In KVM, this is done in a clever way. I ended up writing the following Python script:
#!/usr/bin/env python3
# virt-ip.py script
# (c) 2016 Aleksander Alekseev
# http://website/
import sys
import re
import os
import subprocess
from xml .etree import ElementTree
def print(str ) :
print (str , file = sys.stderr )
if len(sys.argv )<
2
:
eprint("USAGE: " + sys.argv [ 0 ] + "
eprint("Example: " + sys .argv [ 0 ] + " freebsd10" )
sys.exit(1)
if os.geteuid() != 0 :
eprint("ERROR: you shold be root" )
eprint("Hint: run `sudo " + sys .argv [ 0 ] + " ...`" ) ;
sys.exit(1)
if subprocess .call( "which arping 2>&1 >/dev/null", shell = True ) != 0 :
eprint("ERROR: arping not found" )
print( "Hint: run `sudo apt-get install arping`")
sys.exit(1)
Domain = sys.argv [ 1 ]
if not re .match ("^*$" , domain) :
print( "ERROR: invalid characters in domain name")
sys.exit(1)
Domout = subprocess .check_output ("virsh dumpxml " +domain+" || true" ,
shell=True)
domout = domout.decode("utf-8").strip()
if domout == "" :
# error message already printed by dumpxml
sys.exit(1)
Doc = ElementTree.fromstring(domout)
# 1. list all network interfaces
# 2. run `arping` on every interface in parallel
#3 grep replies
cmd= "(ifconfig | cut -d " " -f 1 | grep -E "." | " + \
"xargs -P0 -I IFACE arping -i IFACE -c 1 () 2>&1 | " + \
"grep "bytes from") || true"
for child in doc.iter() :
if child.tag == "mac" :
macaddr = child.attrib["address"]
macout = subprocess .check_output(cmd .format(macaddr) ,
shell=True)
print(macout.decode("utf-8" ) )
The script works with both the default network and the bridged network, the configuration of which we will discuss later. However, in practice, it is much more convenient to configure KVM so that it always assigns the same IP addresses to guests. To do this, edit the network settings:
sudo virsh net-edit default
... something like this:
After making these changes
>
...and replace it with something like:
>
We reboot the guest system and check that it received an IP via DHCP from the router. If you want the guest system to have a static IP address, this is configured as usual within the guest system itself.
virt-manager program
You may also be interested in the virt-manager program:
sudo apt-get install virt-manager
sudo usermod -a -G libvirtd USERNAME
This is how its main window looks like:
As you can see, virt-manager is not only a GUI for virtual machines running locally. With it, you can manage virtual machines running on other hosts, as well as look at beautiful graphs in real time. I personally find it especially convenient in virt-manager that you do not need to look through the configs on which port the VNC of a particular guest system is running. You just find the virtual machine in the list, double-click, and you get access to the monitor.
It's also very convenient to do things with virt-manager that would otherwise require laborious editing of XML files and, in some cases, executing additional commands. For example, renaming virtual machines, setting up CPU affinity, and similar things. By the way, the use of CPU affinity significantly reduces the effect of noisy neighbors and the influence of virtual machines on the host system. Always use it whenever possible.
If you decide to use KVM as a replacement for VirtualBox, please note that they cannot share hardware virtualization with each other. In order for KVM to work on your desktop, you will not only have to stop all virtual machines in VirtualBox and Vagrant, but also reboot the system. I personally find KVM much more convenient than VirtualBox, at least because it doesn't require you to run the command sudo /sbin/rcvboxdrv setup after each kernel update, it works adequately with Unity, and generally allows you to hide all the windows.
As a Linux enthusiast, I check a lot of Open Source and Linux applications and distributions every day. Basically, I use Oracle VirtualBox to test and reproduce various operating systems. VirtualBox is a popular virtualization tool for deploying or testing various kinds of distributions. Like Oracle VirtualBox, there are many virtualization products such as OpenVZ, KVM, Proxmox, etc. Today we will be discussing QEMU.
QEMU is an open source machine emulator and virtualizer that allows users to create and manage virtual machines inside the operating system.
When used as a machine, the QEMU emulator can run operating systems and programs made for one machine on another machine (eg your own PC). By using dynamic translation, it achieves very good performance.
When used as a virtualizer, QEMU achieves very similar performance by executing guest code directly on the host processor. QEMU supports virtualization when running under the Xen hypervisor or using the KVM kernel module on Linux.
QEMU has two modes of operation:
Full system emulation: In this mode, QEMU emulates a complete system (eg PC), including the processor and various peripherals. It can be used to run various operating systems without having to restart the PC, or to debug system code.
User Mode Emulation: In this mode, QEMU can run Linux processes compiled for one processor on another processor. For example, it can be used to launch wine or to facilitate cross-compilation and cross-debugging.
QEMU can run without a kernel host driver and still give acceptable performance.
Install QEMU on Ubuntu 16.04
In this example, let's see how to install and configure QEMU on Ubuntu 16.04 LTS and how to create and manage virtual machines.
QEMU is available by default in the Ubuntu repositories. Thus, we can install it with the Virt Manager tool, using the command:
sudo apt install qemu-kvm qemu qemu-system virt-manager virt-viewer libvirt-bin
After installing the above packages, reboot your system.
Create virtual machines
Now, let's create a new virtual machine.
First, you need to create a virtual hard disk image for the new virtual machine. For example, let's create a 20GB hard disk image.
Qemu-img create ubuntu.img 20G
Then download the Ubuntu 15.04 server installation image from the official website.
To boot the virtual machine, run the following command:
For 64bit systems
Qemu-system-x86_64 -hda ubuntu.img -boot d -cdrom /home/linuxthebest/Downloads/ubuntu-15.04-server-i386.iso -m 1024
For 32bit systems
Qemu-system-i386 -hda ubuntu.img -boot d -cdrom /home/linuxthebest/Downloads/ubuntu-15.04-server-amd64.iso -m 1024
Where “/home/linuxthebest/Downloads/ubuntu-15.04-server-i386.iso” is the directory where the image was downloaded, and 1024 is the amount of RAM allocated to the machine.
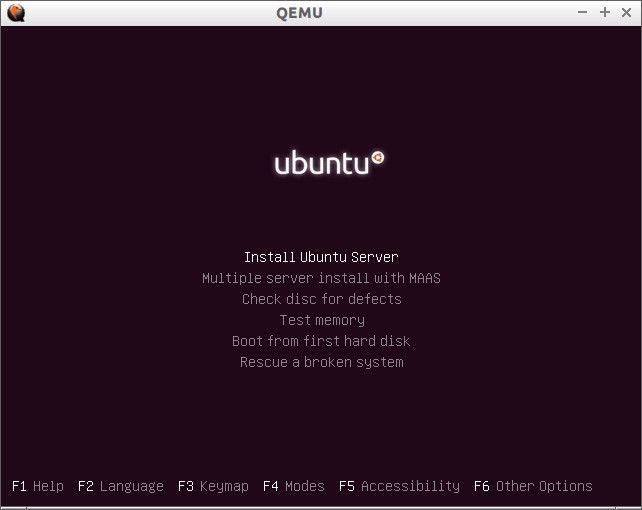
When booting, the installation screen will appear, press the Enter key and proceed with the installation as usual.
After the installation is complete, the system can be booted using the command:
Qemu -hda ubuntu.img -m 1024
That's all.
Don't like the command line? Creating and managing virtual machines from the command line can be a little difficult for some users. Don't worry, we can also create virtual machines with a GUI tool called Virtual Machine Manager (Virt Manager).
If you have not installed it before, you can install it using the command
sudo apt install virt-manager qemu-system libvirt-bin
Creating and Managing Virtual Machines with Virt Manager
Launch Virtual Machine Manager
sudo virt-manager
By default, Virt Manager interface will look like below.

We will now create and install Ubuntu 16.10 in a virtual machine.
To create a virtual machine, go to File -> New Virtual Machine.
Choose which operating system you want to install.
You can install the guest OS using a local ISO/CD-ROM image, Network install, PXE Server, or import existing disk images. In addition, you can select the guest OS architecture from the advanced options.

Select the amount of RAM and processors.

Enter your virtual hard disk size. The default is 8GB.

Enter your guest OS name. And, select the type of network, from the advanced options. And finally, click the Finish button.

After clicking on the Finish button, the guest OS will start to boot automatically.

That's all. Now, install the guest OS just like you would on a regular system.
I installed Ubuntu 16.10 in virt manager and by the way unity 8 works there, compared to virtualbox it doesn't, so if you want to test a new working environment you can install virt manager and run unity 8 there.


KVM is one of the software solutions for providing visualization in Linux environment. Recently, RedHat has abandoned the development of several Xen and KVM virtualization systems at once, and starting from the RHEL / CentOS 6 branch, KVM has become the main system. The main requirement for KVM is that the processor supports hardware rendering. And there are KVM modules only for the x86_64 architecture.
1. Installation
Let's check hardware virtualization support:
# egrep ‘(svm|vmx)’ /proc/cpuinfo
flags: fpu vme de pse tsc msr pae mce cx8 apic mtrr pge mca cmov pat pse36 clflush dts acpi mmx fxsr sse sse2 ss ht tm pbe syscall nx lm constant_tsc arch_perfmon pebs bts rep_good aperfmperf pni dtes64 monitor ds_cpl vmx2x scm pset est sse4_1 xsave lahf_lm tpr_shadow vnmi flexpriority
If the output is empty, then the processor does not support hardware virtualization and kvm will not work, if the output is similar to the above, then you can proceed with the installation. Install the components and start the libvirt service:
# yum install kvm libvirt virt-manager
# service libvirtd start
Starting libvirtd daemon: [ OK ]
We check whether the necessary KVM modules are loaded - it should turn out two modules - the first kvm, the second kvm_intel or kvm_amd for the corresponding type of processor.
# lsmod | grep kvm
kvm_intel 55496 4
kvm 337900 1 kvm_intel
In some cases, despite the presence of hardware virtualization support by the processor, it is necessary to additionally enable virtualization support in the BIOS or flash the BIOS with the latest version.
2. Network setup
The first thing to do is set up a network bridge with the main interface and remove the Default network. The network bridge will allow computers on the physical network to easily communicate with the virtual server as if it were on the same network, and the virtual server will just as easily and transparently communicate with computers on the physical network.
2.1. Configuring bridge0
For example, suppose we have only one eth0 interface on the virtualization server with an IP address of 172.17.1.249, and the /etc/sysconfig/network-scripts/ifcfg-eth0 interface configuration file looks like this.
DEVICE="eth0"
BOOTPROTO="static"
HWADDR="78:24:AF:3C:C5:B5"
IPADDR=172.17.1.249
NETMASK=255.255.0.0
GATEWAY=172.17.1.30
ONBOOT="yes"
Let's bring the file /etc/sysconfig/network-scripts/ifcfg-eth0 to the final form.
DEVICE="eth0"
BOOTPROTO="static"
HWADDR="78:24:AF:3C:C5:B5"
BRIDGE=bridge0
ONBOOT="yes"
Create /etc/sysconfig/network-scripts/ifcfg-bridge0 and populate.
DEVICE="bridge0"
TYPE=Bridge
BOOTPROTO="static"
IPADDR=172.17.1.249
NETMASK=255.255.0.0
GATEWAY=172.17.1.30
ONBOOT="yes"
Restarting the network service
# service network restart
Shutting down interface eth0: bridge bridge0 does not exist!
[ OK ]
Shutting down loopback interface: [ OK ]
Bringing up loopback interface: [ OK ]
Bringing up interface eth0: [ OK ]
Bringing up interface bridge0: [ OK ]
If desired, this procedure can be done remotely, for example, via ssh - in this case, restarting the network service will cause a two-second delay, after which the connection will be restored without reconnecting. Checking the created bridge:
Now let's remove the default virbr0
# virsh net-list
Name State Autostart
——————————————
default active yes
# virsh net-destroy default
network default destroyed
# virsh net-undefine default
network default has been undefined
You can use the brctl utility to check the status of a bridge. This is a standard utility for working with ethernet bridges:
# brctl show
bridge name bridge id STP enabled interfaces
bridge0 8000.7824af3cc5b5 no eth0
3. Installation and management of virtual machines.
To install and manage virtual machines, there is a very convenient Virtual Machine Manager (Virt-Manager) program for a graphical environment. It has a fairly clear interface to understand which any average system administrator can easily understand. You can also manage and create virtual machines using the console, it will be a little more difficult, but there are more opportunities for fine-tuning.
3.1. Installation of virtual machines.
For a sign, let's try to install CentOS 6.0:
# virt-install -n vm01 -r 2048 -l http://mirror.yandex.ru/centos/6.0/os/x86_64 -f /vmstore/vm01.img -s 10 --network bridge=bridge0 --vnc
Launch parameters:
N is the name of the virtual machine
-r - amount of RAM
-l - location of files for network installation
-f - path to the container file containing the disk of the virtual machine
-s - container file size in gigabytes
--network bridge - connect a virtual network interface to a network bridge
--vnc - use VNC display
To proceed with the installation, we will need to connect to the virtual machine screen via VNC. To do this, we check which port was selected for connection, it can vary from 5900 onwards.
# virsh dumpxml vm01 | grep vnc
We connect on port 5900 and complete the installation.
if at the output
then go and edit qemu.conf:
# nano /etc/libvirt/qemu.conf
vnc_listen="0.0.0.0"
….
vnc_password="xxxx"
# /etc/init.d/libvrtd restart
3.2. Machine control
The main console tool for managing virtual machines is the virsh program. The first thing we can do is view a list of all virtual machines and their status:
# virsh list --all
Id Name State
———————————-
vm01 shut off
Start the virtual machine vm01:
# virsh start vm01
Domain vm01 started
We stop - it is tantamount to turning off the computer from the outlet
# virsh destroy vm01
Domain vm01 destroyed
Parameters of virtual machines can be changed by editing xml files. One option is to save the configuration in xml format.
# virsh dumpxml vm01 > vm01.xml
Edit vm01.xml and upload it back:
# virsh define vm01.xml
Domain vm01 defined from vm01.xml
Another is to use the virsh edit function, it will automatically open the default editor configured in the system, and after editing it will save the configuration.
# virsh edit vm01
On most systems, vim is the default editor, if you don't like it, you can easily replace it with, for example, mcedit or nano:
# echo "export EDITOR=mcedit" >> .bash_profile
You need to re-login to apply the settings.
To manage via the virt-manager graphical console:
Download Xming X Server for Windows, install it, run it.
Install:
yum install xorg-x11-server-Xorg
yum install xauth
yum install liberation-sans-fonts
In PuTTY: Connection - SSH - X11 enable "Enable X11 forwarding" and write "X display location" 127.0.0.1:0.0
We launch:
# virt-manager
And we drive through the X-face 🙂
I am writing this note to demonstrate step by step installation and configuration of a virtual machine on Linux based on KVM. Earlier, I already wrote about virtualization, where I used the wonderful .
Now I am faced with the question of renting a good server with a large amount of RAM and a large hard drive. But I don’t want to run projects directly on the host machine, so I will separate them into separate small virtual servers with Linux OS or docker containers (I’ll talk about them in another article).
All modern cloud hostings work on the same principle, i. a hoster on good hardware raises a bunch of virtual servers, which we used to call VPS / VDS, and distributes them to users, or automates this process (hello, DigitalOcean).
KVM (kernel-based virtual machine) is Linux software that uses x86-compatible processor hardware to work with Intel VT/AMD SVM virtualization technology.
KVM Installation
I will carry out all the machinations for creating a virtual machine on Ubuntu 16.04.1 LTS OS. To check if your processes support hardware virtualization based on Intel VT/AMD SVM, run:
Grep -E "(vmx|svm)" /proc/cpuinfo
If the terminal is not empty, then everything is in order and KVM can be installed. Ubuntu only officially supports the KVM hypervisor (part of the Linux kernel) and advises using the libvirt library as a tool to manage it, which we will do next.
You can also check hardware virtualization support in Ubuntu through the command:
If successful, you will see something like this:
INFO: /dev/kvm exists KVM acceleration can be used
Install packages for working with KVM:
sudo apt-get install qemu-kvm libvirt-bin ubuntu-vm-builder bridge-utils
If you have access to the graphical shell of the system, then you can install the libvirt GUI manager:
sudo apt-get install virt-manager
Using virt-manager is quite simple (no more difficult than VirtualBox), so this article will focus on the console version of installing and configuring a virtual server.
Installing and configuring a virtual server
In the console version of installation, configuration and system management, the virsh utility (an add-on for the libvirt library) is an indispensable tool. It has a large number of options and parameters, a detailed description can be obtained as follows:
man virsh
or call the standard "help":
Virsh help
I always adhere to the following rules when working with virtual servers:
- I store iso OS images in the /var/lib/libvirt/boot directory
- I store virtual machine images in the /var/lib/libvirt/images directory
- I explicitly assign a static IP address to each new virtual machine through the hypervisor's DHCP server.
Let's start installing the first virtual machine (64-bit server ubunt 16.04 LTS):
Cd /var/lib/libvirt/boot sudo wget http://releases.ubuntu.com/16.04/ubuntu-16.04.1-desktop-amd64.iso
After downloading the image, run the installation:
sudo virt-install \ --virt-type=kvm \ --name ubuntu1604\ --ram 1024 \ --vcpus=1 \ --os-variant=ubuntu16.04 \ --hvm \ --cdrom=/var/ lib/libvirt/boot/ubuntu-16.04.1-server-amd64.iso \ --network network=default,model=virtio \ --graphics vnc \ --disk path=/var/lib/libvirt/images/ubuntu1604. img,size=20,bus=virtio
Translating all these parameters into "human language", it turns out that we are creating a virtual machine with Ubuntu 16.04 OS, 1024 MB of RAM, 1 processor, a standard network card (the virtual machine will go to the Internet as if due to NAT), 20 GB HDD.
It is worth paying attention to the parameter --os-variant, it tells the hypervisor under which operating system the settings should be adapted.
A list of available OS options can be obtained by running the command:
osinfo query os
If there is no such utility on your system, then install:
sudo apt-get install libosinfo-bin
After starting the installation, the following message will appear in the console:
Domain installation still in progress. You can reconnect to the console to complete the installation process.
This is a normal situation, we will continue the installation through VNC.
We look at which port it was raised from our virtual machine (in a nearby terminal, for example):
Virsh dumpxml ubuntu1604 ...
Port 5900, at local address 127.0.0.1. To connect to VNC, you need to use Port Forwarding over ssh. Before doing this, make sure tcp forwarding is enabled on the ssh daemon. To do this, go to the sshd settings:
Cat /etc/ssh/sshd_config | grep AllowTcpForwarding
If nothing was found or you see:
AllowTcpForwarding no
Then we edit the config to
AllowTcpForwarding yes
and reboot sshd.
Configuring port forwarding
Run the command on the local machine:
Ssh -fN -l login -L 127.0.0.1:5900:localhost:5900 server_ip
Here we have configured ssh port forwarding from local port 5900 to server port 5900. Now you can connect to VNC using any VNC client. I prefer UltraVNC because of its simplicity and convenience.
After a successful connection, the standard Ubuntu installation welcome window will be displayed on the screen:
After the installation is complete and the usual reboot, a login window will appear. After logging in, we determine the IP address of the newly minted virtual machine in order to later make it static:
ifconfig
We remember and go to the host machine. We pull out the mac-address of the "network" card of the virtual machine:
Virsh dumpxml ubuntu1604 | grep "mac address"
Remember our mac address:
Editing the network settings of the hypervisor:
sudo virsh net-edit default
We are looking for DHCP, and add this:
You should get something like this:
In order for the settings to take effect, you must restart the DHCP server of the hypervisor:
sudo virsh net-destroy default sudo virsh net-start default sudo service libvirt-bin restart
After that, we reboot the virtual machine, now it will always have the IP address assigned to it - 192.168.122.131.
There are other ways to set a static IP for a virtual machine, for example, by directly editing the network settings inside the guest system, but here it’s up to your heart’s content. I just showed the option that I myself prefer to use.
To connect to the terminal of the virtual machine, run:
ssh 192.168.122.131
The car is ready for battle.
Virsh: command list
To see running virtual hosts (all available can be obtained by adding --all):
sudo virsh list
You can restart the host:
Sudo virsh reboot $VM_NAME
Stop the virtual machine:
sudo virsh stop $VM_NAME
Execute halt:
sudo virsh destroy $VM_NAME
sudo virsh start $VM_NAME
Shutdown:
sudo virsh shutdown $VM_NAME
Add to autorun:
sudo virsh autostart $VM_NAME
Very often it is required to clone the system in order to use it as a framework for other virtual operating systems in the future; for this, the virt-clone utility is used.
Virt-clone --help
It clones an existing virtual machine and changes host-sensitive data, such as mac address. Passwords, files and other user-specific information in the clone remains the same. If on the cloned virtual machine the IP address was manually entered, then there may be problems with SSH access to the clone due to a conflict (2 hosts with the same IP).
In addition to installing a virtual machine via VNC, it is also possible to use X11Forwarding via the virt-manager utility. On Windows, for example, Xming and PuTTY can be used for this.


