Installing BlueStacks on your computer will allow you to control your favorite game from your mobile device or conduct a quick test of the application you are developing. An excellent player for apk files has become popular among gamers and developers, completely replacing bulky and unstable Android emulators.
Main functions and features
The player interface resembles the familiar Android environment. The same color scheme, scrolling functions and swiping through applications. The difference is that instead of a finger we use the mouse cursor and keyboard.
The program window is divided into three parts:
- Top menu – allows you to launch applications and manage the program window, gives access to BlueStacks settings.
- The central area of the screen contains a list of popular applications.
- Left menu - suggests an analogy to the Android main menu, which adds the functions of shaking, rotating the screen, copying, pointing, accessing the computer’s file system, and installing apk.
The initial confusion is caused by the scrolling of the screen. For two-stage realism of working on a mobile device, the developers made it different from a computer circuit. If you move the mouse pointer down, the image will go down, if you move the mouse up, it will go up.
Note the peculiarity of logging into GooglPlay for existing accounts. When SMS authorization is enabled, you will be redirected to the browser to enter your password.
Navigating through BlueStacks is done using the mouse cursor and the cursor keys (arrow keys), although the program specifies WASD. Use the mouse to scroll up and down, using the keys to the sides.
Considering that the player is aimed at owners of mobile devices using Android applications, the creators have simplified the search. There is a search icon in the upper right corner; click and enter the name. When you first start, there is a delay in activating the computer keyboard.
Video
Results and comments
BlueStacks is a convenient alternative to a mobile device that allows you to receive messages from Android applications directly to your computer. Allows you to synchronize with a tablet, smartphone, and control the gameplay. In the absence of a tablet, it will be a complete replacement for the device.
BlueStacks App Player is a very popular Android emulator for PC. Why is it so popular? Because downloading BlueStacks App Player and then installing it will not be difficult. It is distributed completely free of charge. This Android combine will allow you to enjoy your favorite mobile applications while remaining in Windows. Let's take a closer look at this Android Emulator.
BlueStacks App Player system requirements
- To run games you need support for Intel VT-x or AMD-V technology, you can check
- To install BlueStacks App Player you need a video card that supports OpenGL0+, check
- To run the emulator you need 1GB of free RAM, but this prohibition can be bypassed
In general, this is everything you need from your PC. Are the requirements appropriate? Then let's move on to the installation.
Installing BlueStacks 2
First of all, you need to download BlueStacks App Player, to do this, follow the link. Run the downloaded “Start BlueStacks”, the file name may be different, but this is not significant. Install BlueStacks 2 like any other Windows application and then launch it.
How to install BlueStacks 2 on a computer with only 1GB of RAM? Everything is quite simple, although the performance of Start BlueStacks will not be very pleasing. Procedure:
- Download BlueStacks App Player
- Right-click on BlueStacks.._REL.msi and select “Edit with Orca”
- In LaunchCondition remove "Installed OR PhysicalMemory >= 1024"
- In InstalExecuteSequence remove "CheckMsiSignature"
- Save package
After this, you need to set the allocated RAM for BlueStacks 2 to no more than what is free, but not less than 300MB. To do this, in the Registry Editor you need to go to the HKEY_LOCAL_MACHINE\SOFTWARE\BlueStacks\Guests\Android folder and set the desired RAM size in the decimal system. If you have any problems, write in the comments and I will help.
Setting up BlueStacks App Player
To work comfortably in the emulator, the first thing you need to do is configure the keyboard layout to change by pressing hot keys. To do this, go to settings and then in order:
- Change keyboard settings
- AT Translated Set 2 Keyboard
- Customize keyboard layouts
- Check the boxes for the required languages

After this, the language will be switched by pressing Ctrl + Space.
For comfortable use of BlueStacks 2 there is no need to describe other settings; everything else can be done from the intuitive settings menu.
BlueStacks Root rights - how to get
Many users need root rights in the system, especially if you want to hack some game. In BlueStacks Root rights are very easy to obtain; in the latest version, the process is completely no different from obtaining root on a smartphone.
In BlueStacks Root rights can be obtained by doing this.
What do you think of this Android emulator? Everything is working? Having problems? Write in the comments and I will help you.
The most popular package was and remains BlueStacks. With its help, you can create a virtual mobile device on your PC, run applications and games on it, use the Google Play store and other Google services. Let's look at the basics of how to use BlueStacks on your computer.
First of all, it is worth considering the installation procedure for this Android emulator. Then we will talk about the need for an account and the nuances of using Bluestax. Let's start in order.
Downloading and installing BlueStacks
Before downloading Bluestax, check if your computer meets the system requirements. Their complete list can be found on the developer’s website. But let's say briefly: if your computer was released in the last 10 years, it has a discrete video card (or a good integrated core), at least 4 GB of RAM, and the version of Windows 2014 is at least XP with a third service pack, then you should have BlueStacks start.
We recommend downloading BlueStacks from the developer’s official website –. Yes, some third-party portals offer to download a version with the root already obtained and Superuser installed. However, we cannot guarantee that such modified distributions are completely safe. You can also get root yourself.
If you have already installed the program and now want to update Bluestacks to the latest version, you can do this from within the installed program. To do this, click LMB on the arrow located in the upper right corner of the screen and select "Settings".And then go to the section "Update". Information about the current version of the program will be displayed there.
What needs to be updated before installing BlueStacks?

Installing an emulator is no different from installing any other program under Windows (or, accordingly, OS X, if you have a Mac). Run the installer and follow the instructions of the installation wizard. 
Registration and account differences
The question of how to register for BlueStacks has for some time now had two answers. On the one hand, this may mean registering a Google account. Everything here is exactly the same as in regular Android:

On the other hand, the words “Registration with BlueStacks” can also mean access to the emulator’s own services. In this case, you will also need to create a Google account using the method described above. But access to the BlueStacks store is in the top bar, on the coins icon. In it you can get Pika Points coins (to buy themes, subscriptions or accessories with them), purchase a premium account or get privileged Superfan status. Whether you need it - decide for yourself. 
If your question about BlueStacks is how to log out of your account, then this is done in the same way as in Android.

Your account on the Google server will remain, and there will be no problems with accessing it through other devices or programs.
Installing applications
You can install applications both from Google Play and your own BlueStacks store, and from third-party sources, through regular APK files. The developers have taken care of how to install the APK file on BlueStacks without unnecessary fuss.

If you need to install a game or application with a cache, then before installing the cache in BlueStacks, download it and unzip it into a folder "My Documents". Then do the following:
The correct procedure looks like this:

Working with files in BlueStacks
One of the main advantages of installing an emulator on a computer is easy and fast file exchange. You no longer need to set up a wireless connection, remove the memory card, or connect your tablet or smartphone to your computer with a cable. However, file sharing has its own nuances.
Before you transfer files from BlueStacks to your computer, you need to understand one thing: the emulator’s file system is virtual. That is, you will not be able to find the hidden BlueStacks folder where files downloaded via Android are saved and copy them using Windows Explorer. This is done from inside Android, which just has access to the computer system.
Working with BlueStacks on-screen display
When you hold a real Android device in your hand, you are free to rotate it however you want, and the accelerometer will move the image to the correct position. The computer monitor on which you display the BlueStacks image cannot be rotated so easily.
In the current version of BlueStacks, as a rule, when you launch a game or application focused on portrait mode, the virtual display changes orientation itself. When you exit the application, the interface automatically changes to landscape.
Developers no longer offer the option of manually rotating the screen in BlueStacks. If it is critical for you, install an earlier version of BlueStacks (for example, 2.6) and disable automatic updates.
How to make BlueStacks full screen:

Language
Since BlueStacks has two levels of interface, the question “how to change the language in BlueStacks” may apply to both the installed Android and the external interface of the emulator.
How to change the Android language in Bluestacks:

To change the interface language of the external BlueStacks shell, enter the shell menu through the button in the top panel. Open the “Settings” tab, click on the drop-down menu and select the desired language from it. As a rule, when installing a program, it selects the system language itself. But you can fix this manually.
If you have other questions about BlueStacks, you can search our website for materials about it or contact technical support directly from the program. To do this, right-click on the BlueStacks tray icon, select the “Report a problem” menu item and describe it in the message (ticket) form that pops up. Technical support usually responds promptly to requests.
With the help of these detailed instructions, even a primary school student can install BlueStacks on a computer. Installing an Android emulator on a PC with Windows OS is not so difficult without it, but there are still a couple of nuances that you need to know about in order to avoid mistakes when installing BlueStax.
Hello. Without knowing how familiar you are with the computer and the degree of your readiness for installation, let’s go over a couple of preparatory steps. To correctly install the BlueStacks emulator on your computer, and this is categorical, you need to download the final version of the emulator from the official website, and at the same time study the system requirements. The article will open in a new tab - , read the system requirements, download the official version and come back.
And to be sure to install BlueStacks on computers that meet the requirements, you need to check whether virtualization is enabled and whether it is supported by the processor at all - pre-installation settings and . Without virtualization, Android emulators will install on a PC, but under Windows they will slow down like the cheapest smartphones.
How to install BlueStacks on your computer.
We will consider the pre-installation preparation. You did an excellent job, downloaded the BlueStacks application from the office. program website, enabled virtualization on the processor, let's move on to the simplest thing - installation. Decide on the hard drive partition - where we will install the program, “D” or “E” - where there is more free space, I do not recommend using the system “C” to install BlueStax.
Launch the downloaded “BlueStacks2_native_… .exe”, in the window that appears, give the go-ahead to the standard Windows security prompt, and firmly click on “Run”.
The program will begin unpacking; upon completion, a window with a license agreement will appear, send it to “Next”. In older versions of Windows, a User Account Control window will pop up, click “Yes”.

Let's return to the question of disk partition - click on the word “Browse”, select “D” or “E”, the program will create a BlueStacks package and install Android into it. 16GB of memory, new applications will be installed in this folder and will not clog or eat up free space on the system partition “C”.

We check the presence of “checkmarks” in the BlueStax application and communications store, press the button - “Install”, the status bar appears.

The BlueStax application is installed - don’t interfere, sit back, meditate, and wait for the emulator installation to finish. We check whether it is connected to the Internet (it will start faster and without errors), click “Finish”. If you did not uncheck the “Launch BlueStacks” box, the application will begin initializing.

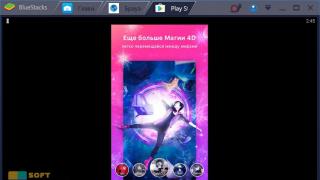
How quickly the Android emulator will start depends largely on the characteristics of your PC - . After waiting a little, you should eventually see the following picture in the program.

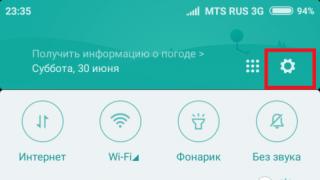
Click on the gear - “Settings”, in the Android settings tab that opens, add a Google account and agree to the terms of use of the service.

If something goes wrong with the emulation, it freezes, or doesn’t start for a very long time - click on the gear in the top right, in the drop-down menu on - “restart the Android module”. Also see - and ways to solve them.
In the previous topic, we described to you an emulator for a computer that allows you to open Android games and applications on your personal computer. We talked about the emulator and, after a while, we found out that . In the new update, a lot of things have changed, including performance and multitasking and allows you to run several applications at once. By the way, this update allows you not only to open several applications at once, but also to work with them simultaneously, as in working tabs.
The previous version of this application was not a full version of the emulator, but this did not stop it from rising in the rankings and defeating its competitors. The emulator itself has become much easier to manage, thanks to changes in its navigation. The program still continues to gain popularity among its users and, as you know, there are more than 100 million of them. Let's take a closer look and see for ourselves how perfect it is.
Review and installation of BlueStacks 2 on Windows PC.
In order to start using the program, you need to download and install it. Where to download and how to install? Let us tell you. You can download it from the official website for free and without registration. You can also download the program from our website. With good internet, the download speed may take about 7-15 minutes.

Choose the source you need and download BlueStacks 2 on your computer. Have you downloaded it? Great! Let's move on. Find the program in the location where you downloaded it and open the installer. The installation wizard will open in front of you, where you need to follow the instructions on the screen.

Upon launch, click on the next button and select the path to install the application (program). When specifying piti, it is better to create a new folder. During installation, there will be 4 simple steps, which the installation wizard will do everything automatically for you, only waiting for you to complete the download. Estimated installation time is 5-15 minutes. It all depends on your device on which you are installing


After installing the program on your computer, you can run it immediately or uncheck the BlueStacks 2 and click on "Done". Now your program is installed, you can proceed to the first launch. Let's launch the shortcut and see what we get next. As you can see, the program congratulates us on the New Year 2016 and offers to install applications in your emulator.

As you can see, the application is open and on the left side, convenient navigation through the program is made. Moving your mouse over any icon, it shows a text with a description that indicates what it means. At the top there are tabs open, welcome and android. The program requires an Internet connection, without it you will not be able to download programs and applications from the market, but you can install a pre-downloaded ApK file. By going to the Android tab, the program provides us with a huge selection of mobile games and applications. Let's take a look together.

Now you need to activate the program. How to do it? You must enter your username and password for your Google Play account. To do this, wait a little or click on any application and go through a one-time setup that won’t take you much time.

Follow all on-screen instructions to proceed. The first point is setting up the App Store, the second point is setting up an account BlueStacks 2, and the third is the synchronization setting. As I said earlier follow all the instructions on the screen to fully activate the emulator.

Confirm your account and wait for the notification that the account has been successfully connected and only then proceed to setting up the third point. Setting up synchronization, click on the continue button and enter your Google login and password in the browser window and wait for the process to complete. Why is synchronization needed? It is needed so that you install applications and games and they automatically appear on your tablet or smartphone, saving all achievements. Logging into your account may take some time, do not rush to close the program.

After you complete its activation, you can install games and applications and also actively use the search column. Thanks to search, you can search, find and install applications on your computer.
As you can see, the application works with tabs and can launch several applications and games at once, the work of the second part BlueStacks works without any complaints or reproaches. I would like to say that when installing and launching the second part of BlueStacks there are no lags and does not load the system. In simple words, your computer can work with several programs at once and not freeze. This feature makes BlueStacks 2 the best emulator.
That's all, thank you for your attention. If you have anything to add or share, we welcome your comments below.