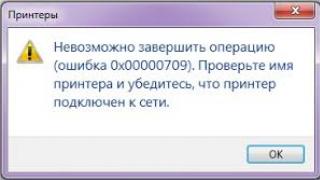
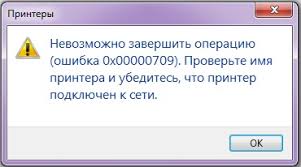
Adding a new printer to Windows 10 is done using a convenient and simple wizard. It has an option that allows you to use the new printer as the default printing device, but in some cases, when you try to select the printer as the main one, an error may appear:
Default printer cannot be set
And in other cases, when trying to select one of the printers as the default printer, another error may appear:
If you encounter one of these errors, try opening the classic Control Panel first and go to the " Devices and Printers" Right-click on the desired printer and select " Use as default».

If the error persists, you will have to make some changes to the registry.

After saving the settings, this printer will be marked with a green circle as the default printer.

Advice. In Windows 10 version 10565, Microsoft changed the default printer assignment algorithm. The default printer is now automatically set to the printer the user last printed on. This behavior can be changed through the registry or the new Control Panel.
- Device
- LegacyDefaultPrinterMode
- UserSelectedDefault
Restart your computer and try to select your default printer as usual. Everything should work out!
Printer manufacturers cannot develop a uniform procedure for installing printing devices in a computer. That is why installing a printer in Windows 10 can be done in one of the following ways.
In some cases, you will only need to connect the printer to the appropriate computer port (usually USB) and wait a little. Windows 10 will automatically find and recognize your new device, then connect it and prepare it for use. All you have to do is refill the printer with paper, ink or toner.
Many manufacturers, striving to remain as independent as possible from software developers, require the installation of special proprietary software to successfully connect printers to a computer. If you do not install such software on your computer before connecting the printer using a cable, the printing device will not work. Printer troubleshooting guide: Troubleshooting Windows 10
Fortunately, you can determine how to install your printer on your computer by reading the documentation that came with it. (Most often, instructions for setting up your printer will appear on a separate sheet of paper labeled Quick Setup.) If your printer did not come with instructions for connecting to your computer, insert the print cartridge(s), load the paper, and then follow these steps:
After booting your Windows 10 computer, connect the printer to it using a separate cable and apply power to it (turn it on). After some time, Windows 10 may notify you that the new hardware has been successfully installed. Don't be fooled ahead of time and check the printer's functionality by following the instructions below.
Open Settings. Right click on the button Start and select the command in the context menu Control options.

In category Equipment and sound click on the link View devices and printers. You will see a list of all devices connected to your computer, organized into separate categories according to their functionality. If you are lucky, you will find a newly connected printer in it.

In this case, right-click on its icon, under which the model name is indicated, and select Printer Properties from the context menu. In the dialog box that appears on the screen, click the Test Print button. When you see a sheet of clearly displayed text emerge from the printer's output tray, congratulations are in order. Printer installation completed successfully!
Test page won't print? Make sure there is no paper stuck in the printer's feed mechanism and that there is enough ink (toner) in the cartridge. If the test print still fails, it is likely that the operating system does not recognize the printing device. For assistance, contact the printer manufacturer in your area or an authorized representative at the store where you purchased the printer.
To output a document as a print file that must first be sent as an attachment to an email message and only then printed, use the Save as Adobe PDF command. This command will produce a PDF file that retains the document's original formatting and is ready to be printed exactly as it appears on the screen. Files of this format are supported and opened on any desktop computer, laptop and tablet. (To view and print PDF files, use the Adobe Reader program https://get.adobe.com/ru/reader/
Connecting multiple printers
When connecting several printers to your computer at once, you need to define the primary printing device in Windows 10. To do this, right-click on its icon (in the Devices and Printers window) and select Set as Default. As a result, print jobs from all running programs and applications will be sent to this printer by default.
- To remove a printer from the operating system, right-click on its icon (see step 3 of the instructions above) and select the Remove device command from the context menu. The printer icon will be removed from the list of available devices, and you will no longer be able to use it to print files opened in programs launched in Windows 10. If a prompt appears asking you to confirm whether to remove the software associated with the printer, click Yes.
- Printer settings are changed not only using the tools in the Control Panel folder, but also in many programs that support printing their files. Typically, the command to change printer settings is executed from the program's File menu (to display the menu bar in the program window, sometimes you need to press the
) and is called Page Setup or Print Options. In the dialog box that appears on the screen, you can change settings such as paper size and orientation, fonts used, headers and footers, and many others. - To share your printer with other computers on your network, first create a homegroup. Please note that after performing this operation, the printer will be available to all users on the home network without exception.
- If the software provided by your printer manufacturer does not work as expected, use the software's built-in help system to find the cause of the problem. The tips it contains are more valuable than the general recommendations in Windows 10 Help.
Windows 10 defaults to the printer you last used. But not everyone likes this and it is not always necessary. Why change my default printer to one I use once a month? Within a minute you can change this behavior of the system and today we will tell you how!
The default printer keeps changing
Open the Start menu and select Settings.
Select "Devices"
In "Printers and Scanners" go down almost to the very bottom and next to "Allow Windows to manage the default printer" switch the slider from on. on off

Now Windows will use the default printer you selected, and not the one you last used.
Set the default printer in Windows 10
Repeat all the steps above, that is, “Start” => Settings => Devices => Printers and scanners => in the Printers and Scanners item, left-click on the printer that you want to set as default => a submenu will appear under it in which you can assign it as the default by clicking on “Set as default”, or remove it from the system by clicking on “Remove device”.
If, before setting the default printer, you completed the previous step and turned off “Allow Windows to manage the default printer,” then the printer you select will not change, it will always be the default until you change it yourself.
By the way, you can disable the “Allow Windows to manage the default printer” option using the registry, I don’t know if you need this, but I’ll describe it anyway :)
Press the Win+R keys in the window that opens, enter regedit and click "OK" => in the registry editor, using the left panel, go to HKEY_CURRENT_USER\SOFTWARE\Microsoft\Windows NT\CurrentVersion\Windows => on the right side, select the LegacyDefaultPrinterMode parameter => double open it left click and set the value to 1 => close the registry editor. That's it, you have succeeded in disabling the function of using the default printer that was last used.
That's all for today, if you have any additions - write comments! Good luck to you :)
vynesimozg.com
How to prevent Windows 10 from automatically changing My default printer.
In Windows 10, the system itself manages the default printer according to the printer you last used. The default printer you select changes periodically if your system has multiple virtual printers, such as Microsoft print to PDF or Foxit PDF, in addition to the physical one. Because Windows 10's choices don't always match yours, you end up having to set your default printer again and again
The classic Control Panel\All Control Panel Items\Devices and Printers is typically used to set the default printer, but there is another option in Windows 10 that overrides the user's custom settings.

Type in Windows 10 Search -Printer, and select Printers and Scanners from the list.

This opens the modern printer setup user interface.

This interface allows you to select a default printer, or remove a device. Select your printer and click Set as default. Then, to prevent Windows 10 from managing your default printer, disable the option
Allow Windows to manage the default printer.
Please note: This option is not available in the Classic Control Panel Devices and Printers.
g-ek.com
How to fix - Default printer cannot be installed
If you get a "Default printer cannot be set" message when adding a printer in Windows 10, here's how to set the default printer using Registry manipulation.

Although we can use different printers in Windows 10, in most cases, we choose one printer that is used frequently. Typically, Windows 10 should mark this printer as the default.
When you add a new printer to Windows 10, the setup wizard will give you the option to set it as the default printer. With this option, you can easily set a new default printer, but sometimes you may receive a "Default printer cannot be set" message as shown below.
As a way out of this situation, you can open the Windows Settings application by pressing the key combination Win + I
Click - Devices > Printers & Scanners and set the desired printer as the default. But if that doesn't work, you can try setting the default printer in the registry as mentioned below.
FIX: Default printer cannot be installed in Windows 10/8.1/8/7
Disclaimer: The next steps will involve registry changes. So be careful when editing registry entries and create a System Restore point.
1. Press Win + R and type Regedit in the Run dialog box. Click OK to open Registry Editor.

2. In the Registry Editor window, navigate to the following section:
HKEY_CURRENT_USER\Software\Microsoft\Windows NT\CurrentVersion\Windows

3. In the Windows registry section, you should find the Devices parameter. This Parameter has three values, the first being the default printer for Windows OS. The second and third values contain data (print spooler services) and connection information, respectively. It is necessary to change the first Value to the one we need:
4. In the Value field, you must change the first value with the name of the printer to which you want to set the default printer. The Printer name must be exactly the same as what appears in the list of printers available in Control Panel > All Control Panel Items > Devices and Printers or Windows Settings > Devices > Printers & Scanners. After changing the first value, click OK.

Now you can open into Control Panel and you will see that the default printer has been updated thanks to the changes you made in the registry:

g-ek.com
Many of you have probably already installed various types of devices in Windows 10 more than once and most likely, in most cases, everything proceeded “as normal” for you, since the “ten” has very high-quality software in the form of an installer that does everything almost without any glitches. But there are situations when the installed printer cannot be set as the default printer, which actually leads to a large number of problems. In such a situation, you need to force set the default printer in Windows 10. First, let's try to go to the "Classic Control Panel" section → "Devices and Printers" → set the printer to "Primary" manually:

If the above method does not help you, then it’s time to move on to using a registry tweak in Windows 10. First, you need to install the printer → select the installed printer as the default device, but not using the Windows interface, but directly. Open the “Registry Editor” using the “regedit” command → go to the following path: HKEY_CURRENT_USER\Software\Microsoft\Windows NT\CurrentVersion\Windows → find the string parameter “Devices” and double-click on it → replace the line so that before the element “,winspool,” was the name of your new printer.

In this example, we are using the “Bullzip PDF Printer” printer, and therefore the line from the previous step will look like this: “Bullzip PDF Printer,winspool,Ne03:”


And the last step, you will need to do the following: go to the application section “Device Settings” → “Printers and Scanners” → disable the “Let Windows manage the default printer” option. This step will not allow the operating system, after the user has finally selected the default printer, to replace it with the one that it considers most suitable.

nm-store.org
Procedure for installing a printer on Windows 8
Installing and configuring a new printer in Windows 8, as a rule, occurs automatically: the operating system stores drivers for a significant number of models of peripheral devices, drives and other equipment. But it often happens that, having purchased a new printer, or when trying to use an old device, the new Windows refuses to install drivers to control its functioning. Let's look at what to do in this case, and also get acquainted with the process of installing a network printer.
Download the driver from the official resource
If the automated installation of the device driver in Windows does not occur, visit the support site, download and install the software manually.
- We decide on the device model.
We study the inscriptions on the case, in the manual or warranty card and, using the information received, look for the official support site for the device.
- We go to the section of the site where you can download the driver.
- Using the built-in search engine or a set of drop-down menus, we find the software for our printer.
- From the drop-down list, select Windows 8 of the required bit depth.
- Run the downloaded exe file and follow the instructions, accepting the terms of the license agreement.
- Reboot Windows.
Using the Update Center
The next Windows 8 tool that allows you to install a printer is Update.
- We launch it in any known way (via “Start”, search bar, tray icon).
- Click on the “Search for updates” button and wait for the process to complete.
- We allow the download and installation of found updates, especially if the printer driver is one of them.
- Reboot the computer.
Manual installation
Having installed the software to manage the problematic printer, let's move on to installing the network device.
- Go to the “Control Panel” through Charms.
- Go to "Devices and Printers".
- In the main menu of the window, click “Add a printer”.
- Click on the link marked in the screenshot.
See also: Setting up Windows 8 hotkeys
- Add a local device.
- Create a new local port.
- Go to “Network” and copy the path to the remote equipment.
First, copy the path to the target computer, as shown below, then through “\\” enter the name of the device copied from the shared resources window of the remote computer.
- In the window with the port input form, enter the path of the network printer. It will look like this: “\\TALGAT\\hplj2015”.
- Select the printer driver that we have shared access to from the list of those present on the computer or click “Install from disk...” and set the path to the driver located on the computer.
- We wait for the device to be installed and open general access to it so that other users on the network can use the shared equipment.
You can enter any resource name or leave the one suggested by Windows.
After this, a new one will appear in the list of connected devices - an installed network printer connected to the computer of one of the network users, most likely to the PC of your system administrator or employee. If you need to configure it, for example, setting it as the default printer, go to the “Devices and Printers” control panel item, where, using the context menu of the device icon, we set the parameters for its operation.
(Visited 1,446 times, 15 visits today)
Many of you have probably already installed various types of devices in Windows 10 more than once and most likely, in most cases, everything proceeded “as normal” for you, since the “ten” has very high-quality software in the form of an installer that does everything almost without any glitches. But there are situations when the installed printer cannot be set as the default printer, which actually leads to a large number of problems. In such a situation, you need Force set default printer in Windows 10.
First, let's try to go to the "Classic Control Panel" section → "Devices and Printers" → manually set the printer to "Main":

If the above method does not help you, then it’s time to move on to using a registry tweak in Windows 10. First, you need to install the printer → select the installed printer as the default device, but not using the Windows interface, but directly. Open the “Registry Editor” using the “regedit” command → go to the following path: HKEY_CURRENT_USER\Software\Microsoft\Windows NT\CurrentVersion\Windows → find the string parameter “Devices” and double-click on it → replace the line so that before the element “,winspool,” was the name of your new printer.

In this example, we are using the “Bullzip PDF Printer” printer, and therefore the line from the previous step will look like this: “Bullzip PDF Printer,winspool,Ne03:”


And the last step, you will need to do the following: go to the application section “Device Settings” → “Printers and Scanners” → disable the “Let Windows manage the default printer” option. This step will not allow the operating system, after the user has finally selected the default printer, to replace it with the one that it considers most suitable.
Sometimes you need to solve a problem related to how to set the default printer. This is especially true if not one device is connected to a personal computer, but several at once, or one of the printing devices can be accessed on it via a local network. Of course, instead of changing the default printer, you can select the required device from the list each time you call up the print settings window. However, such an operation is very tedious, because it forces you to perform several absolutely unnecessary actions.
- If you do not want to constantly select the desired device when printing and decide to use one of the printers by default to solve this problem, then first of all click on the “Start” menu and go to the PC control panel.
- In the window with the presented sections, find “Hardware and Sound”, and then click on “View devices and printers”. If your Windows 7 operating system uses a mode called “Small Icons,” then open the “Devices and Printers” section.
- In a new window where a list of devices connected to the PC is presented, you should find the desired device and double-click on it. To set it as the “default”, open “Printer” and check the box next to the item that implies using the current device as the default device.
- If you don't need other printers, because... If the device you are currently using is quite suitable for solving all the necessary tasks, then simply remove all other devices. To do this, right-click on each device in the list of printers and select “Delete” from the context menu, then confirm your choice by clicking “OK”.
Windows 8
If your PC does not have Windows 7 installed, but a newer version - Windows 8, then to solve the problem of how to make the default printer, follow these steps:
- Move the mouse cursor to the upper right part of the screen and click on the search option in the menu that opens.
- Enter the following query into the search bar: “Hardware and Printers.”
- Next, in the list of devices connected to the PC, find the icon of the device that will be installed “by default”. Open it and check the box next to the appropriate item.
- Click “OK” to change the settings you made, and then do a test print. Please note that if the default device does not work, then documents sent for printing will continue to accumulate in the queue. This may lead to failure in the future.
Windows 10
If you do not have any of the above operating systems installed, because... If your personal computer is running Windows 10, please read the following instructions:
- Click on the “Start” menu, and then select the section called “Settings”.
- Find and click on “Devices”, then select the desired printer.
- Now all you have to do is click on the button, which implies using the current device by default.
Another option for solving the above problem in Windows 10 is to set the default printer to the device that was last used:
- Open the Start menu and click on Settings.
- In the Devices section, find the Make last used... option and turn it to On.
- Save the change you made and try.