Windows 10 has new interface customization options, including a dark theme. Customize Windows 10 the way you like it appearance operating system is quite simple - almost all customization is done through system application"Parameters". It should be borne in mind that the interface settings can be found not only in the "Personalization" section, but also in some others. So let's get started.
open start menu and click on the gear - this is the icon for the "Settings" application. Go to the "Personalization" section and start setting up.
In the "Background" subsection, you can choose what will be used as wallpaper: a specific photo, a solid one-color fill or a slide show - photos that will change themselves after a certain time.
In the "Colors" subsection, you can select an accent color - it will be used to color various panels, icons, and live tiles. This color can also be assigned automatically by the operating system depending on the wallpaper (when the wallpaper changes, the color also changes). Here you can also change the light theme to a dark one, but this will only affect some standard applications, and not the entire interface of the operating system. The start menu and taskbar can be made translucent regardless of the accent color.

The "Lock screen" subsection allows you to select background image for loxrin and the Windows login page (these pages used to have different background, now it is common). You can select a photo manually or let Windows set here every day new picture from the extensive Bing collection. Here you can also specify which applications will display information on the blocking page and after what time of inactivity your computer will be blocked.

There are no settings in the "Themes" subsection, but there is a redirect to the old "Control Panel". Themes from Windows 7 and Windows 8 are suitable for Windows 10, but they only affect the set of wallpapers and system sounds.

The "Start" subsection allows you to customize the start menu: enable or disable application recommendations, show frequently used and recently installed apps, and increase the column width by one medium-sized tile. Here you can also specify how you want to open the start menu - like the classic "Start" or on Full Screen which is relevant for tablets.

In the "Taskbar" subsection, you can choose where the taskbar will be located (bottom, top, left or right), the size of application icons (standard or reduced), and hide or pin this panel so that it does not interfere. If you have multiple screens, you can choose which app icons will be shown on each of them - all or only those that are open on the selected screen. In these settings, you can also hide the icons you don't need in the taskbar notification area.

If for some reason you are not satisfied with the location of the buttons quick action in the "Notification Center", you can swap them. You can do this in System > Notifications & Actions.
Ability to switch to dark theme was one of the most anticipated Windows features. After all, with a lack of light, such color scheme less eye strain. Previously, it was possible to set the black background of the interface to the tenth version of the OS. But the developers listened to users in the Windows 10 update. Anniversary update finally added a simple official way.
After opening the section "Settings" → "Personalization" → "Colors", you will see the item "Select a default application mode" at the bottom. If you activate the dark mode here, then the background Windows interface will partially switch to black. The same applies to some standard and third party programs from the Windows Store.
Separately, you can enable the dark theme in Edge browser. To do this, click on the three dots on the right upper corner program window, then click "Options" and under "Select Theme" select "Dark".
By the way, if you prefer Google Chrome, you can download the dark theme from the Google store and even install .

Sitting at the computer in the dark, you might notice how quickly your eyes get tired. This is because at night the display becomes too bright for a room without sunlight.
Microsoft took care of this problem in the Windows 10 update as well. Creators Update added special color mode monitor " ". It can be configured in Settings → System → Display.
When this mode is active, the system changes the temperature of the colors so that they do not tire the eyes in a dark room.

As you use Windows, it accumulates residual files and other garbage that clogs HDD and slow down the OS. There are many third-party utilities that solve these problems. But standard solution did not exist until recently.
After upgrading to Windows 10 Creators Update, the system appears, which clears the device's memory. You can activate and configure it in the section "Settings" → "System" → "Storage" under the item "Storage control".

Windows 10 has a set standard applications, with which you can work with music, videos, web pages and other files without third-party software. For each file type, the system defaults to one of these preinstalled programs(or warns that it's not supported). That's why, for example, when you click on a downloaded music track, Windows immediately plays it in the Groove player.
But if you want to replace standard player, browser and other third-party programs, it is most convenient to do this in a special settings section. Open Settings → Applications → Default Applications and select here the programs you have installed that Windows should use by default for various tasks.

The password assigned to the account Windows entry, protects personal data and user settings. This feature will be relevant for you if the computer has physical access strangers. Of course, if you try hard, such protection can be bypassed. But in most life situations it will be enough.
You can put it, remove it or reset it if you suddenly forget it, in the section "Settings" → "Accounts" → "Login options".

By default, when you launch File Explorer in Windows 10, a window opens quick access to frequently visited folders and recently viewed files. Perhaps this option suits you completely. But in previous versions File Explorer OS immediately opened the This PC section, and there are users who are used to it.
If you are one of them or you just find it more convenient to immediately see in the "Explorer" local drives, you can return old view. To do this, open "Explorer", click "View" → "Options" and in the "Open File Explorer For" item, select "This PC".

Windows has long allowed you to hide files and folders, making them invisible. Thus, it is convenient to hide directories with important content so that you do not accidentally delete anything you need. You can make an object visible or hidden through the context menu: just click right click by folder or file, click "Properties" and check or uncheck the box next to "Hidden".
In addition, for convenience, the system can display its extension at the end of the name of each file: .exe, .png, .docx, or a letter designation of any other format.
By Windows default 10 does not show items that have been hidden by developers or the user, as well as file extensions. But you may need to display them. For example, to get into hidden folder or see the format of the photo.
To enable display hidden objects or file extensions, open File Explorer, click View and check desired items: "Hidden Items" or "File Name Extensions".

Windows 10 displays notifications like a typical mobile OS. So that nothing distracts you, you can configure them in Settings → System → Notifications and actions. Here you can choose what type of messages will appear on the screen, and set notification options separately for each application.
In this section, you can also select buttons for quick actions that will be displayed on the notification panel. They allow, for example, to instantly activate night mode display, adjust its brightness, or add notes to OneNote.

Errors in the system or third-party software, and incorrect actions user may cause Windows to crash.
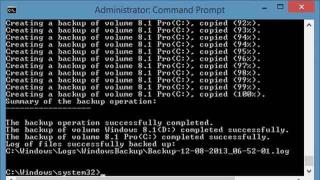
Fortunately, there is a mechanism that returns the OS to its normal state. It's about the recovery service. It creates a copy of important system components every time you update windows, driver or install new program, and saves it to your hard drive. In most cases, you will be able to recover normal work systems from such backups (restore points).
To access the service settings, type in Windows search"Recovery", click on the result and click in the window that opens "System Restore Settings".
Once on the "System Protection" tab, highlight your system disk(usually this is drive C), then click on the "Configure" button and enable system protection. After that, specify the amount of disk space that will be allocated for storing backups. The more space, the more restore points you will have at your disposal. When it ends, new points will replace the old ones. After everything click OK.
Now, if the need arises, you can by returning to the "System Protection" tab. To do this, there is a button "Restore".
But keep in mind that backups contain incomplete Windows image, but only important system files.
10. Screen calibration

Windows has a built-in display calibrator that you can use to improve color quality. The program will display simple step by step instructions. Having done everything as she tells you, you are in the best way. No special knowledge is required for this.
To launch the calibrator, type the word “calibration” in the system search and click on the found element. After that, follow the prompts of the system.
11. Activity log settings
The Windows 10 April 2018 Update added the Activity Log feature to the system. With its help, you can at any time see which documents and web pages you have interacted with in recent days, and return to working on them. Moreover, the log can display actions not only from the current computer, but also from all other devices connected to your account Microsoft.

To set up Activity History, go to Start → Settings → Privacy → Activity Log. Check the "Allow Windows to collect activities from this computer" checkbox if it was not enabled by default. Then check the "Let Windows sync my activities from this PC to the cloud" box if you want current computer appeared on other related devices.

When you're done, click on the icon next to the Start icon on the taskbar. A timeline will appear where you can see previously opened documents.
12. System update options
Windows can be annoying with offers to upgrade at the most inopportune moment. And sometimes it restarts the computer when you do not expect it at all. To insure yourself against such cases, set up the so-called "Activity Period". This is the time of day during which you usually work on your computer. Windows will not update during the specified hours.
To set the Activity Period, go to Start → Settings → Center windows updates” and click “Change activity period”. Specify the schedule for working at the computer and save the changes.

Advanced startup options in Windows 10 allow you to access various parameters boot as well as system recovery options. With their help, you can restore Windows 10 to more early date, restore Windows 10 using a system image, fix boot problems, open a command prompt window to execute various types jobs, change the UEFI settings, and return to previous build Windows 10.
This guide is for Windows 10 1607, 1703, 1709, 1803 and up.
There are several ways to access advanced startup options in the Windows 10 operating system. Below are 7 ways that will allow you to access advanced options Windows boot 10.
Method 1 of 7
Open advanced startup options using the Windows Settings app.
Step 1: Open the app "Parameters". This can be done by clicking on the gear icon in the menu "Start" or with a combination Win keys + I.

Step 2: IN " Parameters», go to the settings group " Update and Security.

Step 3: On the left side of the window, select " Recovery". On the right side, go to the " Special Options downloads» press the button " Reload now". This will immediately restart your device.
Step 4: When the computer restarts, you will see the " Choice of action"
Step 5: In the window " Choice of action», click the " Troubleshooting".

Step 6: In the opened window " Diagnostics" click on the tile " Extra options".


Method 2 of 7
Open Advanced startup options using the login window.
Step 1: In the Windows 10 login window, press the power button while holding down the Shift click the reset button.

Step 2: The computer will restart and you will see the " Choice of action»
Step 3: Click the button Troubleshooting".
Step 4: In the opened window " Diagnostics" click on the tile " Extra options".
Method 3 of 7
Open advanced startup options from Windows 10 desktop.
Step 1: Open the menu " Start". Click on the button nutrition.
Step 2: Holding down a key Shift, select and press the option "without releasing the key Shift.

Step 3: When the computer restarts, you will see the " Choice of action.
Method 4 of 7
Create a shortcut for advanced launch options.
This is also possible.
- Right click on desktop / Create / Shortcut
- Enter path: %windir%\system32\shutdown.exe -r -o -f -t 0
- Give the label a name.
Ready. Now a shortcut for additional options launch is ready to use.
Method 5 of 7
Run Windows 10 in a UEFI environment
If you have Windows 10 installed in EFI (UEFI) mode, you can open Advanced Boot Options with the command
- Right click on the menu "Start", select an item "Execute".
- Type Command and press Enter:
- shutdown.exe -r -fw(delayed) or
- create shutdown.exe -r -fw -t 0(no delay)
Method 6 of 7
Open advanced startup options with DVD or USB drive
The boot menu must be called up using the F 11 , Esc key (depending on the manufacturer) to start from a DVD or USB drive. Otherwise, you need to go to BIOS and change the boot order.
- Boot up DVD disc/USB
- Instead of "Install" click on in the bottom left corner.

Windows 10 will start with advanced startup options.
Method 7 of 7
Windows 10 auto sign in advanced boot options.
If, approximately 3 times in a row, the PC cannot boot the system into normal mode, Windows 10 automatically starts in advanced boot options.
A laptop:
- Remove the battery
- Connect the power cable and unplug the power cable 3 times in a row while booting.
- Your laptop should start with advanced boot options.
Greetings dear friends. Let's talk today about setting up Windows 10. Since it is becoming more and more popular, and I set it up on my tablet not so long ago. Also, if you just installed or bought a device on windows 10, then in any case, it's best to set it up.
Why do you need to customize windows 10?
We will not go deep into this topic, just list a few abrupt reasons to understand how to set up windows 10:
- Initially, the system does not work at 100%. You simply cannot please the user, there are millions of them, and the creators of the operating system want to show all the possibilities, well, or the maximum possible. And everyone's needs are different, so it's better to sharpen the system for yourself.
- Services, applications running with which you may never use, and they load the system.
- Maybe computer is old or just weak, but I want to work on windows 10.
- Powerful games require maximum performance.
- Over time, the system becomes cluttered with various kinds of garbage., needs to be cleaned.
- Maybe standard means and programs do not suit you, some need to be disabled, or maybe just change the shell, the appearance of the system.
- Just Do you like to change something with your own hands always and everywhere? 😮 .
After not complex actions, you can safely work in the system and periodically perform cleaning and tuning. So the system will work for a long time without failures and critical errors.
System update
There is a lot of controversy about whether a system update should be done. In my opinion need, that's right. After all, very often improvements come out, some errors are corrected, all this improves the system. Yes, I do not argue, it happens that an update is installed, and the system starts to fail. Consider how to set up windows 10 for updates.
On windows 10, I haven’t noticed this yet, but in any case, you can roll back as soon as you notice. Besides, faster system it will break if you don't update it. Since those programs that you use, in any case, reinstall or simply install other new programs over time, and the system is hard to work, there may be different kind problems, but this is a separate topic for discussion.
And so, we need to go to Settings and click "Update and Security". Further "Check for Update". And if there are updates, we immediately load and install.
Windows 10 update and update settings
After installing all the updates, click on Advanced options below and at the very top change the parameter to "Notify when planning a reboot". This is necessary so that the system does not restart itself. And you never know, maybe you are playing at an important moment, or you have a serious event, and the system took it by itself and restarted - a crash. Whatever it is, change the parameter.
 Changing update settings
 We also put two checkmarks below. First, to update everything windows products. The second is that the system itself does not start downloading updates. This is necessary so that you manually turn on the download of updates exactly when you need it. For example, when the computer is idle, you can enable downloads and updates.
It’s just that during the download and update the system is loaded, and if the Internet is also weak, then everything takes a long time. Some are beginning to confuse, they say the system slows down, which means it’s bad, but in fact it was just an update.
Below click on "Choose how and when to receive updates" option. Turn off the option as in the screenshot below. This is so that updates do not download from different sources.
 remove download from different places
 Right away, you can disable windows defender(menu on the left). I use third-party antiviruses, so I don't need a protector. By going to this tab, turn off three items, as in the screenshot.
By the way, about how to choose good antivirus, can .
 defender turn off
 Disable login password.
This does not affect performance, but I personally do not need this function, maybe you do not need it either, then it will come in handy. Although it still applies to the topic of how to set up windows 10.

This function is not necessary, if you need a password, then do not disable it, now let's move on, figure out how to set up windows 10.
Customize System settings.
Before setting up, it is better to check if all drivers are installed, if not, install. And you need to install all the programs that you use. Only then do the adjustment and cleaning.
now we turn off notifications and remove some not desired applications .

Customize the Privacy settings.
Now we go into Privacy option(Start - Settings - Privacy). Look carefully here, turn off what you do not need. We continue to answer the question of how to set up windows 10, so here we disable what applications can link to. In principle, I always turn off almost everything and do not worry. I open access to some applications separately when they ask.
- In the General tab - disable the first three functions. They are responsible for in-app advertising.
 General tab - turn off the first three
 - Now in the location tab Turn off "Location". Then apps won't ask for your geographic location.
 turn off location
 - In the Camera tab, disable the top checkbox. Then apps won't use your camera. But if you use the camera in some applications, you can simply leave below the applications that you use, where the camera is needed, and turn off the rest.
 turning off the camera
 - In the Microphone tab, the same as with the Camera.
- In Contacts, disable the first two items like in the screenshot.
 disconnect contacts
 - In the Calendar tab, disable the lowest- Application connector.
 disable connector in calendar
 - Turn off call log, more precisely the most top item.
 Call log not needed
 - Email, just like above, turn off. So that applications do not have access to it.
- Messaging - disable.
- Radio - turn off.
- Turn off sync too..
 Synchronization is disabled
And most importantly - Background applications. Here we turn off everything that we do not use every day, constantly. The point is that everything enabled - always works, otherwise we don’t need what we don’t use, we turn it off so that the system does not load.
 Disable background apps
 Editing system properties.
We are opening now start - system. Left select item - System protection. We will enable it on drive C, or on the drive where you have the operating system installed. To do this, click on desired disk, I have C, click configure below.
Now item - enable and lower the slider set approximately 5-8 GB, this is quite enough. and press OK.
 Enable system protection on the system drive
 We continue to figure out how to set up windows 10. Now on the left under System protection, select - Advanced system settings, Performance - settings.
 Performance settings
 The visual effects option will open, Put a check mark on Provide best performance . Then all the checkboxes in the lower list will be removed. And now in this list we put only 5 checkboxes, as in the screenshot. You will not see much difference, and the system will load less.
 setting up visual effects
 Now next to visual effects click the Advanced tab and below In paragraph Virtual Memory click the Edit...
 change swap file
 Now on the list select system drive, I have C and below check the box No paging file. And here on another disk we put a paging file twice as large as yours random access memory . For example, you have 2 GB of RAM, then we set the swap file to 4 GB or 4000 MB. We write in two fields, opposite the item Specify the size.
Change the system configuration.
We continue and answer the question of how to set up windows 10, describing everything how I do it myself for my computer, which faithfully serves me for a long time and without failure.

- Service wireless communication Bluetooth (if you don't use it),
- Service Bluetooth support(if you don't use it)
- cryptographic services,
- Fax machine,
- Geographic Location Service,
- downloaded map manager
- Telephone communications,
- Dispatcher automatic connections remote access,
- Store Showcase Service,
- Task Scheduler,
- Smart Card Deletion Policy
- Setting up a remote desktop server,
- Service touch keyboard(only if you do not use it, for example, you have a tablet),
- Telephony,
- Remote Desktop Service,
- wallet service,
- windows store service,
- X-box Authentication Manager,
- Saving games on X-box Live,
- X-box Live Network Service.
Now click apply.

We clean from unnecessary files.
Even if you just installed the operating system, clean disks from excess garbage necessary even necessary.
For this we go to my computer (this computer) and on the system drive, I have it C, right-click, click properties in the menu. Below will be Disk Cleanup button, press it and wait as long as necessary until the system scans the disk.
 Disk Cleanup
 Next, a window will open, there we put checkmarks everywhere, below click the "Clean up system files" button", also Check all boxes and click OK. The procedure takes time. It is better to do this cleaning more often, about once every 3 months. The first one is clean for a long time, the next ones are faster. There is nothing to be afraid of, this tool is very reliable and of high quality.
 select all checkboxes
 We continue to figure out how to set up windows 10. Next, after cleaning, also in the properties of drive C, click tab next to - Service. Checking for errors. Even if for the first time he says that a check is not required, we do a check. If it finds something, the system will fix it or notify you and click fix.
 Check disk
 Go to Disk Optimization and Defragmenter, Click Optimize. In the window that opens, click on the system drive, I have C. And below click Analyze. After the process has ended, click Optimize nearby. The process takes time.
 Disk Optimization
 These steps need to be repeated with your computer from time to time. So it will work faster. After optimization, we close everything.
Then again press combination Win+R, the Run window opens. where write %temp%, a window will open where select all folders and delete. What is not removed, we skip.
 Cleaning the temporary folder
 It opens closed folder from temporary files they need to be cleaned periodically.
Power settings.
We continue to figure out how to set up windows 10. We go to Control Panel - Hardware and Sound - Power Options. Down here tick the box " High performance «.
 power settings
 If you have a simple desktop computer, then you don't need to do anything else. If you have a laptop or tablet, it is better to leave the scheme "Balanced (recommended)" and just get out. This will save battery power.
Also on the right, you can click on "Settings for switching to sleep mode" and set there both from the Network and from the Battery, never go into sleep mode. Again, if the computer is always connected to the network.
 Sleep setting
 I think all the most basic how to set up windows 10, we have done. Of course, there are actually a lot of settings, but we have done the most basic. Now the system will work more stable. The main thing do not forget to periodically clean and optimize disks. It is from the garbage that the big problems begin.
Besides, it's better to customize the start menu itself. Reduce some icons and most importantly, remove those icons that you do not use.
The desktop should not have many shortcuts, folders, all this loads the system. Try to put things in order on the desktop and on the disks immediately, while working. This helps the system run quickly.
As an alternative to antiviruses and various cleaning programs, I advise you to install 360 total security. It protects the computer well and cleans it just as well. In addition to this, there are many other interesting things.
Among other things, I strongly advise you to read the article: A lot has also been written on optimization.
That's all for me, stay with us in the future. Subscribe to our articles. Write in the comments, I will answer everyone and share the article in in social networks. All for now.
Bonus I put a video about detailed setting system, very useful, consists of 2 parts.
How to set windows 10 for maximum performance updated: September 11, 2017 by: Subbotin Pavel
From version to version operating systems Windows interface changes. The user has to get used to the new interface, which sometimes leads to difficulties in setting up the system. However, at a fundamental level, all operating systems from Microsoft are not very different. And all settings can be easily found in any Windows versions. Consider this using the example of opening the system properties window in Windows 10.
Hotkeys for calling the system properties window
Win+Pause/Break- invokes system properties in any version Windows from XP to Windows 10. The easiest and fastest way.

There are only two keys on the keyboard. In some laptop models, you will have to additionally hold down the key fn, insofar as Pause there rendered in additional function on the key Break.
Text command to launch basic Windows 10 system properties
Some may find it much more difficult. previous method. It might seem useless. However, there are situations when it is not possible to press a key combination. For example, when remote connection hotkeys may not be available on a computer.
Via the Run applet
In this case, you can start viewing basic computer information using the command line or . The latter can be opened through the Start menu, or by pressing the Win + R key combination.
Type command:
control /name microsoft.system

It's easy to remember, and in an extreme situation it will work on any version of Windows except XP. It works in the 10th version of the system, it will probably work in many more subsequent ones. This can be much faster than looking for where the developers have removed access to the system properties this time. This command can be further simplified and simply typed

Through the command line
The same command is entered through the command Windows line 10. It, in turn, can also be called through the “execute” applet by typing cmd

Through the start menu
Through you can open the system properties in Windows 10 in several ways. I find them all inconvenient, but they are there and our guide would be incomplete if we missed them.
Computer settings
This option appeared only in Windows 10. Something similar is available in Windows 8, but there the settings are launched from a different location.

So, click Start > Settings > System > About System > System Information
Via Windows Utilities
In this case, the sequence of clicks will be different
Start > All Apps > System Tools > This PC > in the right-click "Properties" dialog box

My Computer icon in Windows 10
Surely many remember that in previous versions, the "My Computer" icon was located on the desktop. And in context menu This icon was the "Properties" item. So in this method we use the same icon. We can just drag it to the desktop with Drag-n-Drop and open the computer properties through its context menu.

This icon is of course different from the same “My Computer”, because in Windows 7 and more early versions it was not a label, but special badge. Now we can only create a shortcut to it, which is why you can see two “Properties” items in the context menu. The second is just properties of the label, so the first is needed.
Through the control panel
System properties can also be opened through the control panel. Which can also be launched in two ways.
Quick access to the control panel in Windows from the keyboard
My favorite way is using the command through the Run applet. You can also type this command in the console.

This method of opening the Control Panel works on Windows 10, however it works for any version of Windows.
Launching the Windows 10 Control Panel via the Start Menu
Click on the following menu items:

Start > All Programs > System Tools-Windows > Control Panel
Open System Properties via Windows 10 Control Panel
In the control panel, you need to open "System and Security", then click the main item "System" or the sub-item "View the amount of RAM and processor speed"

Opening Properties Windows systems 10 via control panel