Instruction
Press the "Start" button to enter the main menu and select "Settings".
Go to "Control Panel".
Select the Network Connections field and double click mouse to open the application window.
Specify local area Connection under LAN or High-Speed Internet.
Call the drop-down menu by right-clicking on the Local Area Connection icon and select the "Properties" submenu.
Specify Internet Pronocol (TCP/IP) on the General tab of the window that opens and click the Properties button.
Press the OK button to confirm.
The protocol setup is complete.
work network environment provides Master Browser. Follow the steps below to configure its settings.
Return to the Start menu and select My Computer.
Call the drop-down menu and select "Properties" by right-clicking on the "My Computer" field.
Select System Properties" and go to the "Computer Name" tab.
Click the Change button.
Enter the desired name in the Computer name field and check the box next to Workgroup in the Member of section. Enter a value for SLL in the Workgroup field and click OK.
Restart your computer to apply the changes.
Return to the "Control Panel" after the restart is complete and select "Administrative Tools".
Open a new window for fine-tuning the system by double-clicking on the "Administration" icon.
Go to "Services" by double-clicking on the "Services" icon.
Find the "Computer Browser" service and open the application window by double-clicking the mouse.
Select "Disabled" in the "Startup Type" section. Click the "Stop" button in the "Status" section (if necessary).
Confirm your choice by pressing the OK button and close the service.
The computer settings have been changed to work with the network environment.
Related videos
note
The Computer Browser service must be disabled!
Attempts to manage the network by the Computer Browser service on your own will result in the inability to correct operation not only the user's computer, but also other computers on the network.
The computer name can be arbitrary word or a phrase.
Only use is allowed Latin alphabet and numbers. Not allowed to be included in the name special characters(brackets, punctuation, etc.)
Sources:
- Smart Logic Information Technologies
Do you often access a folder located on another computer connected to local network? In order not to go through the entire search path for the desired folder each time, you can connect it as a network disk. Let's see how it can be done Microsoft tools Windows.
Instruction
Related videos
note
Connections to network drive or folder will not occur if the computer to which you are connecting is turned off or the user does not have sufficient rights. If you cannot connect, contact your network administrator.
Sometimes, in order to organize a network or connect to existing channels, you need to change network settings and settings. Using a standardized approach in this matter allows you to do it efficiently and quickly, even with minimal knowledge of computer networks.
You will need
- - basic knowledge about the structure of a computer network.
Instruction
Decide on the name of the network in which you want to make changes. To see the entire list of available network connections, go to the panel Windows controls in the "Network Connections" section.
In the Windows 7 version, in the control panel, select the "Network and Internet" section, then the "View network status and tasks" item. Go to "Network and Sharing Center". For settings selected network connection double-click the left mouse button on its icon. The status window for this connection opens.
Parameter set for settings network is determined by the components that were involved for it. As a rule, this is:
- Client for Microsoft Networks,
- File and Printer Sharing Service for Microsoft Networks,
- QoS packet scheduler,
- Internet Protocol (TCP / IP). Of greatest interest is last component, since it is in it that the unique IP address of the computer and the necessary gateways are registered.
Be careful. In Windows 7, in addition to the regular Internet protocol TCP/IP (IPv4), IPv6 has been added to expand the range of IP addresses that can be used. Its appearance is due further development Internet communications, but so far remains little in demand.
It is the Internet Protocol (TCP / IP) that is responsible for most of the work of a custom connection. Therefore, accurately enter the information transmitted to you from the provider on setting up the network. These usually include your computer's IP address, subnet mask, gateway IP address (an intermediary computer responsible for routing and accessing remote resources), and DNS servers.
Fast access to the network settings is possible through the corresponding icon in the system tray (lower right corner of the desktop Windows desktop). To do this, simply double-click on the icon with the left mouse button. The settings window will open.
Windows 7 uses templates settings for networks, allowing you to quickly set the required parameters. So, type public network"has the most high level computer protection. In the case of connecting to the Internet from a home computer, this option is best. If you intend to set up a local network, you should select the option " home network". This will allow access and data exchange between computers on the home network.
note
The settings (changes) made may often require a restart of the computer, which you should definitely do.
Sources:
- how to change protocol
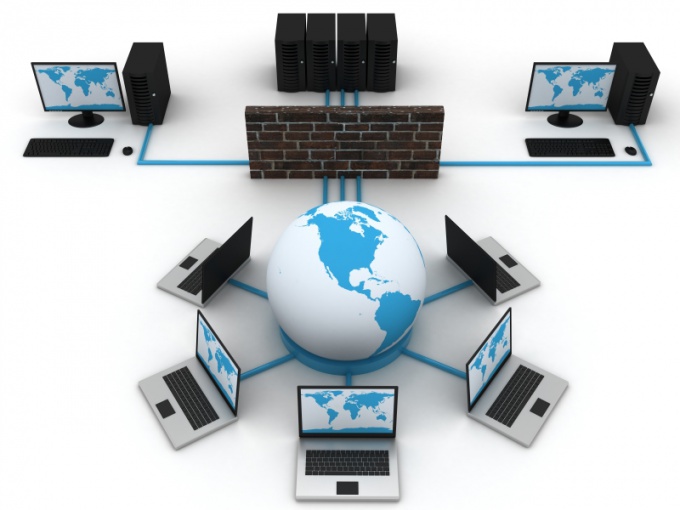
Network environment in modern operating systems is a desktop element that graphically displays all computers connected to each other via a local network (wired or wireless). Through Network Neighborhood, you can exchange files between computers if transfer access is open.
You will need
- Basic computer skills.
Instruction
Typically, if you have a local network, Network Neighborhood components appear in the Start menu. In order to find them, open the "Start" menu (located on the left side of the Taskbar). In the right column of the menu there should be a line "Network Neighborhood". Click on it once with the left mouse button. The network folder will open. environment.
If there is no "Network Neighborhood" line in the "Start" menu, then you can add it there. To do this, call the Taskbar and click on the "Start" button once right click mice. In the menu of actions that appears, select the line "Properties". In the settings window that opens, activate the "Start Menu" tab. Opposite the line with the name of the selected menu type there is a "Customize" button, click it. In the settings menu that opens, select the "Advanced" tab. This tab contains the "Start Menu Items" block, at the bottom of which is the "Network Neighborhood" line, which must be activated. After the line is activated by you, close the settings windows by clicking the "OK" button in them.
There is another way to open the My Network Places folder. To do this, open the "My Computer" folder (from the desktop or from the Start menu). A list is usually displayed on the left side of the window. typical tasks for folders. In the "Other places" drawer, find the line "Network Places" and click on it with the left mouse button once. This will open a network window. environment.
Windows 7 is a well-known operating system. This is a well established system. Windows Vista, which appeared a little earlier. Vista received a number of improvements from the developers, inherited them and new Windows 7. There are still differences between operating systems, and I would like to say that in better side. The network environment has also improved. Here we will figure out how to get the network working between Windows 7 and a bit of the "old" Windows XP. Yes, yes, XP, because this is where difficulties can arise.
Technical side
In order to make the network environment work between Windows 7 and XP, you can buy a router. This is the easiest way. But standard network cable cost less, and besides, it is much better fit to transfer files from one computer to another. Therefore, in most situations, it is easier to set up a network between these operating systems yourself.
Getting down to business
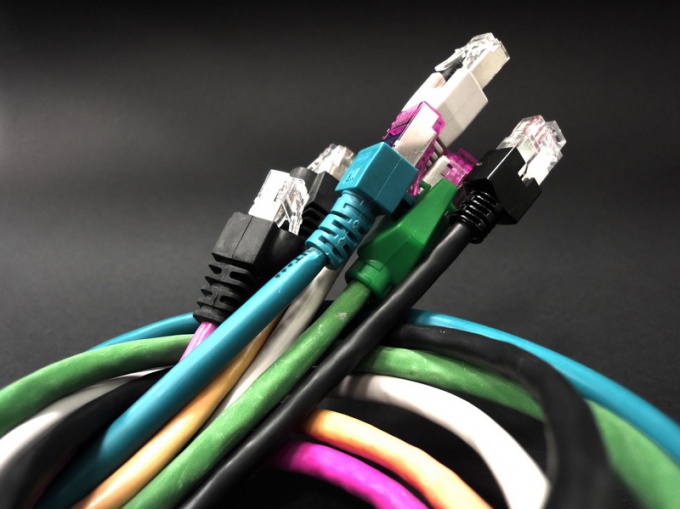
In order for the network environment between Windows 7 and XP to work, you first need to buy a network cable (patch cord, twisted pair). As for the network card, many of them are able to auto-configure by recognizing a direct link. It is better to compress the cable with a crossover. If everything is ready with the cable, and the two computers are connected, then you can start setting up the network directly on the computer.
Setting up Windows XP

The network between the operating systems in question should be configured with Windows XP. Starting this procedure, go to "Properties" by right-clicking on the picture with the name "My Computer". Here we go to the "Computer Name" tab, where the name of the workgroup is indicated (Workgroup is the default). If desired, you can set your own name by clicking on the "Change" button. Then go back to the desktop and right-click on "Network Neighborhood", select "Properties". In the dialog box that opens, find "Internet Protocol (TCP / IP)", and then click "Properties". In this window you will have to register the IP address, set the subnet mask. If you're done, save your changes by clicking OK. Next, you need to select the folders to which access will be granted with Windows 7. The network environment will consider them as shared resources. Therefore, select the desired folder, go to its "Properties", then to " General access and security”, and here we set desired settings access level.
Setting up a network environment in Windows 7
We go to the address: "Start", then "Control Panel", then "System and Security" - "System". Here you can see and change the computer name and domain. The names of workgroups on computers must be the same, but set different computer names. We return to the control panel and select "Network and Internet" from the list, and then "Control Center sharing and networks" - "Change adapter settings". Here you need to enable "Local Area Connection" by right-clicking on it and selecting "Enable". After that, go to "Internet Protocol version 4 (TCP / IPv4)", and then to "Properties". An IP address must be specified here, a subnet mask must be specified. Save the results.
We continue the setup
As already mentioned, the network environment in Windows 7 is not so easy to set up. We return to the “Sharing and Network Control Center” and click on the “Homegroup” link, then go to the “What is a network location?” section. In the window that appears, select the location of the network - "Home network". After that, a window will appear for setting sharing parameters, skip it (uncheck all the boxes and click "Next"). It is not necessary to set a password, so click "Finish".
Finishing the setup
Navigate to "Sharing and Network Control Center", and then click "Edit additional settings public access". Here should be current profile- Home or work. In it we find the section "Connections home group"(it is the last one), set here" Apply Accounts users…”. Save the changes and restart the computer. After the reboot, if everything is done correctly, the network environment between the computers should work correctly. Don't forget to share desired folders on a Windows 7 PC, then they can be accessed from other devices.
Instruction
Use the control panel if you have the Seven version installed or Vista operating Windows systems. In these systems, it is launched by selecting the appropriate item in the main menu, opened by clicking on the "Start" button.
In Windows 7, by launching the control panel, it will be enough to enter the word "personalization" in the search field and the system will find the required component itself, and you will just have to click on the link shown to you with the same name. In Windows Vista, you will have to go a long way to desired page independently: select the section "Design and personal setting”, and in it click the link “Personalization”.
Select the task called "Change desktop icons" - such a link is placed on the left side of the window with personalization settings. This will take you to the system component window with the heading "Desktop Items", which contains settings for displaying some system component shortcuts.
If you are using more early version Windows XP operating system, you can do without the control panel. On this OS, you can click free space desktop with the right mouse button and select the line "Properties" in the drop-down context menu. In the window that opens, you need to click the "Desktop Settings" button placed on the "Desktop" tab. In this way, you will be taken to the "Desktop Elements" window similar to other versions of the OS.
In all of the above Windows versions in the "Desktop Icons" section on the "General" tab of this window, check the checkbox associated with the "Network" (or "Network environment"). After that, click the "OK" button, fixing the change and close all other windows (Control Panel in Windows 7 and Vista or Display Properties in Windows XP).
Sources:
- how to set up network environment in win7 and connect network
Instruction
By default, the window will open on the first tab (“Themes”), and you need to go to the second (“Desktop”) - click it.
This tab contains settings related to background picture and screen saver, and at the very bottom there is a button you need that says "Desktop settings". Click it to open another window for managing the elements placed in the space above the background image.
On the General tab of this window, the top section is named Desktop Icons and contains several checkboxes. By checking or unchecking them, you can enable or disable the display of the corresponding labels. Uncheck the box next to "Network environment". In addition, here you can
Sharing for Managed Computers different versions OS in a networked environment has always been difficult due to differences in operating systems. But thanks to the efforts of Microsoft, the problem gradually began to fade into the background. Today, if XP and seven are installed in your home or office, then you are without special problems can arrange single network to share files and joint work between these two systems. In this article, I will describe what actions someone who decides to independently set up a network environment in their company or at home will have to perform. This also applies to “visibility” problems, when two computers for some reason do not see each other on the network, as well as printing to a network printer.
There is nothing easier than the task of setting up a network environment in windows 7, if all computers are equipped with this OS, thanks to new development"Microsoft" called "Home Group", linking them into a single network is a task for a child. But, unfortunately, this technology is not compatible with Windows Vista and XP,
Where should one start in the difficult task of connecting machines running XP and windows 7? The network environment must be configured from the "stove", that is, from the name. Make sure all computers on your network are in the same workgroup. The default is Workgroup. In some cases, it is used alternative name MSHome, or user-created names. What name you choose for your network is not important, it is important that it be the same on all computers. Only in this situation will your network environment be able to start working normally.
Where to check it? In Windows 7, right-click on "My Computer" and select properties, in the menu that opens, look at the values of the item " Working group". For XP, the path is slightly different, right-click on "My Computer", then in the "Properties" menu that opens, then go to the "Computer Name" item and check what the network name is.
In the case of the seven, go to Control Panel\u003e Networks\u003e Network and Control Center and there we click on the menu item "Change advanced. Sharing Settings".
Then, in the menu that opens, you can check the parameters and carry out fine tuning general access to the system. The main item here, for us, will be "File Sharing Connection". Select 40 or 56 bit encryption for compatibility with previous versions instead of the 128-bit one used in Windows 7 OS. You can also remove password access here (tick at the very bottom) and make other, less significant changes.
If everything is done correctly, then, when you go into the network environment on Windows XP, you will see a machine with Win 7 there. Which was required.
But organizing a working network is only half the battle, often you need to connect this entire network to network printer, as a rule, installed in a single copy.
In order for the printer of a computer running Windows 7 to become available to all other computers on the network, you must perform several simple operations.
We go to control panel, there we click on Devices and printers, then in the window that opens, select our printer and open it with the right mouse button. In the menu, click on the "Printer Properties" option.
The control snap-in will open, here you should go to the Access item. In it, check the boxes for "Sharing this printer” and enter your name, or agree with the suggested system. Since x64 drivers are not compatible with x86 drivers, when you try to connect to your Windows XP x86 printer, you will be asked for a driver for that OS. You can avoid these problems if you download and install drivers for XP, then in the " Additional drivers"You will have an x86 checkbox, by checking which you will be able to connect both versions of Windows on the fly.
Now, from any computer on the network, open Network Neighborhood and find your machine to which the printer is connected. You should see it in the list of folders and devices. Right-click on the printer and select "Add Printer". Next, by clicking a couple of confirmation boxes, you will install the printer drivers on this computer.
Hello. I can't find "Network Neighborhood" on my computer, how can I do it?
Master's response:
Hello.
In current operating systems, a network environment is a system element that graphically shows all personal computers connected via a local (wireless or wired) network to each other. Using Network Neighborhood, you can transfer data between computers if the data is accessible.
If you have a local network, most often the Network Neighborhood component will be displayed in the main menu of the Start system. To get started with it, you need to open the "Start" menu (in the lower left corner of the screen). In the right list there will be an item "Network Neighborhood". You need to click on it with the left mouse button. The Network Neighborhood window will launch. If the "Network Neighborhood" item is not in the main menu of the "Start" system, then you can add it there. To do this, right-click on the "Start" button. A menu will appear where you need to select the "Properties" item. A settings window will open, in which you need to go to the "Start Menu" tab. Next to the line with the name of the menu type there will be a button "Customize", you must click it. Another window will open, where you need to select the "Advanced" tab. And already in this tab there is a block “Start Menu Items”, in which there is an item “Network Neighborhood”, it must be activated. After completing the entire sequence of actions, you need to close the settings windows by clicking on the "OK" button.
There is alternative way go to the "Network Neighborhood" folder. You must open the My Computer component (via the Start menu or on the desktop). In the left part of the window that opens, there is usually a list of commands for folders. In the pop-up menu "Other places" you need to find the item "Network Places" and click on it once with the left mouse button. The Network Neighborhood window will then open.
If other computers are not displayed in the Network Neighborhoods folder, it is worth checking the local network settings.


