The interface changes from version to version in Windows operating systems. The user has to get used to the new interface, which sometimes leads to difficulties in setting up the system. However, at a fundamental level, all operating systems from Microsoft are not strikingly different. And all settings can be easily found in any version of Windows. Let's take a look at the example of opening the system properties window in Windows 10.
Hotkeys for calling a window with system properties
Win + Pause / Break- calls system properties in any version Windows from XP to Windows 10. The simplest and fastest way.

Only two keys on the keyboard. In some laptop models, you will have to additionally hold down the key Fn, insofar as Pause there it is moved to an additional function on the key Break.
Text command to launch basic properties of Windows 10 system
Perhaps someone will find it much more difficult than the previous method. It may seem useless. However, there are situations when it is impossible to press a key combination. For example, when connected to a computer remotely, hotkeys may not be available.
Through the "Run" applet
In this case, you can start viewing basic information about the computer by using the command line or. The latter can be opened through the Start menu, or by the Win + R key combination.
Type the command:
control / name microsoft.system

It is not difficult to remember it, and in extreme situations it will work in any version of Windows, except XP. It works in the 10th version of the system, it will probably work in many more subsequent ones. It could be much faster than looking for where the developers removed access to the system properties this time. This command can be further simplified and simply typed

Through the command line
The same command is entered through the Windows 10 command line. It, in turn, can also be invoked through the "execute" applet by typing cmd

Through the start menu
Through you can open system properties in Windows 10 in several ways. I find all of them inconvenient, but they are there and our guide would be incomplete if we left them out.
Computer settings
This option appeared only in Windows 10. Something similar exists in Windows 8, but there the options are launched from a different location.

So click Start> Settings> System> About System> System Information
Through Windows Utilities
In this case, the sequence of clicks will be different.
Start> All Applications> System-Windows> This PC> in the right-click Properties dialog box

My Computer icon in Windows 10
Surely many people remember that in previous versions the icon "My Computer" was located on the desktop. And in the context menu of this icon there was the "Properties" item. So in this method we use the same icon. We can simply drag it to the desktop with Drag-n-Drop and open the properties of the computer through its context menu.

This icon, of course, differs from the same "My Computer", since in Windows 7 and earlier it was not a shortcut, but a special icon. Now we can only create a shortcut to it, which is why in the context menu you can see two items "Properties". The second is just the properties of the shortcut, so the first is needed.
Through the control panel
System properties can also be opened through the control panel. Which can also be launched in two ways.
Quick access to Control Panel in Windows from the keyboard
My favorite way is with the command through the "Run ..." applet You can also type this command in the console.

This method of opening Control Panel works in Windows 10, however it works for any version of Windows.
Launching the Windows 10 Control Panel from the Start Menu
Click the following items in the menu:

Start> All Programs> System-Windows> Control Panel
Open system properties through Windows 10 Control Panel
In the control panel, you need to open "System and Security" then click the main item "System" or the sub-item "View the amount of RAM and processor speed"

Opening Windows 10 System Properties through Control Panel
I have an operating system Windows 10, I need to configure something. This material will tell you about several ways to open Settings in this operating system in 4 ways.
1. Launching the Settings menu from the Start menu
This method is the fastest to open. Run and on its left side you can find a shortcut, clicking on which will open.

2. Search for settings
There is a search icon on the taskbar, clicking on which and entering text will open the settings menu.

3. Using the "Action Center"
A distinctive feature of Windows 10 from earlier operating systems of the family is. Its purpose is to show what is happening on the device. It also has an integrated section for quick actions. Open by clicking on the notification area icon.
At the very bottom, you can see a section of quick actions, where you need to click on a tile, thereby opening a window.

4. Using keyboard shortcuts
It is even possible that the method of using the keyboard shortcut is faster than the first one to open the settings window in Windows 10. If this method is preferable, then you just need to hold down two keys + (Win + W) at the same time. This action will instantly unlock.
Of course, there are other ways to open the "Settings" window in Windows 10, but the ones given in the guide are the quickest and easiest.
ProComputer.su
5 ways to open the Settings window in Windows 10
Use the Settings shortcut in the Start menu
The Start menu didn't make it to Windows 8 and 8.1, but after massive user discontent, Microsoft brought it back to Windows 10, albeit not quite the way we're used to seeing it. It makes perfect sense that the Start menu provides one of the fastest ways to open the Settings menu in Windows 10.
So, open "Start" and take a look at the bottom left of the menu - there you will see the shortcut of interest to us that allows us to go to "Settings".

Use Search / Cortana
This method is not as fast as the first, but still deserves to be mentioned. Enter the word "parameters" in the "Search the Internet and Windows" field, and as soon as the system shows the search results, press Enter or click on the corresponding result.

Use Quick Actions
Windows 10 includes a new feature called Notifications, the purpose of which is to notify the user about what's happening on their computer. In addition, this function has a series of buttons for performing quick actions.
Open the notification panel by clicking on the corresponding icon in the system tray.
At the bottom of the panel, click on All Options. This will open the Settings application.

Pin "Options" to the taskbar
If you use the settings menu a lot, just place a shortcut to it on the taskbar. To do this, open the "Start" menu, find the "Settings" shortcut and right-click on it (or hold until the context menu appears if you have a touch device). From the menu, select "Pin to taskbar."

Use keyboard shortcuts
This is the last and perhaps the fastest way. All you have to do is press the keyboard shortcut + i. This action will instantly open the Options window.
compsch.com
How to open advanced startup options in Windows 10.
Advanced boot options in Windows 10 allow you to access various startup options as well as system recovery options.
With their help, you can restore Windows 10 to an earlier date, restore Windows 10 using a system image, fix boot problems, open a command prompt window to perform various types of tasks, change UEFI settings, and revert to a previous build of Windows 10.
There are several ways to access Advanced Startup Options in the Windows 10 operating system. Listed below are four methods that will allow you to access Advanced Startup Options in Windows 10.
Method 1 of 3
Open Advanced Startup Options with Windows Options
Step 1: Open the Settings app. This can be done by clicking on the Settings icon in the Start menu or by using the Win + I keyboard shortcut.

Step 2: In the opened Options, click the Update & Security button.

Step 3: Click on the left in the Recovery menu. Under the Special Boot Options section, click the Restart Now button. This will restart your computer.
Step 4: When the computer restarts, you will see the Select Action screen

Step 5: In the Select Action window, click the Troubleshoot button.

Step 6: In the Diagnostics window that opens, click on the Advanced options tile.

Method 2 of 3
Open advanced startup options using the login window.
Step 1: In the Windows 10 logon window, press the power button while holding down the Shift key and press the restart button.

Step 2: When the computer restarts, you will see the Select Action screen
Step 3: In the Select Action window, click the Troubleshoot button.
Method 3 of 3
Open advanced startup options from Windows 10 desktop.
Step 1: Open the Start menu. Press the power button.

Step 2: Hold down the Shift key and select and click the Restart option.

Step 3: When the computer restarts, you will see the Select Action screen, click the Troubleshoot button.
Step 4: In the Diagnostics window that opens, click on the Advanced options tile.
g-ek.com
How to open Control Panel using the Windows Settings app
In Windows 8, Microsoft was the first to introduce an alternative to the traditional Control Panel. The new Windows 10 Settings app not only includes most of the settings and options available in the classic control panel, but also has settings and options that are not in the control panel.
As stated earlier, many of the Classic Control Panel settings have not been moved to the new Settings app. Because of this, from time to time, we have to use the classic control panel even in new builds of Windows 10.
It would be great if there was a button in the Parameters that allows you to open the classic control panel.
Luckily, there is an easy way to open the classic Control Panel right from the settings app. You can use the search box in Windows Settings to open the Control Panel.
Yes, to open Control Panel from the Settings app, all you have to do is type Control Panel and then press Enter.

The search bar in the settings can also be used to quickly access other sections of the control panel settings. For example, you can type Windows Update to access Windows Update options and Device Manager to open Device Manager.

Tip: Did you know that you can create a shortcut to a specific section of settings on your Windows 10 desktop? Please refer to our guide.
g-ek.com
How to open settings on Windows 10
Hello. Back in Windows 8 / 8.1, Microsoft began implementing an alternative settings menu, which should eventually replace the standard control panel. At first, both panels worked in parallel and remained in the figure eight. But with the arrival of Win10 and the next constant updates, the new settings panel gradually acquires more and more functionality, and the control panel is disabled. And since everyone is accustomed to the location of the standard "Control Panel", not everyone finds the new settings. And it is for such people that this article is created.
To begin with, I offer you an option to simplify the entry into the settings by adding them to the desktop context menu, for this you can use this instruction.

The first of the standard methods is hidden in the updated Start menu, in the lower left corner there is a gear icon, hovering over which we will see a prompt “Options”.

In the second way, I suggest using the keyboard shortcut Win + I, by pressing which will open the options menu.
The third method is available if you open the notification center (it is located in the lower right corner), there is a button "All options", if you have not disabled it in the corresponding menu.

Well, the fourth method is available if you open "Computer", select the "Computer" tab and here click on the "Open Options" button.

Finally, I'll tell you how to open the old control panel while you still can. To do this, right-click on the corner "Start" and select "Control Panel".

Look like that's it. I hope this article was useful to you, click one of the buttons below to tell your friends about it. Also subscribe to site updates by entering your e-mail in the field on the right or by subscribing to the Vkontakte group and YouTube channel. Thank you for your attention
Site material geekteam.pro
geekteam.pro

By installing Windows 10, the user may think that this OS is the ideal operating system. But there is no limit to perfection. For personal use in Windows 10, you can and should disable a good portion of the components in order to free up more PC resources.
Why manual tuning is better and better than automatic
Obviously, you need to set up a computer after installing a new system with your own hands, and not with one or two one-button programs. All applications are created according to a template, work according to the same scenario with possible small branches.
No program will do what you specifically need. For example, only the user can choose the design to his liking, disable unnecessary services, defragment individual sections of the hard drive.
In addition, no program can configure the entire system: the work of some is aimed at cleaning the disk and registry, others - at optimizing services, connecting to the Internet, freeing from "surveillance" and data collection, and so on.
I often help to reinstall systems and regularly do it on my computer. I noticed for a long time that programs that perform one-click optimization miss a lot of really important things. Very few applications turn off services, I have never met one that would turn off the visual effects of the system, and so on.
Settings to be made after installing Windows 10
Limiting the Windows Store to download updates
The Windows Store is a platform through which you can buy and install paid and free Windows apps. In addition, the "Store" constantly updates the installed applications, since when you purchase a program or game, you get lifetime service. But in some cases, these updates can disrupt the operation of the system, take away some resources of the hard drive and RAM, so it is better to disable auto-update:
- In the search, enter Store and select the best match. In the search, enter Store and select the best match
- In the "Store" window, click on the ellipsis button. We select "Settings".
 In the "Store" window, click on the ellipsis button and select "Settings"
 - In the "Settings", we move the toggle switch in the "Application update" column to the "Off" state, and then restart the computer.
 In the "Settings", we move the toggle switch in the column "Updating applications" to the "Off."
Stopping unnecessary services
Services are background processes that keep devices running and mediate between devices and the operating system. However, some services may work even if there is no device with which they interact. For example, fax or Bluetooth, which most computers do not have. There is a whole list of services that you can safely disable:

List of services that can be safely disabled on Windows 10:
- "Fax";
- NVIDIA Stereoscopic 3D Driver Service (for NVidia video cards if you are not using 3D stereo images);
- "Net.Tcp Port Sharing Service";
- "Working folders";
- AllJoyn Router Service;
- Application Identity;
- BitLocker Drive Encryption Service;
- "Bluetooth Support Service" (if you are not using Bluetooth);
- Client License Service (ClipSVC, Windows 10 Store apps may not work properly after being disabled);
- "Computer Browser";
- Dmwappushservice;
- Geographic Location Service;
- Guest Shutdown Service (Hyper-V);
- Heartbeat Service (Hyper-V);
- Hyper-V Virtual Machine Session Service;
- Hyper-V Time Synchronization Service;
- "Data Exchange Service (Hyper-V)";
- Hyper-V Remote Desktop Virtualization Service;
- "Service for monitoring sensors";
- "Sensor Data Service";
- "Sensor Service";
- "Functionality for Connected Users and Telemetry" (this is one of the possibilities to disable "tracking" Windows 10 for a user);
- Internet Access Sharing (ICS) (provided that you are not using Internet Sharing features, such as sharing Wi-Fi from a laptop);
- "Xbox Live Networking Service";
- Superfetch (assuming you are using an SSD);
- Print Manager (if you are not using printing features, including the built-in printing to PDFs in Windows 10);
- Windows Biometric Service;
- "Remote registry";
- "Telephony";
- "Telephone communications";
- Secondary Login (assuming you are not using it).
Video: How to Disable Unnecessary Services in Windows 10
Checking and installing missing drivers
During the installation of Windows, standard applications are installed that open only the basic capabilities of the device. For maximum PC performance, you need to have the latest drivers installed on your system.
- Press the key combination Win + X and select "Device Manager" in the drop-down menu.
 Press the key combination Win + X and in the drop-down menu select "Device Manager"
 - Open the tab with the device, right-click and select "Update driver".
 Open the tab with the device, right-click and select "Update driver"
 - We select "Automatic search for driver updates" and wait for the wizard to finish its work. Then we restart the computer.
 We select the item "Automatic search for driver updates" and wait until the wizard finishes its work
 - We update the drivers for the following devices:
- "System devices";
- "IDE Controllers";
- "Video adapters (video cards, video controllers)".
- We reboot the computer.
Video: how to update the driver through the "Device Manager"
Checking and installing system updates
The user needs to keep the operating system up to date. To do this, you need to download updates as often as possible. The update components contain important files for the system, virus databases for the Defender, and much more.

Disable auto-update
If for any reason, for example, a small hard drive is installed in your computer, you do not want Windows to stably update its components, you can disable auto-update. However, it should be remembered that this is not recommended.

Disable spyware
With the release of Windows 10, some users have started to sound the alarm about how much data is being sent to Windows for analysis. It should be noted right away that no one keeps track of personal passwords and credit card numbers. The system simply collects some metadata to improve its performance. Disabling the collection and sending of data is quite simple, you just need to dig a little in the "Parameters" and "Defender" settings:
- Open "Options" and go to the "Privacy" applet.
 Open "Options" and go to the "Privacy" applet
 - In the "General" tab, move all the toggle switches to the "Off" position.
 In the "General" tab, move all the toggle switches to the "Off" position.
 - In the "Speech, handwriting and text input" tab, click on "Disable speech services and input suggestions".
 In the "Speech, handwriting and text input" tab, click on "Disable speech services and input suggestions"
 - In the "Diagnostics and reviews" tab, we also transfer all toggle switches to the "Off" state.
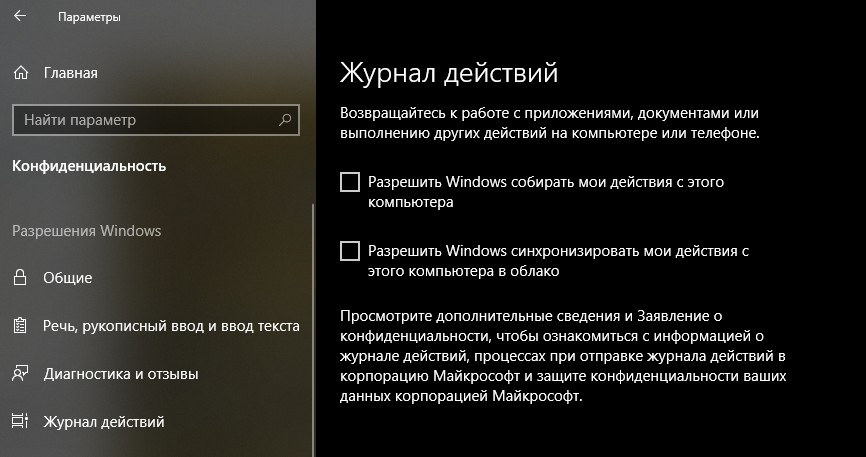 In the "Action Log" tab, uncheck the "Allow Windows ..."
 - We reboot the computer.
Experience has shown that different versions and builds of operating systems track different data, so the Privacy applet may contain more or fewer tracking settings. The system update for a specific period also plays a role. The location of the toggle switches in the tabs may differ. We recommend that you review the "Privacy" section carefully.
Garbage disposal
After installing the operating system, there is usually no garbage in it. But if the new OS was installed without overwriting the old one, the Windows.old folder may well appear on the system disk, which cannot be deleted using simple methods. The Disk Cleanup utility will help you with this.

Minimizing a set of effects
The visual effects (animation of the taskbar, casting shadows from windows, etc.) are certainly beautiful and pleasing to the eye, but they have too much impact on the RAM and video memory. It is better to disable them:

Video: How to Disable Visual Effects
Prevent background applications from running
Windows 10 has many standard apps that, like services, run in the background. They cannot be blamed for overusing resources, but it is better to disable these programs:

It is very important and quite simple to optimize and make the operation of the newly installed operating system work. It is enough to disable all unnecessary, and Windows will be tuned for maximum performance.
Greetings, dear friends. Let's talk today about setting up Windows 10. Since it is becoming more and more popular, and not so long ago I set it up on my tablet. Also, if you just installed or bought a device on windows 10, then in any case it is best to configure it.
We will not go deep into this topic, just let's list a few sharp reasons to understand how to set up windows 10:
- Initially, the system does not work 100%... You just can't please the user, there are millions of them, and the creators of the operating system want to show all the possibilities, well, or the maximum possible. And everyone's needs are different, so it's better to sharpen the system for yourself.
- Services started, applications who you possibly can never use, and they load the system.
- Maybe the computer is old or just weak, but I want to work on windows 10.
- Powerful games demand maximum performance.
- Over time, the system becomes littered with various kinds of garbage. must be cleaned.
- Maybe standard tools and programs do not suit you, some need to be disabled, or maybe just change the shell, the type of system.
- Just You love to change something with your own hands anytime, anywhere 😮 .
After simple steps, you can safely work in the system and periodically perform cleaning and tuning. So the system will work for a long time without failures and critical errors.
System update
There is a lot of controversy over whether or not to update the system. In my opinion need it right... After all, very often there are improvements, some mistakes are corrected, all this improves the system. Yes, I do not argue, it happens that an update is installed, and the system starts to glitch. Let's consider how to configure windows 10 for updates.
I haven't noticed this on windows 10 yet, but in any case, you can rollback as soon as you notice. Moreover, the faster the system breaks down because you don't update it. Since the programs that you use, in any case, reinstall or simply install other new programs over time, and the system is hard to work, all sorts of problems may arise, but this is a separate topic for conversation.
And so, we need to go to Options and click "Update and Security"... Further "Checking for an update"... And if there are updates, immediately load and install.
Updating windows 10 and configuring updates
After installing all the updates, below click on Advanced options and at the very top change the parameter to "Notify when a reboot is scheduled"... This is to prevent the system from restarting itself. But you never know, maybe you are playing at an important moment, or you have a serious event, and the system took over and restarted itself - a crash. Whatever it is, we change the parameter.
 Changing the update settings
 We also put two checkboxes below... The first is to keep all windows products updated. The second is to prevent the system from starting to download updates. This is necessary in order for you to manually enable the download of updates exactly when you need it. For example, when the computer is idle, you can enable download and update.
It's just that during the download and update the system is loaded, and if the Internet is also weak, then everything lasts a long time. Some are beginning to get confused, they say the system is slowing down, it means it is bad, but in fact it was just an update.
Below we click on the "Choose how and when to get updates" option... Turn off the parameter as in the screenshot below. This is so that updates are not downloaded from different sources.
 remove loading from different places
 Also right away, you can disable Windows Defender(menu on the left). I use third-party antiviruses, so I don't need a defender. Going to this tab, turn off three items, as in the screenshot.
By the way, about how to find a good antivirus, you can.
 we turn off the defender
 Disable login password.
This does not affect performance, but personally I don’t need this function, maybe you don’t need it either, then it will come in handy. Although it still refers to the topic of how to configure windows 10.

This function is not necessary, if you need a password, then do not disable it, now go ahead and figure out how to set up windows 10.
Configuring the System settings.
Before making the settings, it is better to check if all the drivers are installed, if not, install. And you need to install all the programs that you use. Only then adjust and clean.
now we disable notifications and remove some unnecessary applications.
Configuring Privacy Settings.
Now go to Confidentiality option(Start - Settings-Privacy). Look carefully here, turn off what is not useful to you. We continue to answer the question of how to configure windows 10, so here we disable what applications can refer to. In principle, I always turn off almost everything and do not worry. For some applications, I separately open access when they ask.
- In the General tab - disable the first three functions... They are responsible for in-app advertising.
 General tab - turn off the first three
 - Now in the location tab turn off the item "Location"... Then apps won't ask for your geographic location.
 disable the location item
 - In the Camera tab, turn off the top checkbox... Then apps won't use your camera. But if you use the camera in some applications, you can simply leave the applications that you use, where the camera is needed, and turn off the rest.
 camera shutdown
 - The Microphone tab is the same as with the Camera.
- In Contacts, turn off the first two points as in the screenshot.
 disconnect contacts
 - In the Calendar tab, turn off the lowest- Application connector.
 disable the connector in the calendar
 - We turn off the call log, more precisely, the topmost point.
 No call log needed
 - Email, just like above, turn off... So that applications do not have access to it.
- Messaging - disable.
- Radio - turn off.
- Disable synchronization too.
 Disable synchronization
And most importantly, Background Apps. Here we turn off everything that we do not use every day, all the time. The point is that all that enabled - always works, but what we do not use, we do not need, we turn it off so that the system does not load.
 Disable background applications
 Editing system properties.
Opening now start - system... On the left we select item - System protection... We will enable it on the C drive, or on the drive where you have the operating system installed. To do this, click on the desired drive, I have C, below we click on configure.
Now point - turn on and set the slider below about 5-8 GB, that's quite enough. and click OK.
 Turn on system protection on the system disk
 We continue to figure out how to configure windows 10. Now on the left, under System Protection, select - Additional system parameters, Performance - parameters.
 Performance settings
 The visual effects option opens. Check the box for Provide best performance... Then all the checkmarks in the lower list will be removed. And now in this list we put only 5 checkboxes, as in the screenshot... You will not see much difference, and the system will load less.
 customize visual effects
 Now next to Visual Effects click the Additional tab and below In the Virtual memory item, click the Change button ...
change the swap fileNow on the list select the system drive, I have C and below put a tick No paging file... But on the other disk we put the paging file twice as much as your RAM... For example, you have 2 GB of RAM, then set the paging file to 4 GB or 4000 MB. We write in two fields, opposite to the item Specify the size.
Changing the System Configuration.
We continue and answer the question of how to set up windows 10, describing everything as I do it myself for my computer, which serves me faithfully for a long time and without failures.

- Bluetooth wireless service (if not using it),
- Bluetooth support service (if not using it),
- Cryptographic Services,
- Fax,
- Geographic location service,
- Downloaded maps manager,
- Telephone communications,
- Remote Access Automatic Connection Manager,
- Store demo service,
- Task Scheduler,
- Smart Card Removal Policy
- Configuring a Remote Desktop Server,
- Touch keyboard service (only if you do not use it, for example, you have a tablet),
- Telephony,
- Remote Desktop Service,
- Wallet service,
- Windows store service,
- X-box Authentication Manager,
- Saving games on X-box Live,
- X-box Live network service.
Now click apply.

We clean up unnecessary files.
Even if you have just installed the operating system, you need to clean disks from excess debris even necessary.
For this we go to my computer (this computer) and to the system drive, I have it C, right-click, in the menu, click properties... Below will be Disk Cleanup button, press it and wait as long as necessary while the system scans the disk.
 Disk cleanup
 Next, a window will open, there we put a checkmark everywhere, below press the button "Clear system files", also put a checkmark everywhere and click OK... The procedure takes time. It is better to do this cleaning more often, about once every 3 months. The first one goes clean for a long time, the next ones are already faster. There is nothing to be afraid of, this tool is very reliable and of high quality.
 select the checkboxes everywhere
 We continue to figure out how to configure windows 10. Next, after cleaning, also in the properties of drive C, click next tab - Service. Checking for errors... Even if for the first time he says that a check is not required, we do a check. If it finds something, the system will fix it or notify you and click fix.
 Disk check
 Go to Optimizing and defragmenting the disk, Click Optimize... In the window that opens, click on the system drive, I have C. And below click Analyze... After the process has ended, click Optimize near. The process takes time.
 Disk optimization
 These steps need to be repeated from time to time with your computer. This will make it run faster. After optimization, we close everything.
Then again press the combination Win + R, the Run window will open. where write% temp%, a window will open where select all folders and delete... We skip what is not deleted.
Cleaning the temporary folderThis opens a closed folder with temporary files, they need to be cleaned periodically.
Power settings.
We continue to figure out how to configure windows 10. Go to Control Panel - Hardware and Sound - Power Supply... Down here put a tick on "High performance«.
 power settings
 If you have a simple desktop computer, you don't need to do anything else. If you have a laptop or tablet, it is better to leave the scheme "Balanced (recommended)" and just get out. This will save battery power.
Also on the right, you can click on "Settings for switching to sleep mode" and set there both from the Network and from the Battery, never go into sleep mode. Again, if the computer is always connected to the network.
 Setting the transition to sleep mode
 I think we have done the most basic way of setting up windows 10. Of course, there are actually a lot of settings, but we did the most basic thing. The system will now work more stable. The main thing do not forget to periodically clean and optimize disks... It is from the garbage that the big problems begin.
Moreover, it's better to customize the start menu itself... Reduce some icons and, most importantly, remove those icons that you do not use.
There should not be many shortcuts, folders on the desktop, all this loads the system. Try to clean up your desktop and disks right away, while you work. This helps the system run quickly.
As an alternative to antiviruses and various cleaning programs, I advise you to install 360 total security. It protects the computer well and cleans it the same way. In addition to this, there is a lot more interesting.
Among other things, I strongly advise you to read the article: We also wrote a lot about optimization.
That's all for me, stay with us further. Subscribe to our articles. Write in the comments, I will answer everyone and share the article on social networks. Goodbye to everyone.
I put a bonus on a video about the detailed setup of the system, it is very useful, it consists of 2 parts.
How to tune windows 10 for maximum performance updated: November 9, 2019 by the author: Pavel Subbotin
Whichever version of Windows is installed on the computer, the user will want to configure it to get the best performance. This question is especially acute for owners of weak hardware, which requires a maximum of free resources for stable operation.
Therefore, tuning Windows 10 for maximum performance is a great priority for them when purchasing new components such as a processor or video card.
Disk Defragmenter
When a large number of files are added to the hard drive, information is written not sequentially, but in fragments on different parts of the disk surface. In this case, fragmentation appears, and during a request for data, the computer takes longer to process them, because it needs to put all the "pieces" together. To minimize these situations, defragment the disk. This is done with standard utilities.
Good to know! In Windows 10, disk defragmentation is performed automatically once a week at a set time. But you can start this process after adding a lot of information to the computer in order to optimize the disk.
Important! In the "Optimize disks" window you can enable / disable and configure automatic defragmentation.
Optimization of startup
In many programs, when they are installed on a computer, the function is enabled during system startup. They may not be used by the user, but, working in the background, they take away the resources of the computer, so its work slows down. Apps that you don't use should be disabled or completely removed from your computer if you don't need them.

Alternative options for disabling programs at startup can be seen in the video.
Disable unnecessary services
Just like startup programs, some Windows 10 services load your computer's resources, which can slow things down. Disabling them will increase system performance.
- In the Run window enter the command services.msc.Alternative option: Control Panel> Administrative Tools> Services or open System configuration (in the Run window, enter msconfig) and go to the Services tab.

- RMB> Properties> Startup Type> Disabled.

- When using the Computer Configuration utility, uncheck the required services and save the changes.

- Reboot your computer.
Video
Watch the video to learn more about which Windows 10 services you can disable and how to do it.
Customizing visual effects
In Windows 10, a lot of PC resources are used to create visual interface effects. Disabling some parameters (visual effects) of performance will increase the speed of older computers. But on modern gaming PCs, they will have less of an effect.

Disable adapting windows and the taskbar to the background color, as well as Windows animations.

Indexing speeds up the search for files that are stored on your computer. But this function constantly scans them, monitors changes, and therefore uses system resources.
Important! You should turn off indexing only when you are not using search on your computer.

Driver setup
One of the problems with slow performance of Windows 10, encountered by a large number of users, is non-original or outdated drivers. This problem is especially relevant for a video card. Look at the driver vendor and their version in Device Manager.

Clearing the Temp folder
The Temp folder in Windows 10 is used to store temporary and intermediate files created by the system and programs. Therefore, to speed up your computer, clean it:

An alternative way is to use the built-in Disk Cleanup utility.

Power settings
By default, Windows 10 sets to Balanced Power Mode, which slows down the processor speed if the device is idle or does not require maximum hardware performance. To speed up your work, put your computer into a "High Performance" power mode.

Cleaning from viruses and malware
If, after performing the above steps, the PC still slows down, and you do not understand why this is happening, viruses or malware are most likely the cause. Check Windows 10 with antivirus programs like DrWEB Cureit or Malwarebytes Anti-Malware.
Conclusion
Optimizing the performance of your Windows computer can help speed it up. To do this, you need to disable all visual effects, remove viruses, and also change the PC settings: disable indexing and some services, update drivers.


