A hard disk with important information may break during operation, due to accidental shock, or concussion. If you are prudent, then some of the files can be saved. In order not to take unnecessary risks, always make a backup and a preventive check for errors and bad sectors once every six months, after deleting junk files.
If during operation you notice that files and folders suddenly disappear, when you access a file, the computer slows down, information is copied from one disk partition to another for a long time, then you should also check.
HDD Diagnostics
A hard drive is made up of a large number of individual cells called sectors. Information is stored on each sector. Special programs are used to check sectors. During the test, the programs access each cell and measure the response time. The norm is considered to be 1 response in 3 milliseconds. If the program produces a result of 600 milliseconds or more, this result is considered critical, and the cell is incapacitated.
All modern HDDs for disk self-diagnosis. The idea of the technology is that during boot, when the HDD is initialized by the motherboard, a self-control test occurs. The owner of the computer can look at the data from SMART and, if there are problems, has the opportunity in advance before they are lost.
A failed disk may have a slower read/write head speed, and therefore a slower data transfer rate. This will significantly reduce its performance. The computer will be slower to load, copy data from / to disk, run programs.
To diagnose hard drives for errors, bad sectors, to obtain S.M.A.R.T. , speed testing uses special programs.
Programs for checking HDD

SeaTools is a set of proprietary utilities, distributed free of charge. Can be downloaded from the official site. The proposed utilities check the disk for errors of different brands, can be used to fix sectors.
SeaTools for Windows performs validation in the Windows interface. The utility for DOS is an iso image from which you can make a boot disk for checking. This version is preferred if the user wants to avoid problems with disk access by the OS during the scan.
Western Digital Data Lifeguard Diagnostic
Western Digital Data Lifeguard Diagnostic is a utility developed especially popular among Russian users. Just like the previous one, it is free, it has a version for Windows and ISO. Provides S.M.A.R.T. information.


CrystalDiskInfo and CrystalDiskMark
CrystalDiskMark is capable of measuring average read and write speeds across different sections of a disk. This free, multilingual program is designed specifically for measuring speed. It works with the most popular versions of Windows. In addition to HDD, it can be used for SSD and flash drives. It is presented in two versions: for installation and portable.
CrystalDiskInfo is designed to diagnose hard drives and SSDs. You can view the health status and temperature of the drive. You can view S.M.A.R.T. like so much more.
Built-in Windows Utilities
Checking with built-in Windows tools. Go to “My Computer” (“This PC” for Windows 8.1). Right click on the drive to open "Properties". Select "Tools" from the menu and press the "Check" button. Wait until the verification process is completed and the computer displays the result.


HDDScan
HDD Scan is a good free program. Supports IDE/SATA/SCSI hard drives, RAID arrays, external USB/FireWire drives, SSDs, and flash cards. Allows you to check hard drives, bad sectors, get SMART data, perform various kinds of disk tests.
Victoria HDD
Victoria HDD is a popular software for diagnosing hard drives: it performs a disk surface test in order to detect possible malfunctions, checks for bad sectors, and marks bad blocks.
Victoria HDD is a fairly simple and powerful hard drive test program that was created to evaluate performance, test, fix minor problems, and format a drive.
The post contains a list of 20 best free tools for partitioning, diagnostics, encryption, recovery, cloning, formatting disks. In general, almost everything you need for basic work with them.
1.Test Disk
TestDisk allows you to recover boot partitions, deleted partitions, fix damaged partition tables and restore data, as well as create copies of files from deleted/inaccessible partitions.Note: PhotoRec is a TestDisk related application. With it, it is possible to recover data in the memory of a digital camera on hard drives and CDs. In addition, you can recover major image formats, audio files, text documents, HTML files, and various archives.

When you run TestDisk, you are presented with a list of hard disk partitions that you can work with. The choice of available actions carried out in sections includes: analysis to correct the structure (and subsequent recovery, if a problem is detected); changing disk geometry; deleting all data in the partition table; recovery of the boot partition; listing and copying files; recovering deleted files; creating a snapshot of a partition.
2. EaseUS Partition Master
EaseUS Partition Master is a tool for working with hard disk partitions. It allows you to create, move, merge, split, format, change their size and location without losing data. It also helps recover deleted or lost data, check partitions, move OS to another HDD/SSD, etc.
On the left is a list of operations that can be performed with the selected partition.
3. WinDirStat
The free program WinDirStat analyzes the used disk space. Demonstrates how data is distributed and which data takes up more space.Clicking on a field in the diagram will display the file in question in a structured view.

After loading WinDirStat and selecting disks for analysis, the program scans the directory tree and provides statistics in the following ways: list of directories; directory map; list of extensions.
4. Clonezilla
Clonezilla creates a disk image with a clone tool that is also packaged with Parted Magic and is initially available as a standalone tool. Presented in two versions: Clonezilla Live and Clonezilla SE (Server Edition).
Clonezilla Live is a bootable Linux distribution that allows you to clone individual devices.
Clonezilla SE is a package that is installed on a Linux distribution. It is used to simultaneously clone many computers over a network.
5.OSFMount
Using this utility makes it possible to mount previously made disk images and present them as virtual drives, directly viewing the data itself. OSFMount supports image files such as: DD, ISO, BIN, IMG, DD, 00n, NRG, SDI, AFF, AFM, AFD and VMDK.
An additional function of OSFMount is the creation of RAM disks located in the computer's RAM, which significantly speeds up work with them. To start the process, go to File > Mount new virtual disk.
6. Defraggler
Defraggler is a free hard drive defragmenter that helps increase its speed and lifespan. A feature of the program is the ability to defragment individual files as well.
Defraggler analyzes the contents of the disk and displays a list of all fragmented files. During the defragmentation process, the movement of data on the disk is displayed. Highlighted in yellow - the data that is being read, and green - those that are being written. Upon completion, the Defraggler issues an appropriate message.
Supports NTFS, FAT32 and exFAT file systems.
7.SS Life
SSDLife - diagnoses a solid state drive, displays information about its condition and estimates the expected life. Supports remote monitoring, manages the performance level on some hard drive models.
Thanks to SSD wear monitoring, you can increase the level of data security, identify problems in time. Based on the analysis, the program concludes how often the solid state drive is used.
8. Darik's Boot And Nuke (DBAN)
A fairly popular free utility DBAN, used to clean up hard drives.
DBAN has two main modes: interactive (interactive mode) and automatic (automatic mode). Interactive mode allows you to prepare the disk for data deletion and select the necessary erasing options. Automatic mode cleans all detected disks.
9. HD Tune
The HD Tune utility is designed to work with the hard drive and SSD. Measures the read-write level of HDD/SSD, scans for errors, checks the status of the disk and displays information about it.
When launching the application, you need to select a drive from the drop-down list and navigate to the appropriate tab to view the information.
10VeraCrypt
VeraCrypt is a free and open source encryption application. Uses encryption on the fly.
The VeraCrypt project evolved from TrueCrypt with the goal of strengthening encryption key protection methods.
11.CrystalDiskInfo
CrystalDiskInfo displays the status of hard drives that support S.M.A.R.T. The utility monitors, evaluates the general condition and displays detailed information about hard drives (firmware version, serial number, standard, interface, total operating time, etc.). CrystalDiskInfo has support for external hard drives.
The top bar on the screen displays all active hard drives. Clicking on each of them reveals information. The Health Status and Temperature icons change color depending on the value.
12. Recuva
The Recuva utility is used to recover accidentally deleted or lost files. It scans the desired media, and then displays a list of deleted files. Each file has its own parameters (name, type, path, recovery probability, state).
The necessary files are determined using the preview function and marked with checkboxes. The search result can be sorted by type (graphics, music, documents, videos, archives) and immediately view the content.
13. TreeSize
The TreeSize program displays a tree of directories on the hard disk, providing information about their sizes, and also analyzes the use of disk space.
Folder sizes are displayed from largest to smallest. Thus, it becomes clear which folders take up most of the space.
Note: With Defraggler, Recuva and TreeSize, you can trigger Defraggler and Recuva for a specific folder directly from TreeSize - all three applications integrate seamlessly.
14.HDDScan
HDDScan is a hard disk diagnostic utility used to test storage media (HDD, RAID, Flash) in order to detect errors. Viewing S.M.A.R.T. attributes, prints hard drive temperature sensor readings to the taskbar, and performs a read-write comparison test.
HDDScan is designed to test SATA, IDE, SCSI, USB, FifeWire (IEEE 1394) drives.
15. Disk2vhd
The free Disk2vhd utility converts a live physical disk into a virtual Virtual Hard Disk (VHD) for the Microsoft Hyper-V platform. Moreover, a VHD image can be created directly from a running operating system.
Disk2vhd creates one VHD file for each disk with selected volumes, keeping information about disk partitions and copying only data related to the selected volume.
16. NTFSWalker
The portable utility NTFSWalker allows you to analyze all records (including deleted data) in the main MFT file table of an NTFS disk.
The presence of native NTFS drivers makes it possible to view the file structure without the help of Windows on any computer reading media. Deleted files, regular files, and detailed attributes for each file are available for viewing.
17.GParted
is an open source disk partition editor. Performs efficient and secure partition management (create, delete, resize, move, copy, verify) without data loss.
GParted allows you to create partition tables (MS-DOS or GPT), enable, disable and change attributes, align partitions, recover data from damaged partitions, and much more.
18. SpeedFan
The SpeedFan computer program monitors the indicators of the sensors of the motherboard, video card and hard drives, with the ability to control the speed of rotation of installed fans. It is possible to carry out automatic and manual adjustment.
SpeedFan works with SATA, EIDE and SCSI hard drives.
19.MyDefrag
MyDefrag is a free disk defragmenter that is used to organize data stored on hard drives, floppy disks, USB drives and memory cards.
The program has a convenient function of working in screensaver mode, as a result of which defragmentation will be performed at the time assigned to start the screen saver. MyDefrag also allows you to create or customize your own scripts.
20.DiskCryptor
With the open source encryption program DiskCryptor, you can fully encrypt a disk (all disk partitions, including the system partition).
DiskCryptor has a fairly high performance - it is one of the fastest disk volume encryption drivers. The program supports FAT12, FAT16, FAT32, NTFS and exFAT file systems, allowing you to encrypt internal or external drives.
A hard drive failure can lead not only to the need to replace it, but also to the loss of all data stored on it. That is why it is so important to regularly check the HDD for errors in it in order to transfer all important information to another medium in a timely manner. There are several programs for checking the hard drive. Windows users can use the built-in utility or download applications from third-party manufacturers.
Windows Hard Drive Checker
The utility for checking the HDD in Windows is located in the system called chkdsk.exe and can be launched both from the graphical interface and using the command line. To run chkdsk.exe, you need to select the Properties item in the context menu of the My Computer section and go to the Tools tab in the window that appears. To run the program, click the Run Scan button.
In the window that appears, check or uncheck the boxes, depending on the parameters with which you want to check. The item Check and repair bad sectors will cause the HDD diagnostics to drag on for a long time and can last up to several hours. Checking the disk without fixing errors will allow you to perform the operation more quickly, but will not fix existing problems, if any.

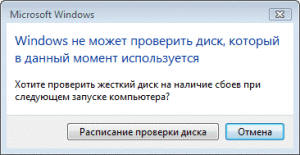
Checking the system partition will only start after the computer is restarted, since during OS operation it is used by Windows.
Running chkdsk.exe from the command line
To run Check Disk from the command line, run cmd.exe and type chkdsk c: /f /r in the window that appears. In this case, the system will also warn you about the impossibility of checking the system partition.

To continue checking, type Y and press Enter.
Programs for checking the hard drive from HDD manufacturers
In addition to the Windows utility, there are many more programs that allow you to identify hard drive errors and fix them. Usually, hard drive manufacturers include all the necessary utilities on the included disk, where, in addition to them, there are drivers. You can also find a diagnostic tool of the corresponding manufacturer on its official website. The following is a list of the most well-known official HDD checkers:
- Western Digital: Data Lifeguard Tools,
- Seagate: SeaTools,
- Hitachi Drive Fitness Test
- Samsung: Shdiag.
One of the most famous programs for checking a hard drive is the Victoria utility, which is distributed absolutely free. Victoria works under Windows and DOS systems.

The main advantage of this utility is that it contains all the tools necessary for diagnostics. In addition, Victoria works with all HDD models from any manufacturer without restrictions.
Despite the fact that the program is designed for use by both professional service center specialists and ordinary users, you need to use the Victoria utility very carefully. Without understanding the built-in options of the program, an inexperienced user can easily damage the media or destroy the data on it.
Another program that allows you to diagnose an HDD of any manufacturer is another free MHDD utility that also allows you to not only check the hard drive, but also fix errors on it.
This utility runs exclusively in pure MS-DOS. Especially for Windows users, the program is distributed as a bootable iso disk image and a bootable floppy disk.
The main functions of MHDD are:
- diagnostics of the mechanical part of the HDD,
- viewing SMART attributes,
- low level formatting
- fix bad sectors.
In addition, the program contains several types of tests.
The MHDD program includes three files - this is the mhdd.exe executable utility itself, the mhdd.hlp help file, and the cfg/mhdd.cfg configuration file.
When using this program, you must take into account the fact that, due to working with drives at the lowest level, MHDD, in addition to a unique diagnostic tool, is also a very dangerous application that, if mishandled, can not only damage the drive, but also irrevocably destroy all it data.
The main difference between MHDD is that it accesses the drive through the IDE / SATA controller, bypassing the BIOS, which allows you to avoid its limitations, as well as obstacles associated with the features of the file system.
Windows hard disk checker
In addition to professional utilities for diagnosing and fixing HDDs, there are simpler programs that even an inexperienced user can figure out with their functionality. These applications include Crystal Disk Info, which has several versions.

Installation and launch of the program are standard and will not cause any difficulties. After launching Crystal Disk Info, a window will appear in front of you, where all the necessary information about the hard disk will be displayed - temperature and technical condition, errors, duration of work, etc.

In the figure above, mark 1 means a place to switch between disks, 2 - temperature and technical condition, 3 - model information, 4 - decoding SMART parameters.
Crystal Disk Info, although it does not allow you to fix bad sectors, however, makes it possible to quickly identify the presence of a problem, after which the user will be able to move on to finer diagnostics.
You can check the hard drive for errors and fix them both with the help of third-party programs and through the built-in services that are in Windows by default. Next, we will consider several methods that allow you to automatically check your hard drive and fix problems found on it.
Checking the disk for errors in Windows 7
You can run diagnostics through the command line, disk properties, PowerShell, and the control panel. Each of the proposed options scans the disk for various types of errors, so it is recommended to use all three instructions and only after that, if the problem is not found, resort to diagnostics through third-party programs.
Checking the hard drive by executing commands
Via disk properties

Video Tutorial: Checking HDD
Via PowerShell

Using the control panel

Using third-party programs to diagnose and check the hard drive for bad sectors
If checking the disk using standard methods did not bring the desired results, then you can use third-party programs that perform disk diagnostics.
You can download the program for free from this site - http://programdownloadfree.com/load/system/test_hdd/victoria/71-1-0-122. Its features and benefits are as follows:

HDAT 2
Similar to the previous application, but supporting more hard drive models and modes of operation. The official website of the program is https://hdat2.com.
CrystalDiskInfo
The program has a beautiful and understandable design, as well as the presence of the Russian language. Official website of the developer -
http://crystalmark.info/?lang=en . In addition to the basic functions common to all the programs described above, CrystalDiskInfo supports diagnostics of external drives, checks the status and temperature of the HDD, and has a wide range of disk settings.
Correction of found problems
In most cases, the found errors will be corrected automatically. But sometimes, the computer may detect an error, but not get rid of it, but only tell you about its presence. In this case, you must fix the error yourself.
With the help of the Victoria program
The Victoria application can both scan the disk for errors and fix the ones found.

So, checking a hard drive or SSD can be done both with the help of third-party and through built-in programs. In most cases, the found errors will be fixed automatically. Before you start working with the disk, it is recommended to restart the computer, the same should be done after you finish working with it.
As you know, all computer data is stored on a small, but often very capacious drive - a hard disk, or hard drive, HDD (Hard Disk Drive). So, like any device, the hard drive gradually wears out, which affects its performance and performance. You can notice this: if your PC (laptop, netbook) is an “experienced” comrade who has been working for more than a year, he may start to freeze, “think” for a long time when accessing certain folders, etc. These are sure signs of the appearance of "broken" sectors on the hard drive. In this case, he just needs your help in the form of checking and, if possible, correcting errors in his work. You can do this in several ways, I'll tell you about everything in order. If you decide to figure out how to check your hard drive for errors, then my recommendation is to read this article to the end, and only then start following the steps that are described in this article.
In order to properly maintain your hard drive, extend its life for many years, you need to understand some of the basics of the drive. Therefore, at first I will try to tell in the simplest possible language what happens inside the hard drive, and because of what it loses its “former grip” over time, and after that I will mention which programs will help you maintain and fix the hard drive. If you do not have the desire to delve into the problem literally from the inside, but plan to simply go over the instructions like “click here - click here” - move to the second part of the article describing the methods and programs for checking the hard drive. The first section of the material will be devoted to theory, and I will try to make it as interesting and understandable as possible. Go!
The principle of operation of the hard disk and formatting
A hard drive is a device that consists of several glass/aluminum plates coated with a ferromagnetic material. Above the surface of each plate (disk), at a distance of about ten nm, there are magnetic heads that read and write information to the disk.
In the production of hard disks, the final stage is the application of tracks, sectors and marks on the magnetic surface of the disk. This process is called low-level formatting. Thus, service information is applied to the disk. In simple terms, the “magnetization” of service information is higher than that with which we will subsequently fill the disk. That is why user data, files can be written and erased many times, but service information cannot.
IMPORTANT: if you read / heard somewhere that low-level formatting will help fix hard drive errors, and you can do it using any program, remember: this operation is performed once and only at the factory using expensive equipment. It is impossible to perform low-level formatting using software at home! Of course, you can format it, but this will not be the formatting that we would like.
Sometimes I resort to such formatting (there are special utilities), but I do this procedure to format the disk when other programs refuse to do so. Ask why is this happening? Because some programs, if they cannot format the disk, write a message, for example, “Formatting the hard disk could not be completed”, and if you use special programs that format several times in the same area, then sometimes this option works - when the disk does not lend itself to simple formatting.
The hard drive is equipped with some kind of operating system (not Windows, which we all know and use). With the help of labels and OS commands applied to the disk, the drive “understands” where exactly the magnetic head needs to be delivered at the current time for reading / writing. The table of tracks, sectors and marks, as well as the OS of the disk - Firmware, firmware - is stored in a special section, closed from the BIOS and the operating systems familiar to us, zone. Therefore, if you suddenly wonder if you need to update the hard drive firmware, you should know: you don’t need to do this. After all, a hard drive is not an iPhone, and it does not need updates for the normal operation of a modern hard drive.
Bad HDD sectors - physical, logical, software
We are getting closer and closer to the problem - the loss of performance by the hard drive.
So, the disks are marked into tracks and the tracks are divided into sectors. By the way, the minimum size of a hard disk sector available to a user is 512 bytes. What happens if a sector suddenly becomes unreadable? The hard drive controller gives the command to make a few more attempts to read (at this moment, on the other side of the monitor, we can notice how the PC is slightly "stupid"), and if the operation was unsuccessful, the system marks the sector as faulty (bad block ), and the information that should have been written to this sector is written to another working sector in the backup partition. At the same time, information is entered into the label table that now this sector is considered non-working. The process of redirecting from bad sectors to spare ones is called "Remapping", or in slang "remap".
Note: imagine: the magnetic head cannot always move continuously along the tracks sector by sector - due to bad sectors, it has to jump to the backup track and back again and again. For this reason, by the way, you can hear extraneous sounds, crackles from the HDD. Naturally, the more bad sectors on the disk, the slower the hard drive works.
There are several types of bad sectors:
- Physical bad block. Such sectors arise as a result of physical, mechanical damage to the hard disk - shedding of the ferromagnet, cracks, chips. It is logical to assume that their occurrence is due to physical impact - vibration, shock or high temperature (overheating), dust penetrating inside the disk. A physical bad sector cannot be fixed by any software, the only solution is to enter it in the defect table and assign it a “deputy” on the backup track. Therefore, do not knock on your laptop and also be attentive to the computer system unit, which is usually placed under the table.
- Logic bad block. They are the result of a violation of the logic of the hard drive and are divided into two categories: correctable and unrecoverable.
- Unrecoverable logical bad block. In this case, service information is violated - the sector label, address, etc., which is sometimes possible to correct, but only available to narrow specialists with expensive equipment.
- Correctable logical bad block. Along with the information, an additional parameter is written to the sector - a checksum, or Error Correction Code (ECC), which allows you to restore information even in the event of a failure. It happens that you turn off the computer (for example, from the socket while the system was still working), the information was written to the hard disk, but the checksum was not entered into the table. In this case, HDD recovery programs come to the rescue, which, “without asking” sectors, forcibly write zeros to them, and, accordingly, new checksums. After that, the sector returns to work, and the disk is formatted without problems using standard Windows tools. If formatting is not done, then the hard drive will repeatedly access the disk and, due to an incorrect checksum, your computer or laptop will freeze.
- Software bad block. The name itself tells us that such blocks occur during the operation of the program, which means that with the help of any program such bads can be fixed. Here we include incorrectly marked sectors and other "small things", which are corrected by the usual formatting.
IMPORTANT: I'm sure you all know this very well, but just in case, I'll say it: formatting will destroy all your data on the disk. Therefore, before formatting a disk, make sure that all the necessary information from it is copied to another medium. Otherwise, you will simply lose it.
Standard utilities in Windows for checking hard drives
With the theory sorted out, let's move on to practice. There are several applications for working with "problem" hard drives that have proven to be powerful and reliable tools. About all in order.
By tradition, I will say a few words about standard Windows tools. The functionality, of course, leaves much to be desired, but for the prevention of disk errors it will do. To check the disk using the OS, open "Explorer", right-click on any of the disks and select the "Properties" line from the menu.
In the window that opens, go to the "Service" tab and see that we have few options - you can check for file system errors or run defragmentation. We will not stop at the check (we press the button and check), but I will say a few words about defragmentation. As the name implies, this process is the reverse of the process of disk fragmentation as a result of a remap (this was discussed in the theoretical part of the article above). Simply put, defragmentation is the ordering of the disk table and spare sectors for faster access to the latter and speed up the response of the hard disk as a whole. It is recommended to run a disk defragmenter occasionally. However, remember: any operation of checking or repairing a hard drive is a lengthy process, so you need to stock up on time.
Conclusion: you need to check the disk for errors in the file system and you can also defragment the disk.
Another way to check the disk using standard means is through the command line. Run it - press "Win" + "R" on the keyboard, then enter "cmd" and click "OK". Next, we write the command “chkdsk C: / f / r”, where “C:” is the letter of the drive being checked, “/ F” and “/ R” are parameters indicating that it is necessary to automatically fix errors, as well as check for bad sectors and try recover information.
Attention! If you fail to use this command, namely, you do not have enough privileges to use this command, then a little lower I will tell you what to do in this situation.
Note: the method that I described above rarely saves, so I highly recommend the chkdsk utility, which saved me more than once.

Also keep in mind that if your physical disk is divided into logical disks, for example, C, D, etc., then you need to check all your logical disks.
If the disk you are checking is currently in use, the system will prompt you to schedule a disk check the next time you restart your PC, you need to press the Y key: "Y" - "Yes" ("Yes"), and "N" - "No" ("No" ). After that, you must reboot your device.
If the disk is free, then a check will be carried out, the results of which the program will display on the screen. Perhaps the program will ask you to disable the volume (local disk), in this case, just press the "Y" key on the keyboard. Below is an example of this message:

If you run the “chkdsk /?” command, the program will display a complete list of options that can be used with this utility, but in most cases, the method described above is enough for diagnostics.
If the utility writes that you do not have privileges to execute the command, then you need to run it as an administrator. Make it simple. For users who have Windows 8 or 10 installed, press the "Win" + "X" keys, a menu will open where you need to select "Command Prompt (Administrator)". After that, you can safely enter the command you need. If your computer has Windows 7 or XP installed, then you need to find "cmd" or "command prompt" through the search, right-click on it and select run as administrator.

By the way, you can return to the disk check results later, even after closing the command line and restarting the PC. For this:
- Press "Win" + "R", write in the line "eventvwr.msc", click "OK".
- In the "Event Viewer" window, open "Windows Logs", right-click on the "Application" item and select "Find ..." from the menu that appears.
- We enter "chkdsk" in the search bar and find the corresponding entry in the log.

Well, we figured out the standard verification tools, now let's go through the software from third-party manufacturers.
If you do not boot Windows, then connect the hard drive to be tested to another computer. Thus, you will boot from another hard drive, and you will check your own (which may have errors).
Checking Your Drive with Seagate SeaTools
This program, as the name implies, was released by the manufacturer of the HDD of the same name - Seagate, but this does not prevent it from being "omnivorous" and working with any disks. You can download from the official site, the software is free:. At the time of this writing, you need to click on the link "Diagnostic software SeaTools for Windows", which is located on the left. After downloading and installing the program, you need to run it.
Next, select the drive that you are trying to restore to normal operation (checking the box on the left) and click "Basic Tests". Here you can select options for working with the hard drive. In the picture below, I showed what verification options this utility has. You can use all the options that this program offers. You can click on the picture below to view the program interface:
Like any self-respecting utility, there is a boot disk image (Seagate for DOS), launching from which will allow you to use the check functions before loading the OS. For example, when the system does not boot. It is advisable to check the hard drive in this mode. Because in this way you will not have problems when checking.
In addition, the program has a "Help" section, which is completely in Russian.
Checking Western Digital Drives
The next utility is more narrowly focused and is designed to work exclusively with Western Digital HDDs. Her name is Western Digital Data Lifeguard Diagnostic. To download the program, go to the manufacturer's website http://support.wdc.com/downloads.aspx?lang=en , find the program in the list and download it. Next, run the program, right-click on the desired disk and select "Run Diagnostics".
Traditionally, there is a version of the bootable iso-image and the capabilities are similar to the previous software, the interface is elementary.
Disk analysis with HDDScan
I will mention another worthy representative of the "army" of fighters with hard drive errors. Here, it is worth noting the function of checking in the linear recording mode - “Test” - “Erase”. When launched, the program forcibly writes data sector by sector, thereby returning most of the bad sectors to work (this was also mentioned above). By the way, if it is possible to disconnect the hard drive from your PC and connect it to another with HDDScan installed on board, then use this verification option. This way you will achieve the maximum efficiency of the check. You can download the program on the website. After downloading, you need to unpack the archive, go to the unpacked folder and run the HDDScan.exe file.
To run the test, select your hard drive on the left, then click on the picture of your hard drive and select "Surface Tests".
In the window that opens, leave everything by default - "Read" and click "Add Test". So, we launched the scan, now we can double-click on the “RD-Read” entry to open a window where there will be detailed information about working with the hard drive.
If you have a lot of delays - from 20ms and above, then this means that your disk is already very bad and you need to think where to copy all the important data that is on hire. In the future, you need to replace the bad hard drive with a new one. It is advisable to use the program on another computer so that no processes interfere with checking your disk.
Hard drive recovery in Victoria
So we got to, perhaps, the most popular tool for "revitalizing" magnetic data storage devices. This program is sometimes very problematic to download from the official site and therefore I will give you a link to another site where you can download this program http://www.softportal.com/software-3824-victoria.html. I always try to give links only to official sites, but sometimes developer sites do not open for some reason and therefore I had to link to a third-party resource. This site is popular and therefore you don't have to worry about viruses.
After downloading the archive, unpack it and run the program as administrator. Be sure to take this step!

At the beginning of work, select the “Standard” tab, and in the window on the right, select the desired disk, and then click on the “Passport” button. In the log window below you will see how your HDD was determined. If an entry appears in the log, it means that the program was able to read information from this hard disk.
If this did not happen, and you saw "Get S.M.A.R.T. command... Error reading S.M.A.R.T!" - probably, the HDD controller is not working in the mode that we need. To change it, you will have to go into the BIOS and go through the following path: "Config" - "Serial ATA (SATA)" - "SATA Controller Mode Option" - change from "AHCI" to "Compatibility" (IDE). Save the BIOS changes and continue working with the program.
Note: do not forget to return everything to its place after finishing work with Victoria.
So we got to the disk test: go to the "Test" tab, click "Start".
In the course of the check, the cells in the left window will be filled with multi-colored rectangles. It is in our interest that they all be gray - this is the color of a healthy sector. But the blue and red ones are an indication of the bad sector of the disk. If, after the check, there are especially many blue cells, then you need to run the check again, first turning on the “Remap” option (located at the bottom right). As a result of such a check, the program will try to isolate broken blocks (I also talked about this in theory), hiding them. It is also worth noting that the orange and green rectangles mean that there are sectors on your disk where there are very large delays. If they are present, then this is also very bad.
IMPORTANT: if the disk check results are disappointing, I recommend copying the information to a backup disk, or be ready to replace it. Since the disk began to “lose” sectors, then most likely this process will continue. How long the disc will last you is impossible to predict. If there are no necessary files on this hard drive, and you use it only for working on the Internet, then of course you can not buy a new storage medium. If next time you have problems with this hard drive, it means that it is already unstable, and you will need to buy a hard drive.
I have tried to describe theory and practice as simply as possible. Of course, it will be difficult for an ordinary user to study the material in 5 minutes, and therefore give your disk enough time to resolve the issue of its unstable operation.
In this article, I gave as an example the utilities used by computer wizards, and if you use other programs, then there is nothing to worry about. After all, the most important thing in your case is the result. Namely, to understand what to do with your media - to restore or it's time to buy a new hard drive.
I hope this article has been helpful to you. Good luck in testing and only high-quality hard drives!
Video that will help you work with Victoria:


