The time has come when one hard drive in a computer is no longer enough. More and more users decide to connect a second HDD to their PC, but not everyone knows how to do it correctly themselves in order to avoid mistakes. In fact, the procedure for adding a second disc is simple and does not require special skills. It is not even necessary to mount a hard drive - it can be connected as an external device if there is a free USB port.
The options for connecting a second hard drive are as simple as possible:
- Connecting the HDD to the computer system unit.
Suitable for owners of ordinary stationary PCs who do not want to have external connected devices. - Connect your hard drive as an external drive.
The easiest way to connect the HDD, and the only one possible for the laptop owner.
Option 1. Installation in the system unit
Determining the type of HDD
Before connecting, you need to determine the type of interface with which the hard drive works - SATA or IDE. Almost all modern computers are equipped with a SATA interface, respectively, it is best if the hard drive is of the same type. The IDE bus is considered obsolete and may simply not be present on the motherboard. Therefore, there may be some difficulties with connecting such a disk.
The easiest way to recognize a standard is by its contacts. This is how they look for SATA drives:

And like this for the IDE:

Connecting a second SATA drive in the system unit
The process of connecting a disk itself is very easy and takes place in several stages:

SATA Boot Priority
The motherboard usually has 4 connectors for connecting SATA drives. They are designated as SATA0 - the first, SATA1 - the second, etc. The priority of the hard drive is directly related to the numbering of the connector. If you need to manually set the priority, you will need to enter the BIOS. Depending on the type of BIOS, the interface and control will be different.
In older versions, go to the section Advanced BIOS Features and work with parameters First Boot Device and Second Boot Device... In newer BIOS versions, look for the section Boot or Boot Sequence and parameter 1st / 2nd Boot Priority.
Connecting a second IDE drive
In rare cases, there is a need to install a disc with an outdated IDE interface. In this case, the connection process will be slightly different.

Connecting a second IDE drive to the first SATA drive
When you need to connect an IDE drive to an already working SATA HDD, use a special IDE-SATA adapter.

The connection diagram is as follows:
- The jumper on the adapter is set to Master mode.
- The IDE plug connects to the hard drive itself.
- The red SATA cable connects one side to the adapter and the other to the motherboard.
- The power cable connects one side to the adapter, and the other to the power supply.
You may need to purchase a 4-pin (4 pin) power to SATA adapter.
Disk initialization in OS
In both cases, after connecting, the system may not see the connected drive. This does not mean that you did something wrong, on the contrary, it is normal when the new HDD is not visible in the system. To use it, the hard disk must be initialized. Read about how this is done in our other article.
Option 2. Connecting an external hard drive
Often, users choose to connect an external HDD. It is much easier and more convenient if some of the files stored on the disk are sometimes needed outside the home. And in the situation with laptops, this method will be especially relevant, since there is no separate slot for the second HDD there.
An external hard drive is connected via USB in exactly the same way as another device with the same interface (flash drive, mouse, keyboard).
The hard drive intended for installation in the system unit can also be connected via USB. To do this, you need to use either an adapter / adapter, or a special external case for the hard drive. The essence of the operation of such devices is similar - the required voltage is supplied to the HDD through the adapter, and the connection to the PC is carried out via USB. Hard drives of different form factors have their own cables, so when buying, you should always pay attention to the standard that sets the overall dimensions of your HDD.


If you decide to connect the disk using the second method, then follow literally 2 rules: do not neglect the safe removal of the device and do not disconnect the disk while working with a PC to avoid errors.
We talked about ways to connect a second hard drive to a computer or laptop. As you can see, there is nothing complicated in this procedure and it is absolutely not necessary to use the services of computer masters.
Hello, friends. Sooner or later, disk space runs out. We are constantly flooding our devices with data and one day we will find out that there is no more space on our disk. And I want it to be always. Today I will tell you how you can quickly cope with this problem yourself. In today's article, we will connect the hard drive to the computer ourselves.
So, friends, you found that you have a problem, but do not worry, it is really easy to connect an HDD. In a regular computer, from one to six hard drives are installed. You can make them a place to store files, you can install another operating system. For example, on one disk you have Windows 10, and on the other Windows 7. When necessary, you boot from the "seven", and when not - from the "ten" - you can do that. And you can make RAID arrays if necessary.
We connect a 3.5 hard drive from a laptop to a computer via a USB adapter
The easiest and most hassle-free option is to buy an external portable hard drive. Such a disk is connected via a USB connector and is used as a large flash drive. The advantage of such a solution is that you can store a lot on it? It connects easily to your computer, is compact and easy to carry. There are also disadvantages:
- the presence of a cord that must be connected all the time;
- read-write speed is lower than that of a disk connected in the usual way;
- special sensitivity to shocks, falls.
What does a laptop drive have to do with it? Inside this enclosure is the most common laptop hard drive. And if you have such a used disk from a laptop, you can make a portable one yourself. The most important part is the adapter. The adapter can be bought in a store, taking a disc with you, and the seller will select an adapter for you, and perhaps even a beautiful case. Putting everything together, we get a portable disk:

It can now be connected to the USB port. Or such an option, without an adapter, just the connector is screwed to the case, into which the hard drive is then inserted. The case itself can be fixed in the system unit basket with screws:

This option is suitable for connecting an HDD without an adapter - inside the system unit. We read further.
Connecting HDD without adapter at home
The same 3.5 hard drive can be easily plugged in by yourself. You will need an additional SATA cable for the hard drive and possibly an additional power plug (if the power supply lacks connectors). On sale there are these cable options where everything is in one:

We open the system unit, having previously disconnected all the wires from it, unscrew the screws:

... remove the cover,

We connect the data cable to the motherboard ...

... and the hard drive along with the power connector:

It is highly desirable that the 3.5 drive does not hang on the wires. If possible, it is better to secure it in a stationary state to avoid vibrations and shocks.
Then, we find a suitable place for it and fix it, if possible, with standard fixing screws in the basket, or at worst with plumbing tape, so that our disk is firmly and motionlessly fixed. We put the cover of the system unit in place.
How to connect a second, additional hard drive to the computer via the SATA connector
If you have a standard hard drive from your computer, you can just as easily connect it as a second drive. We do everything in the same way. First, fix the new disk with standard screws on both sides in the disk cage so that there are no vibrations:

Then we connect the ribbon cable and the power connector. The disk is connected.
Connecting IDE hard drive to motherboard and SATA connector
If your computer's motherboard has connectors for an IDE hard drive, you can try connecting such a drive as well. For a long time, all computers worked on the IDE interface for about this year until 2005. A disk with such an interface looks like this:

The connection socket looks like this:

Sometimes the connectors are multi-colored. And the cable for connecting to the motherboard looks like this:

The blue header connects to the motherboard, the black (topmost) one connects to the hard drive, and the white one connects to the DVD drive.
There is an important point when using IDE drives. If you are going to use such a disc, you need to correctly switch the jumper to the position Master or Slave. This option tells the system what role this disk will play. Master- this disk is considered to be the main one, and it will be loaded from it. Slave- secondary disk.

Different manufacturers have their own pinout of jumpers. The decoding of the switching modes is always indicated on the disk case:

By setting the jumpers to a certain position, we indicate the priorities - which disk is the main one. Earlier, when there were several such disks, it took a lot of time to switch them. The SATA interface is free of these drawbacks. The IDE interface has long been outdated, and is no longer used on modern devices. However, you can connect your existing IDE drive to the SATA socket on the motherboard using a special adapter. You need to connect the adapter to the IDE drive:

... and the SATA cable and power cable to the motherboard and power supply. In this way, you can increase the disk space by some, albeit small (by modern standards) amount. More than a USB stick!

If you bought a new hard drive, you must initialize it before using it, otherwise Windows will not see it, even if it is connected correctly. This is done using special programs such as Acronis Disk Director 12. First, install the disk in the system unit, connect, load Acronis Disk Director:

At first, you will not see the new mapped drive from under Windows. However, if the Disk Management snap-in is available in your version of Windows, you can try to initialize the connected disk through this snap-in. In the photo we first went to Computer Management, then to Disk Management.

However, I always use Acronis, it is guaranteed to see all the disks connected to the computer.

You need to select the desired disk, right-click to bring up the menu, select "Initialize disk", and then at the very top, click "Apply pending operations":

After initialization, we create a partition or partitions on the disk, formatting them in the NTFS file system. This completes the operation of connecting the disk to the computer. We connected it physically and programmatically. After these steps, the disks can be used for their intended purpose - to install an operating system or make volumes from them to store your data.
If you decide to install another operating system on a new disk, then after installation, when you boot your computer, you will need to select the disk on which you installed it. This is done through BIOS. To enter BIOS, first press the key DEL, and then select the desired disk:

Again, you need to select from the list that appears, the disk that you need. You can then change the download at any time. In general, you can connect a hard drive yourself very easily, try everything you will definitely succeed.
Connecting a hard drive to a computer or TV seems like a simple procedure, but like any, where there are underwater currents and rocks.
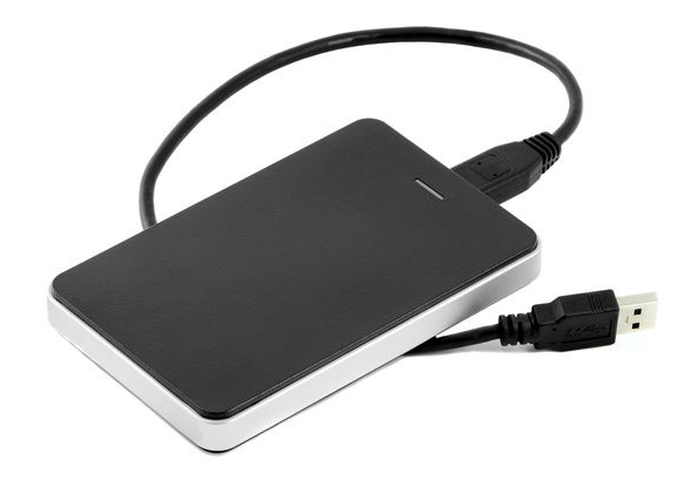
And so the first question that I often hear is why there are two paired USBs on the cables for connecting an external hard drive to a personal computer. Someone will say a spare parallel, for faster data transfer, but it is completely for another.
In fact, not all USB outputs, especially on older computers, provide the stable power needed for your external HDD to work. It is through the second, short (thin) one, coming out of the main one, that you can get the additional required power. You can also use an optional (USB power cable).


It is recommended to connect the main cable for the fast USB port (3.0), and the additional power supply to the weaker USB port (2.0) is possible in two identical ones, but it is not desirable vice versa.
If the device does not work, then this may be for the following reasons:
There is not enough power (power);
Incorrectly connected USB cable sequence (main, power)
Broken USB ports;
Corresponding drivers for USB ports are not installed (you need to install an official driver).
Not so long ago, the use of hard drives was questionable due to the slow data transfer. But at the moment, USB 3.0 has appeared instead of the previous version - USB 2.0. After that, users and custodians of Terabytes of information breathed a sigh of relief. After all, in fact, an external hard drive is a necessary thing that makes life for many easier. Additional external storage is now available to many users, but disk performance is poor.
SO WHAT ARE THE BENEFITS OF THE NEW USB 3.0
Due to the increased transmitted current, almost twice, the new development allows a much larger number of devices to be powered from one port.
Manufacturers have proven that the created USB 3.0 will allow you to duplicate information from your computer to an external hard drive 10 times faster than USB 2.0.
This will save you time and eliminate the need to connect additional power supplies.
CONNECTING THE EXTERNAL HARD DISK YOURSELF
Remember that to replace your hard drive with a new one, you do not need to replace your entire computer. External storage devices are sold separately and can be easily connected to your computer. To do this, you do not need to call a professional master, because you can easily do this work yourself.
If you are the owner of a computer: you can install a new card yourself without any problems. Your personal computer must have an unoccupied PCI Express x1 slot. It is necessary to turn off the computer, open the case of the system unit, insert the card into the desired slot and assemble the computer. In order for the new card to work, you need to install a suitable driver. On this your work is done, you can safely do business on your personal computer. As you can see, doing this yourself will not be difficult.
The approximate cost of an external hard drive you need is from 500 to 800 rubles.
If you are a laptop owner, installing a new hard drive will be even easier for you. Your laptop must have an ExpressCard slot. You need to turn off the laptop, insert the card into the desired slot, turn on the laptop, install the driver.
Laptop cards are a little more expensive - about 1000 rubles.
How to choose the right form factor for your hard drive.
At the moment, there are two types of form factors in circulation - 2.5 and 3.5 inches. Each of them has its own advantages and disadvantages.
FORM FACTOR IN 2.5 INCH.
Its advantages include:
compactness;
a light weight;
does not need additional food;
resistant to mechanical stress.
The disadvantages are:
relatively small volume;
the cost of disk space is higher;
is slower than 3.5 inch models.
2. FORM FACTOR IN 3.5 INCH.
Its benefits include:
weighty capacity;
high-speed performance (in comparison with 2.5-inch models);
the cost of disk space is lower.
Its disadvantages include:
obligatory presence of a source of additional power supply;
heavy weight (about 1 kilogram);
big sizes.
Weigh the negative and positive aspects of these two types and find the one that suits you. As a rule, 2.5-inch hard drives are used as a storage flash card and can be taken everywhere with you. 3.5 "drives are more suitable for" home "use. They are more often bought by lovers of “big” and high-quality information.
To date, the most popular and high-quality, according to experts, are the following models:
Seagate 3.5-inch 2 TB FreeAgent Drive (Highest Performance);
2.5-inch Samsung S2 Portable drive, 640 GB
At the moment, there are a huge number of different models on the market, but you should not get lost among such a large selection. Before buying, compare your monetary capabilities, goals and the required amount of device memory you need. Look at reviews in online stores, consult with experts or with friends who have already purchased this useful thing. Then you can decide to buy without a twinge of conscience. Remember, the miser pays twice. A quality item will be resistant to mechanical stress, work efficiently and will serve you for many years.
Often, not all users may know exactly how to connect an external HDD to their own computer. Everything is relatively simple here. For 3.5-inch hard drives, one end of the HDD is connected to the computer's USB port, while the other is connected to a 220 V power supply. The fact is that the power of a computer or laptop is not enough to spin up such a hard drive. This approach allows you to transfer data to your computer at high speed.
For a 2.5-inch HDD, one end of the cable plugs into the hard drive, the other plugs into the USB connector. There is one thing! If your computer does not "output" the required 5 V from the USB connector, then the other end of the Y-shaped cable should also be connected to the PC. Then your new hard drive will receive additional power and will work without problems. A second cable can also be supplied separately for additional power.
connect an external hard drive
Diagram of connecting an external hard drive to a computer.
The data transfer rate will be directly affected by the USB port itself. If in the first USB 1.0 ports the data transfer rate was as much as 12 Mb / s, then already in USB 2.0 data is transferred at a mind-boggling speed, i.e. up to 480 Mb / s, which is considered a good indicator. And USB 3.0 operates at super speeds - up to 5 Gb / s. But the connection interfaces are very different. For example, if a laptop was brought from America, then it will be possible to use the Firewire or eSATA interface, which makes this type of HDD truly universal for any laptop.
Do not think that connecting an external HDD will cause any special problems on the part of the user. Not at all, as soon as the laptop "sees" the external hard drive, you can try to test it. To do this, any document is created on the laptop's desktop and then it is calmly dragged with the mouse to the external HDD. And if all ports are working fine, then this process will take a matter of seconds.
Hard drives of this type will always be needed as additional capacitive media. And the user will no longer have to buy an impressive number of blank discs, on which all the necessary information will be recorded. Indeed, why spend a lot of money on capricious and poorly made in China "big bugs" when you can buy a reliable and multifunctional external hard drive from well-known brands such as Western Digital, Seagate or Hitachi.
When the first computers appeared, all programs, games and other files practically did not take up disk space. Now things are quite different, and it is often necessary to install an additional storage medium. Therefore, every user should know how to connect a second hard drive to a computer. In fact, this is not difficult to do, you just need to follow simple instructions.
The device must first be purchased from a store. Please note that the hard disk has several connection interfaces. After purchasing the purchase, you can proceed with the installation of the device.
Preparing for installation
- How many hard drives are already connected to the motherboard? Most often, a computer has only one hard drive, so installing a second drive is not difficult. In most cases, the HDD is located directly under the DVD-ROM, so it won't be difficult to find it;
- Is there extra space for installing a second hard drive? In the event that it is not possible to install a second or third disk, then you will have to purchase a USB drive;
- What type of cable is used to connect the hard drive to the computer? If the purchased device does not have the same interface as on a PC, it will be difficult to install.
Please note that you need a 3.5-inch hard drive. You don't need to buy small drives designed for laptops.
Physical disk connection
If the system unit has not yet been disassembled, disassemble it. It is now recommended to get rid of static electricity. This is done by any means known to you. If you wish, you can purchase a special grounding wristband in the store.

After small manipulations, the hard drive will be fixed in the case, now all that remains is to connect the hard drive. Before plugging in the power cable and ribbon cable, it should be noted that the procedure is slightly different for the IDE and SATA interface.
IDE interface
When connecting a disk with an IDE interface, it is recommended to pay attention to such a nuance as setting the operating mode:
- Master (main).
- Slave (slave).
If an additional hard disk is installed, then you need to enable the Slave mode. To do this, you need to use a jumper (jumper), which is installed in the second place. The first row turns on the Master mode. It is important to note that on modern computers, the jumper can be removed completely. The system will automatically determine how hard the master is.

At the next step, you need to connect the second or third hard disk to the "mother". For this, the IDE interface is connected to a ribbon cable (wide, thin wire). The other end of the cable is connected to the IDE 1 Secondary socket (the main drive is connected to the zero connector).

The final stage of connection is power supply. To do this, a white chip with four wires is connected to the corresponding connector. The wires go directly from the power supply (box with wires and fan).
SATA interface
Unlike IDE, a SATA drive has two L-shaped connectors. One is for power connection and the other is for data cable. It should be noted that such a hard drive lacks a jumper.

The data cable plugs into a narrow connector. The other end connects to a special connector. Most often there are 4 such ports on the motherboard, but there are only 2 ports with an exception. One of the slots can be occupied by a DVD drive.
There are times when a SATA disk was purchased, but no such connectors were found on the motherboard. In this case, it is recommended to additionally purchase a SATA controller, which is installed in the PCI slot.
The next step is to connect the power. The L-shaped wide cable is connected to the corresponding connector. If the drive has an additional power connector (IDE interface), just use one of the connectors. This completes the physical connection of the hard drive.
BIOS setup
When all manipulations with the hard disk are completed, turn on the computer, and then enter the BIOS. It is important to note that the BIOS is launched on each computer in its own way. To do this, use the key:
- Delete;

After entering BIOS, you need to go to the configuration setting. It is important to assign boot from the disk where the operating system is installed. If the priority is set incorrectly, the system simply will not boot.
If one of the disks is not displayed in the BIOS, it means that the hard drive was connected incorrectly or the ribbon cable was damaged. It is recommended that you inspect all wires and reconnect (remember to turn off your computer).
As soon as the BIOS setup is completed, you can boot with the operating system. After that, all that remains is to assign a letter to the disk.
The final stage
Since connecting a hard drive to a computer is not enough, you need to make the final settings directly from under Windows. On some computers, a similar procedure is carried out automatically. To check this, you should open "My Computer" and then see if a new disk appears.
If nothing happens, you need to start the control panel. Then select "Administration". As soon as a new window opens, you will need to select "Computer Management". In the left column, you need to find the "Disk Management" tab (on some computers "Disk Manager").

- At the bottom of the window, select disk 1 (if more than 2 hard drives are connected, select the disk with the highest number). This will be the new hard drive;
- You must assign a letter to the logical volume. To do this, right-click on the disk, and then select "Assign letter";
- As soon as a new drive letter is assigned, it needs to be formatted. The procedure can take a long time, it all depends on the size of the hard drive. It is important to choose the NTFS file system when formatting.
When the formatting process is complete, a new disk will appear in the root directory "My Computer". If for some reason it is not possible to connect the HDD using the built-in manager, it is recommended to use third-party programs.
Partition Manager is an excellent tool for working with hard drives. In addition, such a utility allows you to partition a disk into several logical volumes.
Conclusion
Attaching a hard drive takes no more than 15 minutes. If you follow the instructions, difficulties should not arise. Modern computers do not need additional BIOS setup, of course, if the disks are not installed in a completely new computer. Also, do not forget that the operating system depends on how large the plug-in hard drive can be.
Video review: connecting a hard drive
Perhaps you have an unwanted hard drive removed from an old computer or laptop, lying around and collecting dust. If so, it takes very little investment to convert it into a USB 2.0 or 3.0 removable portable storage device. Find out how to do it.
An old drive from a laptop or desktop computer is not very suitable for connecting to new equipment - of course, it does not reach the speed and volume of the new drives that are connected to the computer. However, you can insert your old disc into a special case (adapter) and make it a portable USB storage device.
The special adapter is not just a piece of plastic - it includes a set of corresponding inputs and is a USB adapter. Thanks to him, a hard drive, which is designed to be connected to the motherboard through the appropriate connectors (IDE or SATA), can be connected to a USB port, that is, make it portable. 
The prices for adapters are quite reasonable, on average about 1000 rubles. Also, the cost depends on the USB interface - an adapter with USB 2.0 will be cheaper for USB 3.0 (the difference in data transfer speed).
Types of hard drives by interface
The adapter itself is not universal and you need to select the appropriate model for a specific drive. Pay attention to the size of the disk (2.5 ″ or 3.5 ″), as well as the ribbon cable and power cable (ATA / IDE lub SATA).
Disks 2,5 ″ much thinner and mostly used in laptops. They can be connected via an ATA / IDE ribbon cable or SATA cable. 
Disks 3.5 ″ slightly thicker and usually installed in a desktop computer. Also classified as ATA / IDE and SATA. 
Sometimes certain combinations can occur - a new connector can be plugged in via controller to the "old" motherboard (SATA / IDE). Identifying the hard drive is key, because you need to select the appropriate pocket (adapter) for the given size and drive interface.
How to choose the right adapter
When choosing an adapter, you should study the properties and find the correct model that suits the way you connect the hard drive and its connector. Below is an example of randomly selected USB adapters for different types of hard drives.
- 2.5 ″ SATA: NATEC Rhino 3.0;
- 2.5 ″ IDE: Logilink 2.5;
- 3.5 ″ SATA: ITEC MySafe Advance 3.5;
- 3.5 ″ IDE / ATA: PRO-TECH 3.5;
- 3.5 ″ IDE / SATA: Tracer 731.
Installing a hard drive into an adapter
Installing a hard drive into the adapter is easy. It may vary slightly depending on the model and usually takes less than a minute. Place the drive into the adapter case, and then connect the wires to the appropriate connectors. 
Connection features
There may be one or two USB cables on the outside, depending on the adapter model, interface, and hard drive type. A USB cable is used to connect to a computer port, and a second one may be required for additional power.
When connected via a USB cable, the hard drive should be immediately detected by the system and available for data transfer.


