In this lesson, we will look at the basics of automated photo processing in Photoshop and their practical application. We will create a set of operations and then apply it to other images.
Batch processing will greatly save your time and relieve you of the tedious repetition of the same steps when editing images. Let's learn this useful technique in practice.
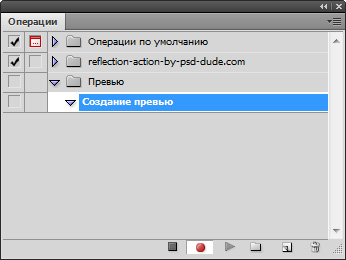
Creation of operations.
Preview of the final result:
Step 1.
Not every fan photoshop is a graphic or web designer. For convenience and ease of work in the program for ordinary users or people who are indirectly interested in photoshop, there is a function of recording all actions performed on the image, and then applying these actions to edit other documents of the program.
The first thing we have to do is select the photos we want to apply some changes to and place them in one folder anywhere on your computer. Then, select one photo from your collection and open it in photoshop.

Step 2
Now let's start creating operations. To do this, go to the top menu of the program in the tab Window-Operations (Window > Actions) or press keyboard shortcut Alt+F9 to call the option window. At the bottom of the Actions panel that opens, click on the folder icon to create a new set of your actions. Enter a name for the folder (in this example, the name "Psdtuts+").
Now, after you've created a New Action Set, click on the New Action icon at the bottom of the panel (a piece of paper with a folded edge, like the new layer icon). In the dialog box, enter the name of the operation "Vintage Halftones" (Vintage Halftone), and then click on the "Record" button (Record) to start recording all your actions on the image from now on. As you can see, three icons appeared at the bottom of the action bar to control the actions performed: record, playback and stop. (Record, Play, Stop).

Step 3
From this moment, we will begin the sequential construction of operations on the photo. You need to be extremely careful when performing each step, otherwise the result will not meet your expectations.
The first step is to resize the photo. To do this, go to the top menu in the Image-Image Size tab (Image > Image Size) and in the dialog box change the width value (width) up to 700 px. Activate the "Keep proportions" function (Constant Proportions) and "Interpolation" (Resample Image) at the bottom of the window, and also select the option "Bicubic sharper (best for reduction)" at the very bottom (Bicubic Sharper), which is well suited for photos of not very good quality and small size.
Don't Use the Transform Resizing Technique (Free Transform), since exact mathematical values are needed here. The entered parameters will be executed only for similar horizontal images, while for vertical images such values will not work.
Click OK on the dialog box and proceed to the next step.

Step 4
Now, when performing each difficult step, we activate the "Reset samples" function (Reset Watches) by pressing "D" on your keyboard. The foreground and background colors are set to black and white.
Now, double-click on the background thumbnail, unlock it, convert it to "Layer 0", and then drag it onto the New Layer icon (a leaf with a folded edge) at the bottom of the layers panel to create a duplicate.

Step 5
Now, on the "Layer 0" copy, go to Filter-Filter Gallery (Filter > Filter Gallery) and in it we select the folder Distortion - Diffused glow (Distort > Diffuse Glow). We make settings for the option: graininess 2, glow degree 3, original 10. Click OK.

Step 6
On the copy layer, change the Opacity level. (Opacity) by 75% by typing the value exactly into the option box. You don't need to use the slider to change the setting, otherwise the recording will show a gradual decrease in opacity: 100, 99, 98, 97, etc., which is undesirable.
Now, while holding Ctrl, click on the original layer, selecting it and the copy in the layers panel. Right-click on the selected layers and select from the menu - Merge Layers (Merge layers). As a result, the two layers will be merged into one "Layer 0 Copy".

Step 7
Duplicate "Layer 0 Copy" by dragging it onto the New Layer icon at the bottom of the Layers panel to get "Layer 0 Copy 2". On the duplicate, go to Filter > Blur > Gaussian Blur. (Filter > Blur > Gaussian Blur) and set the blur radius to 2 px, click OK.

Step 8
Next, change the blending mode (Blending Mode) for duplicate on Overlap (Overlay), without opening the blend modes window, but by clicking on the down arrow in the options window in the layers palette, and selecting the desired mode. You can try different blending modes outside of the recording by first stopping the recording with the Stop button (the square at the bottom of the action bar). After selecting the desired mode, turn on Recording again by clicking on the circle at the bottom of the panel.

Step 9
Next, create a New Color Adjustment Layer. (Adjustment Layer > Solid Color). To do this, click on the black and white circle at the bottom of the layers panel and select the Color option from the drop-down menu. In the options dialog select black color (# 000000) fill and click OK. Drag this layer down the layers panel under "Layer 0 Copy".

Step 10
Go to the "Layer 0 copy" thumbnail, and then go to the tab Layers - Layer Mask - Hide All (Layer > Layer Mask > Hide All).

Step 11
Now we will change the borders of our image. To do this, make a selection of the mask by pressing Ctrl+A("Select All") on the keyboard. It is important to select all the pixels of the mask, otherwise the future result will not impress you.
Be sure to use the "Select All" command (Select All), rather than manually making a selection with the Area Selection tool (Marquee Tool).
If you are using arbitrary selection, then photoshop will save these coordinates and values only for a particular image, which will not work on other images.

Step 12
Activate the Rectangular Selection Tool (Marquee Tool) and right click on the image. In the drop-down menu, select the option - Transform Selection (Transform Selection), and in the top settings bar change the values for the width (width) and height (Height) selection by 95%. To apply the function, press Enter twice (Enter).
Thus, your selection will decrease by exactly 5% of the initial state.

Step 13
Now we will slightly distort the shape of our selection to create a vintage (antique) effect. Make sure you are on the "Layer 0 copy" mask and your selection is reduced. Go to tab Selection - Refine Edge (Select > Refine edge) and enter the settings from the screenshot below. Click OK.
You should end up with a jagged selection like the example below.

Step 14
Next, fill the selection with white. (ffffff). Press "D" on your keyboard to reset the color swatches (Swatches). Then, activate the Rectangular Selection Tool (Marquee Tool) and right-click on the canvas, choosing from the menu the option - Fill (Fill). Specify foreground color (Foreground Color), opacity 100% and mode normal. Click OK. Deselect (Ctrl+D).
Step 15
Now you need to repeat the entire previous process with a frame for the layer "Layer 0 copy 2". You can repeat steps 10 to 14, or duplicate the actions in the Actions panel. First, go to the "Copy 2" layer in the Layers panel and click the Stop button in the Actions panel to stop recording for now. Select all operations with the frame and duplicate them. To do this, stand on the first action with a frame in the "Operations" panel (the "Make" line (make)) and holding Shift, click on the most recent frame operation (line Define Selection (set selection)). Then click the arrow at the top right and select the option from the list - Create a duplicate (duplicate). Now drag the "Select Layer 0 Copy 2" line above the duplicated actions and move to the "Make" line (make), click Play to duplicate the mask. Once the copy of the mask has appeared on the "Copy 2" layer thumbnail, go to the last line in the Actions window and press the Record button to move on.
Step 16
Activate the "Layer 0 copy" layer mask thumbnail and go to Filter-Filter Gallery (Filter > Filter Gallery). Click on the Sketch folder (sketch), and in it on "Halftone pattern (Halftone Pattern). After entering the settings, click OK.
Step 17
Go to the "Layer 0 copy 2" layer and click on the adjustment layers icon (black and white circle) at the bottom of the layers panel. From the list, select the Photo Filter correction (Photo Filter) and activate the "Color" option (Color) in the dialog box. Click on the color square and enter the color value 957345 and the density (density) increase to 100%.

Step 18
Now, create another Hue/Saturation Adjustment Layer. (Adjustment Layer > Hue Saturation) by clicking on the black and white circle at the bottom of the layers panel, and adjust the values from the screenshot below. Don't forget to activate the "Toning" checkbox in the options window:

Step 19
Create a New Layer in the Layers panel (Ctrl+Shift+N) or the leaf icon with a folded edge at the bottom of the panel)) above all the previous ones and name it "Layer 1". Select all by clicking Ctrl+A, and activate the Rectangular Selection tool (Marquee Tool). Set the default foreground and background colors ("D"). Right-click on the canvas and select the option - Fill (Fill). In the dialog box, specify the foreground color (black), opacity 100%, mode normal and click OK.
Step 20
Double-click on the Layer 1 thumbnail to open the Layer Styles window and select the Pattern Overlay option (Pattern Overlay). Open the Gray Paper Pattern Set (Greyscale Paper), and in it the texture "Grey Granite" (Gray Granite).

Step 21
To rasterize this layer, create a new layer (Ctrl+Shift+N) above the patterned one and select them both in the layers panel ( ctrl+ click on the layers icon). Then, merge them into one by pressing Ctrl+E.

Step 22
Change the blend mode (Blending Mode) for layer "Layer 2" to Multiply (Multiply), and Opacity (Opacity) reduce to 75%.

Step 23
Now let's merge all the layers. Select all layers in the layers palette, starting with "Layer 2" and ending with the "Color" layer below, holding Shift.
Right-click on the selected layers and select from the menu - Flatten (Flatten image). Then press the Stop button in the "Operations" window (Actions). Now all our completed actions are ready to be applied to other photos or images.

Now it's time to check how our recording works for other shots. If you did everything right, then the program will perfectly process your images.
To repeat all actions with another photo, open it in photoshop, select the Vintage Halftone operation, and click the Play button (the triangle at the bottom of the Actions panel).
Now we need to save this set of operations. Go to the name of the operation set, in this example, to the line "PSDTUTS+" and click the down arrow at the top right of the window. In the drop-down menu, select the option - save the operation (Save Actions). In the dialog box, enter a name for the operation and save it anywhere on your computer. Now we are all set to batch edit images.
Droplet creation.
A droplet applies actions to one or more images (an image folder). You can save the droplet anywhere on your computer and use it as many times as you want. To create a Droplet, go to the top menu File-Automate-Create Droplet (File > Automate > Create droplet…). In the dialog box that opens, first select the folder where you want to save the droplet. Inline Set (Set) specify the name of the set ("PSDTUTS+" in this example), in the operation line specify the name of the set operation ("Vintage Undertones").
Next, select the folder with the photo to which you want to apply the effect, after making a copy of it, and work with it. In addition, you can customize the names of future images, add text to them, series number, extensions for maximum compatibility. Once you have entered all the required information, click OK.
In the example below, you can see that I placed the droplet in a folder with a lot of photos in it.

Now select the images from the copy folder and drag them onto the droplet icon to apply its actions to the photo. The program will automatically download the images and process them, saving all the images in the folder you specified. Finally, open the folder with the changes made and see how your pictures now look.

You now have a whole collection of vintage photos ready to print or use on your blog. Good luck!

Hi all! Today we will deal with one of the main automation function in photoshop, and how to put them into practice. We will create a complex action, build a Droplet based on it, and perform a batch edit operation on the entire folder.
Part I - Creating an Action
Step 1 - Let's Get Started!
First of all, move all the images you need to process into one separate folder. Open any of these photos.

We use it to create Actions in Photoshop.
Step 2 - Setting the Action.
To get started, open the Actions window (go to the following path Window> Actions or press Alt + F9). A window will open for creating a new Action group for which you need to specify an arbitrary name.

After creating the group, let's create a specific action. Click on the “create new action” icon at the bottom of the Action panel. Let's name the new action "Vintage Halftone".

After creating, pay attention to what you have in the bottom panel of the window Actions three small icons appeared: stop, record and playback. To continue, you need to make sure that the recording icon is active.
Step 3 - Resizing the Image
Let's build an action. Once you've opened your image and activated the record icon, let's start recording the steps.

The first step is to resize our photo. Since we plan to use images in the web gallery, we need to reduce their size. To do this, go to the following path Image> Image Size and set the width value to 700 px and check the box to keep proportions. In addition, you must check the boxes Resample Image and choose Bicubic Shaper (best for reduction).
Step 4 - Copy the image.
Now, we need to reset the colors we're painting with. To do this, you can use the key D on keyboard.
Do not change colors with the color picker or eyedropper.

Then double click on the "Background" layer in the layers palette. And click "OK"
Drag the layer to the icon "Great new layer", to create a copy of the layer.
Make sure "Layer 0 copy" is selected and you can proceed to the next step.
Step 5 - Add Diffuse Glow
Add a Diffuse Glow filter to the "Layer 0 copy" layer. This will increase the lighting and give the photo a dramatic look. Let's go to the next path Filter > Filter Gallery and choose Distort> Diffuse Glow. Here you need to set the value, as shown in the screenshot below, and click the OK button.

Step 6 - ChangeOpacityandMerge Layers
Lower the opacity of the "Layer 0 copy" layer to 75%.
To change the opacity of the layer, it is better not to use the slider, because when changing with the slider, Photoshop records each step for each percentage (100, 99, 98, 97 ... 75) and we do not need this.

The final layer should be called "Layer 0 copy".
Step 7 - Gaussian Blur Filter
Duplicate the "Layer 0 copy" layer as we did earlier (step 4).

Make sure "Layer 0 copy 2" is selected and navigate to the following path: Filter > Blur > Gaussian Blur, set the Radius to 2px and click OK.
Step 8 - Change the Blending Mode of the copy.
Change the Blending Mode of "Layer 0 copy 2" to Overlay.
If you have a desire to experiment with different blending modes, click on the Stop button in the Actions window. Then hit Record, and choose the desired blend mode.
Set the opacity value to 70%.

Step 9 - Create a Layer Fill
Now, we need to add a black background to our work.
To do this, go to the following path: Layer > New Fill Layer > Solid Color, click OK and choose the color #000000 .

Move the "Color Fill 1" layer to the very bottom.
Step 10 - Adding a Layer Mask
Click on the "Layer 0 copy" thumbnail and go to the following path: Layer > Layer Mask > Hide All.

Step 11 - Select the layer mask
Now we will create a random stroke on our images.
After creating the layer mask, we must click on its thumbnail and then select everything by pressing the combination Ctrl+A on keyboard.

This is an important step, if you don't click on the layer mask thumbnail, you will end up with a wrong result.
Also, when you select everything, you cannot use the Marquee Tool and make a random selection. If you do this, Photoshop will only store the coordinates as exact numbers for that specific image, and it won't work on another photo.
Step 12 - Transforming the Selection
Let's choose Marquee Tool in the tool palette. Right-click on the selection and select the option Transform Selection.
You should pay attention to the top panel, there are two values \u200b\u200bW and H (these are the width and height, there should be a value of 100%). Click on the label with the little chain in the middle and change the value to 95%. Thus, we reduced the selection area by 5%. Click on the checkbox and apply the transformation.

Step 13 - Creating a custom border
Let's change the selection arbitrarily.
Make sure the "Layer 0 copy" mask is selected.
Then we go to the following path: Select > Refine edge, and set the value as shown in the screenshot below and click OK.

You should end up with something like this.
If you are working with a different image size, you should play around with the Refine edge values a bit.
Step 14 - Fill Selection
Now fill the selected area with white.
Reset the colors with the D key. Then select the Marquee tool in the tool palette, right click and select Fill... In the dialog box, set the settings as shown in the screenshot below.

Remove selection by pressing Ctrl + D.
Step 15 - Copy Actions
Now we need to repeat the process of creating a custom border (steps 10 to 14), but this time on the "Layer 0 copy 2" layer.
To simplify the work, these actions can simply be duplicated in the "Actions" window.
In order to copy the steps, you first need to select "Layer 0 copy 2". Stop recording.
Then we select (in the Actions window) all stages of the process for creating borders, i.e. from "Set Selection" to the step before Select "Layer 0 copy 2".

Click on the button on the right and select Duplicate. They will be copied.
Now the selected actions can simply be dragged below the "Select 'Layer 0 copy 2'" step. After we start playback of the selected fragments.
Now, click on the last step in the "Actions" window and start recording.
Step 16 - Halftone Pattern
Click on the "Layer 0 copy." layer mask thumbnail. Next, go to the following path: Filter > Filter Gallery, and go to Sketch> Halftone Pattern Here you need to set the values shown in the screenshot below, and then click OK.

Step 17 - Adding a Photo Filter
Select "Layer 0 copy 2" in the layers palette and then go to Create New Fill or Adjustment Layer > Photo Filter, select a color (#957345) and set the Density to 100%. We press OK.

Step 18 - Hue/Saturation

Step 19 - Fill the New Layer
Create a new layer in the layers palette and place this layer above all other layers. Let's leave it the name "Layer 1." Then we press the key combination Ctrl + A (select all) on the keyboard, then select the Marquee tool, right-click and select "Fill ..." use the foreground color. Everything should be filled with black.

Step 20
Now let's add a Pattern Overlay effect to "Layer 1". I recommend using "Gray Granite" from the Grayscale Paper package.
Step 21 - Rasterize the Layer Effect
Let's create another layer.
After it's created: Shift+click on "Layer 1" in the Layers Palette to select both layers. And press the key combination Ctrl + E to merge the selected layers.

Step 22 - Change the blend mode and opacity
Change the Blending Mode of "Layer 2" to Multiply and set the Opacity to 75%.
Step 23 - Flatten image
Select all layers in the layers palette. Right click and select Flatten image. Finally, in the Actions window, you can click Stop.
That's all! Now you can apply these actions to any images.
End of Part I - check it out!
It is worth checking how correctly our actions work on other images. To do this, open the image, find our action (Vintage Halftone) and press the play button.
Before continuing, you should save the action itself.
To do this, select our set of actions in the "Actions" window, and then go to the advanced options (the icon in the upper right part) and select Save Actions ... Enter a name for your action and save it anywhere.
After saving, you can proceed to batch editing.
Part II - Batch Editing
Step 1 — Creating a Droplet
Droplets apply actions to one or more photos or even to a folder by dragging them onto the droplet icon.
You can save the droplet anywhere and use it as many times as needed. To create a droplet, go to the following path in the menu File > Automate > Create droplet… There you can select many options.
First, select your original images folder and save the droplet there. For the Play option, select your kit and the Vintage halftone action. It is better to choose a different folder for the destination folder.

In addition, you can customize the name of the resulting image by adding custom text, number sequence, extension, and choose the maximum compatibility. After you have configured the droplet, click the OK button.
Step 2 - Working with the droplet.
Now open your photo folder. Select and drag the desired photos to the droplet icon. We will see that Photoshop will automatically edit the selected photos and save them to the specified folder.
Conclusion
Automating actions in Photoshop sometimes saves a lot of time. Future designers, webmasters and photographers should be able to use it.
I advise you to try these tricks to save your time.
No related posts.
(0 votes . Average 0 of 5)
Hello my dear blog readers. Today we will, as always, study some of the nuances of working in graphics programs, and I will show how to automate the processing of many images at a time. This knowledge will definitely come in handy in your daily work.
The reference raster graphics editor Photoshop, among other things, contains convenient tools for automating the same type of action on a variety of objects. Suppose you want to quickly reduce the size of photos and improve their quality before sending them by e-mail. Take, for example, 5 shots. For all of them, you need to set the width to 800 pixels, at the same time increasing the sharpness. Such a task in the program can be carried out in several ways, two of which are discussed below.
Batch processing photos in Photoshop using an action
Action (Action) Photoshop is a sequence of automatically executed commands applied to one of the images. Once saved, the action can be extended to all others. Before proceeding directly to the action, you should create two directories on your computer to store the original and processed images. Let's name them Old and New, respectively, and place the original images in the first one.
Open in the editor (for example, photoshop cs6 version) any of the processed photos, for example, a 4.jpg snapshot with a width of 1200 pixels.

Then go to the "Window" menu and check the "Operation" line. In the opened tab of the same name, click on the "Creates a new operation" icon.

In the top line of the "New operation" tab, enter its name - (in our case - "Size + Sharpness") and click the "Record" button.

Attention! From now on, you need to be especially careful, because all subsequent user actions will be recorded in action. Unnecessary and, especially, erroneous manipulations with the keyboard and mouse must be excluded.
In the Image menu, go to Image Size, enter a width value (800) and click OK. The screenshot shows that the "weight" of the file will be more than halved.

From the Filter menu, select Sharpen, then Smart. The peculiarity of this command is that it does not work everywhere, but only in those fragments where it is required.

After saving the corrected picture by simultaneously pressing the Ctrl + S keys, the last line “Save” will appear in the action records. It remains to click the "Stops playback / recording" button.

Now the created action can be applied to all objects. To do this, in the "File" menu, go to "Automation" and click "Batch Processing".

In the opened window of the same name, in the "Operation" list, specify:
- the name of the recorded sequence;
- name of the source objects folder (D:\Old);
- name of the output directory for recording corrected photos (D:\New);
- naming option for output objects. Since our initial images were simply numbered, we need to choose a “Ordinal number” from a single digit and an “Extension” that will repeat the original one.

After clicking OK, batch processing of photos in Photoshop will take place. The recorded sequence will be applied to all pictures in the Old directory. After a few seconds, all corrected pictures will appear in the New folder. As you can see in the screenshot, their width has become equal to 800 pixels.

Obviously, in the general case, the recorded action can include a much larger number of commands than the two described. For example, it is often necessary to protect your author's photographs from copying. To do this, the author's logo or watermark is applied to them using the editor's tools. But the essence of the matter will not change. The difference will be that it will take more time to create an action, and it will be completed in tens of seconds instead of several.
Using the Droplet
Batch processing photos in Photoshop can also be produced via a droplet. This is the name of a special executable file that automatically processes photos dragged onto its icon. Similar to the first method, the droplet uses a pre-recorded action.
To create a droplet, you need to perform the following sequence of actions.
In the "File" menu, go to "Automation", then - "Create Droplet".

In the window that appears, specify the location where the droplet will be saved. A little later it will become clear why it is convenient to write it to the same directory in which the corrected pictures are located, i.e. New. In the "Output folder" block, the default value "Save and close" means overwriting the corrected objects in the place of the initial ones. (Of course, you can save them to a different directory if you want.)
In the "Operation" list, you must specify a previously created action.

After clicking OK, a droplet called Unnamed.exe appears in the New folder.

After that, just select all the pictures, drag them to the droplet icon and click "Open with".

In the same few seconds, the photos dragged onto the icon will be completely processed. All pictures will be exposed to the "packed" action in the droplet. The screenshot shows the result - the same 800 pixels.

As follows from the above description, a droplet created by a specialist can be easily used by users who do not own the program. Upon receipt (for example, on a flash drive or by mail) of the droplet, it will be enough for them to drag a photo onto it without opening Photoshop. A prerequisite here is only the presence of this program on the computer.
I also advise you to read and get acquainted with the free program for photo processing in large quantities in a couple of minutes. Subscribe to the blog newsletter and don't forget to like. Good luck and see you soon in the next posts.
Sincerely, Galiulin Ruslan.
Batch processing of photos in Photoshop is a feature that greatly simplifies the lives of people who, by the nature of their work, often face the task of processing a large number of images / photos (designers, photographers).
In one of the previous tutorials, I told you what actions are, how to create them, and how you can use them to facilitate the process of image processing.
When it comes to the same type of processing of several images, we can simply apply a specially recorded action several times. But when there are a huge number of images, even a partially automated process can take a lot of your time.
Batch processing is used in cases where it is necessary to perform a series of sequential identical operations with a large number of images. For example, when you need to unify in size, make the same type of color correction, increase sharpness, add a signature / logo and save several hundred captured photos.
At its core, batch processing photos in Photoshop is the process of mass applying an action to a library of images.
You can use absolutely any action that you recorded or downloaded from the Internet.
Let's see in practice how batch processing of photos in Photoshop works.
Preliminary preparation
Let's say we have a folder that contains n-th number of photos, each of which we want to subject to the same type of processing using the selected action. My photo folder is called "Sources", it contains 30 photos (originally there were 6, I just multiplied them for clarity).

We also need to create a final folder in which ready-made processed photos will be saved. I named the output folder "Processed".
I will record a simple sequence of operations to reduce the image and slightly color correct it, and then we will try to apply the resulting action to all the photos from the "Sources" folder.
Getting Started
Stage 1 - Create an action
We launch the program, open the palette "Operations" (Actions) - Alt + F9.
Create a new action by clicking on the icon at the bottom of the Actions palette (similar to the new layer icon).

We give a meaningful name to the action. We press "Record".

A red circle will light up at the bottom of the Actions palette, which means that the recording has begun, and all your further actions will be recorded by the program.
Open one of the photos from the "Sources" folder - Ctrl + O.

Reducing the size of the image. Originally the photo size was 7776*7456 , for web graphics, for example, this is a lot.
Go to the menu: Image – Image size (Image – Image size), or press Alt + Ctrl + I.
Let's say I want all images to be no larger than 500px wide. Set the image width to 500px.

Pay attention to the Actions panel: as we perform operations, they are recorded as part of the action we created.
Now let's convert the image to black and white and set a slight tint of color.
Switch to the layers palette "Layers" - F7.
Create a new adjustment layer by clicking on the black and white circle at the bottom of the layers palette.

Select "Black and White" from the context menu.

Hold Ctrl and select both layers in the Layers palette.
Right-click on the selected layers - select "Convert to smart-object" (Convert to smart-object).

Right-click again and select Rasterize layer.

Soften the contrast a little - go to the menu: Image – Correction – Hue / Saturation (Image – Adjustments – Hue / Saturation) (Ctrl + U).
We increase the brightness by about +25.
Now go to the menu: Image – Correction – Options (Image – Adjustments -Variations).
The two upper windows show the source and the future processing result, which changes depending on your actions, that is, you can immediately see what happens after applying color correction without applying any settings yet.
Click, for example, "More yellow", then "More blue" and "Lighter" in the column on the right - "OK".

That's it, now save the image: File - Save for web & devices (Save for web).

I chose the Jpeg format, set the quality to 70 to compress the photos by weight.

Specify the “Processed” folder, which was previously created, as the directory for saving the finished photo.

After saving the photo to the destination folder, stop recording the action by clicking on the "Stop" button (leftmost square) at the bottom of the operations palette.

Our action is ready. Now it remains to apply it to the remaining 29 photos.
Stage 2 - Batch photo processing
We can close the first photo.
Go to the menu File – Automation – Batch processing (File – Automate –Batch).

Select the action you just created (or any other) from the list.
Specify the path to the folder with raw photos, in another line select the directory where you want to save the processing results (we created a folder for finished photos in advance).
In our particular case, we check the boxes as in the picture so that during the processing of the photo we are not disturbed by unnecessary dialog boxes.

I would like to draw your attention to the fact that you check the box "Ignore commands" Open "" only when your action contains an opening command.
Since actions can be completely different and do not contain commands for opening an image and saving it, carefully read the program prompts when you check the boxes.
After setting all the settings, click "OK".
If you have a lot of photos, you can go for coffee while the program does all the work for you.
Processing 30 photos took about 1 minute, in the end I got a folder with automatically processed photos.

Thus, the method of batch processing photos in Photoshop is that you edit just one photo, record an action, and then you can apply this action to hundreds of photos already without any intervention on your part and very quickly.
You can make it even easier - download ready-made actions if they suit your tasks, there are a lot of them on the net, and then the process of mass photo processing will be even easier and faster.
That's all!
In this tutorial, we learned what batch processing of photos in Photoshop is and how to use it to facilitate the routine process of mass image processing.
I hope you learned something new and interesting for yourself from this lesson!
Often we have to work with a large number of photographs. Processing 300-500 photos at a time is very difficult and time consuming. Thanks to a little Photoshop tutorial on batch processing photos, you will learn how to do several actions on images at a time, which will significantly reduce the time for work.
Consider the lesson on the example of such a concept as preview. It is extremely important for any photographer. You might now say that only by zooming in on an image you can realize its quality and skill, but as practice shows, even the best photographs are rarely posted in their original size. Most likely, as part of the preview, they will remain. Then it is extremely important that, despite the small size, the user feels the quality of the photo.
The main thing in processing small photos is sharpness, especially if you have greatly reduced the original size of the image. In addition to resizing, when creating a preview, sharpening is required.
If you are to process hundreds of photos (batch processing), then the most appropriate option would be to resort to help. In this case, you only need to record the course of actions once, and that's it, then the program will do everything for you.
Our action can be applied to photos of any size and subject. The main actions that we need from the action are to resize the photo, increase the sharpness and then save it in the desired format. To do this, we first need to study the command , it's in the tab File - Automation.
As opposed to just a team "Resize", which changes the size of the image, regardless of whether the photo was originally horizontal or vertical, recognizes the type of photo and accordingly brings it to the desired view.
In order to visualize what the work of the team is, I will give an example. Let's imagine that through "Resize" we set the parameters to 400px, as a result, all horizontal photos will be processed correctly, but the vertical ones will become much larger, since they should not have a width of 400px, but a length.
Through we simply put the two necessary numbers and the program itself will recognize which number refers to the length and which to the width.

Now let's move on to the instructions for batch processing a photo.
Step 1
To begin with follows. We will carry out a series of operations on it, which we will write into an action.
Step 2
Let's start recording the action. To do this, open palette Operations, create or select a folder where it will be stored, click the small button at the bottom of the palette Create a new operation, give it a name. You can find out more information about . The recording has begun!
Attention! All of the following actions are already recorded in the action.
Step 3
It is necessary to convert the photo to sRGB format (only this standard is correctly displayed by all browsers, on any devices). To record an action, press Edit - Edit Profile. If all sources are already saved in the required format, then this step can be omitted.
Step 4
AT the Change Dimension option set the value to 700px. Of course, you can put any number, but as practice shows, this is the ideal size for a preview.
Step 5
Now the main thing is sharpness. To optimally increase the sharpness, it is best to use a filter. So let's go to the section. Filters - Sharpness - Smart Sharpen. Set the optimal parameters.
Step 6
The last step is to save the image. The next step is to specify the quality of the photo. For Internet sites, the optimal parameter would be 9-10.
Step 7
Finally, close the photo if you don't want to end up with 300 open tabs.
Step 8
We press Stop. All! Our universal action is ready.
There is one thing that makes editing photos for the web even easier and more convenient. It . Thanks to this, you can create a file that will run the entire action.
How to create
It is created from an already recorded action.
Step 1
We go to File - Automation - Create Droplet

Step 2
You need to set the parameters:
- Select the folder where the photos are stored;
- Select an already recorded action;
- Select the folder where you want to save the received photos.

After clicking on the OK button, a droplet will appear in the folder you specified. in the form of a blue arrow. You just need to transfer your photos to this arrow, and all the preset settings will be applied to them immediately.
Save your time and use batch photo processing!
Noticed an error in the text - select it and press Ctrl + Enter . Thank you!


