Enable or disable developer mode in Windows 10: Previously, to develop, install or test applications on Windows, you needed to purchase a developer license from Microsoft, which must be renewed every 30 or 90 days, but from emergence of Windows 10 no longer requires a developer license. You just need to enable developer mode and you can start installing or testing your apps on Windows 10. Developer mode will help you test your apps for errors and further improvements before sending them to Windows App Store.
You can always choose the security level of your device using following settings:
Applications Windows Store. These are the default settings that only allow you to install apps from Window Store apps Unpublished applications: this means installing an application that has not been certified in Windows Store, for example, an application that is internal to your company. Developer Mode: allows you to test, debug, install applications on your device as well as Sideload applications.So if you are a developer or need to test third party application on your device, you need to enable Developer mode in Windows 10. But some people also need to disable this feature as not everyone uses Developer mode, so without losing let's see how to enable or disable Developer mode in Windows 10 with the help of the guide below .
Enable or disable developer mode in Windows 10
Method 1: Enable or disable developer mode in Windows 10 settings
Method 2: Enable or disable Developer Mode in Registry Editor
- Press Windows + R then enter regedit and press Enter to open registry editor
- Go to the following registry key:
HKEY_LOCAL_MACHINE\SOFTWARE\Microsoft\Windows\CurrentVersion\AppModelUnlock - Click right click mouse on AppModelUnlock and select New> DWORD (32-bit) value.
- Enter this newly created DWORD as AllowAllTrustedApps and press Enter.
- Similarly, create a new DWORD named AllowDevelopmentWithoutDevLicense.
- Now, depending on your choice, set the above registry keys as:
Windows Store apps. Set AllowAllTrustedApps and AllowDevelopmentWithoutDevLicense to 0 Sideloaded apps- set AllowAllTrustedApps to 1 and AllowDevelopmentWithoutDevLicense to 0
Developer Mode. Set AllowAllTrustedApps and AllowDevelopmentWithoutDevLicense to 1 - Close everything and restart your computer.
Method 3: Enable or disable Developer Mode in Group Policy Editor
- Press Windows Key + R then enter gpedit.msc and press Enter.
- Go to the following path:
Computer Configuration > Administrative Templates > Windows components> Deployment application package - Be sure to select " Application Package Deployment" then in the right area of the window, double-click " Allow all trusted applications to be installed» And " Allowdevelopment Windows applications Store and installing them from politicians integrated development environment (IDE) ».
- To enable Developer Mode in Windows 10, set the above policies to Enabled and then click Apply and then OK.
Note.If you need to disable Developer Mode in Windows 10 in the future, simply set the above policies to Disabled.
- Restart your computer to save the changes.
Mode Windows developer 10 allows developers to test applications before they go into production Microsoft Store. All applications are available in the Windows 10 Store and have undergone a series of tests by developers. For a regular user Developer mode may also be needed to install applications available in the Microsoft Store, but from other sources.
In this article we will look at how to enable Windows 10 Developer Mode different ways. But remember that turning on developer mode, including installing and running applications not published in the Microsoft Store, can weaken the security of your device and personal data or cause harm to it.
Options
Developer mode allows you to install any signed and trusted applications and use additional functions development.
Local Group Policy Editor
The current setting allows or prevents Windows Store apps from being developed and installed directly from the IDE.
If this policy setting and also the group policy With Allow installation of all trusted apps enabled, you can develop Windows Store apps and install them directly from the IDE.
Registry Editor
Before making changes to the registry using the editor, we recommend that you create a backup copy of the Windows 10 registry. After which you can always roll back any changes in the registry in just a few clicks.
Developer mode will only be enabled after you restart your computer. If there are no current parameters along the path indicated above, then you will have to create them yourself.
conclusions
Today we looked at how to enable developer mode in Windows 10. To enable the mode, you can use the updated Windows settings 10, Registry Editor or Local Group Policy Editor. Developer Mode itself is a great tool for both developers and ordinary users, since it allows you to install many applications distributed in the Microsoft Store that you download yourself.


Many people working on PCs with Windows 10 are wondering why “Developer Mode” was introduced - an option that can be enabled in the settings of the popular operating system. If this is a mode for users who create various utilities, how can it be useful for ordinary users? How to activate it?
What is “Developer Mode” in Windows 10 and how is it useful?
"Developer Mode" is a "ten" environment in which programmers can create applications and debug them through Visual Studio in order to get a program that runs smoothly in Windows 10. However, this new feature“tens” can be successfully used by ordinary users for certain purposes. With an activated environment, the system gives OS clients more freedom and capabilities. The main ones are the following:
- installation of utilities not from the Windows Store, that is, those applications with the appx extension that do not have a Microsoft signature;
- launching applications with extended rights;
- display hidden folders and files and so on.
Activating "Developer Mode" on Windows 10
There are several methods for turning on the environment in question: they differ in degree of complexity. For beginners, we recommend using the first one - enabling it in the system settings. For more experienced users, activation methods in system editors Windows.
In system settings
The fastest and easy activation environment for developers - through the “Settings” menu, which contains all the basic system settings available to any PC user. How to get to desired item in this window, we will describe in detail in the instructions:
- The “Settings” window is launched very easily - using the Win + I key combination. If suddenly the combination does not work on your device, open the “Start” panel, through which you turn off the PC, and click on the gear (it leads directly to the same window ). IN system menu“Start” click on the gear to open the “Windows Settings” window
- On home page there will be several tiles in the window. Let's look at the end of the list. We immediately click on the “Update and Security” section.
 In the Windows Settings window, click on the Update and Security tile.
 - On next page we need the second tab from the end “For Developers”. Here you need to already activate our “Developer Mode” with one click on the corresponding value.
 In the “For Developers” tab, click on the corresponding value to enable the mode
 - The system will display a warning message. In it you need to click “Yes” to confirm your intention to activate the environment for programmers.
 Click on “Yes” to confirm that you want to enable the mode
 - We are waiting for the OS to load all the components for stable operation mode. As a result, a notification about successful activation will appear under the item.
- After this, you can restart the PC. This is mandatory, since without a reboot, not all parameters will be available for change. This will be stated in the message under the item: “Some functions may not work until the device is restarted.”
 Be sure to restart your computer after activating the mode so that all its functions become available to you
Through the "Registry Editor"
Editing Windows registry- not the easiest task that novice PC users may not be able to cope with. Nevertheless, you need to know about the method and, if possible, learn how to use it, since it works for all versions of Ten, including Home. To make the task a little easier, we will describe all the steps in detail and clearly:
- Most quick way launch the editor through the “Run” window. We call him two Win keys+ R: hold them down at the same time. In the “Open” line, write or paste the previously copied regedit code.
 In the “Run” window, write the command regedit
 - In the next window that opens the OS, we allow the editor to make changes on your device: click on the “Yes” button.
 Allow the editor to make changes on your device by clicking “Yes”
 - In the left column of the editor we are interested in the third branch HKEY_LOCAL_MACHINE. Let's launch it double click.
 Open the third main branch on the left side of the window
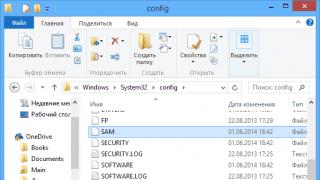
 - Next, you need to go one by one to next sections in the same left side of the window: SOFTWARE - Microsoft - Windows - CurrentVersion - AppModelUnlock.
 Last open folder there should be AppModelUnlock on the left side of the window
 - In the last running folder there will be two entries. Double-click on the first one with the name AllowAllTrustedApps and put the number 1 as the value in the small gray window (this activates the entry). To save all changes, click OK.
 In the “Value” field, write 1 and click on OK to save the changes
 - Repeat the same action for another entry.
- Now close all windows running on the PC and reboot the device.
You can also change the value of the same registry settings using the Command Line console. How to launch it and what codes to enter in it?
- Open the console through the “Search” panel. Click on the icon in the form of a magnifying glass, and in the line below write the request “Command line” or cmd.
 Enter the prompt “Command Prompt”
 - In the search results, click on the item right key mouse and select “Run as administrator” in the gray menu.
 Click on "Run as administrator" in the gray menu
 - In the black editor, insert the command reg add ″HKEY_LOCAL_MACHINE\SOFTWARE\Microsoft\Windows\CurrentVersion\AppModelUnlock″ /t REG_DWORD /f /v ″AllowAllTrustedApps″ /d ″1″ and press Enter.
 In the “Command Prompt” we execute two codes in turn to enable the registry settings associated with “Developer Mode”
 - After its execution, insert another code: reg add ″HKEY_LOCAL_MACHINE\SOFTWARE\Microsoft\Windows\CurrentVersion\AppModelUnlock″ /t REG_DWORD /f /v ″AllowDevelopmentWithoutDevLicense″ /d ″1″. Also, press Enter.
- Close all windows and restart the PC.
In the “Local Group Policy Editor” system window
The activation method in this editor is quite simple. How to get to required parameters in it, we will tell you in the instructions:
- The window of this editor is called up by analogy with launching the “Registry Editor”, that is, through the “Run” window. However, in this case we insert the code gpedit.msc. Then, press Enter on the keyboard or OK in the window so that the entered command is executed.
 Paste the command gpedit.msc into the “Open” line and click OK
 - In the editor, immediately double-click on the “Computer Configuration” block.
 Open the first large section “Computer Configuration”
 - Now you need to launch three menus one after another with the following names: “Administrative Templates” - “Windows Components” - “Application Package Deployment”.
 Open the Application Package Deployment folder on the right side of the editor window
 - will appear small list available functions. The second item on the list should interest us first. Double click let's launch it.
 In the list of available policies, first open “Allow development of Windows Store apps”
 - In the gray window that opens on top of the editor, put a round mark to the left of the “Enabled” value. For the changes to take effect, click on “Apply”, and then on OK - the additional window will disappear.
 Set it to Enabled and apply changes using the dedicated button
 - Then we go to another option dedicated to the installation of all trusted applications. Here we also set the value to “Enabled” and apply the changed parameters.
 Enable another policy called “Allow installation of all trusted applications”
 - Close all windows and restart the device. The computer will boot into “Developer Mode”.
Video: three methods for enabling “Developer Mode”
How to disable "Developer Mode" on Windows 10
You can deactivate the environment for programmers in the same windows that we used in the previous sections of the article to enable it:
- In the “For Developers” tab, simply select “Windows Store Apps” or “Sideloaded Apps.”
- In the Local Group Policy Editor, set two options to Disabled: “Allow development of Windows Store apps” and “Allow installation of all trusted applications.”
- In the Registry Editor window, write the value 0 for the AllowAllTrustedApps and AllowDevelopmentWithoutDevLicense entries. After this, save the changes and restart your PC.
Additional features provided by “Developer Mode”
When the user activates the environment, he has access to various settings systems that were previously unavailable. Some of them can be changed in the “For Developers” tab, where the mode is enabled.
Changing Windows Explorer settings
In the corresponding section you can configure the display of hidden folders, system files and their extensions. This is necessary, for example, to clean the system of unnecessary, junk files, with which the system gradually became clogged over time.
 In the “Explorer” section, you can include the full path to files in the title of the window of the same name, and also configure the display of hidden folders and documents
 For ordinary Windows users The option to display the full path to the file in the address bar of the Explorer window will also be useful. It is displayed in the header after double clicking on the line.
 The full path to the file in the Explorer address bar can be easily copied from address bar with “Developer Mode” enabled
 Setting up a remote desktop
In the same “For Developers” tab in the Windows Settings window, you can configure “ Windows Firewall" In order for devices to be able to connect to the remote “Desktop” of a PC, it is necessary to change the security settings, since the built-in “ Windows Defender" will block the connection, considering it a threat.
To ensure that the user always has access to his remote “Desktop”, he can disable the transition to “Sleep mode” or “Hibernation” if the computer is powered not from the battery, but from the network.
 In the “Remote Desktop” section you can allow remote connections to your computer
 Run local scripts without signing in PowerShell
For security purposes, the PowerShell console only accepts and executes digitally signed commands. “Developer mode” involves testing various scripts, so checking the execution of local scripts is disabled in it.
 "Developer Mode" allows programmers to enter unsigned scripts into a PowerShell window
 This way, users will not encounter the command line error: The file is not digitally signed. They will be able to print various scripts, but only from trusted creators.
 You cannot enter commands in Command Prompt or PowerShell without digital signature: appears The error file is not digitally signed
 Each section has its own “Apply” button: after changing the parameters in it, you must click on it so that everything specified values came into force. To the right of each item there is a “Show options” link. If suddenly the parameter itself is not clickable, click on it - this or that will open Windows window, which it corresponds to on the system, and change the settings there.
Using Ubuntu in Bash on Windows 10
In the "top ten" all users have the opportunity to work with the Bash shell based on the Ubuntu environment. Bash can be compared to PowerShell or " Command line": in Windows, its window is the same editor on a black background. Ubuntu is an operating system based on Linux.
After enabling "Developer Mode" Windows client can download the Ubuntu application from the store or any other program corresponding to a particular type of Linux OS. Most often it is Ubuntu that is downloaded. The utility is something like an emulator that reproduces the Linux environment (in in this case Ubuntu) inside Windows.
After installing the application, the user finds in " Windows Search» Bash console via the corresponding request.
 Enter in search bar Bash value to open Ubuntu console
 Thus, using the familiar Windows 10, programmers get full access to the Linux environment, its functionality and application programs, which they need to create and debug programs.
 In the Bash console, the programmer can write commands for the operating system Linux systems
 Device Portal and Device Discovery features
The “Device Portal” option allows you to remotely configure your computer and manage it in real time via a network or USB connection. A portal is something like a web server that connects various devices on the local network ( desktop computers, phones, XBox and much more).
Detected devices are connected via the portal by entering a code. This function - useful tool for creating and debugging utilities, as well as just to get a complete remote access to the files of one or another connected device. For example, a portal can be used to remote connection to HoloLens, Microsoft's mixed reality glasses, when creating a holographic utility window. The next item “Device detection” allows you to make the PC visible for future connections via a local network or via USB.
 Device Portal allows two devices to connect via local network or USB to configure settings in remote mode
 Problems with “Developer Mode” and their solutions
Sometimes problems may arise with entering “Developer Mode”, as well as while working in it. What errors can you encounter and how to fix them?
Inactive option to enable the mode in the “For Developers” tab
The item for launching the environment may simply not be clickable. In this case, it is recommended to use other activation methods described above (using one of the two system editors).
Unavailable items for portal and device discovery
If the first two options for portal and device discovery are not clickable, your computer may not support this function.
 The “Enable Device Portal” and “Device Discovery” items may not be clickable due to this computer does not support the function
 The reason may also be Windows versions and installed updates. Try rolling back to previous version OS by uninstalling the latest update. To do this, you can use the built-in Windows tool to restore the system (instructions in the section below) or manually remove the update:
- Open the Update & Security tile in the Settings menu. In the "Center" tab Windows updates» click on the link «View log installed updates».
 Click on the link “View installed update log”
 - Now click on the first item to get rid of the recent update in additional window.
 Click on the "Uninstall updates" link to open a new window
 - In the new window, right-click on latest update(the first item in the list) and click on “Delete”.
 Right-click on the item and select “Delete”
 - Confirm the action by clicking on “Yes”.
 Confirm your intention to remove the update
 - Try enabling "Developer Mode" again.
Error: "Some computer settings are managed by your organization"
You may see the message “Some of your computer settings are managed by your organization” at the top of the page to enable the mode after you try to activate the environment in the System Settings window. Moreover, part important functions really turns out to be inaccessible, much to the regret of users (they cannot be clicked on, just like the “Show parameters” button).
This may be caused by changes in the registry and local group policies that the user previously made on the device. As a result, some important system files may have been deleted, causing the crash. If you don't remember what you changed, try rolling back using the recovery tool:
- Right-click on the “This PC” icon on the “Desktop”. In the gray menu, click on the “Properties” item.
 IN context menu"This PC" icon, click on "Properties"
 - In a large window with information about the “operating system” and your PC, look for the link “ Extra options systems." We click on it.
 In the “System Protection” tab, click on the “Restore” button
 - A recovery window will open. Select “Select another recovery point” or “Recommended recovery” if the error appeared after recent update.
 IN initial window tools for restoring system files, click on one of two items depending on the restore point to which you want to rollback
 - In the first case, select in the list desired point left button. Don't forget to check the box next to the item to enable display of other points. So, you can see the entire list.
 Select the required restore point by left-clicking
 - Click on “Next”. On the next page, click on “Done” to confirm.
 Click “Finish” to start the recovery process
 - The recovery process will start. The duration of the procedure depends on the number of parameters that need to be changed. After this, the device will restart.
Finding or installing the "Developer Mode" package failed with error code 0x80004005
After trying to activate the environment, a red notification may pop up under the item stating that the system was unable to install the “Developer Mode” package or that the “Update Center” was not available of this package. Both errors have code 0x80004005.
 If you are experiencing error code 0x80004005, this means that Microsoft servers are unavailable in this moment
 They may occur due to problems with network connection, so first make sure your internet is working. Restart your router or modem, and also try opening several tabs in your browser to check the connection.
If you have any installed third party utilities that disable Windows 10 surveillance, such as DWS or AntiSpy, deactivate them temporarily. Perhaps they are the ones blocking access to Microsoft servers.
An antivirus may also mistakenly block access to official servers Microsoft. To check this, you need to disable it for a while. The defender program should always run in background in order to detect and neutralize the threat in time, so its icon must be in Windows tray. Let's look at disabling using Avast as an example:

If your antivirus is not a problem, check for Windows 10 updates:

If all are already installed current updates Windows, check if there is a package for “Developer Mode” in the block with a list of additional components:
- Launch Windows Settings again, but this time click on the Applications tile.
- In the first block, click on the link to open a list of additional components.
 Click on the "Manage additional components" link
 - In the list that appears there should be an item called “Windows Developer Mode”.
 The list should include the item “Windows Developer Mode”
 - If it's not there, Windows won't be able to find the correct package for your PC. Click on the “Add Component” button for the system to load it.
 Click on “Add Component” to download the package for “Developer Mode”
 - After adding the package, try activating the mode again.
“Developer mode” is useful both for IT specialists and ordinary users who want to install reliable application without Microsoft signature. You can enable the environment in different ways. The easiest one is in the Windows Settings menu. If you cannot activate there, use the registry and group policy editors. Problems with starting the mode often arise when there are no important updates Windows or if there is no access to Microsoft servers. The latter may be a consequence malfunction antivirus or lack of Internet on the PC.
Hello! We continue to dismantle the super operating room Windows system 10. Today you will learn how to enable developer mode on Windows computer 10. “Developer mode” will allow you to install applications on your computer for testing and launching and use additional development functions. In general, for all those who want to experiment and tinker with Windows 10.
To turn on “Developer mode”, in the lower left corner of the screen, open the menu "Start". In the window that opens, click on the icon or tab - Settings.


– Windows 10 Store Apps, Only apps from the Windows 10 Store are installed.
is installing and running or testing an application that is not yet certified by the Windows Store. For example, this could be an application used only internally by the company.– Developer mode allows you to download Sideload apps and run apps from Visual Studio in debug mode.


Note! Even if you sideload apps, you can only install apps from trusted sources. When you install a sideloaded application that is not yet certified by the Windows Store, you agree that you have received all necessary rights to download the application and that you are fully responsible for any damages that may result from installing and running the application.
Sideloading apps - more safe option than developer mode because you won't be able to install apps on your device without a trusted certificate. In addition to the capabilities provided by the sideloading feature, Developer mode allows you to debug and use additional options deployment. It replaces Windows requirement 8.1 for a developer license.
There are a number of tools you can use to deploy an app from a Windows 10 PC to mobile device with Windows 10. Both devices must be connected to the same subnet using a wired or wireless connection or connected to each other via USB. Using any of the above methods will only install the application package (APPX file); certificates will not be installed.
Still have questions? Write a comment! Good luck!

Windows 10 Developer Mode updated: October 25, 2016 by: Ilya Zhuravlev
Windows 10 Developer Mode allows developers to test apps before they are released to the Microsoft Store. All applications are available in the Windows 10 Store and have undergone a series of tests by developers. An ordinary user may also need developer mode to install applications available in the Microsoft Store, but from other sources.
In this article we will look at how to enable Windows 10 Developer Mode in different ways. But remember that turning on developer mode, including installing and running applications not published in the Microsoft Store, can weaken the security of your device and personal data or cause harm to it.
Developer mode allows you to install any signed and trusted applications and use additional development features.
Local Group Policy Editor

The current setting allows or prevents Windows Store apps from being developed and installed directly from the IDE.
If this policy setting and the Allow installation of all trusted applications group policy setting are enabled, you can develop Windows Store apps and install them directly from the IDE.
Registry Editor
Before making changes to the registry using the editor, we recommend. After which you can always roll back any changes in the registry in just a few clicks.

Developer mode will only be enabled after you restart your computer. If there are no current parameters along the path indicated above, then you will have to create them yourself.
conclusions
Today we looked at how to enable developer mode in Windows 10. To enable the mode, you can use the updated Windows 10 settings, Registry Editor, or Local Group Policy Editor. The developer mode itself is an excellent tool for both developers and ordinary users, since it allows you to install many applications distributed in the Microsoft Store that you download yourself.