System satellite television is a supply complex, the main purpose of which is to receive television programs. This broadcast is carried out using special communication satellites placed in geostationary orbits. Their location is the region of the equator.
This type of television is becoming more and more common. And millions of families own satellite dishes. For their installation and connection, most often enlist the help of professionals. But also ordinary person setting up satellite dishes under the force. You don't need any special skills or knowledge to do this. It is not such a difficult matter to independently configure a satellite dish, the price of which, even without paying for the services of a specialist, is significant for an ordinary person.
Choosing a satellite
After the decision was made to independently install and configure a satellite dish, you need to decide on a satellite. This means that you need to select the operator of this type of television, whose signal it will receive.
The name of this television arose due to the fact that a whole system of orbiting satellites in space is used to provide it. They broadcast the signal received from television stations to vast territories located on Earth.
Satellite dishes are a kind of its receivers. After receiving the signal, it is reflected to the collecting head, which is called the convector. He transmits it to the receiver - a device for tuning satellite dishes and decoding. And only after passing through all these stages does it hit the TV screen in the form of an image and sound.
Types and placement of satellites
There are 2 types of satellites. Some are used for broadcasting open channels, others - encoded. There are cases when the owners of the equipment on the satellite are different operators. Then self-configuring a satellite dish involves the purchase special card to decode each channel separately. But in most cases, a group of channels makes up a package. And to restore access to them, it is enough to have a single card.
Broadcast Russian language channels carried out from different satellites. They are located at different latitudes and meridians. To ensure reception of a signal from the selected source, you need to point the antenna accurately at it and correctly tune the reception frequency. If the selected satellites are separated by a significant distance, you can receive a signal from them using just one antenna.
In the selection process, you need to consider whether it is possible to direct your antenna to a specific signal source. If any objects (neighboring buildings, trees, etc.) create significant interference with its flow, you need to install it on the roof of the house. If this is not possible, you must try to tune the antenna to other satellites located in the visibility zone.
Equipment
It is easy to guess that one antenna and its signal is not enough. In order to set up a satellite dish with your own hands, you need to have, properly install and configure whole system satellite equipment. It can be purchased at a specialized store.

Basic elements for assembly:
- The antenna, which is often called a "dish". Its diameter is from 0.7 m to 1.2 m. Its purpose is to form the received beam into focus.
- The most expensive part is the receiver. Its choice must be approached with special care and responsibility, because broadcasting is divided into two formats: mpeg2 and mpeg4. The second one is much better.
- The head, which is a convector. Their number can vary from 1 to 3. Depending on the number of satellites - one for each. They must be universal linear type polarization.
- 2 mounts (multifeeds).
- Converter switch - disc. Its presence is due to the fact that the tuner assumes the simultaneous reception of the signal of only one satellite. A disk - a device for tuning satellite dishes - ensures their switching in the case when 2 or more are used.
- Coaxial cable, whose resistance is 75 ohms. Its quantity must be calculated so that there is a margin of 3-5 meters.
- The plugs used to make the connection (F connectors).
- Bracket and dowels.
Required Tools
Do-it-yourself installation and configuration of a satellite dish is carried out with the following tools:
- extension cord for at least 3 sockets;
- drill or puncher (used to secure the bracket with dowels);
- wrenches 10 and 13 mm;
- Phillips screwdriver;
- hammer;
- insulating tape or plastic ties.
Assembly process

The correct setting of satellite dishes depends on the choice of location for their installation. In this case, several nuances must be taken into account. In order to receive a signal from a satellite, it is necessary that it freely hit the receiving mirror. Therefore, it is necessary to install the antenna as high as possible. Rooftops are ideal for this.
Program for setting up a satellite dish "Satellite Antenna Alignment"
In order to correctly calculate the elevation (elevation angle) and azimuth of all satellites separately, use the Satellite program. It differs from other similar services in that it determines these characteristics for all satellites simultaneously. You can immediately see which of the satellites are available at a given antenna location, and which are not.
But here the calculation is purely theoretical. But in practice, many factors and obstacles must be taken into account. But this satellite dish tuning program helps to more accurately estimate the position.
Features of modern tuners, their settings
Most of those tuners that are on sale are already programmed with channels. Therefore, there is no need to scan and sort them. This provides a more convenient and easier setup.

To implement it, you need to connect the TV and satellite receiver to electrical network. After you need to enable desired channel on Astra, because the tuning of the satellite dish to the satellite will be carried out in its focus (in other words, in its center).
After that, press the "Info" button on the remote control. When desired channels missing on the satellite, you need to edit the frequencies of the transponder. If they are not registered there, you need to do it yourself. When they are driven in on the scales on the screen, it will be possible to determine the power and quality of the signal.
Some nuances associated with connecting the antenna
In this process, there are several important points. For example, you need to properly and well strip the cable. You also need to be very careful when connecting the F-connector, since otherwise a short circuit of the braid and the central core may occur. In the worst case, the receiver will be damaged.
Equally important is correct connection cable to the desired LNB_IN output.
If you connect the entire assembly, you can configure disk ports. But this is a more complex self-tuning of a satellite dish.
Satellite setup process
Now the antenna is located approximately correctly and turned in the intended direction of the satellite. You need to go to the settings of the receiver (tuner) and select the appropriate satellite there. After that, you should specify for it the correct indicators of frequency, speed and polarization. For example, for the Sirius satellite, these figures are 11766, 2750 and N, respectively.
Then two bars can be seen on the screen. The first will show that the signal is caught by the dish, and the second will show its power. At correct installation satellite dish signal strength indicator should be more than 40%. It is only necessary to increase the quality value, which is currently in the range of 0.
If it is not possible to simultaneously tune the antenna and look at the TV screen, you need to enlist the help of an assistant. He will correct your actions. Then setting up satellite dishes will not take much time, but will be done quickly enough and with better quality.
First you need to completely turn the plate on right side up. From this position, you need to slowly turn it to the left and continuously monitor the degree of signal on the TV screen.

If this attempt to capture the signal fails, you need to omit satellite dish a few millimeters down and repeat all over again.
Setting up satellite dishes is a painstaking search for a signal using manual adjustment.
"Tricolor-TV"
Setting up a Tricolor satellite dish is practically no different from other analogues:

Independent connection of the antenna for receiving "Telecard TV"
Before purchasing the Telekarta TV set in a specialized store, you should decide on what diameter the plate should be. In this case, you must take into account your location relative to the satellite. The indicator of its diameter can vary from 60 to 90 cm.
The "Telekarta TV" satellite dish is tuned to the Intelsat-15 satellite. If it is not in the list of your receiver, you must enter its data yourself:
- converter frequency - 10600
- food - incl.
Then you should check the characteristics of the transponder: the frequency should be 12640 MHz, the indicator symbol rate- 30000, FEC - 5/6, vertical polarization type and broadcasting format - MPEG2, DVB-S.
After starting the search, the receiver should find 18 channels. There are no HD channels in the "Telekarta TV" package, so when you connect it to more modern models TVs should take into account HD satellite receivers. They are transforming satellite signal and "show" a clearer picture when "TV Card" is received.
"Adjustment" of the signal level
In order to fix the position of the antenna, it is necessary that the signal quality indicator be at least 20%. Now you can turn it slightly in both directions in order to achieve a minimum, which is 40%.

But this is far from the end of this painstaking and difficult work. In order for the whole system to work correctly, you need 60-80% quality. It can only be achieved by manipulating the convector. To do this, turn it clockwise or counterclockwise until the signal level is satisfactory.
Then you need to adjust side convectors(if any). Setting up additional heads is much easier, since the main one already fully performs its functions. It is necessary for each of them to specify the corresponding satellite and catch the signal. This process is similar to what was done with the main head.
Now the small thing remains - this is setting up the channels of the satellite dish and adjusting the TV itself. To do this, you should streamline all the channels - line them up in a way that will be convenient for each owner. It may be necessary to remove some or block. This process is individual for each user.
Instructions for installing and self-configuring satellite dishes NTV PLUS, Tricolor TV, Tricolor TV Siberia, Continent and Telecard.
Many people ask questions about how to install a satellite dish on their own and how to independently set up an NTV +, Tricolor, Tricolor TV Siberia, Continent, Rainbow or Telecard antenna.
Setting up and installing satellite TV antennas is not the most difficult process, and setting up a satellite dish from a specialist takes several minutes when using the device to set up satellite dishes.
To properly set up a satellite dish to a satellite, you need to choose the right place to install a satellite dish. The main thing is that no matter what interferes with the direct hit of the signal on the dish of your satellite dish.
Choose a location for the plate. It should be, if possible, easily accessible and have a direct line of sight to the satellite.
The picture below shows where you can and where you can not install a satellite dish.
To determine the direction of the satellite, I use simple service located at: dishpointer.com
In the window google maps find your location and click on the intended installation location of the dish. Then in the field All Satellites | Motorized Systems | Multi-LNB Setups: select your satellite, and we show the direction of the antenna to the Tricolor TV Siberia satellite (in my case, for Bratsk).

The photo shows that there are trees in front of the building. On this site, you can determine whether the trees will interfere with the visibility of the dish on the satellite. To do this, we need to know the distance to the obstacle and the height of the obstacle. In the right upper corner check the show obstacle (line of sight checker) box and after that move the red slider to the edge of the obstacle and get the distance d and the height h of the obstacle, which will interfere with visibility to the satellite. Height is taken from ground level.
Tricolor TV
For self setting satellite antenna Tricolor TV in the All Satellites field, select satellite 36E EUTELSAT 36A | EUTELSAT 36B.
Tricolor TV Siberia
To independently configure the Tricolor TV Siberia satellite dish in the All Satellites field, select the 56E Express-AT1 satellite
NTV PLUS VOSTOK
To independently configure the NTV PLUS VOSTOK satellite dish, in the All Satellites field, select the 56E Express-AT1 satellite
Telecard and Continent TV
To independently configure the Telecard and Continent TV satellite dish, in the All Satellites field, select the satellite 85.2E INTELSAT 15
Telecard Vostok
To independently configure the Telekart Vostok satellite dish in the All Satellites field, select the satellite 140E EXPRESS AM3
For self-tuning of the Yamal satellite dish in the All Satellites field, select the satellite 90E YAMAL 201 | YAMAL 300K | YAMAL 300K
To connect antennas, sometimes programs are used to configure a satellite dish. Examples of such programs:
Program for calculating the angles required when installing a satellite dish.
« satellite antenna Alignment" or program for setting up satellite antennas FastSatFinder.
I find dishpointer.com to be more convenient than these programs.
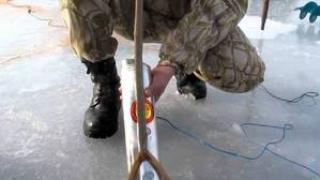
In my practice, there have been cases when in winter they themselves installed and tuned satellite dishes to the satellite, through the branches of trees. In winter, the TV worked fine, the signal quality was sufficient to show satellite channels, but when the leaves bloomed in the summer, the signal disappeared completely. Trees are one of the main enemies of the installer. They pose two dangers to satellite dish tuners. The first is that over time they grow and prevent the signal from reaching the dish. The second is trees and their branches shake in windy weather, and if the dish is placed too close next to a tree in calm weather, the signal quality drops or floats due to the trees in the wind.
After we have decided where we mount the satellite dish, we can proceed to install the satellite dish. Usually bundled with offset satellite dish everything goes for self installation except for mounting the cymbal bracket. We assemble the plate according to the attached assembly instructions. We install the converter in the holder with the connector down and connect the cable with the F-connector installed to it.
The photo below shows how to properly compress the TV F connector. To crimp the F type connector, we only need a knife.

In this article, we will look at installing and configuring a satellite dish on Eutelsat satellite 36A/36B broadcasting from position 36°East (36 degrees East). From this satellite, the most popular Russian cameramen NTV+ and Tricolor are broadcast, and broadcasting is carried out in circular polarization. To implement the reception of circular polarization, a special KU-band converter is needed. They come in different designs and can have both one outlet and 2-16 outlets. The main thing is to carefully read the inscription on the label. On the heads of circular polarization there is an inscription Circular LNB, Input Freq: 11.7-12.75 GHz, L.O. Freq 10.75GHz. Accordingly, the local oscillator frequency in the receiver settings should be set to 10750 MHz.
Unlike universal (dual-range) converters with linear polarization, converters with circular polarization have one range of 11.7 GHz -12.75 GHz.  Broadcasting TV channels from the satellite is carried out using several transponders (transceiver devices), on different satellites there are their own number. Each transponder (transceiver) has its own frequency, polarization, modulation, data rate and other parameters. Circular polarization can have both the right direction of oscillation and the left one, and depending on this, right and left circular polarization are distinguished. In most receivers, when setting up transponder parameters for such words as "right" and "left" polarization, you most likely will not find what to do in this case? When setting the right (R - right), polarization - in the receiver, select vertical (V - vertical), which corresponds to the supply voltage of the converter 14 volts, and when setting the left (L - left), polarization - in the receiver, select horizontal (H - horisontal) , which corresponds to the supply voltage of the converter 18 volts.
  Choose the installation location and direction of the satellite dish:
In order to quickly install a satellite dish, you need to know the direction to our satellite. You can find the direction with the help of a compass, the sun, GPS navigator or nearby plates of small diameter. Since the signal from the Eutelsat 36A / 36B satellite in the CIS countries is quite strong, receive channels from this satellite you can even on small plates (0.6m).
The fastest and most accurate direction to the satellite can be found using the program This program calculates the azimuth and elevation required for the installation and adjustment of the dish, for any available satellite, in your geographic point reception. You only need to specify your geographic coordinates of the installation site - north latitude - "N", south latitude - "S". Similarly, east longitude is "E", west longitude is "W". After entering the coordinates into the program, on the left side of the table you will receive the calculated azimuth and elevation angles (elevation angle) of the antenna.
Azimuth is the direction to the satellite (in degrees), defined as the angle between north and the satellite is on the compass. elevation angle- this is the direction, defined as the angle (in degrees) between the direction to the satellite and the ground plane at the receiving point, determined using the program, measured using a goniometer. A negative elevation angle means that the satellite is below the horizon line and is not available for reception.
You can find out the coordinates of a place using the Yandex.Maps API service, or in any search engine, enter in the request: the coordinates of your location.
For example, let's calculate the Azimuth and Elevation for the Eutelsat 36A/36B (36E) satellite, our conditional location is Moscow. As a result, we get our Azimuth: 210.474°, Elevation: 41.737°.
 Knowing the azimuth, with the help of a compass we determine our direction of the antenna. Be sure to check that the direction to the satellite is free from high-rise buildings, trees and other obstacles.
First you also need to set the Elevation Angle, this will also help us with the wonderful program "Satellite Antenna Alignment". Since we will use an offset antenna during installation, it already has a certain elevation angle (within 20-25 degrees). You only need to measure and enter the dimensions of your offset antenna(height and width) and the program will calculate the exact angle of elevation for this antenna. The calculation is made only for antennas whose height is greater than the width. Antenna dimensions are entered in millimeters in the "Offset Antenna" tab. It will also show the angle of elevation and the angle at which you really need to install the antenna.  So, we have decided on the installation site and the angle of inclination of the antenna, now we need to firmly and securely fix our bracket on the wall of a building, the roof of a high-rise building or a mast. If we install the antenna on the wall of a building (this preferred option), then first you need to fix the bracket with the help of fasteners, controlling the verticality of the bracket by the water level.
Preparing the antenna before tuning:
Before installing the antenna, it must be assembled and checked for geometry. First, we fasten the arc to the mirror, then install the fasteners to the bracket and install the circular polarization converter.
Setting up a satellite dish:
Before setting up the dish, you need to prepare the equipment for tuning: it can be either a special SatFinder device with pre-selected transponders, or satellite receiver with a prepared set of transponders, set the local oscillator frequency of the head to 10750 MHz and a portable TV connected. We install the antenna on the bracket, set the azimuth according to the compass (210 ° - for Moscow), and with the help of the protractor we set the dish tilt angle (105 °). Using a piece of cable, we connect the receiver to the convector Eutelsat 36A/36B.
The tuning should start with the strongest transponders and end with the weakest, achieving maximum readings on the quality scale. We go to Receiver menu -> Antenna installation -> Channel search -> Satellite Eutelsat 36.0E, select any of the transponders listed in Table 1, and a scale for visual control of the signal should appear. I draw your attention to the fact that for each brand of receiver, the satellite setting point may be located in a different place, the tuning scales are also different. It is convenient to have a receiver with a scale that expands to full screen for tuning.
Tab. No. 1. Satellite dish transponder parameters:
| Satellite | Transponder | Channel for visual inspection |
| Eutelsat 36B/36C | 11900 R(V) 27500 | TV1000 Russkoe Kino, Viasat Sport East, EuroNews |
| 11977 R(V) 27500 | Moya Planeta, Nauka 2.0, Ru TV | |
| 12130 R(V) 27500 | Nat Geo Wild HD, Mezzo Live HD, Perviy kanal HD | |
| 12303 L(H) 27500 | Soyuz, TV2-TV |
By smooth and slow rotation of the antenna in the horizontal direction, we scan the horizon with the antenna, after which we slightly change the vertical angle of the antenna and again repeat the horizontal scan. All these actions must be performed slowly, continuously observing changes in the quality scale readings, until a signal appears. If a signal appears, it is necessary to stop, slightly tighten the screws that fix the angles of rotation and tilt, and with slight slight movements up and down, left and right to achieve the maximum signal level on the scale. Then we firmly fix the screws for fixing the angle of inclination and the angle of rotation of the plate. Next, we proceed to fine tuning converter, for this we rotate it a little in the holder, you can also move it a little along the holder back and forth, while achieving maximum readings on the QUALITY scale.
VERY IMPORTANT POINT! You need to make sure that the antenna is tuned specifically to our Eutelsat 36A / 36B satellite, and not to some other one. To do this, scan the transponders from table 1 and turn on NTV Plus Infokanal, or another, then a picture should appear (if the channel is not encoded). If the channels are not scanned or scanned but not the same, then the antenna is tuned to another satellite, and the setting should be repeated. When everything is done, it is necessary to tighten all the adjusting screws, focusing on the maximum readings of the signal scale. Let me remind you again that final setup should be made on weak transponders. 
Everything, the antenna tuning is finished, it remains to run the cable to the stationary TV, connect the tuner, scan all the transponders, sort the channels by subject and enjoy the picture quality.
Enjoy watching!
Setting up an antenna for receiving television channels from satellites ABS1, Express AM2, Yamal 201 using multifeed.
1. Collect multifeed, according to the attached picture.
(The location of the LNBs is indicated for a 0.9 m antenna. For a 1.0 m antenna, the distances between the LNBs should be slightly larger)
2. Install the angle of inclination of the converters so that they look at the center of the antenna mirror
The distances given above between the converters are indicative only. In each case, they may differ slightly and are determined on site, for a particular antenna and according to maximum level signal.
3.
Gather antenna according to the assembly instructions. Multifeed with converters is fixed with a central support in place of the standard converter mount. To securely fasten the multifeed, it may be necessary to drill 2 holes in the sleeve. Firmly fix the support at the selected point. When installed on a balcony or loggia, the fence is drilled through and the support is attached with ordinary long bolts of large diameter. When mounted on a wall, holes are drilled in it and self-wedging anchor bolts are used.
4. Having mounted antenna, you should immediately turn it in the direction of the position of the sun at approximately 12-14 o'clock in the afternoon, and install it vertically relative to the support.
Often there are some obstacles in the direction of the satellite that can interfere with signal reception.
It should be noted that any obstacles, including window panes, not to mention trees and bushes, located in the signal path can make it impossible to receive it.
5. Installing antenna and directing it to the location of the alleged location of the satellite, slightly fix it on the bracket, but so that it can turn on it with little effort. Installing a clamp under the antenna mount on the bracket greatly simplifies the tuning process. In this case, the mounting bolts can be loosened to such an extent that the antenna will rotate freely, leaning on the clamp.
6. Then, connecting the receiver and the central converter (Express AM2) with a cable (initially, all settings should be made directly, without connecting disks), proceed to tune the antenna. Antenna tuning consists of several steps.
Initial tuning of the antenna to the central satellite:
To tune the antenna to the central Express AM2 satellite, you should enter the parameters of the transponder on which you will search for the satellite into the receiver.
Frequency - 11606, polarization - vertical, flow rate - 44948.
In most receivers, this is done as follows:
Enter the Menu, select "antenna installation", or "transponder search" and enter the appropriate transponder parameters.
You can tune on any satellite from the list. It is not this that is important, but the correctly entered value of the transponder parameters. Be sure to check what type of converter (LNB) is set in the settings. IN this case the LNB type "Universal" must be selected, or in some receivers "Single". When right choice converter type, you should have the following local oscillator frequencies: 9750/10600.
Then enter with number buttons receiver remote control the above transponder parameters. The setting is made by the menu item "Signal level" (Scan, etc.). Modern tuners usually have 2 level scales. The first scale - "Level (Signal)" - shows the IF level at the tuner input. The second - "Quality" - shows the level of the useful signal with given parameters(frequency, speed and FEC). The level on the first scale includes both the useful signal from the satellite and the noise of the head, terrestrial noise, the noise of all devices on the way from the head to the tuner. Most often, before connecting the head, the level is "0" and becomes greater than zero when it is connected. Some tuners have only one scale, but often on them, when a useful signal is captured, the color of the scale changes, for example, it turns from gray to yellow. The initial search is carried out on the first scale. The level on it increases as you approach the satellite. The search is performed by scanning the sector in which the satellite is supposed to be located. It should be borne in mind that obstacles, such as a nearby tree, the sun, or just a hand, also increase the signal level on the first scale. But through them it will be impossible to receive a satellite. When the tuner catches a signal from the satellite, the level will appear on the second scale - "Quality". Further tuning is carried out on the second scale for the maximum signal. The scale may be located in another menu item and, depending on the brand of the receiver and the version that serves it operating system, be placed vertically or horizontally. One thing is clear: when you disable the option " LNB supply" the scale will indicate zero value. You should scan, starting from the position in which you have the antenna installed, slowly rotating to the left or right degrees by 10-15 degrees different sides. Rotate slowly enough digital signal is not processed as fast as analog, and appears on the TV screen with some delay. As soon as you catch a signal, the bottom bar will also be colored. In this case, you should turn the antenna very carefully to achieve the maximum value of the signal level on the lower strip.
If you did not catch the satellite in one pass, then raise the antenna a little up or down and repeat the operation. You may have to do this procedure several times.
final score correct setting on the satellite is the presence of the picture on the TV screen. It happens that on nearby satellites some frequencies coincide and tuning the antenna for the presence of a level in the lower band in the menu does not lead to tuning to desired satellite. Therefore, having adjusted the antenna in this way, before finally tightening the fastening nuts, you should make sure that there is a picture.
Having reached the maximum value of the signal level, proceed to the final tightening of the fastening nuts. They should be tightened carefully, all the time monitoring the signal level on the receiver scale, since in this case the antenna shifts slightly in one direction or another, depending on which side you tighten the nut.
Then, having finally fixed the antenna, proceed to setting up the rest of the multifeed converters. Connecting the receiver with a cable to the converter located to the left of the central converter (if you look at the multifeed from the antenna side), enter the parameters of the ABS1 satellite transponder.
Frequency -12640, polarization - vertical, flow rate - 22000 .
Further, if there is no signal quality scale, by loosening the converter fastening bolts and moving it up and down in different directions, you achieve the signal value on the quality scale and its maximum level.
After setting up this converter, proceed to setting up the converter located to the right of the central converter. This converter is designed to receive a signal from the Yamal 201 satellite.
The transponder parameters to be configured are as follows:
Frequency - 11057, polarization - vertical, flow rate - 26470.
Having set up the multifeed, connect all three converters with the disk with the attached short cables, in accordance with the attached picture.
In the receiver settings, you should bring the port parameters in line (select the appropriate numbers in the Diseqc 1.1 menu: ABS1 - 1, Express AM2 - 2, Yamal 201 - 3) with connecting cables to the disk drive.
Then, you should make automatic search satellite channels. If not all channels are found as a result of the search, then you should switch to the mode manual search and by entering the parameters of the missing transponders, search. Below is a table with a list of channels.
| ABS 1 75° | Express-AM2 80° E Ku | Yamal 201 90° E Ku | |||||||||||||||||||||||||||||||||||||||||||||||||||||||||||||||||||||||||||||||||||||||||||||||||||||||||||||||||||||||||||||
|
|
|