What to do if the system automatically loads the BIOS upon startup. I launch it and immediately goes into the BIOS. The keyboard doesn't jam. and got the best answer
Answer from Stala rato[guru]
It's quite possible there's a bug in the BIOS. Try resetting it (as already advised). In addition, the battery could stupidly run out, the settings get lost, so he swears. Change the CR1232, I think. It costs 15 rubles in a computer
Well, to the extreme. My parents had a similar story. Every boot I swore at something and went into the BIOS. I tormented it for 1.5 years, then I came to the conclusion that the BIOS version needed to be flashed. I dug up the latest one and installed it.
It was terribly scary, but nothing. It worked out. But now at least he squeaked once... .
PS About removing the battery (answer above) is not entirely correct. More precisely, it has not been correct for a long time.
1. There is Load default values in the BIOS itself
2. Removing the battery helps only in old mothers.
3. In newer mothers, next to the battery there is a jumper and 3 pins. Closed 2. Now you need to close the middle and free ones for 5 seconds. Then put it in place. This is a reset.
Answer from Vladimir[guru]
try resetting the bios
Answer from Igor Sokolov (RA2FCZ)[guru]
Apparently in the BIOS there are such settings, reset to default. Just take the battery out of the motherboard for 5 minutes and put it back in
Answer from Valery[master]
The best option is to change the battery
Answer from Nazgul[guru]
I met one like that. Look carefully at the POST messages (can fly by quickly, pause can help), as options: dead battery (date will be reset, replace), screwed up with the settings (reset to default), error of some device.
To gain access to control all the computer system hardware, you need to know how to enter the system menu, or BIOS. Most often, this is necessary to install a new OS from external media.
BIOS is a whole set of system programs that create the basic data input and output system on a computer. All these programs are located on the motherboard of your PC.
The main task of the BIOS menu is to manage the boot process of the operating system and indicate the startup queue of devices.
Using the system menu functions, you can increase the efficiency of the processor, change the bus frequency, etc., view the factory characteristics of the PC, set the time, change the language, etc.

Standard way to enter BIOS
This method is the most common and is suitable for most personal computers and laptops running Windows.
The essence of the method is that you need to get into the menu when the computer is already turned on, but before the operating system starts loading.
For this turn off your computer and start it again. In the first 3-5 seconds after pressing the power key, click on the F2 button. After a few seconds, the BIOS system menu will appear on the monitor screen.

F2 is the most common key to open the system menu. However, depending on the computer manufacturer and the brand of motherboard, the call key may differ. Below we bring to your attention tables of correspondence between BIOS hotkeys, device manufacturer and BIOS manufacturer, widely distributed on the Internet.


The button to enable the settings window is indicated in the start window for starting the personal computer. If you do not see any information, try entering the menu using the Del, F10, F1 or Esc keys alternately. As a result of correct execution of all actions, the I/O system window should appear:

The appearance of the system menu and the arrangement of tabs may differ on different computers. It all depends on the BIOS firmware version and its manufacturer.
If for some reason you were unable to enter the BIOS using the standard boot method, use one of the methods described below.
Using special boot options
This method is relevant for Windows operating systems versions eight and ten. This method is also suitable for starting the installation of a new OS from a flash drive or disk.

Follow the instructions:
- open a search for files and directories on your computer;
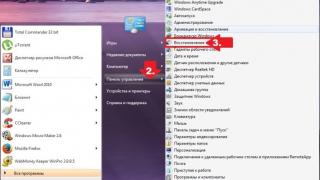
- Enter the word “Recovery” in the text field and open the specified object in the search results;
- then, on the right side of the window that opens, find the item for special download options;
- Click on the “Reboot” button. The computer will restart and then the following window will appear:

- select the “Diagnostics” tile;
Important! If you want to go into the BIOS to boot from a flash drive or disk, select “Use device” and then select the location from which the boot will be made.

- in the new window, click on “Advanced options”;
- now select the “UEFI Firmware” tile;

- In the window that appears, click on the reboot button. A few seconds after performing this action, the BIOS menu will appear on the screen.
You can enable the I/O menu using the regular command line on your computer. This method is very simple and does not require many steps. You only need to launch the command line and enter one single command.
To open the Command Line, press the Win + R keys simultaneously and type “cmd” (without quotes, as in Fig. 7) in the text field of the window that appears.

After a second you will see the Command Line window:

Now type the command shutdown.exe /r /o(Fig.9) and press Enter:

Command Shift+Restart
The next way to open the BIOS window is to use operating system hotkeys. Open the Start menu and select the Shutdown PC icon. Then hover over Reboot and, while holding down the Shift key, click on it. This method allows you to open a menu of special options for starting the operating system.

Using third party software
You can also enter the BIOS through third-party applications. Let's look at a few of the most popular:
- TweakBIOS– the utility allows you to enter the BIOS and change the system bus parameters. The peculiarity of the program is that it allows you to work with the BIOS without turning off the operating system. However, for all changes to be saved and take effect, you need to restart the computer. TweakBIOS can also optimize the performance of components such as the PC motherboard or CPU. The utility is compatible with all versions of the Windows operating system;
Even the most careful users will one day have to log into the basic computer system themselves. Being afraid and doing something wrong is normal, but the same cannot be said about the opposite reaction - the frivolity of beginners driven by the irresistibility of testing the microsystem in action. However, both some and other users may have a question: “The computer does not enter the BIOS: what to do,” even when the “same” service key for calling the basic microsystem of the computing device is used to enter. It will be interesting for everyone, even you an advanced user!
Introductory theory of "unstartability"
Let's leave the dull story about what a BIOS is and why it is needed at all... You need to know one thing - BIOS is not a place where you can thoughtlessly conduct experiments. Before you change any parameter or make a certain change in the operation of the microsystem, you need to understand that the result may be tragically unexpected. So let’s turn on our brains and get down to business.
Energy “CMOS problem” - the battery is dead
The one who knows what we are talking about will smile. Although it is not a fact that when the situation “The computer does not enter the BIOS” arises, a knowledgeable user will immediately pay attention to the battery that keeps the CMOS memory chip, so to speak, in good shape.

Sometimes an advanced computer engineer takes a roundabout route - he tries to reflash the BIOS or subjects the system to a kind of software “shock therapy”, loading various DOS utilities and trying to resurrect the “maternal instinct” of control system bootability.
In fact, the first thing you need to do when the problem we are considering occurs is to replace the CMOS battery and reset the BIOS settings to default values.
Where is the “main” battery located and how to reset the BIOS?
The location of the battery may depend on the modification of the computing device, its type and other design features of the device. If we talk about laptops, access to the battery is often incredibly difficult, since the battery is often hidden deep in the bowels of the compact device. However, turning to the material of the article, which is located , you can reset the BIOS settings without going through the difficult process of dismantling the laptop frame.

In the case of stationary computers, everything is much simpler - we disconnect the power cable from the system unit, remove the protective cover and, without much stress, we immediately find a large coin-type battery. Naturally, it must be dismantled and before installing a working battery in its place, close the battery contacts of the socket with any metal object (static, you know!). After that, proceed to the “reset user settings” operation.
Mechanical method - closing special connectors with a jumper or clicking on the “Clear” button
Some manufacturers provide the motherboards they produce with a special button, pressing which allows you to clear the CMOS memory and return the BIOS settings to, so to speak, their original state - factory. However, most motherboards are equipped with a more ascetic reset mechanism - a three-pin breaker, the location of which can be easily determined by the “CLR CMOS” marking.

So, in order (by default, we de-energized the computing device and removed the protective casing):
- Typically, the reset pin mechanism is located in close proximity to the CMOS battery. However, in the photo below, the jumper is located in a different place on the board.

- Working position of the jumper “1-2” - move the contactor one position forward/backward, in accordance with the markings on the motherboard. Regarding the graphic example (above picture), this is position “2-3”.
- Wait a couple of minutes and install a new battery in the battery connector.
- If the motherboard is equipped with a special button, activate it.

- Close the cover and connect the power cable to the system unit.
- Turn on your computer.
If everything went well, as they say, “Hurray”, then pressing the “necessary” button will take you to the basic settings interface, no - we continue to look for the reason.
Keyboard “passions”, or Why can’t I enter the computer’s BIOS?
Sometimes, especially with regard to portable electronics, the culprit of “uncontrollability” is the keyboard module itself. Make sure that none of the keys are stuck, that is, not in a closed (pressed) state.

Perhaps some unfortunate incident that happened the day before will come to mind - a spilled cup of coffee, for example.
In any case, it’s worth trying the “connecting an external keyboard via USB connector” option.
If the premises are correct, the keyboard module needs to be replaced. For desktop computers, the most acceptable test scheme is to connect a known-good keyboard to the PS/2 connector.
Complex case - “hard” problems
The inability of a computer system BIOS to start or complete a full initialization process may be caused by a malfunction of any hardware component of the computer. Most often, the reason lies in the incapacity of the hard drive. By the way, do not neglect the importance of sound signals (produced by the BIOS system). You can find out more about “beep” codes . This kind of knowledge greatly simplifies the process of finding a specific fault.
It is not uncommon for a favorable boot scenario to be disrupted by a malfunction of the front connection panel, to which external audio and other peripheral devices are connected. Try disconnecting the external controller connecting cable from the motherboard.

Check whether the problem “the computer does not enter the BIOS” has been resolved; if not, disconnect the hard drive and start the computer again. In the end, if possible, experiment with RAM strips - check their performance, so to speak, by alternating connections. All of the above also applies to laptops. Perhaps information from It will come in handy for you.
In addition to what has been said
So, you, dear reader, have become familiar with the basic methods for eliminating the reasons when the computer does not enter the BIOS. We dare to assure you that the described troubleshooting algorithm is the most optimal. However, if your BIOS has simply crashed, then you still cannot do without flashing the CMOS chip (see the article located ). Happy repairs to you!
Hi all.
I updated the BIOS on an ASUS laptop, I don’t remember the model, perhaps Asus x550, via Easy Flash. The update seemed to go fine. At least the process completed and the machine rebooted. After rebooting the BIOS opened. Boot devices are no longer displayed. In addition, the settings for selecting boot devices, as well as the “Create a boot option” option, have disappeared. Moreover, in SATA configurations, hard drives are displayed and therefore identified. But they are not in the Boot section, just as there is no USB drive, which was previously detected and worked. Moreover, he clearly sees the drive, because after the reboot he first starts to spin it, but does not want to boot from any device! It just opens the BIOS. That's all.
As I understand it, it’s updated, it’s updated, because it loads, it sees that there’s a new version... But it doesn’t want to load the devices. It just opens the BIOS when you turn it on. When exiting - reboot. The screws are formatted and of course he won’t boot from them, but he didn’t open the BIOS before, he just wrote “where is your boot device?”, and now neither of this nor from the boot drive. Perhaps some data was written incorrectly to CMOS, but I have no idea how to reset this data (I don’t suggest disassembly, the machine is new).
I updated the BIOS with a connected USB drive. It had boot priority.
Chipset - Intel HM76
I took the BIOS firmware from the official website.
I read the manual for such updates - everything is simple, insert a flash drive with the new BIOS, use the Easy Flash utility (which is located in the BIOS) to select the file and confirm the update.
Basically, the BIOS jambs are of a slightly different kind - a black screen.
In general the solution:
go to the Boot section in the BIOS, then enable Launch CSM

then go to the Security section and disable the Secure Boot Control option.