Windows Defender is a standard application that protects the computer system from trojans and viruses that can be picked up on the Internet or when transferring files from a flash drive or other media. Usually it works until another antivirus is loaded, which will disable the standard protection without your intervention.
However, this does not always happen, and it may be necessary to deactivate programs manually. This is necessary in situations where a standard antivirus program interferes with installing a game or downloading a file. From this article, you can understand how to disable Windows 10 and Windows 8.1 Defender. Also at the end it will be described how you can turn it back on if necessary.
There is nothing difficult in disabling a security program, even those people who own a computer at an initial level can cope with this task. It is enough to follow the instructions and not deviate from it.
First you need to go to the Control Panel. This can be done in two ways:
- Click on "Start" with the left mouse button and select the desired item.
- Move the cursor to the lower right corner of the screen, in the section that appears, select "Parameters", in which there will be an item "Control Panel".
A window will appear in which all sorts of sections designed for personalizing your computer will be presented. It is advisable to change the view type from "Category" to "Large icons" to make it easier to find the desired function. Among all the items will be "Windows Defender" - and we need it. You will need to click on it and pay attention to the pop-up window.
If an inscription appears, which says that the application is not functioning, and it is not being monitored, then the defender has already been disabled either by you or by another user who has access to your electronic device, or by antivirus. In this case, nothing needs to be done.
How to turn off the defender in the modification of the eighth version "8.1" is a question that may interest people who have this application activated and interferes with their work. The answer is much easier than in the case of the tenth version of the operating system.
First, you need to go to the Control Panel and click on the icon of the standard defender, select the "Settings" section and the "Administrator" subsection there. If everything is done correctly, an item titled "Enable Application" should appear.

You need to uncheck the box and click on the "Save changes" button, but first make sure that such protection is really no longer needed. If a good antivirus program is not yet installed on the computer, then it is not recommended to deactivate the built-in one, as this may cause serious problems with the system.
Disable Defender in Windows 10
The way to deactivate the built-in protection in version 10 of Windows is much more complicated than in the eighth. However, it is quite doable, the main thing is to follow the guide exactly how to disable Windows 10 Defender temporarily or permanently.

Having opened the "Parameters", which are located at the top right, it will be necessary to rearrange the item "Real-time protection" from on to off. However, this option is only suitable for those people who only need to temporarily deactivate the standard defender. It will not work for about 15 minutes, and then it will automatically turn on.
There are other, more sophisticated ways that can help you make a permanent shutdown. They should be used if this kind of protection is not required or interferes.
Instructions for the first method:
Start the local group policy editor using the Win + R combination and enter gpedit.msc in it. After that click on the "Ok" button.

Go to Device Configuration - Administrative Templates - Windows Components - Endpoint Protection. The final version of the top ten may not have such a section. Therefore, its owners will need to go to Windows Defender, where there are also functions for deactivating the built-in protection.

Find the Endpoint Protection item in the main editor window, open it and make it "Enabled" for it. After that click "OK" and leave the editor.

If everything was done correctly, then the Vidnovs defender will be disabled, about which you will immediately receive a notification, in which you will be prompted to start the program.

Do not be intimidated by the inscription that the computer is under threat, since it means practically nothing.
For the second method, you will need to use the registry editor:
Having opened it, you need to select the HKEY_LOCAL_MACHINE \ SOFTWARE \ Policies \ Microsoft \ Windows Defender section. In it, you need to make a DWORD parameter, which you need to name DisableAntiSpyware, if there is none in the section. The main thing is to choose a value of 1 for it if the defender needs to be deactivated. If you want it to be on, then the number must be changed to 0.

After that, the program should not interfere with work, and you can safely install games or a new antivirus program.
How to activate Windows Defender
It may happen that you or a certain program have deactivated the Defender, which can be understood from the corresponding pop-up window. If now, for some reason, you need to make it work, then this can be easily done by clicking on the required notification in the security center. The question of how to enable Windows 10 Defender if it is disabled will no longer be relevant, since the system will do everything on its own. However, if you used the registry editor, then you will need to do the reverse operation yourself.
How to enable Windows 8.1 Defender if it is disabled is also an easily resolvable question. You just need to go to the Support Center and view the messages that are there.

If they say that the standard anti-virus program is disabled, then you can activate it by clicking on "Enable now". After that, everything should work without your intervention. If it doesn't, the system probably crashed and should be restarted.
System Restore is disabled by default - at least on some computers. Meanwhile, this functionality, which allows you to take snapshots of system files for recovery in case of failure, has been around since the days of Windows ME.
However, the very ability to create restore points from Windows 10 has not gone anywhere, so you can just turn it on if you want to be extra secure. But in general, Windows 10 has other system restore tools, so restore points are no longer so relevant.
Why was System Restore disabled?
Microsoft doesn't explain why System Restore is disabled by default, but you can guess. Restore points require a lot of space, and Microsoft is trying to reduce disk space. Microsoft wants Windows 10 to run on devices with only 16GB of storage to compete successfully with Chromebooks and cheap Android tablets.
In addition, System Restore is now less relevant thanks to other Windows 10 tools that allow you to quickly return the system to its pristine state without reinstalling. This is accomplished by the Reset PC function, which refreshes Windows without deleting user data.
How to enable system restore
You can enable System Restore through the Control Panel. Keep in mind that you need a lot of storage space to store your restore points, so this should not be done on cheap laptops and tablets with little internal storage. But for a computer with a large hard drive, this is not a problem.
Please note that System Restore is disabled by default and no restore points are created. Therefore, if you encounter any problem, enabling recovery will no longer help - there are no restore points created before the problem occurred anyway. And then, when turned on, a new restore point will be created - a snapshot of the damaged system. So if you plan to use System Restore, you need to enable it well in advance, before any problems arise.
This option is only available in the Control Panel - it is not in the new Settings interface. The fastest way to get to the settings is to enter the keyword "restore" in the search bar of the "Start" menu or on the initial screen (in the genitive case; for the English interface - "restore") and select "Create a restore point" in the search results ( Create a restore point). Alternatively, you can open Control Panel, go to the System section and click the System Protection link in the sidebar.
In the window that opens, you will see that system protection is disabled both for the system disk and for all others. Select the system drive and click the Configure button to enable this feature.

Select the Turn on system protection option and specify how much disk space should be reserved for recovery points. The less space, the fewer recovery points will be stored at the same time. Click "OK" to enable System Restore.

To use System Restore in the future, open the same System Protection window, click the button that will now be active, and you can select a restore point.
If Windows does not boot normally, you can boot into Safe Mode and perform a System Restore, or start it from the Advanced Options section of the Recovery Environment.
Other ways to solve system problems
If you wanted to use System Restore to solve a problem, but find that it is disabled, you will have to solve the problem in other ways.
If the problem persists after installing the update, you can try uninstalling it or. This will resolve issues that are caused by the update incompatibility with your hardware or software.
If the system files are damaged, you can use it to find and automatically fix errors.
If the problem occurs after installing a program or driver, you can uninstall it through the Control Panel.

If Windows does not boot normally, try booting into Safe Mode. You can also try the options from the "Advanced startup options" section - it is on the screen that appears if Windows 10 cannot boot normally.
There are many other ways to diagnose and troubleshoot problems in Windows 10. However, the surest solution is to use the Reset this PC feature available in the Settings interface. This will restore the factory settings of the system. You will have to install programs and change system settings again, but all your personal data will be saved. This method fixes any system problems as it restores the Windows 10 system files to their original state. You can try
Windows 10 Defender or Windows Defender is a free built-in antivirus from Microsoft that runs on a PC until the user installs third-party software. There are several ways to enable Windows 10 Defender. And although it does not guarantee 100% system protection, it works stably and does not affect the performance of Windows 10.
How do I enable Embedded Windows Defender on a new operating system?
Full protection of the Windows 10 operating system is carried out using three components, namely:
- Built-in Defender antivirus;
- Firewall or firewall;
- Smart Screen filter.
Defender provides basic protection for Windows 10. It starts automatically after system installation. To check if it works or enable protection, you should follow these steps:
- Click "Start", "Settings" and select "Update and Security".
- In the left menu, select "Windows Defender". In the "Real-time protection" section, the slider should be set to the "Enabled" position. If not, then we exhibit. This is how we turn on Defender.

- If you enable "Cloud Protection", all information about viruses and attacks on your PC will be sent to the Microsoft server. If you do not want to share data, this option can be disabled. The "Send samples" function is similar to the previous one.

- If you go down below, you can see the "Exceptions" item. If you click on the "Add exclusions" button, the settings window will open.

- You can add both a file and a folder of a program.

- By clicking on the corresponding button, the Explorer will open. We specify the file to exclude.

- At the very bottom of the "Windows Defender" section there is a button "Use Windows Defender". If you open this link, the Windows Defender window will appear. It has three tabs: Home, Refresh, and Journal. If you click the Options button, you can enable or disable the service.


You can also enable Windows Defender antivirus through the registry. To do this, do the following:
- We press "Win + R" and enter "regedit".

- Go to the branch "HKEY_LOCAL_MACHINE", "SOFTWARE", "Policies", "Microsoft", "Windows Defender". Right-click on the last section and select "New", "DWORD Parameter". Name this parameter "DisableAntiSpyware". We set the value "0" to turn on the defender, or "1" to turn it off.

IMPORTANT! Before making changes to the registry, you should create a backup in case of an error.
You can also manually enable standard Windows 10 antivirus through the Local Group Policy Editor. To do this, do the following:
- Press "Win + R" and enter "msc".

- The Group Policy Management Editor will open. Go to the address: "Computer Configuration", "Administrative Templates", "Windows Components" and find in the list "Windows Defender". It can also be referred to as "Windows Defender". Double click to start the "Turn off Windows Defender" service.

- The settings window will open. We put the mark "Disabled" to activate the antivirus.

- Close the Group Policy Management Editor and restart your PC.
How do I manually disable Windows 10 Defender?
If you are planning to install a third-party antivirus and do not know how to disable Windows 10 Defender, the following guidelines are worth following.
- Click "Start", select "Control Panel", "System and Security", "Administrative Tools".

- Choosing services. If you want to manually disable the antivirus, find in the list "Windows Defender Service" or "Windows Defender" and double-click to open the settings.

- Set the startup type to "Disabled".

You can also disable the defender through the registry. In it, go to the branch "HKEY_LOCAL_MACHINE", "SOFTWARE", "Policies", "Microsoft", "Windows Defender" and set the value "1" in the "DisableAntiSpyware" parameter.
Also, if you are interested in the question of how to disable Windows 10 Defender programmatically, it is worth noting that only some utilities are suitable for this purpose. Among them it is worth highlighting "Win Updates Disabler" and "Destroy Windows 10 Spying".
The principle of their work is as follows: download and install programs. We launch them on our PC. In the "Win Updates Disabler" check the box "Disable Windows Defender".

In "Destroy Windows 10 Spying" put a check mark "Disable Windows Defender".

Also, using this program, you can uninstall some applications.
If, when you try to disable the built-in antivirus, you receive a notification that "The application is disabled and does not monitor your computer," then you have installed a third-party defender or disabled Defender yourself. Alternatively, go to Control Panel and select Support Center. In the "Parameters of the support center" we turn on the defender.

After completing these steps, it is worth restarting your computer or laptop.
Also, about how to turn off Windows 10 Defender, see the video:
Windows 10, like previous versions of this operating system, is not completely immune to crashes, computer viruses, hardware failure, and other problems. Therefore, if you have any problems when working or loading the OS, you can use the built-in tools to return the operating system to a working state.
There are several ways to restore Windows 10.
If the computer boots up:
- Using a restore point.
- File history.
If the computer does not boot:
- Using a recovery drive.
- Using the installation disc.
Now let's look at these recovery options in more detail.
Method 1 - Using a system restore point
Windows periodically stores information about programs, system settings, drivers, registry, and drivers in system restore points. This occurs before significant changes to the OS, such as installing programs, drivers, or updating the system. You can also create a restore point manually. You can read how to do this in.
It is worth noting that after the restore, your data will remain intact, and the drivers, programs and updates installed after the restore point was created will be deleted.
1. Launch the system properties window (keyboard shortcut Windows + Pause) and open the item "".
2. Press the " Restore"And then" Next ". In the list of available restore points, select the desired item and click "Next" again.

3. Check the selected parameters again, press the " Ready"And then" Yes "in the warning window. The recovery process begins and the computer restarts.
Method 2 - Factory Reset
In Windows 10, it is possible to reset the system settings to their original state. In this case, you can do a full reset or save user files. The advantage of this method is that if you want to reinstall the system, you do not need to install Windows from scratch, you just need to perform a reset.
To use this function, you need to go to the next section: " Computer Settings -> Update & Security -> Recovery -> Reset Computer"And click the" Start "button.

We examined the factory reset process in more detail in this article:
Method 3 - File History
This method is not directly related to system recovery, but in conjunction with other methods can also be useful.
File History allows you to make automatic and manual backups of your files. You just need to activate this function and specify which folders you want to save. The system will automatically make backups of your documents at a frequency that you can customize. If necessary, you can easily restore files of the version you need.

You can read how to enable, configure and use this tool in this article:
Method 4 - Using a recovery disc
If Windows 10 won't boot, you can try to reanimate your system using a recovery disc, which will allow you to access additional startup options.
If you don't have a recovery disc yet, follow these instructions:
After booting from the USB recovery drive, go to the " Diagnostics -> Advanced Options».

Here you can use several options for reanimating your computer:
- Restore Windows using a restore point. We have already considered this option above. Its meaning is the same, only the launch is done in a different way.
- System image recovery. This method has been known since Windows 7. If you have previously created a system image in Windows, you can easily restore it through a recovery disc. How to create a system image in Windows 10 can be read here:
- With the next step, you can try to fix boot errors automatically.
- For more advanced users, it is possible to run the command line for system recovery or other purposes.
- Well, the last option is to return Windows to the previous build.
It should also be noted that if you wrote the system files to the disk when creating the system recovery disk, then you will have the opportunity to reinstall Windows from this disk. But if you bought a computer with Window 8 (8.1) preinstalled with a hidden recovery partition, then the version of the system that was originally supplied with the computer will be restored.
Method 5 - Using the installation disc
If Windows won't boot and you don't have a recovery disc, you can use the installation disc to reanimate your computer.
You can burn the installation disc to USB or DVD using the downloadable media creation tool.
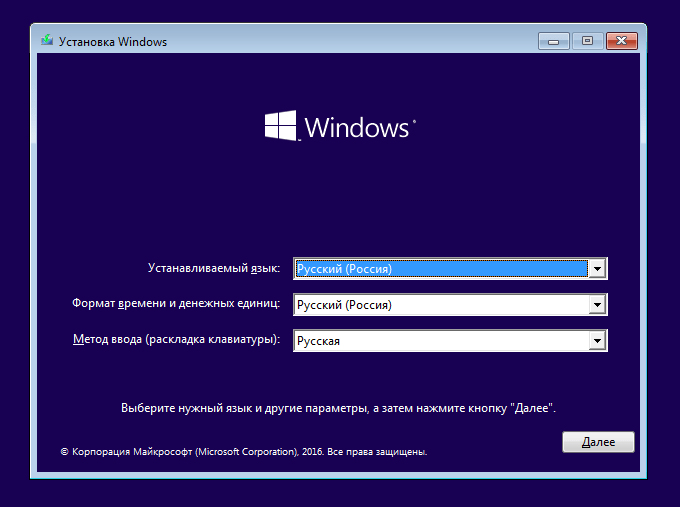
After booting from the installation media, you will see a window in which you need to select the language options and click the "Next" button.
- Reset the computer to its original state. A factory reset will be performed with or without saving user files. We have already considered this tool above (method 2).
- Extra options. Just like on the system restore disk, a list of tools will open with which you can restore Windows performance using restore points, a system image, etc.

We've covered the main ways to restore Windows 10. Usually, they are enough to get the system back to working condition. You could also add a clean installation of Windows here, but this is already a last resort and has an indirect relationship to system recovery.
Restoring Windows 10 allows you to return the operating system to a working or original state from an automatically or manually created system rollback point or a complete system image stored on the hard drive.
Also in the toolbox "dozens" there is a tool for performing an OS reset, which will save you from the lengthy reinstallation of Windows 10, and the creation of a recovery flash drive necessary to resume the functioning of the operating system in critical situations (when Windows 10 does not boot and does not provide an opportunity to get into the recovery environment) ...
The proposed instruction article tells about all the tools that make up the system recovery environment in Windows 10, the mechanisms of their functioning, how to use this or that function and the effectiveness of recovery methods in certain situations.
Before starting to study the material, it is recommended that you familiarize yourself with the instructions on how to restore the operating system bootloader, check its files for integrity and restore damaged registry files.
The first thing to try when you encounter problems is to boot into Safe Mode. Let's consider the situation when the "ten" does not load and does not allow a reboot with the appropriate parameters (you will not be able to get into this mode via msconfig or special boot options).
1. We start from the bootable media with the Windows 10 distribution using the Boot Menu.

4. We execute the command "bcdedit / set safeboot minimal" for the subsequent start of the computer in safe mode.
5. Reboot by closing all windows.
After starting the computer, you can start solving the problem that prevents the normal start / operation of the PC.
We return the computer / laptop to its original state
The most notable recovery feature that came with Windows 10 is revert Windows to its original state. You can use it through the "Parameters".
1. We call the menu using Win → I.
2. Go to the "Update / Security" section.
3. Click on the "Recovery" tab.
This opportunity should be used as a last resort when the options below did not help solve the problem, because in the end you will get a clean, only installed operating system with or without personal data, depending on the specified parameters.

4. Click "Start", after which a dialog will appear asking you to specify the parameters for resetting the operating system.
The first option is a complete cleaning of the system volume from all files and a quick reinstallation of the "dozen" without using the installation disk with the operating system distribution kit, the second method is a quick installation of Windows 10 while saving user files and settings of applications installed on the PC, the programs themselves will not be saved ...

There is one more way to call the reset dialog of the operating system even without authorization in the system. Everything is done on the authorization screen. To access the function, press the "Restart" icon while holding down the Shift key. After restarting the computer, click on the "Diagnostics" icon, then click on the button to return the system to its original state.
The advantages of the method are that there is no need to have an installation disk / flash drive and all actions are performed automatically without any user intervention.
There is only one drawback - when the user deletes the system image or the location of this file in the damaged sectors of the hard disk, it will not be possible to perform a quick reinstallation, but here in the arsenal of the "dozens" there are several additional tools: using the system recovery disk if available (a very rare occurrence) and backup Windows 10 using OS tools on a non-system volume.
Windows 10 recovery flash drive
The tool is called a Windows recovery disk, but in the top ten it should be renamed to a recovery flash drive (we will use this very term).
If earlier in the OS from Microsoft there were utilities for performing automatic reanimation of the system, which in most cases only tried to do something, then in the top ten there is an option to create a system image for the subsequent return of the system volume to the state imprinted in this image by automatically reinstalling the OS , as discussed in the section above.
A similar image is created in the following way:
1. Call the Control Panel applet called "Recovery".

3. We mark the option of backing up system files to a recovery flash drive in order to be able to perform an instant reinstallation of the "dozens".

4. Upon completion of all write operations or, if necessary, boot from the created drive using the Boot Menu function.

5. In the action selection window, go to the "Diagnostics" section.
While in it, we will open the opportunity to perform the following operations:
- using a flash drive with an image, return Windows 10 to its previous state;
- visit the UEFI / BIOS options;
- to resort to resuscitation of the "ten" by means of the rollback point;
- run through the command line, for example, to create a copy of the bootloader on the corresponding volume;
- restore Windows 10 from a full OS image.

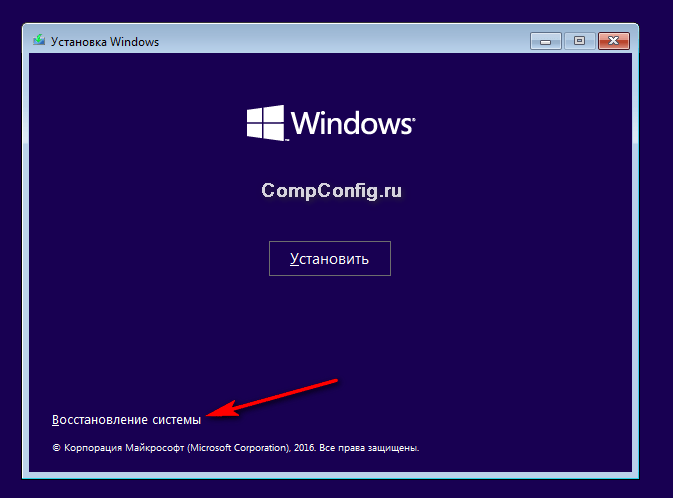
The presence of such a flash drive in the case of the "ten" is much more useful than even the installation one, although the latter allows you to start some of the operating system recovery operations on the screen with the "Install" button immediately after choosing the language.
We create a complete image of the system's resuscitation
Preparing for automatic recovery consists in creating a snapshot of Windows 10 at the time of its current state. It is best to create such an image immediately after installing the operating system with all the drivers and software, as long as the system volume is not littered, like the registry.
It is not necessary to form a snapshot in the first hours of the new OS functioning, this can be done a couple of days after reinstalling it, so that Windows gets used to it and is brought to a normal functioning state, but does not have time to acquire garbage files and registry keys.
1. The process begins with cleaning the C: drive from the system registry and uninstalling programs that were unnecessary.


5. Determine the storage location for the operating system snapshot and the partitions that will be backed up (it is best to specify a removable drive).

Once the system files have been compressed and transferred to the specified digital media, you can use it to quickly revert Windows 10 to an imaged state. In order to start image recovery, you must boot the computer from the USB flash drive on which the file is stored, or through the Windows 10 installer ("Diagnostics" - "Advanced options" - "OS image recovery").
Windows 10 rollback points
There are no innovations with this function, all its capabilities work as in previous versions of the OS. It provides a chance to return the system to one of its preserved states through the recovery environment or in a running operating system. To take full advantage of the feature, it must be activated. You can check the status through the Control Panel applet under the name "Recovery". In the window, click "System Restore Settings".

To change the parameters, click "Configure" and specify the space allocated for storing rollback points on the system disk.

When using a licensed image, this function is activated, but if you installed Windows 10 downloaded from pirated sites, the author of the assembly may have deactivated this function. How do I enable System Restore? Select the system partition, click "Configure" and move the checkbox to the "Enable system protection" item.

Typically, rollback points are generated automatically when the user or any application makes changes to system files, settings, services and registry settings. The option to manually create restore points is also available. In the "System Properties" window, click "Create" and enter the name of the snapshot to make it easier to identify it.
To operate the system rollback function through one of the restore points, go to the same applet and click "Start System Restore". In the case when Windows 10 does not start, we boot from a recovery disk or installation distribution kit and call "System Restore" through "Advanced options" in the diagnostic window.
File history
Another innovation in Windows 10, which allows you to make and store backup copies of the specified files (often text documents and various projects) and extract the desired copy of the file from the backup if necessary.
As you can see, the "top ten" has an extended set of effective functions to return the system to a working state in any cases and without reinstalling the OS. In addition to all the listed tools, you should definitely include the function of repairing the bootloader using Windows 10 tools.


