When starting the 1C Accounting program, the operator may encounter the message “License not found. The application protection key or the acquired software license was not found. " The occurrence of this problem may be associated with a change in the system configuration, as a result of which 1C recognized the system as qualitatively new, or with incorrect settings of 1C itself (in particular, the network settings of the nethasp.ini configuration file). In this article, I will analyze in detail the reasons for this error, and also explain how to fix it.
Dysfunction reasons
The "License not found" error usually occurs when the 1C program has not found a license file (usually with the .lic extension) on the local PC (or server), which makes it possible to fully launch the specified system.
A similar situation may arise due to the following factors:

How to fix "License not found" in 1C
Let's consider the ways to get rid of the error “License not found. The program protection key or the obtained software license was not found "on 1C user systems:
- Disable your firewall before running the program;
- Install "Alladin monitor" into the system. This product shows the use of licenses in the network version of the program. Use it to make sure that your system has an installed license;
- When using a hardware license, in the infobase window, click on "Settings" and check the box next to the "Use hardware license" option, if there is no such checkbox there;
- Edit the Nethasp.ini file in the path as needed:
Open this file and write down the IP addresses of the client PCs and the names of the license managers there. To do this, specify in the specialized section:
![]()
Then, in the section, specify the IP address of the license manager server (should look like NH_SERVER_ADDR = required IP), and the name of the license managers (NH_SERVER_NAME = manager name).
Previously, the name of the manager is indicated in the section as NHS_SERVERNAMES = name 1, name 2, and so on.
- Activate your existing license. If you get a message about the absence of a detected license, click on "Yes" and specify the path for installing the license (local PC or server).
- Then we select the option of initial or re-obtaining a license, or its renewal. Set the visibility of the license to "All computer users", select the method of obtaining it - manual, automatic, on a digital medium. We fill out the registration form, after which we save the data in a file, which we place in the directory:
After performing these operations, the error may disappear.

Conclusion
The "License not found" error in 1C usually occurs due to damage (deletion) of the license file with the .lic extension, incorrect system configuration, or reinstallation of the operating system. Follow the tips listed above, this will solve the "license not found" problem in your 1C system.
Good day!. The last two days I had an interesting task of finding a solution to such a situation, there is a physical or virtual server, on which the well-known CryptoPRO is probably installed on it. Connected to the server which is used to sign documents for VTB24 DBO... Locally on Windows 10 everything works, but on the server platform Windows Server 2016 and 2012 R2, CryptoPro does not see the JaCarta key... Let's figure out what the problem is and how to fix it.
Description of the environment
There is a virtual machine on Vmware ESXi 6.5, Windows Server 2012 R2 is installed as the operating system. The server has CryptoPRO 4.0.9944, the latest version at the moment. A JaCarta dongle is connected from a network USB hub using USB over ip technology. Key in the system seen, but not in CryptoPRO.
Algorithm for solving problems with JaCarta
CryptoPRO very often causes various errors in Windows, a simple example (Windows installer service could not be accessed). This is how the situation looks when the CryptoPRO utility does not see the certificate in the container.

As you can see in the UTN Manager utility, the key is connected, it is seen in the system in smart cards as a Microsoft Usbccid (WUDF) device, but CryptoPRO does not detect this container and you have no way to install the certificate. The token was connected locally, everything was the same. They began to think what to do.
Possible reasons with container definition
- Firstly, this is a problem with the drivers, for example, in Windows Server 2012 R2, JaCarta should ideally be defined in the smart card list as JaCarta Usbccid Smartcard, not Microsoft Usbccid (WUDF)
- Secondly, if the device is seen as Microsoft Usbccid (WUDF), then the driver version may be outdated, and because of which your utilities will not detect the protected USB drive.
- Obsolete version of CryptoPRO
How to solve the problem that the cryptopro does not see the USB key?
We created a new virtual machine and began to install the software all sequentially.
Before installing any software that works with USB media, which contains certificates and private keys. Need to NECESSARILY disable the token, if plugged locally, then disable it, if over the network, terminate the session
- First of all, we update your operating system with all available updates, since Microsoft fixes many errors and bugs, including drivers.
- The second point is, in the case of a physical server, install all the latest drivers on the motherboard and all peripheral equipment.
- Next, install the JaCarta Unified Client.
- Install the latest version of CryptoPRO
JaCarta PKI Unified Client Installation
JaCarta Single Client is a special utility from the Aladdin company for the correct work with JaCarta tokens. You can download the latest version of this software product from the official website, or from the cloud from me, if suddenly it does not work out from the manufacturer's website.

Next, you unpack the resulting archive and run the installation file for your Windows architecture, I have it 64-bit. Let's start installing the Jacarta driver. A single Jacarta client is installed very simply (REMINDER your token at the time of installation must be disabled). On the first window of the installation wizard, just click next.

We accept the license agreement and click "Next"

For the JaCarta token drivers to work correctly, you just need to perform a standard installation.

If you choose "Custom installation", then be sure to check the boxes:
- JaCarta Drivers
- Support modules
- Support module for CryptoPRO


After a couple of seconds, Jacarta Unified Client is successfully installed.

Be sure to reboot the server or computer so that the system can see the latest drivers.

After installing JaCarta PKI, you need to install CryptoPRO, for this go to the official website.
https://www.cryptopro.ru/downloads

At the moment, the latest version of CryptoPro CSP is 4.0.9944. Run the installer, leave the checkbox "Install root certificates" and click "Install (Recommended)"

Installation of CryptoPRO will be performed in the background, after which you will see a prompt to restart your browser, but I advise you to completely reboot.

After rebooting, plug in your JaCarta USB token. My connection goes over the network, from the DIGI device, through. In the Anywhere View client, my Jacarta USB drive is successfully identified, but as Microsoft Usbccid (WUDF), and ideally should be identified as JaCarta Usbccid Smartcard, but you need to check in any case, since everything can work like that.

Opening the "Jacarta PKI Single Client" utility, the connected token was not found, so something is wrong with the drivers.

Microsoft Usbccid (WUDF) is a standard Microsoft driver that installs on various tokens by default, and it happens that everything works, but not always. The operating system is Windows by default, puts them in mind of its architecture and settings, I personally don't need this at the moment. What we do is we need to uninstall the Microsoft Usbccid (WUDF) drivers and install the Jacarta media drivers.
Open Windows Device Manager, locate Smart card readers, click Microsoft Usbccid (WUDF) and select Properties. Go to the "Drivers" tab and click Uninstall

Agree to uninstall the Microsoft Usbccid Driver (WUDF).

You will be notified that for the changes to take effect, a system restart is required, we will definitely agree.

After rebooting the system, you can see the installation of the ARDS Jacarta device and drivers.

Open the device manager, you should see that now your device is defined as JaCarta Usbccid Smartcar and if you go into its properties, you will see that the jacarta smart card now uses the driver version 6.1.7601 from ALADDIN RDZAO, so it should be ...

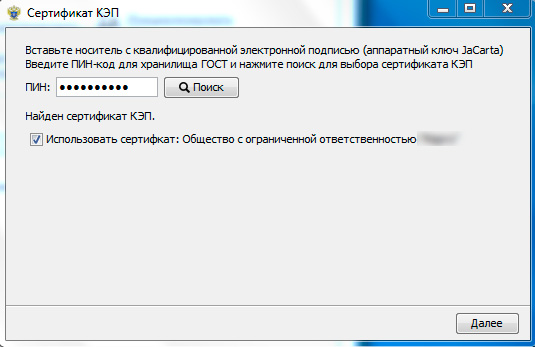
If you open a single Jacarta client, you will see your electronic signature, which means that the smart card was detected normally.

We open CryptoPRO, and we see that the cryptopro does not see the certificate in the container, although all the drivers have been identified as needed. There is one more feature.
- In the RDP session, you will not see your token, only locally, this is how the token works, or I did not find how to fix it. You can try the recommendations to resolve the "Unable to connect to smart card management service" error.
- You need to remove one checkbox in CryptoPRO

ALWAYS uncheck "Do not use outdated cipher suites" and reboot.

After these manipulations, CryptoPRO saw a certificate for me and the jacarta smart card became working, you can sign documents.

You can also see your JaCarta device in devices and printers,

If you, like me, have the jacarta token installed in the virtual machine, then you will have to install the certificate through the console of the virtual machine, and also give rights to it to the responsible person. If this is a physical server, then there you will have to give rights to the management port, which also has a virtual console.
When you have installed all the drivers for Jacarta tokens, you can see the following error message when connecting via RDP and opening the "Jacarta PKI Single Client" utility:

- The smart card service is not started on the local machine. The architecture of the RDP session, developed by Microsoft, does not provide for the use of key media connected to the remote computer, therefore, in the RDP session, the remote computer uses the smart card service of the local computer. From this it follows that starting the smart card service inside an RDP session is not enough for normal operation.
- The smart card management service on the local computer is running, but is not available for the program inside the RDP session due to the Windows and / or RDP client settings. \
How to fix the error "It is not possible to connect to the smart card management service."
- Start the smart card service on the local machine from which you initiate the remote access session. Configure it to start automatically at computer startup.
- Allow the use of local devices and resources during the remote session (in particular, smart cards). To do this, in the "Remote Desktop Connection" dialog in the parameters, select the "Local resources" tab, then in the "Local devices and resources" group, click the "More ..." button, and in the dialog that opens, select the "Smart cards" item and click OK, then Connect.

- Make sure the RDP connection settings are saved. By default, they are saved in the Default.rdp file in the "My Documents" directory. Make sure that this file contains the line "redirectsmartcards: i: 1".
- Make sure that the group policy is not activated on the remote computer to which you are making an RDP connection
- [Computer Configuration \ Administrative Templates \ Windows Components \ Remote Desktop Services \ Remote Desktop Session Host \ Device and Resource Redirection \ Do Not Allow Smart Card Reader Redirection]. If it is enabled (Enabled), then disable it, and restart the computer. - If you have Windows 7 SP1 or Windows 2008 R2 SP1 installed and you are using RDC 8.1 to connect to computers running Windows 8 and higher, then you need to install an update for the operating system https://support.microsoft.com/en-us/ kb / 2913751
Such was the troubleshooting for setting up the Jacarta token, CryptoPRO on the terminal server, for signing documents in VTB24 DBO. If you have any comments or corrections, then write them in the comments.
For correct work in the EGAIS system, you need to get access to the organization's personal account on the official website. Already at this stage, many users face serious problems. One of them is that the EGAIS website does not see the key.
Most likely causes
There may be several reasons for this problem. Most often, the token cannot be found due to technical problems with the computer, lack of drivers or necessary add-ons. How do you solve each of these problems?
Wrong media inserted
Many entrepreneurs confuse the jacarta key with an electronic signature for submitting declarations to FSRAR, and try to enter their personal account using the latter. There are several ways to check if you have inserted the correct media.
- Examine the electronic signature certificate issued by the certification center. It should contain the serial number JC-xxxxxxxxx and the Jacarta PKI / GOST media type.
- open "One Jacarta Customer". If the flash card is detected, but the connected tokens are not displayed in the program window, you are probably using the wrong medium.
If you have not yet purchased egas, where can you get jacarta with an electronic signature? Contact a certification authority in your region that is authorized to sell this type of CEP.
The driver for the egais hardware key is not installed
You may be trying to use for egais key, driver which is not yet installed. When you connect jacarta for the first time, the basic programs are automatically installed. This is standard procedure for any new flash card and takes 1 to 5 minutes.
After the installation is complete, a success notification appears in the lower right corner.
Do not try to enter your personal account before the drivers appear - your computer has not yet established a connection with the electronic signature at this moment!
Jacarta Single Client not installed
The program was released by the token developer and must be installed. You can download it and other drivers for protected media on the website of the token manufacturer "Aladdin - RD".
USB port does not work
There are two solutions:
- Insert the token into a different port and run the check again;
- check if the USB port is working properly.
To test, connect any other working flash card to USB. If it is also not detected, then the problem is in USB. Contact your organization's technician or repairman.
When Jacarta media is properly inserted into the computer, an indicator on the computer will light up. It may be green or orange depending on the model. If the indicator is off, then the key cannot be found for the EEGAS, since it is not connected.
Disabled add-on Rutoken EDS 2.0
When trying to log in, a message about the Rutoken web authentication library add-on may appear at the bottom of the browser screen. This software is provided by FSRAR, is secure and necessary for the correct operation of the site. To start, click "Allow" in the pop-up window, and then try again.
How to use the EGAIS hardware key correctly?
So, the first problems have been solved, and you have successfully entered your personal account. How can you avoid the repetition of these situations? Insert the ECC only for work and do not use it at any other time to prevent overheating of the media. Before starting work, always check the indicator - it signals that the token is working correctly.
To start working in the EGAIS system, you need to connect and configure the JaCarta PKI / GOST SE hardware key or its analogue Rutoken 2.0. The keys allow you to detect an external medium (Jakarta itself or Rutoken) on the computer and use these keys to establish a connection between the EGAIS servers and the user. Only a properly connected subscriber can get access to an encrypted connection to the EGAIS website.
The cryptokey gives access to the EGAIS website to the CEP, identifies the received certificate. If the subscriber was connected incorrectly, there will be no connection. As a result, the client will not be able to use access and work in the account.
Where can I get it?
The purchase of a hardware encryption key is possible through the accredited center "Kaluga Astral". We help to install the program, configure the Rutoken 2.0 media. The carrier has its own crypto provider. It makes it possible to sign CEP electronic documents and authorize on the EGAIS portal.
The document will be read only if the certificate of conformity is correctly installed. Otherwise, the program cannot detect the user's details and there will be no connection with EGAIS.
Our team of specialists will help to avoid such situations. We offer services from purchasing to setting up and entering your details into the system. We provide assistance if you have connected a token on your own, but there is no connection with EGAIS.
EGAIS does not find the key, the reasons
List of reasons for problems with EGAIS:
- the media is not connected to the computer;
- the Rutoken 2.0 driver is not installed;
- the driver version does not match the system;
- Rutoken EDS 2.0 add-on is not included;
- outdated plugin.
In such conditions, the system cannot find the key and start working correctly. Perform a preliminary check to analyze the error.
Look again if Rutoken EDS 2.0 is inserted into the PC. The green LED on the crypto device should be on. This confirms its performance. Reinstall the latest drivers. You can download them at rutoken.ru/support/download/drivers-for-windows/. The electronic ID must be visible in the control panel settings. Check the box next to the support window.
Path:
Electronic ID control panel → “Administrative Tools” → “Information” → “Supported” window.
Continuing the topic of connecting to the Unified State Automated Information System, let's move on to the practical part of the issue. Unfortunately, the developers of the system change the rules and technical conditions literally on the go. This material was almost ready, when the developers unexpectedly limited the list of supported browsers to one IE, they had to redo the finished material. Therefore, despite the fact that all our articles are necessarily checked in practice, it may turn out that this information turns out to be incorrect or outdated, at the same time we will try to promptly keep this material up to date.
First of all, make sure your computer meets the system requirements to install the transport module. Specifically, you must have Windows 7 or newer and Internet Explorer 9 or newer installed. As you can see, nothing special is required from the system if you use the latest OS versions and regularly update the system - you already have everything you need, otherwise it will be necessary to bring the software in line. You will also need Java 8 installed, which is required for the transport module to work.
Installing software for working with the JaCarta crypto-key
As we have already said, the JaCarta crypto-key used in the system contains two GOST and PKI storages, each of them requires its own software, which can be downloaded and installed separately, there is also a single client that combines all the necessary tools into one package.
 Let's go to the page http://www.aladdin-rd.ru/support/downloads/jacarta/ and get acquainted with the list of offered software. The first on the list is proposed Single Client JaCarta and JaCarta SecurLogon 2.7.0.1226, in our opinion, this is the most convenient solution and there is no reason to refuse it. Nowadays Single client does not support Windows 10, so if you are using this OS, then you will need to download and install packages JaCarta GOST for Windows and JaCarta PKI for Windows.
 Actually, the installation of the specified software is carried out in the usual way and does not conceal any difficulties.
 After installing the software, we connect the crypto-key and make sure that it is detected in the system and all the necessary drivers have been installed.
 Obtaining a test CEP
If, when purchasing a crypto-key, you did not immediately receive a qualified electronic signature (CEP), which we strongly recommend to do, you can use a test CEP for the time of setup and verification. To do this, go to the page http://egais.ru/testkey/innkpp and enter the TIN and KPP of the organization.
 All that interests us on this page is a link to the generator, download it.
 We launch it, fill in the required fields and click Generation, the key will ask for a password from the GOST storage, by default it is 0987654321, enter it and wait for the end of the request generation. The only subtlety is that as the mailing address you need to specify the one that you used to register in your FSRAR personal account.
 We upload the received request to the site, do not forget to select the request file before clicking the button Download and continue.
 Now you can go to have lunch or do other things, the certificate is generated for some time and will be sent to the mail. Download it to any convenient place and write it to the key using the generator utility.
 Then launch the Unified JaCarta client or the utility for working with the GOST storage and make sure that the CEP certificate is written successfully.
 Generating an RSA key
After you have received the CEP, you should generate certificates for outlets. To do this, go to the page https://service.egais.ru/checksystem and click the button Read the terms and conditions and check their fulfillment, the system requirements check page will appear. Unfortunately, there is no other way to your personal account and you will have to go through the check every time, since you do not need to visit it so often.

If you have met all the requirements for the software, then you should pass the first two points of the check successfully. By the way, the mention in the first paragraph of Windows XP is quite interesting, theoretically you can try to run the transport module based on it.
Supplemented. Since 12/13/15, Windows XP SP3 has been officially added to the list of supported systems.
The next step is to install the module Fsrar-Crypto 2 To do this, just download and run the installer from the link.
 After that, once again repeating the check, you will finally get to your personal account. First of all, you need to get an RSA key for a secure connection, for this go to the section of the same name and select the desired outlet. Please note that each key must be written to its own token, while all this operation can be performed on one computer.

The process is as simple as possible. Select a retail outlet and click Generate a key, then enter the password from the PKI storage, by default 11111111, after which the key will be generated and written to the token.
 After the key has been successfully written, the token is completely ready for use and you can proceed to installing the transport module.
 Installing the transport module
To get the transport module, go to your personal account again. Please note that there are two versions of the transport module: test and production. All data transmitted over the working UTM are recorded in the EGAIS and it is unacceptable to use it to check and test the work. At this stage, you should install the test transport module, and only after you configure the entire system and make sure that it works, you should reinstall the transport module to its working version.
 Download the required distribution kit and run the installation, the first stage of the installation should not cause any particular difficulties.
 But then you need a crypto-key and a certain amount of care. First of all, it would be nice to find a permanent place for the crypto-key, since if it is absent, the transport module will not load and its services will need to be started manually.
After unpacking the necessary files, the transport terminal will be installed, which uses encrypted files and requires a key. First, the installer will ask you for the PKI storage password (11111111) and will offer you to choose the RSA key. This is necessary to establish a secure connection with the EGAIS servers.
 Remember the certificate code, this is your FSRAR ID, you will need it later, when setting up the inventory accounting software, you can also always look at it in the certificate properties.

Then you will need to provide a password to the GOST storage (0987654321), which contains the CEP, which is required to authenticate the data transmitted on behalf of your organization.
 After that, the installation will proceed to the final stage, at this stage the installer will connect to the EGAIS servers, receive the necessary data and carry out the initial configuration of the software for a specific client. Subsequently, work with this transport module will be possible only if the copy of the crypto-key with which the installation was performed is available.
 You can check the operation of the transport module by typing the IP address or hostname in the browser, indicating the port 8080.
 Setting up inventory software
In our example, the inventory accounting software of the 1C: Enterprise system will be used, if you use software products from other manufacturers, then refer to the technical documentation for them.
First of all, you should update the configuration to the current version with EGAIS support, today the certified configuration for EGAIS is 1C: Retail, but work with EGAIS is also supported in the Trade Department. In the future, all examples will refer to 1C: Retail 1.0, however, other 1C configurations are configured in the same way, the differences are insignificant.
After updating the configuration, go to the accounting parameters and on the tab Alcohol accounting check the box Consider alcoholic beverages.
 Then follow the link below Transport modules and create a setting for working with our UTM. You can choose the name arbitrarily, you need to specify your FSRAR ID and the UTM network address correctly. We remind you that the FSRAR ID can be found in the RSA key certificate number.
 Below we will go to the second link Used transport modules and indicate the transport module used in this outlet. Explaining, reference Store transport modules contains information about all UTM in all outlets, you need to select the one you need from this list. This setting makes an entry in the register of information that connects the place of sale (Store in terms of 1C: Retail), a legal entity and related UTM.

Finally, let's move on to setting up the schedule, since at the beginning of work with EGAIS you have to quite often request data, then we set the task to repeat every 30 seconds, subsequently this value should be adjusted in accordance with real needs.
 Finally, take a look at the tab Data exchange and make sure it is enabled and the user is specified for scheduled jobs.
 After completing all the necessary settings, restart the program, now a new menu item will appear in it - EGAIS. The purpose of the sub-items is quite clear, and working with them is intuitive and should not cause difficulties for any confident 1C user.
 However, before starting work, you need to compare your own reference books of counterparties and nomenclature with the classifiers of organizations and alcoholic beverages of the EGAIS. To do this, go to the appropriate menu item and complete the request specifying the TIN of the counterparty. To obtain a classifier of alcoholic beverages, you must indicate the TIN of the manufacturer or importer. Special attention should be paid to this point: it is the TIN of the manufacturer (importer), and not of the supplier.
Then, having received the requested classifier, you should compare it with the data of the program directories, for this we select the appropriate items in the classifier (left) and the directory (right) and press the button Compare... The matched items are highlighted in green.
 As you can see, there is nothing particularly difficult in the practical implementation of EGAIS. Now, after making sure that everything works as it should, do not forget to get a working CEP (if you have not done this before) and reinstall the UTM from test to working.


