The appeal of the Word text editor lies in the large number of formatting features that are available to the user. Even from the first versions, this editor was distinguished by an impressive number of corresponding options, which made it popular among users all over the world.
In this article, we are going to show you how to change line spacing in Word. This feature is useful for those who deal with complex text formatting.
Spacing Methods
Two things should be noted at once: firstly, the standard line indent can change from version to version, and, secondly, its adjustment can be made either for the entire document as a whole, or for a separate part of it. Therefore, the first thing to do is to mark the editable area of the document with a selection.
Note! We will demonstrate changing line spacing using Word 2013 as an example.
For a part of the document, this can be done with the cursor keys or with the mouse, and it is even easier to select the entire document - just use the keyboard shortcut Ctrl + A. In this case, the background color of the selected text will become inverse.
The question of how to reduce the space between paragraphs in Word has no definite answer. For the convenience of the user, there are several ways to solve this problem:
- Using the "Home" toolbar.
- By accessing the Page Layout tab.
- By adjusting the default size.
- Using keyboard shortcuts.
Home Toolbar
On the "Home" panel there is a button with the image of horizontal stripes and a pair of arrows - this is the "Interval" button we need.
Pressing it leads to the appearance of a drop-down panel on which you can select one of the typical sizes, or (using the "Other options for line spacing" option) - customize your own.
Page layout
Another way to increase or decrease the space between lines in Word is to refer to the Page Layout tab. There you will find an arrow to the right of the word "Paragraph". 
Pressing this arrow opens access to the settings window, among which there is a line spacing regulator.
Default size
In the same window there is a button "By default". Pressing it leads to the saving of your selected settings in the program.
To understand how to remove the space between paragraphs in Word, you can refer to the same "Page Layout" tab - there are a couple of sliders on the "Paragraph" panel.
Advice! If you select the necessary paragraphs and set the spacing value to zero, then the space between the paragraphs will disappear.
By specifying the "Before" and "After" values, you can vary the inter-paragraph distances in an arbitrary way.
Keyboard shortcuts
To quickly change the line spacing in Word without using the "mouse", there are several useful keyboard shortcuts:
- CTRL + 1 - sets single line spacing in the text.
- CTRL + 2 - Increases the indent to double.
Here, in fact, are all the main ways to work with line spacing in Word. If you still have a question about working with Word,. Together we will try to quickly figure it out.
You can set single line spacing for the whole document or part of it.
Using the button Spacing between paragraphs in the tab Design you can quickly apply single spacing to an entire document.
In the tab Design press the button Spacing between paragraphs.
Select item No paragraph spacing.
This will override the options for the current style. If you want to reset the settings later, click again Design > Spacing between paragraphs and select an option under Styles set... It can be a parameter Default as shown above, or the name of the current style set.
Applying single spacing to part of a document
To apply single spacing to a portion of the document:
Select the paragraphs you want to change.
In the tab home press the button.
Select a value 1,0 .
Note: When you change the font, the spacing between lines and paragraphs may change.
Applying single spacing to the entire document
The easiest way to set single spacing throughout your document is to apply the Word 2003 Quick Styles set. Applying this set will set single line spacing with no extra space between paragraphs and no indentation on the first line of a paragraph. Keep in mind that such spacing makes it difficult to visually distinguish between paragraphs. One way to solve this problem is to add a blank line between paragraphs.
Advice: If you want to increase the space between paragraphs, you can use the Traditional quick style set, which indents the first line of each paragraph.
Use single line spacing with no extra space between paragraphs
In the tab home in Group Styles press the button Change styles.
Please select Styles set and click Word 2003.
If you want to apply these line spacing settings in all new documents, click the button again. Change style, and then select Default.
Use single line spacing with blank line between paragraphs
If you want to use single line spacing with a blank line between paragraphs so that you don't have to press Enter twice after each paragraph, change the paragraph style to Normal.
Apply single spacing to a selected paragraph

Remove extra space before or after the selected paragraph

Setting single spacing for addresses
When entering addresses, it is easiest to use single spacing, ending each line with a line break rather than a paragraph break. In this case, each of the addresses, consisting of several lines, will be a separate paragraph. You can then apply the paragraph spacing style you want without adding extra space between address lines.
If you have entered addresses so that each line is a separate paragraph, or have been merged, you can use a quick style set to remove extra space between paragraphs. You can also highlight the address lines and remove any extra space between them.
Single-spaced address entry
Enter the address. At the end of each line, press SHIFT + ENTER, and at the end of the last line of the address, press ENTER.
Click anywhere on the entered address.
In the tab home in Group Paragraph press the button Spacing between lines and paragraphs (Line spacing in Word 2007).
Click 1,0 .
Right-click the addresses and select Styles.
Enter a name for the style, for example The address.
When entering the following addresses, apply a new style to them (on the home in Group Styles select the created style).
Formatting address paragraphs to remove excess space
In the tab home in Group Styles press the button Change styles.
Please select Styles set and click Word 2003.
Select paragraphs with addresses.
In the tab Page layout using arrows Front and After specify the desired value.
If your entire document consists of addresses (for example, contains a sheet of address labels), you should use the Word 2003 Quick Styles.
If addresses are included in a document containing intervals of different sizes, and you want to change the intervals only in the part with addresses, do the following:
Line spacing in Microsoft Word determines the distance between lines of text in a document. Spacing is also or may be between paragraphs, in which case it determines the amount of white space before and after it.
In Word, by default, a certain line spacing is set, the size of which may differ in different versions of the program. So, for example, in Microsoft Word 2003 this value is 1.0, and in newer versions it is already 1.15. The spacing icon itself can be found in the "Home" tab in the "Paragraph" group - there simply are numeric data, but the checkbox is not set next to any of them. How to increase or decrease the distance between lines in Word will be discussed below.
Why do we start with exactly how to change the spacing in an existing document? The fact is that in an empty document, in which not a single line of text has yet been written, you can simply set the desired or necessary parameters and start working - the interval will be set exactly as you set it in the program settings.
The easiest way to change the spacing between lines in the entire document is by using Express Styles, in which the required spacing is already set, which is different for each style, but more on that later. In case you need to change the spacing in a specific part of the document, select a piece of text and change the indentation values to those that you need.
1. Select all the text or the required fragment (use the keyboard shortcut "Ctrl + A" or the button "Select" located in the group "Editing"(tab "Home").

2. Click the button "Interval" which is in the group "Paragraph", tab "Home".

3. Select the appropriate option from the drop-down menu.

4. If none of the proposed options suits you, select the item.

5. In the window that appears (the tab "Indents and Spacing") set the required parameters. In the window "Sample" you can see how the display of text in the document changes according to the values you entered.

6. Press the button "OK" to apply changes to the text or part of it.
Note: In the line spacing settings window, you can change the numerical values to the steps available by default, or manually enter those that you need.
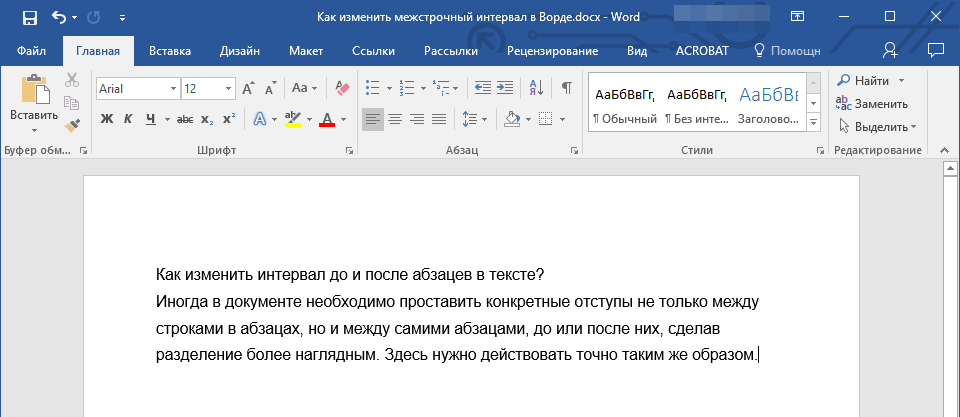
How to change the spacing before and after paragraphs in the text?
Sometimes in a document it is necessary to put specific indents not only between lines in paragraphs, but also between the paragraphs themselves, before or after them, making the separation more clear. Here you need to act in exactly the same way.
1. Select all the text or the required fragment.

2. Click the button "Interval" located in the tab "Home".

3. Select one of the two options presented at the bottom of the drop-down menu "Add spacing before paragraph" either "Add spacing after paragraph"... You can also choose both by setting both indents.

4. More precise settings for spacing before and / or after paragraphs can be done in the window "Other line spacing options" located in the button menu "Interval"... There you can also remove the indentation between paragraphs of the same style, which may clearly be necessary in some documents.

5. The changes you made will instantly appear in the document.

How do I change line spacing with Express Styles?
The spacing methods described above apply to all text or to selections, that is, the same spacing is set between each line and / or paragraph of text, selected or specified by the user. But what if you need to separate lines, paragraphs and headings with subheadings in one go?
It is unlikely that anyone wants to manually set the spacing for each individual heading, subheading and paragraph, especially if there are quite a lot of them in the text. In this case, the “Express Styles” available in Word will help. How to change the intervals with their help will be discussed below.

1. Select all the text in the document or a section, the spacing in which you want to change.

2. In the tab "Home" in Group "Styles" expand the dialog box by clicking on the small button in the lower right corner of the group.

3. In the window that appears, select the appropriate style (you can also change the styles directly in the group, by hovering over them, using a click to confirm the selection). By clicking on a style in this horse, you will see how the text changes.
4. After choosing the appropriate style, close the dialog box.

Note: Changing the spacing with express styles is also an effective solution in cases where you do not know what spacing you need. Thus, you can immediately see the changes rendered by a particular style.

Advice: To make your text more visually appealing, and just plain descriptive, use different styles for headings and subheadings, as well as for body text. Also, you can create your own style, and then save and use it as a template. For this you need in a group "Styles" open item "Create Style" and in the window that appears, select the command "Change".

That's all, now you know how to make a single, one and a half, double or any other interval in Word 2007 - 2016, as well as in older versions of this program. Now your text documents will look more visual and attractive.
Set the line spacing before starting work. If you want to create a document with one standard line spacing, set it before you start (to save time later). To change the line spacing, go to the Home tab or Page Layout tab.
Change the spacing on the Home tab. On the Home tab, find the Paragraph section. Here, click the Line Spacing icon to open the Line Spacing menu. The icon has 4 small lines with an arrow pointing up and down. From this menu, you can select general line spacing options.
- If you do not see the Line Spacing icon, it is most likely missing because the window is not large enough. You can change the spacing by clicking the arrow icon to the right of the word Paragraph. This will open the Paragraph menu.
- In the Paragraph menu, you can adjust the line spacing using the "Line spacing:" drop-down menu in the Spacing section.
Change the spacing on the Page Layout tab. On the Page Layout tab, click the arrow icon to the right of the word Paragraph. This will open the Paragraph menu. In the Paragraph menu, you can adjust the line spacing using the "Line spacing:" drop-down menu in the Spacing section.
Change the spacing between paragraphs. In addition to changing the spacing between lines, you can change the spacing before and after each paragraph. On the Page Layout tab, look for Spacing under Paragraph.
- "Before" will add space before the beginning of the paragraph.
- After will add space every time you press Enter to start a new paragraph.
Line spacing options. By default, line spacing is set to 1.15. If you want to set the spacing to single, you need to select 1 in the drop-down menu of the "Line spacing" icon or "Single" in Paragraph-Line-Spacing.
- “Exactly” allows you to set the exact distance between lines, measured in points (72 points in inches).
- The “multiplier” allows you to set a larger interval, for example, a triple interval.
Change the default spacing. If you want to change the default spacing (1.15), set the values you want and click the Default ... button. Word will ask you to confirm the changes to the default values.
Change the spacing for certain parts of the text. To do this, select the text you want to change and then adjust the spacing as described above.
- You can change the spacing of an entire document by selecting all of the text. To quickly select all text, press Ctrl + A (PC) or Command + A (Mac). It will not affect headers, footers, or text boxes. To change the spacing in them, you will need to select these sections separately.
Perhaps, Word (Word) is the leader of the top programs most frequently used by the user. However, Word is not as simple a program as it seems at first glance. It has a ton of functions and variation parameters that some "advanced" users don't even know about. In this article, we will take a closer look at all the intricacies of Microsoft Word in relation to spacing settings.
Intercharacter spacing
This setting is used very rarely. Many people even believe that this parameter cannot be changed, but when you need to enter a caption in the table or avoid the need to put a hyphenation by leaving a word on one line, this parameter can help out quite well, and therefore it is important to know how to set it up.
How do you set the required character spacing?
- Select the required word and press the right mouse button. (Tip! For quick selection, point the cursor over the word and double-click the left mouse button).
- In the drop-down menu, select the "Font" parameter, in the window that appears, go to the "Advanced" tab.
- Change the "Interval" parameter as necessary. There are three options to choose from - thin, regular and compact.
Line spacing
To control this parameter, we will use the "Paragraph" menu:
- Select the lines for which we want to make a different spacing, and press the right mouse button.
- At the moment we are interested in the "Spacing" section of the "Indents and Spacing" tab.
- The available line spacing options are single, 1.5 lines, double, minimum, exact, and multiplier. The latter allows you to set a multiplier for the spacing between lines. You can enter non-integer numbers, for example "1.15". The fine option allows you to specify the exact number of points for line spacing.
Spacing between paragraphs
If you want the spacing between paragraphs to differ from the line spacing, follow these steps:
- Select the paragraph for which we want to make a special spacing, and press the right mouse button.
- In the drop-down menu, select the "Paragraph" parameter.
- In the "Indents and Spacing" tab, we turn to the "Before" and "After" parameters of the "Spacing" section.
- These parameters mean the spacing before and after the paragraph and can be set to any desired number of points. Moreover, you can use both integers and fractional numbers.
Spacing between pages
As a rule, by default, Word spacing is set, and most users find it more convenient to work with such spacing, but others have a question - how to remove the spacing in Word?
- Select the "File" tab of the main Word menu, click on the "Options" item.
- In the window that appears, select "Screen" and uncheck the "Show fields between pages in layout mode" option.
There is another way to perform this procedure - you need to double-click the left mouse button on the gap between the pages. By repeating this procedure, you can return the interval.
Page spacing (margins)
To control the spacing on the page, there is a special "Fields" menu. Where to find it and how to manage it?
- On the main Word toolbar, select the "Page Layout" tab, in the "Page Setup" group of parameters, find the "Margins" item.
- Left-click on the "Fields" item. A drop-down menu with a set of ready-made field styles will appear in front of us, and at the very bottom we will see the line "Custom fields".
- You can choose either a ready-made style if you are satisfied with that, or you can click on the "Custom fields" line and set the parameters of the desired style in the window that appears.
You can set margins without the help of a special menu, but by moving the "sliders" of the vertical and horizontal rulers, which are always displayed in Word.
That is, perhaps, all the subtleties about the work of intervals. Now you know how to make spacing in Word "for yourself". We hope you will remember these simple instructions and will actively apply them. You can read more about customizing paragraphs in Word in this article.


