Where to insert this code in WordPress? General structure of theme files. How to insert Html code into Html page
Where to insert this code in WordPress? General structure of theme files. How to insert Html code into Html page
06.12.2021Windows Phone
Moreover, I would like to immediately clarify that we will insert the code into the article itself, so that our readers can copy it without wasting time typing the text itself. Thus, we will increase the convenience () of our resource - this time. And the articles will look more professional and finished - that's two.
I would also like to note that the information in this article will be useful for people who either, as we tell you, how to make various kinds of additions on the site, or users who just like to share useful information. And it doesn't matter that this information is a code 🙂 By the way, I'll reveal a little secret, on this project we display it using the Wp-Syntex plugin.
You ask: "Why do we use this particular?" The answer is simple - there are no comrades for taste and color. Joke. In fact, we chose this plugin because it is easy to use, it perfectly adds visual style to various kinds of programming languages (css, html, java, javascript, perl, sql, etc.), and it does not overload our server.
Well, since I let slip about Wp-Syntex, so let's use his example and show how to insert code into articles on WordPress.
First you need to install this plugin. We talked about how to do this in the article about .
Therefore, I will not describe this action here.
As a result, you will have the following output:
The code you want to be displayed
Also, instead of php in this code, you can insert another programming language, such as css or java. At the same time, the style of the appearance will change.
Additional functions of Wp-Syntex
If you add the attribute line, that is, the code you will need to insert will start like this:
The code you want to be displayed
Hope you noticed the difference?
There is one more small attribute that you may need - this is escaped... It allows you to convert html character codes directly to the characters themselves. For example, "& gt" it converts to ">". In order for this function to work, insert the following attribute into the opening “pre” tag:
escaped = "true"
Accordingly, the tag will begin like this:
<
pre lang=
"php"
line=
"1"
escaped=
"true"
>
Also on the Internet, I found information that you can install another plugin (WP-Syntax Button), which works in conjunction with our plugin and adds a code insert button to the WP editor. I was not lazy and decided to protest it.
Immediately after installing it, I was alarmed by the fact that it had not been updated for a long time and had not been tested with our version of Wordpress. Well what can I say, my fears were justified.
After activating WP-Syntax Button, I decided to insert a java script into one of our articles. I did everything as it was indicated in the mountain instructions and recommendations. I inserted the script into the article, selected it and clicked the "code" button.
Then he indicated the programming language and the line number from which the script output should begin.
You may ask, why did I write about this experiment in this article? By this I wanted to say that when you are looking for some information on the Internet, pay attention to the publication date. After all, there is a very high probability that the information in the old article was relevant several years ago, but at the moment it simply does not work, and its application or implementation can lead to the vulnerability of your project.
On our blog, I try to keep all the material up to date, constantly follow the updates and, if necessary, make adjustments to the already written articles.
If you want to receive up-to-date information to yourself by e-mail, then I recommend it.
Video "How to insert HTML code into an article"
Friends, if someone prefers to see how this is done, then I recorded a video for you. And let me remind you that we also have a youtube channel that you can also subscribe to.
Related articles:
Well, I hope the article turned out to be not complicated, and I managed to tell you in detail about how you can insert html code into a website without unnecessary problems.
Don't neglect the aesthetic appearance of your blog. After all, our reader, as in life, meets on clothes, and sees off according to the mind.
That's all for me!
Bye Bye!
Best regards, Anton Kalmykov
Let's talk about how to insert the code into the site, how to insert the html code, counter code, third-party script code into Artisteer. In the program itself, the code can be inserted in two places, the first is when creating the footer by clicking on the "text" button, and the second is at the very bottom of the page, when setting the export settings, the "Description" tab. In the latter, it is still more convenient to insert after the template has been created.
How to insert the counter code
Counter code can be inserted at the bottom of the page in the place indicated in the picture, this is the most logical place. In templates Joomla counter code can be inserted by opening the index.php page of the template folder with notepad. We find at the bottom of the line:
(highlighted with a blue frame). By the way, I brought them out through loading from files, and not by placing the scripts themselves in this area. After that, I sped up my blog a lot. There will be a separate article on how to do this. Wait!
Hopefully, when you are told to insert code in these areas, you will get it done without any problems.
Let's move on to a more complex question and try to learn how to determine the places in other template files into which various other codes are inserted. Typically, these codes include:
Display of similar posts;
Displaying the subscription form;
Displaying social buttons and so on.
All these things are inserted after the main part of the content, that is, after the end of the article. Each has a different template code and, therefore, a universal answer to the question "Where does my article output code end up?" simply no.
But you can easily define the end of the code, after which you need to implement the function you need. I have already partially shown this method in the article about choosing a WordPress template (). I then used the standard functionality of the Internet browser.
To better understand the whole essence of this method, I highly recommend watching the video at the beginning of this post. In it, I showed how everything happens in real time. Well, now I will try to describe it as clearly as possible.
I'll show it using the Google Chrome browser as an example. In other browsers, this function is also available, it may be called a little differently.
Google Chrome - view the element code;
Firefox - explore an element;
Opera - inspect an element.
The principle in 3 browsers is similar. Now I will show you how to determine where to display any area in any template.
Go to the view of the element code (Google Chrome). Right-click on an empty area of the page.
After that, a panel appears at the bottom of the page, which shows the entire source code of the page, which we can edit and watch how the structure and appearance of the template will change in real time. But data changes are not saved. To do this, you need to edit the template files themselves.
This is what this panel looks like.
With the arrow, I pointed to a magnifying glass (magnifying glass), by clicking on which we can inspect the structure of the template and determine which blocks our template consists of. I call this function an inspector.
After clicking on the inspector, we can move the mouse over our page and we will see that all the elements that we hover over begin to be highlighted with a colored background. As an example, I will show a screenshot from the article about choosing a template. There I hovered over the title of the post.
If we need to insert code after the output of our article, then it will not be difficult to guess that we need to inspect the area of our template and find a block that contains all the content of the article. You can search for both the end of the block and the beginning. That is, you can inspect the template from the bottom and from the top.
But here's one remark
... We need to find not just the lines of the article, but the blocks in which the content itself is located, since there are no articles in the template files. There is only code that displays content, and it is enclosed in blocks. It is after the closing block tag and you will need to paste the code.
So what are we doing? Click on the magnifying glass icon and start inspecting the area in which our article is located. You need to find such a part of the page when the area of the entire article is highlighted. This will be the block that displays the content.
For example, I created a new article with small content to show how this block will be highlighted.
You should also poke around to find the block that contains your content. On hover, you see a small tooltip showing the name of this block.
When you find such a part of the template, you press the mouse button and this part becomes active. A line of code with this block will be automatically highlighted in the element code view panel.
As you can see, this block has exactly the same name as in the hover tooltip.
When we know the name of the block in which the main part of the article is displayed, we can go to the required file and insert the code we need after this block. Let's take a post output file (single.php) as an example.
I open it in Notepad and look for a line in the code that starts exactly the same as in the element code view panel.
It is very convenient to work in the Notepad editor, since when you click on the opening tag of the block, the closing tag is also highlighted (shown in the image above). The end tag indicates that this is the end of the content output. It is after him that we can insert our social buttons, related posts and other functions.
I just inserted the social buttons there along with the form to sign up for updates.
This is how they are displayed on the pages.
Similarly, it is inserted into other template files (pages, categories, archives ...).
Without practice, this insertion method is unlikely to be mastered from text and images. Therefore, take it and try it. I am sure that everything will work out. Also to help the video at the beginning of the article.
About determining the place in the template file for the subsequent insertion of the desired one into it, when we figured it out.
There is one last moment, which is worth sanctifying at this point.
There are many settings that require intervention in the template's functions.php file. But, how to insert codes into it, you also need to understand.
As a rule, on all blogs they write that the insertion must be made at the very end of the file before the closing tag?>.
But what if this tag is not in the file? For example, I just don't have it. How to be in such a situation? The absence of an end tag does not mean that the file is invalid. The blog works. So everything is OK.
In this case, I propose to do the opposite - insert it into the code at the very beginning of the file, before the opening tag. Take a look at the image below.
The opening tag is highlighted in red, and the code that was inserted is highlighted in blue.
This is one option. You can also paste code at the end of the file, but before the last code. In this case, you need to understand at least a little where the last code starts, so as not to cut it off.
That's all. If suddenly you have the same situation with the absence of a closing tag in the funsctions.php file, you will know how to proceed.
Defining visual styles in a template
Also, we ourselves can view the design styles for page elements and change them, as well as add our own. The same element inspector helps with this.
When we find the required element and click on it, the styles for the selected block (element) are displayed in the right area of the code view panel. I'll show you the styles for the same article block discussed above.
If we want to edit these styles in real time and see how this or that element will look, we can change them right in this panel. Just click on the values of the desired styles and change them.
But the changes will be valid only until the 1st page refresh. To apply these styles, you need to add them to the template's stylesheet. In one of the images above, I showed with a blue frame an area that shows the name of the file in which these styles are written, as well as the exact line from which they begin.
Therefore, open the stylesheet style.css and look for line 890 in my case.
Here you can edit them. Save the file and upload it to the hosting.
Note that I edit all files on my computer. In this case, I use external programs, which makes it possible to undo any changes if any problems arise. The same goes for various experiments with codes and scripts - everything is on.
I strongly recommend that you also perform similar editing of any files on your computer. To do this, you first need to download the files to your computer from your hosting using an ftp client. I wrote about this in. And then just open the files with any editor convenient for you that can open them. I use Notepad for this purpose.
This concludes the article. Here is such a tricky process of determining where to insert some code or script. At first glance, this procedure may seem complicated. But everything is very simple. You will try a couple of times and you will not ask such questions.
Of course, you can insert codes and scripts into your blog using special plugins, which I will definitely consider in the following articles. But, in order to avoid using them, you can do such actions without them, which I recommend. By doing this, you will get rid of unnecessary load on the site, thereby speeding it up and making it more convenient for your visitors to use.
All friends. This concludes. I am waiting for your questions in the comments. Let's figure it out. See you in new materials.
Best regards, Konstantin Khmelev.
We have released a new book, “Content Marketing on Social Media: How to Get Into the Heads of Subscribers and Fall in Love with Your Brand”.
There are many tools out there to help you improve your website, improve your online business, and improve customer engagement. Many of these tools are free. But what if you're not a web developer and don't know how to install them on your site? This is a big hurdle.
As ironic as it may sound, a business that develops useful tools for your site also has an obstacle to its own prosperity - the need to impose the installation of its code on users.
Let's try to solve two problems at once by talking about the most common ways to insert JavaScript code / snippets (fragments) for websites:
On WordPress.
Self-written admin panels (using old-school FTP).
At Squarespace.
On Shopify.
We'll touch on Wix at the end of the article. In most cases, this platform does not allow installing JavaScript codes or snippets, but it does offer an alternative in the form of integrations for various services.
Where to get the installation code
Let's see where to find the installation code using the Crazy Egg service as an example.
The process is standard: we enter the registration data, after loading we get into the dashboard. There we are looking for a section with a code.
How to embed code into a WordPress site
You can use a special plugin - Tracking Code Manager.
To insert the Tracking Code Manager, go to the site admin panel and look for the plugins section in the control panel.
Select the "Add New" function.
A search bar will appear on the right. Enter "Tracking Code Manager", then click "Install Now".
After finishing the installation, you need to make sure that the plugin is activated. Let's go to the settings.
Click "Add new Tracking Code".
You can do without the Tracking Code Manager plugin. In this case, our option is to paste the code into the header.php file of the WordPress theme (more on that later).
How to install code on WordPress.com
A WordPress site and a WordPress.com site are two different things.
A WordPress site is a site that is managed by a CMS installed on its own server. This means that you paid for the domain name (myname.com) and for hosting.
The WordPress.com site is free. You can register a website on it without paying for hosting. In this case, the site URL will be: myname.wordpress.com. There are a few additional steps you need to take to change your domain name.
When you run your site on WordPress.com, you are limited in the choice of JavaScript codes and snippets that you can install. The reason is in the security protocol - the developers do not allow users to insert codes into the platform. For example, the MySpace developers allowed. Obviously, this is why the site dropped from 5th place in the world to 1967 in six years.
At the same time, WordPress.com offers users various bonuses for running a business. For example, integration with Google Analytics or the ability to add social media buttons. But in some cases, this may not be enough.
How to install JavaScript codes and snippets on a custom admin panel
Using FTP. We'll have to go back to the basics.
Nowadays, many sites are self-written. Self-written site was created from scratch, does not use CMS for content management.
Let's imagine that we have just such a site. It will be a little more difficult to put the code on it than on WordPress, because you will have to remember about FTP.
FTP managers like FileZilla allow you to drag and drop files and images from a website to a server. Using the program, you can add files to the server or download them, replace old files with new ones, delete unnecessary data, change the names of docks.
There is nothing complicated in the data transfer protocol: after 20 minutes you can feel like a pro. For most people, the hardest part is simply contacting the server.
If you have any problems with the server, contact your hosting company. It may take an hour, but after 60 minutes you will know everything you need to know. I usually recommend recording such conversations through ScreenRecorder. Or at least make notes manually.
Once you've logged into the FTP server, be sure to do. If you make a mistake, important files won't go anywhere. You can make a backup by simply dragging and dropping all files from the server to your computer.
Typically, the FTP manager API has two columns. For example, in the image below, in the left column, you see files that are stored on your computer. On the right - files from the server.
To change or add files, simply drag and drop them from one column to another.
Warning
Replacing files is dangerous. You can easily replace a new version of a file with an old one and lose more current data, accidentally delete something important, or make another mistake. The backup copy allows you to hedge against such mistakes and protect yourself from unnecessary problems. Remember to save all files in a separate folder on your computer before making any changes.
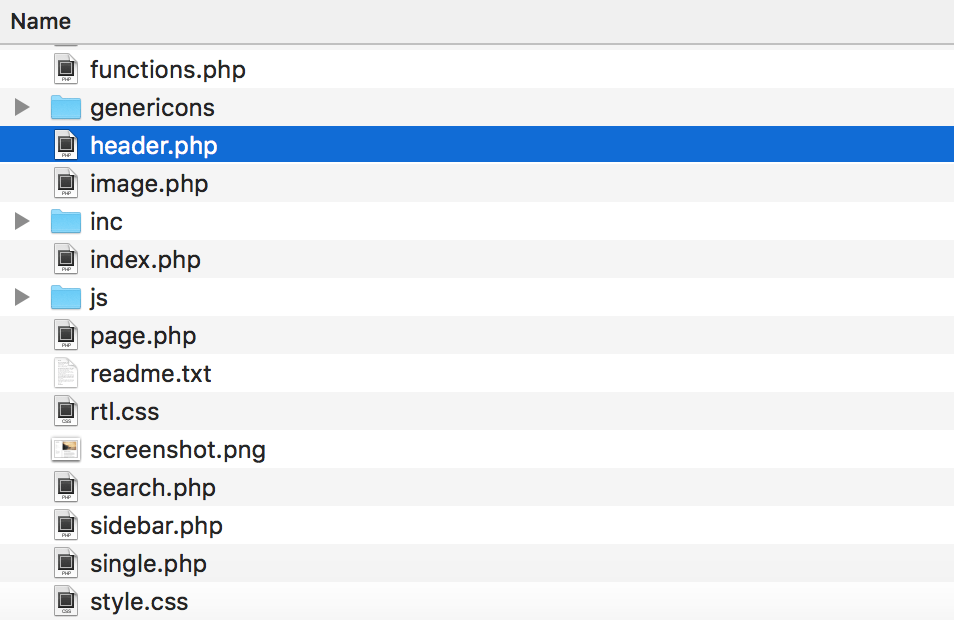
How to insert code using header.php
Let's say we have a website that we use WordPress to manage. To insert the code, we need to find the header.php file or another file called header or head. Header needed to activate a code or JavaScript snippet on all pages of the site. You can use a free program like Sublime Text to open the file. With its help, you need to open a file that is stored on your computer, and not a similar file on the server.
When we open the file in Sublime Text, we can see the rainbow from the color code. Do not be afraid, everything is simple there.
All pages are divided into two sections - The head and the body. Headings are denoted by HTML code
and... Body -
and
.
Most of the things that make the site work and display text are in between these two sections. You can use page search to find these tags. In most cases, you can insert your code right before the closing tag.
After you have inserted the code or snippet, save the file and upload it to the server. Ready.
Now about the self-written admin panels. If your site was built manually and you can't find the head or header file, you will most likely have to insert the code manually into each page. Most often, this does not cause much difficulty.
The image above is a hypothetical HTML site that consists of four HTML files. If we wanted to insert any code on it, we would have to open all these files one by one and insert the code or snippet into the tags of each of them. After that, the process is standard: we save the files and upload them to the server instead of the old ones.
How to embed code on a Squarespace website
Squarespace has made it easy for its users. You can use "code injection" to insert JavaScript code or snippet. In the menu, go to the Settings> Advanced> Code Injection tabs. You can add code to
or site footer.
We find the settings.
Scroll down and click on "Advanced".
We select "Code Injection".
Paste in the code and save the changes.
How to embed code on Shopify
In the control panel, find the section with Online Stores and select Themes.
To access the desired tab, click on "Actions" and select "Edit HTML / CSS".
We need fragments.
Clicking on the option will open a dialog box with the ability to add a new fragment.
Give the snippet a name and click on the Create snippet button.
Enter the snippet code in the "tracking snippet.liquid" area. Click save.
How to embed the code if your site is on Wix
Wix quickly became a popular website builder. Like WordPress.com, it imposes restrictions on its users in the ability to insert codes.
But Wix offers a solution in the form of the Wix App Market. There you can find a variety of widgets for marketing, social media and analytics. By the way, there you can also vote for the most needed widget.
Hello dear friends. Today, in continuation of the topic, accelerating the loading speed of the blog, let's talk about the possibility of replacing plugins with "light" scripts. Scripts, unlike plugins, have a much lower load on the server, and therefore the site load speed will be higher. Today there are a lot of plugins and they are able to solve many problems of bloggers. But often, these plugins can be replaced with faster scripts. And sometimes even disable unnecessary plugins altogether. And the fewer third-party plugins, the higher the loading speed of the site or blog.
If you analyze the site loading speed, you can see which plugins slow down the loading speed of your site. What services to use for verification I wrote. In my case, the biggest brake is a plugin that allows you to display examples of source code in articles, with syntax highlighting for this very code. This plugin is called SyntaxHighlighter.
The test result did not even fit on the page. Of course, the highlighting of the code is very beautiful, but if you figure it out, it's not about the highlighting. By and large, the efficiency of the code is important. And if the code is just inserted, then there is a high probability of its inoperability.
And today I will tell you how to replace the SyntaxHighlighter plugin with regular code, and even insert a button into the editing panel of your blog.
How to enter a code in an article without a plugin
It is known that in WordPress, in order to display an example of the source code in an article, when typing an article from the visual editor, it is enough to go to the test one and enclose the required code in tags
Your code
But such code will hardly stand out in the bulk of the text of your article. And so you can add multiple styles, say, background color, font color, border, and so on. This way your code will be most clearly presented in the form of an example.
How to change the view of the displayed code
This is quite simple to do.
Option 1
You can assign to the tag
Class, for example, class = "cod" and set the required styles in the style.css file..cod (width: auto; background-color: whitesmoke; border: 1px solid # C7C3C3; border-radius: 5px; color: # 167dec;)
Option 2
You can set styles directly when inserting the code. It will look something like this:
Your code
And in the first and second examples, if the inserted code gets out of the bounds of the article, you should add the property overflow: auto; which will allow you to manipulate the block element.
These methods are good for everyone, but I would like something simpler. In general, again, laziness - the engine of progress makes you come up with something that will facilitate this process.
How to add the "Insert Code" button to your WordPress editing panel
A simple button in the WordPress editing panel will make this process easier. And it looks like this.
If you want to put such a button on yourself, then you will need a few minutes of time and a few files from me. So let's get started.