A native context menu is rarely used in a web page interface. After all, it is not at all obvious to the user that on some element it is necessary to click not with the left, but with the right mouse button and select an item from the list. In addition, not all site visitors like to use the right mouse button, and on smartphones it does not exist at all, only an imitation. Despite these features, in HTML5 it is possible to create your own context menus, this has been implemented so far only in Firefox, and that is very peculiar.
First, let's see how they are generally created different menus. To do this, use a combination of tags and (example 1).
Example 1: Context Menu
HTML5 IE Cr Op Sa Fx
Context menu

The contextmenu attribute tells us that our menu is a context menu and at the same time points to the tag with the given ID (in this case edit ). So far, no browser understands the above example, including Firefox. For it, instead of a tag, a non-standard tag should be inserted (example 2).
Example 2: Menu in Firefox
HTML5 IE Cr Op Sa Fx
Context menu
The code turned out to be invalid, but when you click on the picture in Firefox, it appears beautiful menu(Fig. 1).
Rice. 1. Context menu
While this menu is not working properly, so let's change it. First, let's add an icon next to the menu item using the icon attribute, so the menu will be prettier. The value specifies a relative or absolute path to the graphic file. Then you need to make sure that when you click on the menu item, some action occurs. To do this, we will use the onclick event and use it to call desired function. Example 3 shows the creation context menu for text, if you select "Edit" in it, then the text can be edited. In fact, a hidden text field is used, which becomes visible when the edit () function is called, while the text itself is hidden during editing. After pressing Enter, the text from the form is inserted into place text paragraph, giving the impression that it was we who ruled it. The form is hidden again after editing is completed.
Example 3: Text Editing
HTML5 IE Cr Op Sa Fx
Context menu #edit ( width: 200px; border: 1px solid #ccc; display: none; ) function edit() ( document.getElementById("text").style.display = "none"; document.getElementById("edit" ).style.display = "block";document.getElementById("edit").value = document.getElementById("text").innerHTML;document.getElementById("edit").focus(); ) function text() ( document.getElementById("text").innerHTML = document.getElementById("edit").value; document.getElementById("edit").style.display = "none"; document.getElementById("text").style .display = "block"; )
Sample text
The view of the new menu is shown in fig. 2.

Rice. 2. Icon menu
As you can see from the example, creating a context menu is no different from creating other interactive elements. When a menu item is clicked, our function is called using the onclick handler, and then this function will do what we want. Firefox 8 was the first browser to support HTML5 context menus, but it's surprising why Firefox developers introduced your own custom tag for the menu. There are several options for the development of events:
- the tag will be added to the HTML5 specification;
- this tag will become obsolete and will not be supported in future versions of Firefox;
It remains only to wait for the response of other browsers in which the tag will finally be implemented, as well as different menus based on it.
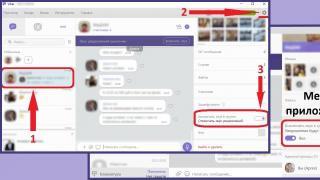
Instruction
If the menu is not displayed in the browser, and you see only the selected web page on the screen, then your browser is working in full screen mode. There are several ways to get out of it.
If this command is not in the drop-down menu, use the keyboard shortcut Alt and Enter, which allows you to switch to and back in many programs. also in different browsers mode change is carried out using the F11 key.
When the panel is no longer hidden behind the top edge of the screen, move the cursor to it and right-click. Set the marker in the context menu opposite the item " Menu Bar" or " Menu Bar"(The wording depends on which browser is installed).
After this action the browser window should display standard menu items. The "File" item allows you to manage the program window, open and close new windows and tabs, send web pages for printing.
The "Edit" item contains the standard commands "Copy", "Cut", "Paste", "Find" and is not much different from similar paragraph in any other program. Behind appearance the browser window corresponds to the "View" item.
Access to the resources saved by the user is carried out using the "Favorites" or "Bookmarks" item, the "Tools" or "Tools" menu allows you to customize the browser according to your needs.
The menu bar can also contain other tools, such as the status bar, favorites bar, navigation bar. To customize their display, also move the cursor to the panel, right-click on it and select the necessary items from the context menu, marking them with a marker.
Sources:
- where is the browser
The number of groups playing music of all directions from jazz to rap-core can be judged by visiting one club. During the evening, up to two dozen come on stage. To stand out from this crowd, it's not enough to play good music - you need to invest in your promotion. If the team is not ready to part with a large amount, you have to look for outside help.
Instruction
Sponsors tend to partner with groups that have already achieved success. Therefore, before, win a sufficiently large and stable audience. To do this, in addition to music, take care of the scenography, special effects, the interaction of musicians on stage, make each performance a little new.
Compose organizations located in your area or in the area whose activities are directly or indirectly related to music. In another list, list the rest of the organizations that do not have a connection with you. Help can come from anywhere, but start with the first list.
Learn possible options. Before contacting any organization, check if it is sponsoring and in what area; whether other musicians applied to it and whether they were refused. Even if you yourself, study his business before making any decisions.
For a while, you will become the face of the organization. Therefore, considering your candidacy, the sponsor will be very picky about your appearance. If you are not ready to change your image for the sake of conformity, do not count on consent. As a rule, a potential sponsor does not insist on such a change, but simply refuses. If you do not take into account the criterion of appearance, you will lose time and, possibly, the chance of meeting with a real sponsor.
Don't agree on anything. All conditions must be spelled out in the contract. Discuss each of its points with a lawyer. If something doesn't suit you, don't be shy about it. It is better to find out all the controversial points now than to bite your elbows later because of your own inattention.
Related videos
The "Favorites" log is necessary in order not to look for those resources that the user often accesses in daily work. It provides fast access to the right materials. To find "Favorites", you need to perform several steps.

Instruction
"Favorites" exists not only in browsers, but is also provided in the menu of any folder stored on the computer. Since the menu bar is always present in folders, you do not have to configure anything additionally. Open the folder, select the "Favorites" item from the menu by clicking on it with the left mouse button, the context menu will open. To add a folder to the list, select the "Add to Favorites" command by clicking on it with the left mouse button. The selected folder will appear in the menu.
When working with Internet browsers, you may need to customize the display of the menu bar or special button, with which you will access the Favorites magazine. To do this, in Internet Explorer, right-click on the panel, in the context menu, select one of the available options. Set the marker in front of the "Menu Bar" item - this way you can open "Favorites" in the same way as described in the first step.
If you want the bookmarks to be displayed on the browser panel, select the "Favorites Bar" item in the context menu, also marking it with a marker. Another toolbar will be added to the browser window. If you feel like it's taking up too much space, you can quickly access the right resources and in another way. Click the star icon on the toolbar and the log will expand. Select the "Favorites" tab in it to view a list of site addresses stored in the log.
In browser Mozilla Firefox a magazine with a list of resources is called Bookmarks. You can call it through the item of the same name in top line menu by setting the display of "Favorites" in the toolbar or by opening the "Library" magazine. This journal is called up in several ways: select the "Bookmarks" item in the menu bar and the "Show all bookmarks" command, or press the combination Ctrl keys, Shift and B. The log will open in separate window.
A browser window is a form of graphical interface used by a user when browsing the Internet. At the same time, the browser window got its name due to the fact that, like an ordinary window, it has a rectangular shape.

Today, this market segment is constantly expanding, so users have the opportunity to choose from several more or less popular browsers depending on which functions and features available in each of the programs seem more convenient to them. So, one of the most used browsers for a long time is “Internet Explorer”, which for a long period was the leader in popularity among users, but several others claim its position today. convenient programs, for example "Mozilla Firefox", "Opera", " Google Chrome" and others.
Browser windowsAs a rule, the choice of a particular browser is based on what functions it offers the user, as well as on the convenience of its interface, that is, the graphical organization of the page, for specific person who plans to install it. In terms of these parameters, the listed browsers have quite noticeable differences, however, there are a number of interface parameters that are the same for all such programs.One of these parameters is the form of providing information from the web page. In all browsers that exist today, it is presented in the form of a so-called window - a rectangular field in which text, pictures, videos or other information is displayed. The browser window can be expanded to Full Screen, that is, fill the entire monitor space with it, or use the compressed form of the window presentation by clicking on the symbol in the form of two squares in the right upper corner screen. In addition, a window that you no longer need can be closed by clicking on the cross symbol, or minimized, that is, temporarily removed from view, by clicking on the dash symbol.
Each browser window can open one or more additional tabs to access multiple web pages at the same time. This can be done by moving the mouse cursor to upper part screen. In some browsers, this feature is shown as a plus symbol, while in others it is shown as a small free field next to the name of the already open site. In order to close separate tab, you must also click on the cross symbol - the one that is located on the right side of the tab.
The main elements of the window in any browser are the address bar and the main field for displaying information. Address bar displayed at the top of the browser window. It usually begins with the characters "www" or "http://" and is a letter code that will take you to the page you need. Currently, page addresses in Russian-speaking Internet can be typed in both Latin and Cyrillic characters. In the main field you can see the most different texts, pictures, videos and other information, the composition of which depends on the content of the site you are viewing.
Sources:
- What is a web browser, browser window and address bar?
In this lesson, we will take a closer look at the functions of very useful key, which is on any keyboard. This key is called the "Context menu key". It is located in the lower right part of the keyboard between ALT keys and CTRL
When this key is pressed, the CONTEXT MENU is called up, exactly the same as if you pressed the RIGHT mouse button.
The feature of this button is that the menu called up when pressed will display functions (menu items) that can be applied in current program, V active window, desktop, etc. Those. this menu adapts to the process in which you are directly working, and this is very convenient.
Now let's take a detailed look at the main options for displaying the context menu in different environments and the functions that can be performed using this menu.
When you press the RIGHT mouse button or the "Context menu" key on the desktop Windows desktop 7 the following menu appears:

1. At the very top of the menu - setting the parameters of your video card.
2. View - setting the display of icons on the desktop

3. Sorting - setting sorting by displaying icons on the desktop

4. Refresh - Refreshes the display of content on the desktop.
5. Paste - if you have copied something, you can paste it on the desktop.
6. Create. Here you can create on the Desktop: a folder, a shortcut, a text document, an archive, MS Office documents - Word, Excel, PowerPoint, etc. (if installed)

7. Screen resolution. Here you can set the necessary screen settings: select a screen (there may be several), find out or set the screen resolution, determine the screen orientation, and also configure other screen settings, for example, connect a projector.

8. Gadgets - selection and installation Windows Gadgets 7. There is no such function in Windows XP.

9. Personalization. Here you can customize the appearance of the Desktop, change the background, splash screen, sounds, theme, window color, etc.

When you press the RIGHT mouse button or the "Context menu" key on a file in Explorer or any other file manager the menu is also adjusted to the file certain type. For example, I clicked on a video file. The following menu opens:

In this case, the menu offers functions that correspond specifically to the video file, namely: play, add to the list of the player that is selected by default for of this type file. And a number of standard functions: open with, add to archive (if an archiver is installed), send, cut, copy, delete, rename and file properties.
If you click the RIGHT mouse button or the "Context menu" button on graphic file, then a menu will open that will correspond to the graphic file type:

Here you can immediately open, edit or print the selected file in the default image program. In my case, this is the ACDSee program.
Here you can immediately make the selected file background image for the Desktop, very convenient when you choose from big list. And then there are again the standard functions for working with files.
I will dwell in more detail on the points “Open with” and “Send”.
Benefits of the "Open with" feature

Here you can select or assign to work with the selected file any installed program, which understands the selected file format. In this case, I clicked on a video file and several programs can work with this format on my computer: Light Allow, WinAmp and of course Windows Media player.
If the list does not contain the desired program, but you know for sure that it is installed, select the menu item "Select program". Windows will prompt you to select programs from a list of recommended or other programs. In Windows XP, the appearance of this window is slightly different, but the meaning is the same.

If you want the selected file format to always be opened by the program you choose, then check the "Use the selected program for all files of this type" checkbox.
If the desired program is not in the list of recommended programs or in others, but you know for sure that the program is installed, then click the "Browse ..." button and select it from the folder where the program is installed.
What is the use of the "Submit" function
Using this function, you can send (transfer, transfer) the selected file via BlueTooth (bluetooth), skype, mail, to the desktop, to archive, to write to a CD / DVD disc, to a USB flash drive etc.

And here, too, the menu adjusts to different situations, depending on where you click on the web page. For example, if you click on a link, then the following menu will open:

With this menu, you can open the content of the link in a new tab or window, bookmark the link, send the link, copy the link, if the link is a file, then you can save it with "Save Target As...". If you have download programs installed, you can download the contents of the link with their help.
If you click the RIGHT mouse button or the "Context Menu" key on the picture on the web page, then a menu with other functions will open:

Here you can copy the image to the clipboard and paste, for example, into word document, you can save the image to your computer using "Save image as ...", send the image by mail, make the selected image background pattern desktop, find out information about the image (type, size, file name), etc.
Let me summarize. In this lesson, we looked at the most popular options for using the context menu, which is called by clicking the RIGHT mouse button or pressing the "Context Menu" key on the keyboard.
Namely:
1. Pressing the RIGHT mouse button or the "Context menu" key on the Windows desktop
2. Pressing the RIGHT mouse button or the "Context menu" key on a file or folder in Explorer or any other file manager.
3. Pressing the RIGHT mouse button or the "Context menu" key in any Internet browser.
essence this lesson is that you learn how to use the useful features of the specific active environment of your computer. In any environment, by clicking the RIGHT mouse button or by pressing the "Context menu" key, you will get a list useful features available in this moment time relative to the selected object.
- Translation
- tutorial
Web applications today are becoming a new step in the development of the web. These are far from ordinary information sites. Gmail and Dropbox are examples of advanced web applications. As the functionality, accessibility, and usefulness of web applications grows, so does the need to increase the efficiency of their use. This guide will look at creating such a useful thing as your own context menu, and in particular:
On your computer, right-clicking on the desktop will bring up a context menu operating system. From here you can probably create new folder, get some information and do something else. The context menu in the browser allows, for example, to get information about the page, view its source code, save an image, open a link in a new tab, work with the clipboard, and so on. And the set available actions depends on where exactly you clicked, that is, on the context. This is the standard behavior laid down by browser developers [ And extensions to it].
Web applications are slowly starting to replace standard context menus with their own. Gmail and Dropbox are great examples. The only question is how to make your own context menu? In the browser, right-clicking fires the contextmenu event. We will have to override the default behavior and make it so that instead of standard menu our own came out. This is not so difficult, but we will understand it step by step, so it will come out quite voluminous. To begin with, we will create the basic structure of the application so that the example being developed is not completely out of touch with reality.
Task List Let's imagine that we are building an application that allows us to maintain a list of tasks. I understand that you are probably already incredibly tired of all these task lists, but so be it. The application page contains a list of pending tasks. For each task, a typical set of CRUD actions is available: get information about the task, add a new one, edit, delete.An example of the result is on CodePen. You can look there right away if you are too lazy to read or want to make sure that you are really interested in further reading. Well, let's get started step by step development conceived. I'll use some modern CSS tricks and create a simple to-do list with data attributes. I'll also use Eric Meyer's style reset and reset the box-sizing property of all elements in the border-box:
*, *::before, *::after ( box-sizing: border-box; )
I won't be using CSS prefixes, but the CodePen demo includes an auto-prefixer.
- Go To Grocery
If you are using CodePen, you can enable auto-prefixer and enable CSS reset in the settings. Otherwise, you will have to do everything by hand, if you have not automated this process yet. Don't forget that our goal is to create a context menu, so no action handling will be implemented. Now let's add some more CSS:
/* tasks */ .tasks ( list-style: none; margin: 0; padding: 0; ) .task ( display: flex; justify-content: space-between; padding: 12px 0; border-bottom: solid 1px # dfdfdf; ) .task:last-child ( border-bottom: none; )
The full set of styles (and everything else) is presented on CodePen. And here will be the most important parts of the code, markup and design. But let's finally get close to our context menu. Let's sketch out our context menu - the markup The basis of our menu is the same as any other menu - an unordered list nested in a nav tag. Each action will be represented as a list item with a link. Each link is responsible for a specific action. As I mentioned earlier, we need three actions in the context menu:
If you have no idea where to put this markup, put it before the closing body tag. Before moving on to CSS, let's clarify a couple of points:
.context-menu ( display: none; position: absolute; z-index: 10; ) .context-menu--active ( display: block; ) Expanding our context menu - JavaScript Let's start by looking at how to register the contextmenu event . Let's open a self-executing function and catch the event on the entire document. We will also log the event to the console to get some information:
(function() ( "use strict"; document.addEventListener("contextmenu", function(e) ( console.log(e); )); ))();
If you open the console and right-click somewhere, you will see that the event is indeed displayed there. There is a lot of different information that we can use. We are especially interested in coordinates. Before overriding the default behavior, let's keep in mind that this should not be done for the entire document, but only for the items in the task list. With this in mind, you will need to follow the following steps:
(function() ( "use strict"; var taskItems = document.querySelectorAll(".task"); for (var i = 0, len = taskItems.length; i< len; i++) { var taskItem = taskItems[i]; contextMenuListener(taskItem); } function contextMenuListener(el) { el.addEventListener("contextmenu", function(e) { console.log(e, el); }); } })();
If you look at the console, you can see that a unique event is fired each time an item from the task list is clicked. Now, in addition to canceling the default behavior, we implement the display of the context menu by adding an auxiliary class to it.
But first, let's add an ID to the menu to make it easier to get it through JS. Also add state variable the menuState menu and a variable with the active class. There are three variables:
var menu = document.querySelector("#context-menu"); var menuState = 0; var active = "context-menu--active";
Let's go further. Let's revisit the contextMenuListener function and add a toggleMenuOn to display the menu:
function contextMenuListener(el) ( el.addEventListener("contextmenu", function(e) ( e.preventDefault(); toggleMenuOn(); )); ) function toggleMenuOn() ( if (menuState !== 1) ( menuState = 1 ;menu.classList.add(active); ) )
At the moment, with the right mouse button, you can already call up our context menu. But it cannot be said that it works correctly. Firstly, it is not at all where we would like it to be. It takes a little math to fix the problem. Secondly, it is not yet possible to close this menu. Given how normal context menus work, we would like our implementation to close when the menu is clicked and when Escape is pressed. In addition, when right-clicking outside of our menu, it should close, and instead it requires the default menu to open. Let's try to solve all this.
Lots of code
(function() ( "use strict"; /////////////////////////////////////////////////////////////// ///////////////////////////////////// // // H E L P E R F U N C T I O N S // AUXILIARY FUNCTIONS // / ///////////////////////////////////// ///////////// /////////////////////////// /** * Some helper functions here. ///////////////////////////////// ////////////////// ////////////////////// // // C O R E F U N C T I O N S // CORE FUNCTIONS // ///////////////// ////////////////////// //////////////////////////// /////////// /** * Variables.* Variables.*/ var taskItemClassName = "task"; var menu = document.querySelector("#context-menu"); var menuState = 0; var activeClassName = "context-menu--active"; /** * Initialize our application"s code. * Initialize our application code. */ function init() ( contextListener(); clickListener(); keyupListener(); ) /* * * Listens for contextmenu events.* Handle contextmenu events.*/ function contextListener() ( ) /** * Listens for click events. * Treatment click events. */ function clickListener() ( ) /** * Listens for keyup events. * Handling the keyup event. */ function keyupListener() ( ) /** * Turns the custom context menu on. * Display context menu. */ function toggleMenuOn() ( if (menuState !== 1) ( menuState = 1; menu.classList.add(activeClassName); ) ) /** * Run the app. * Application launch. */init(); ))();
Now we are not iterating over the elements of the list. Instead, we will process the contextmenu event throughout the document, checking if it belongs to one of the tasks. Therefore, the variable taskItemClassName has been introduced. We will do this using helper function clickInsideElement that takes two parameters:
function clickInsideElement(e, className) ( var el = e.srcElement || e.target; if (el.classList.contains(className)) ( return el; ) else ( while (el = el.parentNode) ( if (el .classList && el.classList.contains(className)) ( return el; ) ) ) return false; )
Let's go back and edit the contextListener:
function contextListener() ( document.addEventListener("contextmenu", function(e) ( if (clickInsideElement(e, taskItemClassName)) ( e.preventDefault(); toggleMenuOn(); ) )); )
By having a helper function that does some of the dirty work for us, and catching the contextmenu event on the entire document, we can now close the menu when clicked outside of it. To do this, add the toggleMenuOff function and edit the contextListener:
function contextListener() ( document.addEventListener("contextmenu", function(e) ( if (clickInsideElement(e, taskItemClassName)) ( e.preventDefault(); toggleMenuOn(); ) else ( toggleMenuOff(); ) )); ) function toggleMenuOff() ( if (menuState !== 0) ( menuState = 0; menu.classList.remove(activeClassName); ) )
Now right click on the list item. And then - somewhere else in the document. Voila! Our menu closed and the standard menu opened. Then we will do something similar for the click event, so that it is closed by more than one right button:
function clickListener() ( document.addEventListener("click", function(e) ( var button = e.which || e.button; if (button === 1) ( toggleMenuOff(); ) )); )
This piece of code is slightly different from the previous one because Firefox. After right button the mouse is released, the click event fires in Firefox, so here we have to additionally make sure that there was actually a left click. Now the menu does not blink on right click. Let's add a similar handler to the click ESC keys:
function keyupListener() ( window.onkeyup = function(e) ( if (e.keyCode === 27) ( toggleMenuOff(); ) ) )
We got a menu that opens and closes as intended, interacting with the user in a natural way. Let's finally position the menu and try to handle events inside it. Positioning our context menu Given the current HTML and CSS, our menu appears at the bottom of the screen. But we would like it to appear where the click occurred. Let's correct this unfortunate omission. First, let's add another helper function that gets the exact coordinates of the click. Let's call it getPosition and try to make it handle various browser quirks:
function getPosition(e) ( var posx = 0; var posy = 0; if (!e) var e = window.event; if (e.pageX || e.pageY) ( posx = e.pageX; posy = e. pageY; ) else if (e.clientX || e.clientY) ( posx = e.clientX + document.body.scrollLeft + document.documentElement.scrollLeft; posy = e.clientY + document.body.scrollTop + document.documentElement. scrollTop; ) return ( x: posx, y: posy ) )
Our first step in menu positioning is setting up three variables. Let's add them to the corresponding block of code:
varmenuPosition; varmenuPositionX; varmenuPositionY;
Let's create a positionMenu function that takes a single argument - an event. For now, let it print the menu coordinates to the console:
function positionMenu(e) ( menuPosition = getPosition(e); console.log(menuPosition); )
Let's edit the contextListener to start the positioning process:
function contextListener() ( document.addEventListener("contextmenu", function(e) ( if (clickInsideElement(e, taskItemClassName)) ( e.preventDefault(); toggleMenuOn(); positionMenu(e); ) else ( toggleMenuOff(); ) )); )
Poke into the context menu again and look at the console. Make sure the position is actually available and logged. We can use inline styles to set the top and left properties via JS. That's a new version positionMenu:
function positionMenu(e) ( menuPosition = getPosition(e); menuPositionX = menuPosition.x + "px"; menuPositionY = menuPosition.y + "px"; menu.style.left = menuPositionX; menu.style.top = menuPositionY; )
Call now everywhere. The menu is everywhere! This is awesome, but there are a couple of things that need to be addressed:
varmenuWidth; varmenuHeight;
As you remember, our menu is hidden by default, so you can't just take and calculate its size. In our case, the menu is static, but with real application its contents may change depending on the context, so it is better to calculate the width and height at the time of opening. Let's get the required values inside the positionMenu function:
menuWidth = menu.offsetWidth; menuHeight = menu.offsetHeight;
Let's introduce two more variables, but this time for the window size:
varwindowWidth; varwindowHeight;
Let's calculate their values in a similar way:
windowWidth = window.innerWidth; windowHeight = window.innerHeight;
Ultimately, let's assume that we want to display the menu no closer than 4 pixels from the edge of the window. You can compare the values, as I said above, and adjust the position something like this:
var clickCoords; var clickCoordsX; var clickCoordsY; // updated positionMenu function function positionMenu(e) ( clickCoords = getPosition(e); clickCoordsX = clickCoords.x; clickCoordsY = clickCoords.y; menuWidth = menu.offsetWidth + 4; menuHeight = menu.offsetHeight + 4; windowWidth = window. innerWidth; windowHeight = window.innerHeight; if ((windowWidth - clickCoordsX)< menuWidth) { menu.style.left = windowWidth - menuWidth + "px"; } else { menu.style.left = clickCoordsX + "px"; } if ((windowHeight - clickCoordsY) < menuHeight) { menu.style.top = windowHeight - menuHeight + "px"; } else { menu.style.top = clickCoordsY + "px"; } }
Now our menu is behaving quite well. It remains to do something with the window resize. I already talked about how Dropbox does it, but instead we'll close the context menu. [ This behavior is much closer to the standard] Add to the init function next line:
resizeListener();
And let's write the function itself:
function resizeListener() ( window.onresize = function(e) ( toggleMenuOff(); ); )
Great. Hooking events to context menu items If your application is more complex this example, and you have dynamic context menu content planned, you will have to delve deeper into what is happening next in order to figure out the missing details yourself. In our application, everything is simpler, and there is only one menu with a constant set of actions. Thus, you can quickly check which element was selected and process this selection. In our example, we simply save the selected element to a variable and write its data-id and the selected action to the console. To do this, edit the menu markup:
Next, let's cache all the necessary objects:
var contextMenuClassName = "context-menu"; var contextMenuItemClassName = "context-menu__item"; var contextMenuLinkClassName = "context-menu__link"; var contextMenuActive = "context-menu--active"; var taskItemClassName = "task"; var taskItemInContext; var clickCoords; var clickCoordsX; var clickCoordsY; var menu = document.querySelector("#context-menu"); var menuItems = menu.querySelectorAll(".context-menu__item"); var menuState = 0; varmenuWidth; varmenuHeight; varmenuPosition; varmenuPositionX; varmenuPositionY; varwindowWidth; varwindowHeight;
The variable taskItemInContext has appeared, which is assigned a value when a right-click on a list item. We will need it to log element IDs. There are also new class names. Now let's go through the functionality.
The initialization function remains the same. The first change affects the contextListener, because we want to store the element that the user clicked on in taskItemInContext , and the clickInsideElement function just returns it:
function contextListener() ( document.addEventListener("contextmenu", function(e) ( taskItemInContext = clickInsideElement(e, taskItemClassName); if (taskItemInContext) ( e.preventDefault(); toggleMenuOn(); positionMenu(e); ) else ( taskItemInContext = null; toggleMenuOff(); ) )); )
We reset it to null if the right click was not on a list item. Well, let's take on clickListener. As I mentioned earlier, for the sake of simplicity, we will simply print information to the console. Now, when the click event is caught, a few checks are made and the menu is closed. Let's make adjustments and start processing a click inside the context menu, performing some action and only after that closing the menu:
function clickListener() ( document.addEventListener("click", function(e) ( var clickeElIsLink = clickInsideElement(e, contextMenuLinkClassName); if (clickeElIsLink) ( e.preventDefault(); menuItemListener(clickeElIsLink); ) else ( var button = e.which || e.button;if (button === 1) ( toggleMenuOff(); ) ) )); )
You may have noticed that the menuItemListener function is being called. We will define it a little later. The keyupListener, resizeListener and positionMenu functions are left unchanged. We will edit the toggleMenuOn and toggleMenuOff functions slightly, changing the variable names for better code readability:
function toggleMenuOn() ( if (menuState !== 1) ( menuState = 1; menu.classList.add(contextMenuActive); ) ) function toggleMenuOff() ( if (menuState !== 0) ( menuState = 0; menu.classList .remove(contextMenuActive); ) )
Finally we implement the menuItemListener:
function menuItemListener(link) ( console.log("Task ID - " + taskItemInContext.getAttribute("data-id") + ", Task action - " + link.getAttribute("data-action")); toggleMenuOff(); )
This completes the development of the functionality.
- Chrome 39
- Safari 7
- Firefox 33
Codebase for this guide