Systemd is a system and service manager for the Linux operating system. It was designed to be backward compatible with SysV init scripts and provide useful features such as running system services in parallel at boot time, activating daemons on demand, maintaining system state snapshots, and dependency-based service control logic. In CentOS 7, systemd replaces Upstart as the default init system.
In this article we will look at the process of managing services in systemd for a CentOS 7 user. This knowledge will be useful in other distributions as well, since systemd has long been used in Fedora and is planned for Ubuntu 14.10 and Debian 8. We will leave it behind the scenes.
While reading this article, you can try systemd on classic VPS and cloud VPS from Infobox. We strive to add support for modern operating systems in a timely manner so you can use the latest technologies to work more efficiently. The very idea of writing an article was born after another question from users about using services in CentOS 7.
Introduction
Systemd brings the concept of systemd units. Units are represented by configuration files located in one of the directories:- / usr / lib / systemd / system /- units from installed RPM packages.
- / run / systemd / system /- units created at runtime. This directory takes precedence over the directory with installed units from packages.
- / etc / systemd / system /- units created and managed by the system administrator. This directory takes precedence over the directory of units created at runtime.
Systemd unit types:
- .service- system service
- .target- a group of systemd units
- .automoun t - file system automount point
- .device- file of the device recognized by the kernel
- .mount- file system mount point
- .path- a file or directory in the file system
- .scope- a process created externally
- .slice- a group of hierarchically organized units that manage system processes
- .snapshot- saved state of systemd manager
- .socket- socket interprocess communication
- .swap- Swap device or swap file (swap file)
- .timer- systemd timer
Main features of systemd in CentOS 7
- Socket Based Activation... At boot time, systemd listens for sockets for all system services, supports this type of activation, and transfers sockets to these services immediately after the start of the services. This not only allows systemd to start services in parallel, but also provides the ability to restart services without losing any messages sent to it while the services were unavailable. The corresponding socket remains available and all messages are queued.
- D-Bus based activation... System services that use D-Bus for interprocess communication can be started on demand when a client application tries to communicate with them.
- Device Based Activation... System services that support device-based activation can be launched when a particular type of equipment is connected or made available.
- Path-based activation... System services can support this type of activation if the state of a folder or directory changes.
- System state snapshots... The system can save the state of all units and restore the previous state of the system.
- Mount point and automount management... Systemd monitors and manages mount and automount points.
- Aggressive parallelization Systemd starts system services in parallel due to its use of socket based activation. When combined with services that support on-demand activation, concurrent activation significantly reduces system boot time.
- Transactional logic for activating units... Before activating and deactivating units, systemd calculates their dependencies, creates a temporary transaction, and verifies the integrity of that transaction. If a transaction is inconsistent, systemd automatically tries to fix it and remove unneeded jobs from it before generating an error message.
- Backward Compatible with SysV Initialization... SystemD fully supports SysV init scripts as described in the Linux Standard Base (LSB) specification, making it easy to migrate to systemd.
Service management
Previous versions of CentOS used SysV or Upstart. Initialization scripts were located in the directory /etc/rc.d/init.d/... Such scripts were usually written in Bash and allowed the administrator to manage the state of services and daemons. In CentOS 7, init scripts have been replaced with service units.By way of using service units .service resemble init scripts. To view, start, stop, reboot, enable or disable system services, use the command systemctl... Commands service and chkconfig are still included in the system, but only for compatibility reasons.

The file extension is optional when using systemctl.
Below are the basic commands systemctl:
- systemctl start name.service- service launch.
- systemctl stop name.service- service stop
- systemctl restart name.service- service restart
- systemctl try-restart name.service- restarting the service only if it is running
- systemctl reload name.service- reloading the service configuration
- systemctl status name.service- checking if the service is running with a detailed output of the service status
- systemctl is-active name.service- checking if the service is running with a simple answer: active or inactive
- systemctl list-units --type service --all- displaying the status of all services
- systemctl enable name.service- activates the service (allows you to start during system startup)
- systemctl disable name.service- deactivates the service
- systemctl reenable name.service- deactivates the service and immediately activates it
- systemctl is – enabled name.service- checks if the service is activated
- systemctl list-unit-files --type service- displays all services and checks which ones are activated
- systemctl mask name.service- replaces the service file with a symlink to / dev / null, making the unit inaccessible to systemd
- systemctl unmask name.service- returns a service file, making the unit available to systemd
Working with Systemd targets
Previous versions of CentOS with SysV init or Upstart included a predefined set of runlevels, which represented specific modes for operations, numbered 0 through 6. In CentOS 7, the concept of runlevels was replaced by systemd targets.Systemd target files .target are designed to group other systemd units together through a chain of dependencies. For example unit graphical.target, which is used to start a graphical session, launches the GNOME Display Manager system services ( gdm.service) and Accounts Service ( accounts – daemon.service) and activates multi–user.target... In turn multi–user.target starts other system services such as Network Manager ( NetworkManager.service) or D-Bus ( dbus.service) and activates other target units basic.target.
CentOS 7 has predefined targets similar to the standard set of runlevels. For compatibility reasons, they also have aliases for these purposes, which are directly mapped to the SysV runlevels.
- poweroff.target (runlevel0.target)- shutdown and shutdown of the system
- rescue.target (runlevel1.target)- customizing the recovery shell
- multi–user.target (runlevel2.target, runlevel3.target, runlevel4.target)- setting up a non-graphical multi-user system
- graphical.target (runlevel5.target)- setting up a graphical multi-user system
- reboot.target (runlevel6.target)- shutdown and reboot the system
The following command is useful to determine which target unit is the default: systemctl get – default.
To view all loaded target units, use the command systemctl list-units --type target, and to view all target units in general with the command: systemctl list-units --type target --all.
To change the default target, the command will help systemctl set-default name.target.
To change your current goal: systemctl isolate name.target... The command will start the target unit and all its dependencies and immediately stop all others.
In CentOS 7, systemctl replaces a significant number of power management commands. Previous commands have been retained for compatibility, but it is recommended to use systemctl:systemctl halt- stops the system
systemctl poweroff- turns off the system
systemctl reboot- reboots the system
Managing systemd on a remote machine
Systemd allows you to control a remote machine over SSH. To manage, use the command:systemctl --host [email protected] _name command where user_name is the username, host_name is the name of the host being remotely controlled, and command is the systemd command to run.
Typical systemd .service
This section will help you if you need to quickly support service management from systemd. For details on all of the options in the .service file, see the related section of the systemd documentation.Description = Daemon to detect crashing apps After = syslog.target ExecStart = / usr / sbin / abrtd Type = forking WantedBy = multi-user.target
Let's take a look at the section
... It contains general information about the service. This section is available not only in service units, but also in other units (for example, when managing devices, mount points, etc.). In our example, we give a description of the service and indicate that the daemon should be started after Syslog.
In the next section directly contains information about our service. Parameter used ExecStart points to the executable file of our service. V Type we specify how the service notifies systemd that it has finished starting.
Final section contains information about the purpose for which the service should start. In this case, we say that the service should be started when the target is activated. multi–user.target.
This is a minimal working systemd service file. Once you've written your own, copy it to /etc/systemd/system/service_name.service for testing. Run the commands systemctl daemon-reload... Systemd will know about the service and you will be able to start it.
Additional Information
An excellent guide to systemd from RedHat, which forms the basis of this article.Documentation for writing your own systemd service unit.
"Systemd for Administrators" from the systemd developer in Russian.
Conclusion
In this article, we learned how to manage CentOS 7 services. Of course, this is not the only function of systemd, and other aspects of it will be discussed in the future. The OS itself has been available almost from the time of release on classic VPS and cloud VPS from Infobox. Try systemd now. This knowledge will be useful in connection with the migration of many distributions to systemd.If you find an error in the article, the author will gladly fix it. Please write to the PM or e-mail about it.
In case you cannot leave comments on Habré, you can write them on the blog
System Linux is a multi-tasking, multi-user operating system, which means that a significant number of people can run many different applications at the same time on the same computer. This system Linux differs from MS-DOS, for example, where only one person can work on a computer at a time.
Options Linux commands usually start with a - character, after which you can specify several options at once. For example, instead of the ls -l -F command, you can enter the ls -lF command.
As command arguments Linux lists of names of files or directories can appear. For example, the arguments to the cp command are the names of the files to be copied. The list of copied files is closed by the name of the file (or directory) where the files will be copied. When copying more than one file, there must be a directory name at the end.
Create username
Before starting work on a newly installed system Linux you need to make a name for yourself for your day to day work. It is undesirable to use the root name for this, which is reserved for the execution of special commands and for work to maintain the health of the system.
To create a username, log in as root and use the useradd (or adduser) command.
Login to the system
Typically, when you log in, the following prompt appears on the screen:
After entering the username and pressing the key Enter you will be prompted to enter a password:
localhost login: oleg Password:
After that, you must enter the password (the characters being dialed are not visible on the screen). If the password is entered incorrectly, the following message will appear on the screen:
localhost login: oleg Password: Login incorrect login:
After entering the correct username and password, you are logged in.
Virtual console
The system console is a monitor and keyboard directly connected to the computer. System Linux like other versions of the system UNIX, provides access to virtual consoles from which you can carry out several sessions at the same time in the system.
To get acquainted with the work in virtual consoles, log in and press the Alt-F2 key combination. The login: prompt appears again (this is the second virtual console). To return to the first virtual console, press the Alt-F1 key combination (there is a return to an already started work session).
Newly installed L system inux typically provides access to the first six virtual consoles, which can be accessed using Alt-Fx key combinations. Thus, already at the initial stage, the user receives a powerful tool that allows you to work at the same time in several sessions at once.
Shells and commands
Most of the communication with the system Linux occurs through command shells (shell). Command shell is a program that takes commands entered from the keyboard and converts them into instructions for the operating system.
After logging in, the operating system launches a command shell, after which commands can be entered. Command is the first word on the command line. Anything else on the command line is taken as arguments to that command. As an example, let's create (mkdir) the commands directory:
$ mkdir commands
Sign Out
To exit the system, enter the command after the shell prompt:
change Password
To change the password, enter the passwd command. The command will prompt you to enter the old password, and then the new one. The command will then ask you to enter the new password again for confirmation:
Files and directories
In the operating system Linux the concept of a file is used ( file). A file is a certain "piece" of information that has its own name ( filename). You should be aware that information is stored on the disk only in the form of separate files.
The names of regular files in Linux can be up to 255 characters long and can be any character other than the codeword and / (slash). However, there are a number of other symbols that have in the shell shell special meaning and which is therefore not recommended to be included in names. These are the following symbols:
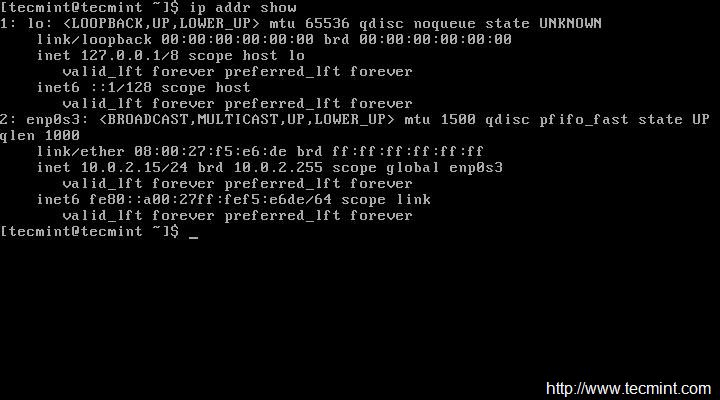
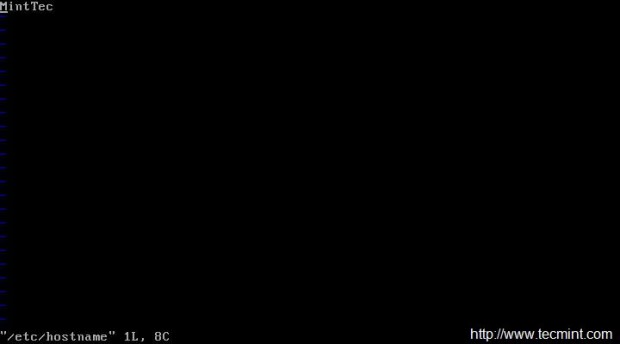
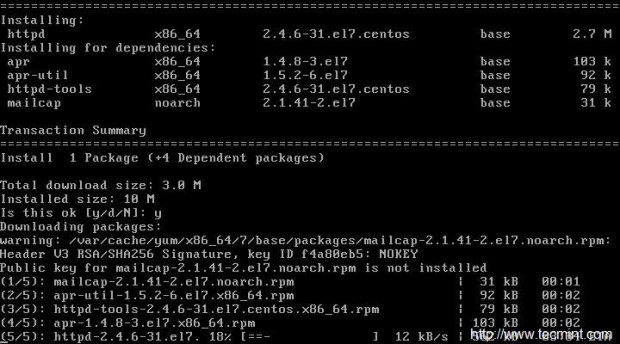
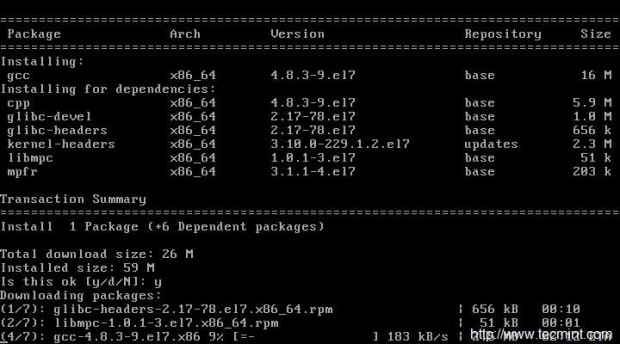
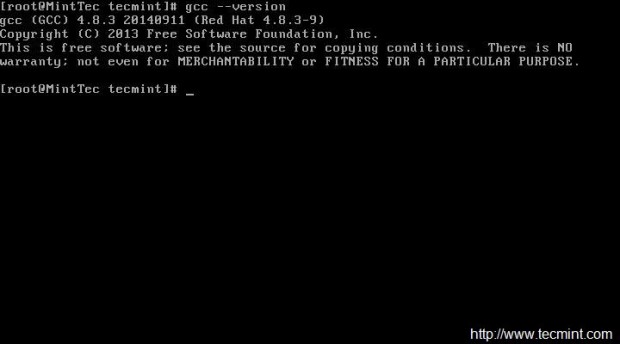
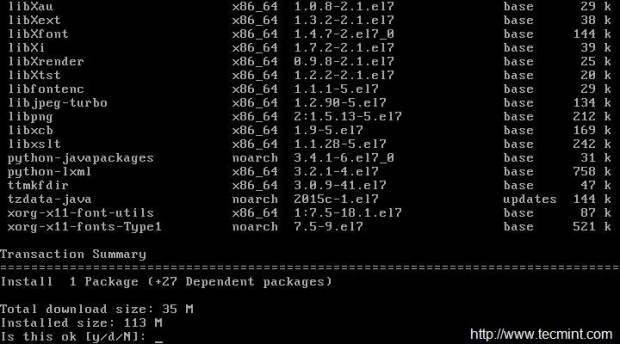
! @ # $ & ~ % * () { } " " \ : ; > The concept of a file is closely related to the concept of a directory ( directory). A directory is a collection of files. Users Windows called a directory "folder", by analogy with a folder that contains many different sheets. However, this analogy is incorrect, since the directory contains not the actual files, but links to the files, as well as to other directories. The directories are given names by which they can be recognized. In addition, the directories form a tree structure; in other words, there is a single root directory containing all the other directories within it. When accessing a file, the path (path) is specified, which can consist of the name of the directory (the names of directories nested in each other), followed by the name of the file. The names are separated from each other by a slash (/). For instance: In the above example, you can see that the names are separated by a /. It is for this reason that they cannot contain it. On most systems Linux a standard file location is used, so the location of the main system files and programs is easy to find. The directories form a tree structure that begins with the / directory. This directory is also called the root directory. The important subdirectories / bin, / etc, / dev, / usr and others are adjacent to the / directory. At any given time, the command issued refers to the current directory ( current directory). When you log in, the current directory is set to the home directory (in our case / home / oleg). When referring to a file, you can specify either the full path to this file, or only the path from the current directory. The previous example, when found, for example, in the / home / oleg / docs directory, will look like this: $ less mokshadharma / index.xml If the path to a file (for example, mokshadharma / index.xml) begins with a character other than /, then the file is being accessed relative to the current directory. This way of addressing is called relative way (relative path). If the file name begins with a /, then the system interprets this as a full path, that is, a path that leads to the file starting from the root directory / (/home/oleg/docs/mokshadharma/index.xml) ... It is also called absolute way (absolute path). In a command shell bash included in almost all newly installed systems Linux, the home directory can be denoted with ~. For example, the command: $ less ~ / docs / mokshadharma / index.xml is equivalent to the command: $ less /home/oleg/docs/mokshadharma/index.xml The command used to navigate the directory tree is called cd, short for change directory(change directory). As an example of using the cd command, go to the / home / oleg / docs / mokshadharma / directory: $ cd ~ / docs / mokshadharma Now, from the current directory, you can refer to the file with the following command: $ less index.xml To go to the nearest higher-level directory, there is a command: To change to the home directory, you can issue the cd command without arguments: Ls command (short for list) displays a list of files and directories (the -F option allows for more complete information): $ ls -F ~ / docs / mokshadharma ch / ch01.html ch02.html ch03.html cron.sh * docbook.xsl index.html index.xml pr01.html pt01.html style / In the listing, we see that the character / is attached to the end of the name of the subdirectories, and to the end of the name of the executable file ( executable) is assigned the * character. To create a new directory, use the mkdir command (short for make directory). For example, let's create a new directory and enter it: $ mkdir example $ cd example The touch and cat commands are used to create files. The touch command creates an empty file: $ touch file_name To create a file with the cat command, designed to redirect output, data from standard input (keyboard) is sent to its input, and the output of the command is sent to a new file: $ cat> new_file After the required text is entered, the key combination Enter and Ctrl-D or Enter and Ctrl-C is pressed, and everything entered will be recorded in new_file. Of course, mostly short text files are created this way. Only the superuser can change the owner, the file owner or the superuser can change the group. In order to have the right to change the group, the owner must additionally be a member of the group to which he wants to give rights to this file. To destroy files, use the rm command (short for remove): $ rm index.xml $ By default, the rm command is not always configured to issue warnings before deleting a file. To destroy directories, use the rmdir command, which only destroys an empty directory. $ cd .. $ rmdir example $ ls -F $ To destroy directories containing files and subdirectories, use the rm -rf command, which should be used with extreme caution. the content is destroyed by her without warning. The more and cat commands are used to view the contents of the files. The more command displays the contents of the file in chunks (one screen at a time), and the command cat outputs the entire file at once. An improved version of more is called less. Use the B and Space keys to view the content displayed by the less command (you can also use Page Up and Page Down). Almost all systems in the family UNIX including system Linux, have on-screen documentation ( man pages). Its texts contain documentation on system commands, resources, configuration files, etc. and can be displayed on the screen during operation. To access the on-screen documentation, use the man command (short for manual). For example, to view the options for the ls command, enter the command. Today's article is entirely devoted to beginners who are just taking their first steps at the stage of getting to know the CentOS operating system. In this article, we have collected the top 20 commands that will be useful in everyday work, server management and basic troubleshooting. We often have to install various programs. By default, the system has only the most necessary, and if you need something specific, then you will have to install programs manually. Installing Linux software is, in a way, easier than installing it on Windows. Here, most of the required programs are located in the official repositories and to install or update them, you just need to run a few commands. In this article, we will look at how to install CentOS 7 packages. Let's look at the basics of working with the yum package manager, its capabilities, and finding and resolving package dependencies. YUM (Yellowdog Updater Modified) is an open source package manager developed by RedHat for working with RPM packages. It allows users and system administrators to install, remove, and update packages on RedHat-based systems. The program is distributed under the GPL (General Public License) and any user can access the source or even improve the code. The package manager supports connecting third-party repositories and resolving dependencies for installing packages. Various plugins can be downloaded to improve the performance of Yum. The utility works in the console, and its syntax is very simple: $ sudo yum options command package_name First, let's take a look at the basic commands of the package manager: We will also consider additional options that you may need when installing rpm CentOS: Now you know all the main features of the utility, let's look at some examples of working with it. Before proceeding with the installation of CentOS packages, you need to update the list of repositories and the system to the most recent version. For this there is a command: To install a package that is in the official repositories, you just need to use the install command. Just type this command and package name, for example for firefox: sudo yum install thunderbird During installation, you will have to confirm that you want to install this particular program by pressing the y key. To avoid this use the -y option: sudo yum -y install thunderbird To view information about an installed package, use the info command: sudo yum info thunderbird To remove a package, use the remove command: sudo yum remove thunderbird We do not know the exact names of all packages. But yum does support a search feature to help you figure out which package to install CentOS 7. There are two search commands. The first is search, which allows you to find a package by name: sudo yum search mysql The second one allows you to find the required package by the command that you need, in some cases this is very convenient: sudo yum provides lspci Now you know what package is needed and installing the CentOS 7 rpm packages can now be done very quickly and you do not need to open many forums to find information. Package groups are also quite a handy tool. With it, you can not install packages one at a time, but install a whole group at once. First, see the list of available groups: sudo yum group list sudo yum group info "Standard Web Server" Then. to install a package group type: sudo yum group install "Standard Web Server" Likewise, you can update a package group to avoid updating the entire system: sudo yum group update "Standard Web Server" Or remove: sudo yum group remove "Standard Web Server" The official repositories do not contain all the required packages. If server programs can be found there without difficulty, then with programs for the desktop, the same codecs, there will be problems. They need to be installed from third-party repositories. Repositories on CentOS are not added via a config file, they are installed by downloading and installing the rpm repository file. For example, one of the most commonly used third party repositories is EPEL. Its installer is in the official repositories, so to connect it is enough to run: sudo yum install epel-release But this is not the case with all repositories. Many of them store installation files on their own. For example, a repository with various nux multimedia software is installed differently. First, you need to download the repository file from the link. Download the latest version, otherwise nothing will work. For example, at the moment the newest wget http://li.nux.ro/download/nux/dextop/el7/x86_64/nux-dextop-release-0-5.el7.nux.noarch.rpm Then install the downloaded package using yum: sudo yum install nux-dextop-release-0-5.el7.nux.noarch.rpm Then update the list of repositories and you can install packages: sudo yum install vlc Well, we look at the list of repositories: sudo yum repolist All available repositories are displayed here. To remove a repository, it will be enough to remove its package. If you do not like to use the terminal, then the installation of CentOS 7 programs can be done through the graphical interface. But here the possibilities are much less than in the terminal. Use the utility "Programs", which is located in the main menu: CentOS is a free distribution based on the Red Hat Enterprise Linux source code, in fact, it is created from these sources with little or no modification, the developers only cut out all the Red Hat branding. But unlike Red Hat, CentOS is completely free and receives regular updates shortly after they are released for Red Hat, since they are also built from source. CentOS is often used as an operating system for servers. In one of the previous articles, we looked at how it is done. Today we will look at setting up a CentOS 7 server after installation. We will cover all the basic parameters that you will need to change to get your server ready for use. The first thing to do is set up your network. On personal computers, obtaining an IP address via DHCP is used, and the computer will have a different address every time it starts, the server must always work at the same address, so we assign it a static IP. You also need to configure DNS and default gateway. But first install the net-tools utility: yum install net-tools First, let's see the available network interfaces and the current IP address: Now you can go to configuring the interface through the file / etc / sysconfig / network-scripts / ifcfg-enp0s3, for example, using the vi editor: vi / etc / sysconfig / network-scripts / ifcfg-enp0s3 Ipaddr = your_ip After making changes, this file will look like this: Then it will remain to reboot the network to apply the new settings: service network restart Then, if necessary, you can change the IP address in the same way. The next thing we need to do is change the computer name. The current computer name is stored in the HOSTNAME variable: To change it, you need to edit the / etc / hostname file and replace the old name with the new one there. vi / etc / hostname Alternatively, you can use the hostnamectl command: hostnamectl set-hostname "hostname" After installation, it is customary to update the software to the latest version to ensure that all security updates are installed. To update the list of packages in the repositories and install new versions, run the following command: yum update && yum upgrade In many cases, you have to use CentOS from the command line without a graphical interface, so you may need a browser to find something on the Internet or check the functionality of sites from the command line. To install the links browser, type: yum install links You can find other console browsers for Linux, such as Lynx or Elinks. Correct time zone setting is very important for the server. This will remove the confusion in the logs and allow your applications to display the correct date and time. The timedatectl utility is used for configuration. First, get a list of time zones: timedatectl list-timezones Then install the one you want, for example, Europe / Kyiv: timedatectl set-timezone Europe / Kyiv Then check: The locale determines the language and encoding that will be used on your system, for example, to enable the Russian language, set the value ru_RU.UTF-8 localectl set-locale LANG = ru_RU.UTF-8 Then we see what happened: Then we set the keyboard layout: localectl set-keymap us A set of SELinux policies are designed to control access to files on a Linux system, but if you do not intend to use them, then this feature can be disabled. To do this, run: sed -i "s / (^ SELINUX =). * / SELINUX = disabled /" / etc / selinux / config Then restart your computer and check if the feature was actually disabled: It is unsafe to use the system on behalf of the superuser, and all the more unsafe to leave open access to the root account via ssh. First, create a regular user and set a password for it: useradd username Then add the user to the wheel group to allow the user to run as administrator: usermod -G wheel username Now it remains to tweak the sudo settings, for this add the following line, if it is not already there: % wheel ALL = (ALL) ALL Adding third-party repos to a production server is not a good idea and can lead to bad consequences in some cases. However, sometimes you may need programs that are not in the official repositories. Therefore, let's look at how to add multiple repositories. To add the Enterprise Linux Repository (EPEL), run: yum install epel-release Most often, we have to work with servers not directly, but over the network, via SSH. Usually SSH is already installed and activated, but it needs a few tweaks to make it work properly. First, you need to configure the use of only a secure protocol, for this open the / etc / ssh / ssh_config file and delete the Protocol 2,1 line. And instead add: You also need to disable login as superuser: PermitRootLogin no If you plan to use the machine as a web server, you will need Apache. With it, you can host websites, multimedia content, client programs, and more. To install, run: yum install httpd When the installation is complete, you need to enable HTTP in the firewall before you can get to work: firewall-cmd --add-service = http Now it remains to add Apache to autoload: systemctl start httpd.service PHP is a modern web application and scripting language. It is often used as a general-purpose programming language. To install, run: After installation, you need to restart Apache: echo -e ""> /var/www/html/phpinfo.php Then open the generated file in a browser: links http://127.0.0.1/phpinfo.php MariaDB is a database based on MySQL source code. Red Hat based Linux distributions use MariaDB instead of MySQL. Databases are indispensable on a server, so post-install CentOS setup should include installing it. To install MariaDB, type: yum install mariadb-server mariadb Then run and add to autoload: systemctl start mariadb.service And allow to use the service in the firewall: firewall-cmd --add-service = mysql It remains to run the configuration script: / usr / bin / mysql_secure_installation GCC stands for GNU Compiler Collection and is a set of compilers that are considered the standard for building programs on Linux. But it doesn't come with CentOS by default, so to install, type: Then you can look at the GCC version: Java is a general-purpose objective-oriented programming language. It is not installed by default, so configuring CentOS 7 after installation might include installing it as well. To do this, run: yum install java Then check the version: In this article, we looked at how to configure the CentOS 7 server after installation. As you can see, there are many elementary steps you should take before using the server in production. If you have any questions, ask in the comments!
Directory tree
Current directory
Referring to the home directory
Moving through the directory tree
Viewing the contents of directories
Creating new directories
Creating new files
Change the owner of a file or group of a file
View file contents
Screen documentation
Commands
Installing packages on CentOS 7
Installing a CentOS package


Finding CentOS packages


CentOS package groups


CentOS package repositories


Installing CentOS programs in the GUI

1. Setting up a static IP address
GATEWAY = gateway_for_network_access
DNS1 = IP_Address_DNS1
DNS2 = DNS_IP_address

2. Computer name

3. Upgrading CentOS

4. Install the browser

5. Time zone setting
7. Setting the locale
8. Disable SELinux
9. Create a user
# passwd password10. Enable third party repositories
# rpm -Uvh http://www.elrepo.org/elrepo-release-7.0-2.el7.elrepo.noarch.rpm10. Configuring SSH
11. Install the Apache web server
# firewall-cmd -permanent -add-port = 3221 / tcp
# firewall-cmd --reload
# systemctl enable httpd.service
12. Install PHP

13. Installing the database

# systemctl enable mariadb.service
14. Install GCC
15. Install Java

conclusions


