Is it time to free the hard drive from the unnecessary “seven”? There is nothing difficult in this, but many users do not dare to delete it in one fell swoop - simply by formatting the partition, for fear of erasing important data or disrupting the operation of the second OS. And they are right: if you immediately format the system partition, all of its contents will be irretrievably lost. And it can contain both user files and bootloaders of other operating systems, if there are several of them on the computer.
Let's talk about how to demolish Windows 7 safely.
Removing the only operating system Windows 7
How can I uninstall Windows 7 from a PC if there are no other operating systems on it? Before proceeding with the deletion, transfer important data from the system partition to another medium. As a new medium, you can use other partitions of the same disk, DVD, flash drives, cloud storage, etc.
By default, the user's data is saved in the user's account folder. It's in the C: Usres section (Drive C, Users folder).

Going there, just copy the directory of your account and paste it on any drive that is suitable in terms of capacity.

The system partition can now be freed. While Windows 7 is loaded, you will not be able to delete its directories and files - first you have to start the computer from another medium - a Live CD or an installation disk of any operating system.
So, having booted from the Windows XP Live CD, we can go into disk management, find the partition with the “seven” and format it (formatting, like other operations with a partition, is launched from the context menu). After that, the partition will be completely cleared of data while preserving the NTFS structure - it, as before, will be visible in Explorer.

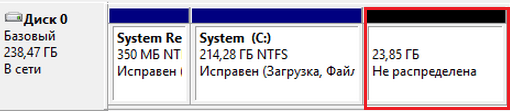
If you choose the "Delete Partition" option from the menu, the system partition will turn into an unallocated space, which will also have to be formatted first to use it.
You can also delete data from a partition with Windows 7 by formatting it from under the installation disk. The rest (non-system) sections will not be affected.

Removing the old system (Windows.old folders)
Now let's consider a case when a new operating system was installed on a partition with an old one without preliminary formatting. During the installation of Windows into a non-free partition, the installation program renames the old Windows directory to Windows.old. The Windows.old folder remains on the PC only as a backup copy of data and is not used in any way, so it can be safely demolished.

How do I uninstall Windows 7 from a previous installation? The safest way to do this is through the "Disk Cleanup".
- Going into the "Computer" folder, open the properties of the section where both systems are installed - the old and the new. Click the Disk Cleanup button on the General tab.

- Click “Clean up system files”.

- Select the “Previous Windows Installations” checkbox and click OK.

Confirm your consent to delete files and wait for the cleaning to finish. After that Windows.old - the old Windows 7 directory from the previous installation will disappear.
How to remove the "seven" from the multi-system configuration
How to uninstall Windows 7 if multiple operating systems are installed on the PC? This is done in two steps:
- format the section with "seven" according to the instructions given at the beginning of the article;
- remove it from the boot menu of operating systems.
After using formatting to free the partition, Windows 7 will still be present in the boot list.

To remove it from there, boot the remaining OS on your computer (for example, Windows XP or 8) and log into it with administrator rights. Run the system configuration utility msconfig.exe through the search.


Restart your computer for the setting to take effect. The “7” will no longer appear on the boot configuration screen.

The partition freed after formatting can be attached to one of the remaining, used to install another operating system or to store data.
In a situation where the computer starts to work slowly, the only correct way out among the recommendations for self-configuring the computer, you will find reinstalling the operating system, but this is not always done correctly, so then it becomes necessary to remove the old windows after installing the new one. Usually, the OS is installed on a clean partition, but if it happened that you installed the new windows operating system in the same place (on the same logical drive) as the old one, then it will automatically remove the files of the old operating system into a folder called “windows.old ". After all the necessary files have been saved, the folder with the old OS can be deleted. Moreover, hard disk space is never too much. This can be done in two ways.
Removal using windows
Now you have independently figured out the BIOS settings on your computer, your new system is running and you are ready to go. But so that it was not hampered by anything, Microsoft has already thought about how to remove old windows after installing a new one is convenient for the user, so they added such an item to the standard software as "Disk Cleanup". All work performed will be performed in the windows 7 operating system. In other operating systems of the windows family, the order will be the same. Let's walk through how it works step by step:
- Click the "Start" button (in the lower left corner of the screen).
- Enter "Cleaning" in the search bar.
- Select "Disk Cleanup" at the top of the window.
- The application selected by the previous step will open.
In the window that appears, select the disk where the operating system was previously installed and click OK. Then the program will estimate how much disk space can be freed up and will open the next window in which you need to check the box "Previous windows settings" and click OK. The program will ask you again if you want to delete the files. Agree, click "Delete files", and in a few minutes the files of the previous windows installation will be deleted.
There is another way to open a program that cleans up the disk. Click "Start", then "All Programs". Then we select "Standard", in them - "Service", and after "Disk Cleanup".
Removing an old windows installation manually
If for some reason you want to delete the folder with the old version of windows manually, you will have to tinker a little and perform a number of settings.
First, you need to log into the system under an administrative account with full rights. Otherwise, you will not be able to uninstall the paku.
Now let's go through the settings step by step:
- Open "My Computer".
- Open the drive with the installed operating system (for example, local drive C).
- Find the "windows.old" folder.
- By right-clicking on the folder, open the context menu and select the "Properties" line.
- In the window that opens, select the "Security" tab.
- Click the "Advanced" button - you will see the "Advanced security settings for windows.old" window.
- Go to the "Owner" tab and click the "Change" button.
- In the next window, select your account as the owner, that is, the account from which the deletion will be performed, and click "Apply".
- You will see a message stating that you have become the owner of the windows.old folder - click OK and close the properties window.
- You can start deleting the folder with the old windows operating system.
There are also two ways to delete a folder. The first is to right-click on the folder icon and select "Delete". Agree that you want to delete the folder. Then empty the trash. The second is to select the folder by clicking the left mouse button, press the Shift + Del keys on the keyboard at the same time, agree with the deletion. The folder will be deleted past the trash can, that is, it will not need to be emptied.
After you have coped with installing the new OS and deleting old files, we recommend reading the article about drivers for windows 10, since not all of them are included in the installation package. If you have not migrated to a new system yet, you can find out how to download drivers for the "seven" here.
Clearing the boot menu
After you have installed a new operating system in the same partition, you may have a problem in the form of a menu that prompts you to choose which OS to choose when booting. This problem is simple enough to solve.
- Click "Start";
- Type msconfig in the search bar;
- Select this program in the search results;
- In the next window go to the "Download" tab;
- Choose an old operating system;
- Click the "Delete" button, after which the program will inform you about the need to restart;
- Reboot your computer.
After all the above steps, the operating system will boot in normal mode and the menu with the choice of the operating system will no longer appear.
There is nothing difficult in how to remove old windows installations, the main thing is to decide on the method of execution. Now you can start adjusting the sound on your computer, and setting up drivers, network and other things with peace of mind. Remember: in order to avoid the procedure for uninstalling previous versions of operating systems, it is recommended to install windows on a pre-formatted partition. Thus, you will save your new operating system from garbage in the form of programs and files of the previous version of windows.
Read also: - How to set up headphones on a windows 7 computer - How to set up a local network between two computers - Setting up a windows 7 network - How to set up a microphone on a windows 7 computer - How to distribute wifi from a windows 7 laptop - Setting up Skype on a windows 7 laptop
← Back
bitu.ru
Removing old windows after installing a new one
After installing a new Windows, files from the old version remain on the hard drive, which can take up several gigabytes of disk space. Moreover, in the boot menu, previous versions of Windows continue to "hang", prompting the user to boot from them. In addition, they clog up the PC hard drive and slow down its work. So how to remove old Windows?
Through the disk cleanup menu
You can remove the old version of windows using the Disk Cleanup utility, which is available in all Microsoft operating systems, including windows 10
We go to "Computer" and right-click on the icon of the section where the previous version was. We select the item "Properties", then - "Disk Cleanup".
The system will start scanning this section for trash files; among them will be the item "Previous Windows installations"
Make sure it is ticked. Confirm the deletion. windows will ask you again if you want to continue the operation - click "OK". After a few minutes, the utility will notify you that all trash files have been removed.
The disk cleanup utility can be called in another way: left-click on the "Start" manipulator and enter the word "Cleanup" in the search bar (it also works for windows 10 / windows 8.1). In the list that appears, select the Disk Cleanup item. Click the "Enter" button. The utility will prompt you to select the partition where the cleaning operation will be performed
The previous version of windows can be detected and removed using other cleaning programs. You can use, for example, CCleaner, the latest version of which has been optimized to work with windows 10. You can install other utilities - Glary Utilities, IOBit Advanced Care, and so on. The main thing is that they support work with windows 10 / 8.1 / 7.
Removing the "windows.old" folder and adjusting the boot menu
It happens that neither the standard windows cleaner, nor a third-party one can find old files. This leads to the fact that the user has to look for the "windows.old" folder himself, delete it, and then, through the Windows boot configuration menu, disable the option to select a version that does not already exist. But for this you need to set system administrator rights
How to do it? It's very simple: press the key combination Win + R, enter secpol.msc and click "Enter". In the left menu that appears, double-click on "Local Policies", then - "Security Settings". After that, now in the right window, look for the item "Accounts: Status" Administrator ". Double click on it and switch from "Disabled" to "Enabled" and save the changes.
After that, you need to reboot and start a new (not old!) Version of the operating system. After the main stage of loading, windows will prompt you to log in through two accounts, among which there will be an administrator account. We go through it. That's it, now you can play around with the system as a system administrator.
Now you need to go through the "Explorer" to the section where the folder "windows.old" is located and delete it. To do this, right-click the manipulator on the icon of this folder and select the "Properties" item. Then you need to click on "Security" and then on "Advanced". Among the proposed tabs, select "Owner", press the "Change" button and select the account from which the deletion will be carried out. Save the changes with the "Apply" button and click "OK".
A message will appear that we have become the owner of this directory. Click "OK". Now you can delete the "windows.old" folder (after moving it to the "Trash", this directory must be removed from there as well).
Now you need to go to the boot configuration menu. Press the key combination Win + R, enter msconfig and click "Enter". Go to the "Download" tab and select the previous versions of windows. Click the "Delete" button
The computer will notify you that a restart is required. We agree and restart the system. Everything, the question "how to remove old windows" is resolved.
secretwindows.ru
How to delete the windows old folder (old windows) | Computer for dummies
Without formatting the system drive before reinstalling windows, you will get a burden in the form of files of the previous operating system (OS) stored in the windows.old directory and occupying tens of gigabytes. In addition, the system folders of the old profile and the already inoperative option in the OS boot menu will remain. Getting rid of this garbage is necessary for the normal operation of the computer. In this article, we will explain step by step how to remove traces of old windows. 
Remove windows.old
This folder is located on the C drive and stores personal data of the old windows user, for example, documents. You can open the directory, view the contents and copy the files you want. You cannot erase windows.old in the usual way. To do this, you need to follow the sequence of actions:

Removing old system folders
When you open the Users folder on the C drive, you will see the system folders left over from the old windows. They cannot be removed either from the explorer or by special programs. To do this, you need to obtain the owner's rights:

Having obtained the necessary rights of the folder owner, you can safely send it to the Trash.
Editing the boot menu
From the command line "Run"
With this method, you can permanently remove unnecessary options from the bootloader menu.

From system settings
This option will hide unnecessary downloads at computer startup.
- Press Start + Pause.
- Go to Advanced Options.
- In the "More" menu under "Download ..." click "Options".
- Remove the "birdie" from the item "Display OS list" and click "OK".
Windows XP features
The boot.ini file is responsible for the windows version boot manager. It is hidden in the C root drive and can be edited in a regular notepad. It is best not to do this: a mistake in editing will lead to a system failure. A safer way is to use the settings described above (remove the list of OS downloads). You decide. We will only give advice on how to edit boot.ini:
- Click on "Start", right-click on "My Computer". Select Properties from the menu.
- In the "Advanced" tab, click on "Options" in the "Download" subsection.
- Select Edit to open boot.ini.
- Make a backup to roll back the system in case of a boot failure. Open "File" - "Save As", select the name of the file and the path to write it. The name can be descriptive for easy searching, for example, "backup.boot.ini".
- In the source file, select the line with the old windows with the mouse and erase it. Click "File" - "Save".
After rebooting, the menu with the old OS option will not appear. Only installed windows will be loaded.
Deleting an old profile
Old profile data is stored on the hard drive and in the registry branches. Correct removal will clear the system of all traces of an unnecessary profile.
 Loading ... Published: 20.03.2016
 How to delete the windows old folder (old windows)
dontfear.ru
How to remove windows old from windows 10
- 1 Getting rid of the old
- 2 If it didn't work right away
A nice addition to the new windows 10 operating system is the fact that you can roll back to the previous axis. This saves all user files, settings and programs. Unfortunately, this comes at a very high cost in the form of depriving some of the hard drive space. Yes, there is a folder called windows.old that stores the old version. So the 10th generation can quite easily return to the user everything that he had before the installation.
However, the old folder is huge in size, as it takes a lot of data to roll back correctly. Many users wish to delete such a folder. Well, in fact, windows 10 looks so great, and all the bugs will most likely be fixed in the not too distant future. Thus, the question arises, how to delete this already unnecessary old folder in order to give the system free breathing and not store an impressive pile of old junk? On this score, there is a certain simple sequence of actions.
Getting rid of the old
The old folder on the computer is formed if the user automatically switched from windows 7 or 8 to 10 series. Also, it can occur if you perform a clean install without formatting the hard drive. Often it eats away at several gigabytes, which are very valuable at the current cost of hard drives.
It should be remembered that if you rub the old folder on your computer, you will not be able to painlessly return from windows 10 to your old system.
So this decision should be approached extremely carefully. So, if all doubts are swept away, then:
- Press Win + R on the keyboard, which launches a special Run window.
- Enter the command in the window that appears: cleanmrg and click on OK.
See also: After installing windows 10, the video card does not work
- Thus, the standard disk cleanup starts.
- In the window that appears, click on the Clean up system files button.
- It is necessary to view the list of those files that windows 10 offers to permanently delete. Among them there will be an interesting item called Previous windows installations. This is the old folder, which in the most impudent way devours free space on the hard disk. Let's put a daw on it and send it into oblivion using the OK button.
- The last step is to wait for the hard disk space to be cleared.
In this simple way, you can delete a folder called windows.old. But windows 10 is a cunning system full of unpleasant surprises. Therefore, in some cases, you can simply not delete the old folder for reasons not clear to the user. In this case, there are countermeasures.
If it didn't work right away
We open a wonderful command line interface, which always helps out in difficult times. Naturally, you need to do this under administrator rights. Next, enter the command: RD / S / Q C: \ windows.old. Of course, this folder must be located on the C drive. Press Enter and wait for the result.
There is another way to delete the old folder. To do this, you should:
- Launch Task Scheduler, which can be opened via search.
- In the list of tasks that opens, find the SetupCleanupTask.
- Right-click on this task and select Run from the drop-down menu.
At the end of the process, the old folder should be gone forever.
(Visited 3 186 times, 1 visits today)
windowsprofi.ru
How to remove old / second windows
Alexander Shikhov, 12.12.2013 (updated 11.07.2017)
After installing a new operating system on top or in parallel (in another section) of the previous one, the question arises of how to get rid of the remnants of the old version. Old windows, if installed in the same partition, is named windows.old and does not interfere with the main system. If the old operating system is installed in a different partition, then the folder name remains the same, but this does not interfere with the new system either. Everything seems to be fine, but there are two problems. Firstly, the old system takes up useful space and the volume can be more than impressive. Secondly, it is present in the boot menu, which we see when we turn on the computer. How to get rid of old windows?
Why can't you just delete old files?
Old system files cannot be deleted just like that. It hinders the lack of access to the folder for the user of the current version of windows. This message usually appears.
Attention! Start deleting old windows and Program Files directories only after transferring all their data to the new windows!
If the new system is installed on the same partition as the old one
In this case, we just need to clean up old system files, including the windows.old folder. To do this, we use the Disk Cleanup program, which is included with the operating system. Detailed instructions can be found on the Microsoft website.

By the way, in the same way you can remove unnecessary windows updates and a number of other service files.
If the new system is installed in a different partition
Remove old windows from the boot menu
To put things in order in the boot menu, open the "Advanced system settings" (to do this, press Win-Pause and select the item of the same name).

Now uncheck the box "Display the list of systems ...". All: the old operating system will not appear in the boot menu when the computer starts.
For those who like to control all launch parameters, we offer a method with direct editing of this menu. Press Win + R and write msconfig in the window that appears.

We simply delete the old system from the list.
Removing old system files
Now let's start deleting the old system windows directory itself. To do this, find it on the disk and open the folder properties.

Here we select "Security" and click on the "Advanced" button.

To become the owner of the folder, enter the name of the user under which you are working in the field indicated in the picture.

Do not forget to check the boxes "Replace owner of subcontainers and objects" and "Replace all records ...", click OK.
You are now the owner of the folder and it is in your power to delete the directory. During the deletion, the following message may appear.

Check the box "Run for all ..." and click Continue.
Remember that after deleting old system files, the way back will be closed. So take your time with it. First, make sure that all the programs and data you need have been transferred to the new system.
← Like the material? Follow us on Facebook
Quite recently, during the first appearance of a new version of the OS and updating the system, many became interested in the question of how to delete windows old in Windows 10, and today we will tell you about all the ways to delete the archive folder.
Windows.Old - repository of components and files of the "previous" previously installed system. This folder is created when installing the system in the same section where the operating system was previously installed or when updating to a new assembly. Also, this is a backup copy of the data necessary to return to a previous version of Windows (in case of an upgrade) or restore personal files when reinstalling the system to the same partition.
Unfortunately, restoration of applications in case of reinstallation is impossible (using standard methods). Basically, personal data will be stored here (folders Users, respectively Downloads, Documents, Photos, desktop, etc.), application settings (* Outlook pst files, saved games, application configurations), application data (databases) ...
The folder is stored for 10 to 28 days, depending on the actions performed.
- 10 days - update of the "dozen" to the new assembly (1511-> 1607, 1607-> 1703). This period is necessary for a painless return to the previous version of the system.
As part of cleaning, these applications can delete or empty the Windows.Old folder, making it difficult or negligible to roll back to a previous version of the operating system.
- 28 days - this period is provided after the update (7 -> 8; 8.1 -> 10, etc.), as well as in case of reinstallation in the same partition (where the OS was previously installed or there was a system folder with files).
If all the files are transferred or the OS update was successful, and this folder just interferes and takes up free disk space, then use the following recommendations to remove it:
- Deletion through the Options window
- Removing via Disk Cleanup
- Removing via the Command Line
Deletion through the Options window
To clean the disk from the unwanted folder through the Options menu, follow these steps:
Removing via Disk Cleanup
Also, Disk Cleanup can help you, for this you should follow these steps:

Uninstalling via the command line
If the above methods did not help, then we will delete through the command prompt window:
Call the window Command line by searching for cmd or Command line, run the application as Administrator and enter the following commands one by one:

- takeown / F C: \ Windows.old \ * / R / A
Permanent redefinition of the rights to the contents of the folder will take place. Confirmation will be required by pressing the Y key - cacls C: \ Windows.old \ *. * / T / grant Administrators: F
Confirmation will be required by pressing the Y key - rmdir / S / Q C: \ Windows.old \
Deleting the Windows.Old folder

Windows.Old can store both personal data from past Windows installations, and can store a "backup" copy of the operating system, so that it would be possible to return to a health state in case of an update error or unforeseen situations such as turning off the light. If you are sure that you will no longer need this folder, then feel free to delete it, according to the instructions that were described in this article.
"" Is displayed when a list of operating systems for select their download... If we had Windows XP installed on our computer, and then we installed the "Seven" on another disk, I don’t delete the first one, then after turning on the computer we will need to choose which one we want to run.
So on the list, this case will look like this. Look at the picture first:

This is displayed Windows Boot Manager... To start Windows 7, we will need to select the line with the inscription Windows 7 and press "Enter", and to start the old system, that is, "XP" we will need to select the item "".
This is how we began to name it in the list of downloads when choosing a system. Let's look at how to rename this inscription to the name we are used to as "Windows XP".
There are several ways how you can change this inscription, make it both standard Windows functions, and using separately installed programs. We will do all this without installing other programs, we will manage with standard system tools.
Let's get started. Booting from Windows 7, this is a must. It is in the "Seven" that we will be adjusting so that in the Windows Boot Manager instead of the inscription "Previous version of Windows" there was a more understandable name - Windows XP.
We need to launch Command Prompt. To do this, go to " Start - All Programs - Accessories - Command Line».

And we write the command bcdedit / set (ntldr) description "Windows XP"... Then press the "Enter" key. And we see that the operation was successful!

Everything is ready. Now you can restart your computer and see what happens. Instead of the inscription Previous version of Windows, we now have Windows XP. Everything is logical.
For many PC users, after updating or reinstalling Windows, the "Windows.old" directory appears, if, for example, you upgrade Windows 8 to Windows 10... This folder contains all files of the previous OS, as well as all files of users and programs. All this information takes up a lot of space on your hard drive. Depending on the amount of user data of the previous OS, in some cases this directory can reach tens of gigabytes. Therefore, we will try to understand this issue in detail.
The system keeps the previous version for further opportunity to return to it(execute the so-called Downgrade). As a rule, this feature is temporary, and if you do not use it, the folder will be deleted automatically.
Eight removal process
Let's consider an example of deleting the "Windows.old" directory after upgrading the seven to Windows 8. For this go to our local drives by clicking Win + E. Select the local disk with Windows installed and go to its properties, as shown in the figure.
In the disk properties window, click the button.

The Disk Cleanup analysis window should appear.

After that, the "Disk Cleanup (C :)" window will appear, where you should press the key Clean up system files.

If you click this button, the system will estimate the amount of files to be deleted, and we can go to the next window. Here you need to put one check mark, as shown in the figure.

In our case, the files of the previous OS are 7.92 GB... After the appropriate item is selected, you can safely press the OK button. Disk Cleanup will start, which will delete all files from the previous OS.

The process of deleting a folder in the top ten
Deleting a directory in a top ten is very similar to erasing a folder in a eight. We also go to the explorer. Select the local drive "C: /" and go to its properties.

We also click on the button.

After clicking on the button, we will see the same window as in the figure eight, only with a slightly different design.

Press the same key Clean up system files and go to the next window.

Select the same checkbox and press the OK button.
As you can see, the process is similar to the first one with the eighth version of Windows.... In this example, we have released 8,36 GB which is not a bad result.
It should also be remembered that when you delete the "Windows.old" directory, user data and files of installed programs are erased. The structure of subfolders with files from the previous OS is shown below.

These files can be multimedia data, Word or Excel documents. Therefore, before deleting this folder, you should save important data in it.
Deleting the Windows.old folder using CCleaner
The most optimal option is a program for cleaning the system. CCleaner... This program can be downloaded for free from the official website www.piriform.com/ccleaner. Installation of the program is quite simple and even a novice PC user can handle it. After starting the program, you should select in the "Cleaning" tab the item " Old Windows installation"As shown below.

Now click the Analysis button. This is necessary in order for CCleaner to analyze the files to be cleaned and display their complete list in the program window. In the figure below, a line is highlighted that contains files from the "Windows.old" directory.

After clicking the Clean button, the program will completely delete the files of the old OS.
Manual deletion
Now we will describe the process of deleting manually, that is, if you were to delete a directory with the Delete key. By deleting the folder using the Delete key, you can see this message.

This message means that we do not have permission to delete this directory. To correctly set the appropriate rights, go to the properties of the folder on the tab " Safety».

Now click the Advanced button. You should be taken to the additional security window for this folder.

As you can see from the figure, the owner of our folder is “ SYSTEM". Therefore, you need to select the owner of the user with which you logged in and click the Apply button. After applying the rights, you can delete "Windows.old" using the explorer with the Delete key.
Removal with TakeOwnershipPro
You can delete the "Windows.old" directory with a simple utility TakeOwnershipPro which you can download at http://www.top-password.com/download.html. After installing the utility it will appear as a separate item of the explorer context menu a. To delete a directory, go to the context menu for the folder to be deleted and select the item " TakeOwnershipPro».

After clicking, the program window will start, where scanning and assignment of rights for files and directories will be performed in order to remove them later.

Scanning can take two minutes or longer, depending on the size of the folder to be deleted. After waiting for the scan to complete, click the Take Ownership button. After that, the folder will be permanently deleted after about two minutes.
Conclusion
After reading this material, you should no longer have a question why I can not delete the "Windows.old" folder. By doing this, you will free up gigabytes of free space on your hard drive. I would also like to remind you that by deleting this directory, you delete all user data from the previous OS. Therefore, if necessary, you need to make backup copies of this data.
Related Videos


