Printer sharing means that computers not directly connected to the printer can also share the printer. Such an opportunity kills the need to buy extra equipment. It is enough to install one printer per cabinet, share the printer and all users can use it. Usually, a print server is used for such purposes - a special computer whose only task is to be always on and act as an intermediary between the printer and the end user.
How to share a printer?
In order to share a printer, the user must first connect it properly, that is, it must be ensured that printing from the local computer is possible. After that, you need to go to the window
- Control Panel
- Equipment and sound
- Devices and printers
There, among all the connected printers, find the one you want to make public. Then you need to open Properties this printer and go to the tab Access. In this tab, you must check the box with the name Sharing this printer. After these steps, you only need to save the changes and the printer will be shared.
How to share a printer that is in the Homegroup?
The process of sharing a printer in a HomeGroup is a bit more complicated. To do this, you first need to enable global printer sharing. Let me remind you that when joining a Homegroup, the user must select the resources to which he shares. To be more precise, there are 5 of them: 4 default Windows libraries and printers. It is at that moment that you need to put a tick in front of the item Printers if you are going to share printers that are directly connected to your computer.
If you did not do this when joining the Homegroup, then you need to fix it. To fix this, you need to go to the window:
- Control Panel.
- Network and Internet.
- home group.
- Change advanced sharing options.
- Activate Turn on file and printer sharing.
Once the global printer sharing feature is open, you must share directly with a printer. And you can do this by following the instructions given in the previous paragraph. That's all the wisdom on the topic of sharing printers on a local network.
Printer sharing, an indispensable feature when working at home or in an office where there are several PCs and one printer. This feature will significantly reduce the time it takes to print the necessary documents for all users. Let's look at how to enable file and printer sharing in a Windows system.
What will be discussed:
How to share a printer in Windows XP
To make the printer public (share), all PCs must be connected to the same network. The procedure for connecting a PC to the homegroup: click on Start with the left mouse button (LMB), select Control Panel, select Network and Internet Connections, select the item
To share the connected MFP, you need to open the menu.
From the list of all devices, select the necessary one and right-click (right-click), select Sharing and confirm the selection by clicking OK.

To be able to use a public device, you need to open the Printers and Faxes section.
Select the required device from the list of available devices.
Note: when adding a network printer, it often becomes necessary to install software for this equipment, the system will try to install the necessary software automatically, if this does not solve the problem, you must use the "firewood" disk.
Usually it comes with the device, but as a rule, it is often lost. In the absence of a disk, it is worth trying to download the necessary programs from the official website of the printer manufacturer and install them using the prompts of the installer program.

Sharing a Printer in Windows 7
To create or edit homegroup settings, you need to go to Start LMB or through the Win button. Next, you need to open the Home Network item in the Control Panel or using the command line.
Note: if the control panel automatically opens to the "All Control Panel Items" section, then just go to the Homegroup section.
To make your MFP publicly available, you need to check the boxes by sharing it with all PCs of this group.
After these manipulations, all PCs in your group will have access to the MFP.

To connect to a public printing device, you must be connected to this network, it is imperative that the host PC with the connected MFP has the correct settings. To work on the MFP, the PC to which it is connected must be turned on.
Note: To connect to your home network, you must know the homegroup password.
With the correct settings, it becomes possible to use a public device during the call to print a document.
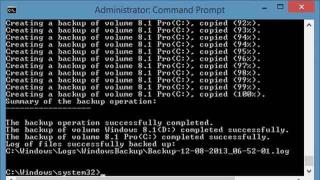
Sharing a printer in Windows 8 and 8.1
First you need to go to the Control Panel.
Note: The easiest way to open the Control Panel is to right-click on the Start icon and then select the desired item.

Open the Network and Sharing Center.
Note: The path will be correct when opening the category list. When you open the icon mode, you need to immediately find the desired item from a wide list.
To share the printer, check the boxes, save the changes.
Note: for faster and more convenient use of the functions, it is necessary, if possible, to disable the password request for the group.
To access the shared device, you need to go to the control panel section.
In the list of available printing devices, select the required one and save the changes.
Sharing a Printer in Windows 10
To create a local group, go to the Homegroup item in the Control Panel and check the necessary items.
The network is created and the MFP is shared for all PCs of this group.
Users need a password to access your group.
Adding a public printing device requires a connection to this local group.
Start the search and select from the entire list the required MFP.
Frequently Asked Questions When Sharing
Printer sharing won't turn on or error 0x000006d9
If you encounter error 0x000006d9, do not immediately panic. This error occurs when you try to share a printer connected to your PC. This is due to the fact that the firewall is turned off, and this can be observed on the computers of many users. To fix the problem, you need to enable the firewall and then share the printer. Note: if the firewall bothers you so much, after all the manipulations, you can turn it off again, this will not affect further work.

Can't connect to local network
There are quite a few reasons for such a problem, let's consider the most common and simple one: your antivirus interferes with such a connection, as it sees a threat in it. It is worth a try, temporarily turn off the protection and connect again. As a result of success, you need to add the connection to the antivirus ignore.
The computer does not see the shared printer
When you try to add a shared device to the list of available devices, your PC does not see the network printer? This problem, oddly enough, often lies on the surface itself.
Solution options:
- Check the device and PC connection, the required software, and try to print the document directly from the connected computer.
- In case everything is working properly. But there is still no connection, check the settings on both PCs.
- Install the software for this device model on your PC.
Is it possible to connect a PC with different OS?
Yes, this option is possible, with rare exceptions, there are no problems with this issue and everything goes in order for the operating systems described above.

Also, for convenience, you can print it in a document or save it in a convenient place.
Hello!
It's no secret that many of us have more than one computer in the house, there are also laptops, tablets, and other mobile devices. But the printer, most likely, just the same one! And indeed, for most, one printer in the house is more than enough.
In this article, I would like to talk about how to set up a printer for sharing on a local network. Those. any computer connected to the local network - could print on the printer without any problems.
And so, first things first…
1. Setting up the computer to which the printer is connected
2) When you go to explorer (for Windows 7 users; for XP you need to go to network) at the bottom, in the left column, computers are shown (network tab) connected to the local network.
Pay attention - whether your computers are visible, as in the screenshot below.
3) On the computer to which the printer is connected, drivers must be installed, the printer must be configured, etc. so that you can easily print any document on it.
1.1. Printer access
Go to Control Panel\Hardware and Sound\Devices and Printers(for Windows XP " Start/Settings/Control Panel/Printers and Faxes"). You should see all printers connected to your PC. See screenshot below.
You also need to look at the ““ tab: here check the “ print" for users from the" all« group. Turn off the rest of the printer management options.
This completes the setup of the computer to which the printer is connected. We pass to the PC from which we want to print.

2. Setting up the computer to print from
Important! First, the computer to which the printer is connected must be turned on, as well as the printer itself. Secondly, a local network must be configured and shared access to this printer must be opened (this was discussed above).
We go to " control panel/hardware and sound/devices and printers". Next, press the button " add a printer«.
You should be asked several times whether you really trust this device, whether to install drivers for it, etc. You answer in the affirmative. Drivers for Windows 7, 8 are automatically installed by themselves, you do not need to download or install anything manually.

The most common way to share a printer over a network in Ubuntu Linux is to use Samba. For example, in Ubuntu 12.04, when installing a local printer, it is automatically made a shared network printer via Samba (of course, if the Samba service was installed before).
Note. Samba is a linux server that recreates the Windows networking environment, allowing you to share network resources with Windows computers. At the same time, Windows computers "see" Linux computers as if they were also Windows computers. Samba allows you to share files and printers over a network.
In general, Samba works quite well. Performing the functions of sharing network resources not only between Linux - Windows computers, but also Linux - Linux. However, there are situations when you need to use other options. For example, share a printer over the Internet, or if you have a so-called "Windows printer" that cannot be shared via Samba.
Note. Any printer works under the control of its own firmware - firmware. In normal printers, the firmware is stored in the printer itself. But there are such printers, there are quite a lot of them, in which the firmware is dynamically loaded into the printer by the driver of this printer. Typically, these printers work fine only under Windows. And under other operating systems, certain problems arise with them. For example HP LaserJet M1132 or HP LaserJet P1102 on Linux they connect and work locally, but it is very difficult to get them to work over the network via Samba.
This article will describe how to set up a network printer in Ubuntu 12.04. There are several network printing protocols, one of them is IPP (Internet Printing Protocol). This protocol enables printing over TCP/IP network protocols. Although it is called "Internet Printing Protocol", it is also possible to access the printer through the LAN, since it uses the same TCP/IP protocols. From a technical point of view, there is no difference between the Internet and a local area network.
Printer Sharing in Ubuntu Linux (via IPP)
Step one
Naturally, the first thing to do is install and configure a local printer on the computer to which it is connected. Usually, in Ubuntu, this is done automatically, some time after you have plugged the printer into a USB port and turned it on. After connecting a local printer, you need to check its operation. And after that, share the printer over the network.
step two
On Linux, printing is managed by the CUPS service. In Ubuntu, access to the CUPS service settings is possible through any browser - you need to open the address "localhost:631" and in the panel, on the "Administration" tab, enable the options "Allow sharing ..", "Allow printing from the Internet":
This must be done on the computer to which the printer is connected locally! This will be the server computer.
Step Three
You need to find out the IP address of the server computer. This can be done, for example, through the console, with the command " ifconfig -a".
Step Four
Connecting the printer over a network, on a client computer. It is executed through a standard GUI interface, for GNOME it is the "Printing" applet. Click the add printer button, then select "Find a network printer" in the dialog box, enter the IP address of the server computer and click the "Find" button:

As a result, a printer (or several printers) will be found, select it and press the "Forward" button:

That's all.
After installing a network printer, you need to check its operation.
IPP over LAN
Sharing (network) access to a printer via IPP has advantages over access via Samba:
- Printing via IPP is faster than printing via Samba.
- Some "Windows printers" are very difficult or even impossible to get to work through Samba.
When using IPP over a local network, ensure that the server computer has a permanent IP address. If network settings are distributed via a DHCP server (a very common version of a router with a DHCP server), then in the DHCP server settings you need to specify a permanent IP address for the server computer (via the MAC address).
If there is no access to the DHCP server, then you can specify manual settings for the network card on the server computer.
How to share a printer over the Internet
In order for this printer to be accessible via the Internet, the server computer must have a "direct" IP address. That is, it must be connected to the Internet not through a gateway. It's easy to check:
- find the IP address of the server ifconfig -a).
- open in the browser (from the server) the address 2ip.ru, the IP address will be indicated there
- compare them.
If the addresses are the same, then the address is "direct". If the addresses are different, then you are connected through a gateway (router). If you are connected to the Internet through your own router, then you need to look at the IP address not on the computer, but on this router. If you are connected to the Internet through a router and your router has a "direct" IP address, then in the router settings you need to do "port forwarding" (port forwarding) for TCP port 631.
If the IP address of your computer or router is not "direct", then you will not be able to print over the Internet.
If you found this article useful or just liked it, then don't be shy - support the author financially. This is easy to do by throwing money on Yandex Wallet № 410011416229354. Or on the phone +7 918-16-26-331 .
Even a small amount can help writing new articles :)
Greetings!
In the age of information technology, no one is surprised by the presence of many gadgets in the house: computers, laptops, tablets, smartphones, etc. And if there can be several voiced gadgets and devices, then the printer, as a rule, is one.
In most cases, there is no particular point in acquiring several printers for home use, and therefore it would be nice to set up local network sharing so that you can print the necessary materials from all computers and devices that are available and connected to your home local network.
This material is intended to tell you how to set up a printer for sharing on a local network.
Presetting a computer with a printer
1) Naturally, you must first configure the local area network (LAN) itself - computers connected via a hub or router must be part of the same workgroup, etc.

2) Check if other computers connected to your local network are displayed in the system window Net. The picture posted shows what it looks like. In this case, of course, in your case, the names of computers and their number of computers will be different.
3) On the main computer to which the printer is directly connected, the driver for the printer must be installed, and the printer itself must be configured to work. In other words, the printer must be ready to print.
Sharing the printer (sharing the printer)
To share the printer, go to the menu Control Panel -> Equipment and sound -> Devices and printers.

You can also immediately open this window as follows: press the key combination on the keyboard Win+R, in the opened window Run enter control printers, and then press OK.

In this window you will see all the printers installed in the system. Right-click on the printer you want to share so that you can print to it from other computers on the network. In the context menu that appears, select Printer Properties.

In the printer properties window that opens, switch to the tab Access. There, first press the button Setting up sharing, and then check the box Sharing this printer.
If you wish, you can also change the name of the printer that will be displayed on other computers.

Now go to the tab Security. Here select in the block Groups or Users paragraph Everything and allow printing for them by checking the appropriate checkbox. Uncheck all other printer controls.
If you are at a loss, then look at the image and make the adjustment exactly.
After making changes, press the key OK to save the settings.
Setting up the computer(s) to print from
Before you can directly configure other computers, the following conditions must be met:
- the computer and the printer attached to it must be turned on and ready to print
- settings must be made as described above
If these conditions are met, then proceed to the configuration. To do this, open the system window Devices and printers. How this can be done the fastest was described above.

In the Devices and Printers window that opens, click on the button located there Add printer.

The process of finding and adding printers will start. If in your case several printers and other printing devices are detected, then select yours and click Further.
In the subsequent process of installing the printer and drivers for it, corresponding requests will appear in the system - answer them in the affirmative.
Possible problems you may encounter at this stage:
1) If the printer was not detected during the installation process, then try restarting all computers and try again.
2) The printer may not be detected also because different generations of operating systems are used, for example, Windows 7 and Windows 10. And you are guaranteed to encounter a problem if you try to share the printer on a computer with outdated Windows XP to print from Windows 7, 8, 10 on your local network.
Solution: stop using Windows XP and install the latest version of Windows on your computer.
3) Even if you are using an operating system of the same generation, but their bit depth () is different, then problems may also arise - the appropriate driver will be requested.
Solution: try to search for drivers with the required bit depth yourself, if they were not found and installed by the system in automatic mode.
I hope that you will not encounter these problems, and everything will be installed automatically.
When finished, the system will display your printer, to which you can print documents and other materials, as if it were directly connected to your PC.
The only caveat: the computer to which the printer is directly connected must be on at the time the data is sent for printing. Otherwise, the documents will not print.
Summary
In this article, we examined in detail how you can share (share) a printer on a local network. The steps and possible problems that lie in wait on the way to the desired were considered in detail.
I hope this article has been of some help in setting up network sharing for the printer.
If you have any questions, you can ask them in the comments.