Android N adds support for displaying multiple apps at the same time. On mobile devices, two applications can be launched side by side or on top of each other in the mode split screen... On TVs, apps can use the picture-in-picture to play the video while users are using another application.
If you are building an application using the N Preview SDK, you can specify how it will act in multi-window mode. For example, you can set the minimum allowable size for the application window. You can also turn off multi-window mode for an application so that it only appears in full screen mode.
Overview
In Android N, multiple apps can be on the screen at the same time. For example, a user can split the screen to view a web page on the left and write an email message on the right. User experience varies by device.
- Split-screen mode is available on Android N mobile devices. In this mode, two applications are displayed side by side or on top of each other. The user can drag the dividing line to enlarge the window of one application and reduce the window of another.
- On Nexus Player devices running Android N, apps will be available, which will allow the app to display content while the user is browsing or interacting with other apps.
- Manufacturers of larger devices can activate freeform mode, where the user can resize each window in any way. In this case, in addition to the split screen mode, this mode will also be available on the device.
Rice. one. The two apps are displayed side by side in split screen mode.
The user can switch to multi-window mode in the following ways.
- If the user opens and long-presses the name of the operation, it can be dragged to the selected part of the screen and switched to multi-window mode.
- If the user presses the Browse button for a long time, the device will switch the current operation to multi-window mode and open a browse screen where the user can select another operation to share.
In this mode, at any given time, only the last operation with which the user interacted is active. Such an operation is considered the highest... All other operations are suspended, even if they are displayed. However, the system prioritizes suspended but visible operations over invisible ones. If the user interacts with one of the paused operations, it resumes and the previous topmost activity is paused.
Note. In multi-window mode, the application can be paused and still visible to the user. An application may need to continue its operations even if it is suspended. For example, a visible paused application playing a video will still display the video. That's why we not we recommend to pause playback in the handlers of such applications. Instead, you should pause the video at and resume playing at.
If the user puts the application in multi-window mode, the system notifies the operation of the configuration change as specified in the document. In fact, this change has the same effect on the lifecycle of an operation as the system notifies the application about the transition of the device from portrait to landscape, only the screen dimensions are changed, not the orientation. As described in the document, an activity can handle the configuration change on its own, or it can allow the system to delete the activity window and recreate it with new dimensions.
If the user enlarges one of the sides of the window, the system resizes the operation window according to the user's action and applies it as needed. If the application fails to draw new areas, the system temporarily fills them with the color specified by the default windowBackgroundFallback attribute or style attribute.
Configuring the application for multi-window mode
If your app targets Android N, you can specify how (and whether) your app's operations support multi-window mode. Size and layout control attributes are set in the manifest. The attribute settings of a root activity apply to all activities in its task stack.
Note. If a multi-orientation app was built with an SDK version earlier than Android N and the user runs the app in multi-window mode, the system will force the app to resize. The system displays a dialog box with a warning that the application might function unexpectedly. System not resizes the window for applications with a fixed orientation. If the user tries to open such an application in multi-window mode, it will occupy the entire screen.
android: resizeableActivity
Android: resizeableActivity = ["true" | "false"]
When this attribute is set to true, the operation can be run in split screen and freeform modes. If the attribute is set to false, the operation does not support multi-window mode. If the value is false and the user tries to start the operation in multi-window mode, it takes up the entire screen.
If the app targets Android N, but no value was specified for this attribute, then the default is true.
android: supportsPictureInPicture
Set this attribute on node
Android: supportsPictureInPicture = ["true" | "false"]
Layout attributes
In Android N, the manifest element is
Android: defaultWidth The default width of the activity window in freeform mode. android: defaultHeight The default freeform mode height of the activity window. android: gravity The starting position of the freeform activity window. See the class description for the allowed values. android: minimalSize Minimum values for the height and width of the operation window in split-screen and freeform modes. If the user moves the dividing line in split screen mode to make the operation window smaller than the specified minimum, the system will crop it to the user-requested size.
The following code example demonstrates how to set the default size and position of an activity window, and its minimum size in freeform mode:
Launching an application in multi-window mode
Android N brings new capabilities to support multi-window applications.
Unavailable features in multi-window mode
Some features are disabled or ignored in multi-window mode because they do not make sense for an operation that is displayed on the device screen at the same time as other operations or applications. Below are examples of such possibilities.
- Some customization options are disabled. For example, apps cannot hide the status bar unless they are running in full screen mode.
- The system does not consider attribute changes.
Change notifications and prompts in multi-window mode
Activity.inMultiWindow () Call this method to see if the activity is in multi-window mode. Activity.inPictureInPicture () Call this method to see if the activity is in picture-in-picture mode.Note. Picture-in-picture mode is a special case of multi-window mode. If the myActivity.inPictureInPicture () method returns true, myActivity.inMultiWindow () also returns true.
Activity.onMultiWindowChanged () The system calls this method when an activity enters or exits from multi-window mode. The system passes the method to true if the operation enters multi-window mode and false if it exits. Activity.onPictureInPictureChanged () The system calls this method when the activity goes into picture-in-picture mode. The system passes the method to true if the operation enters picture-in-picture mode and false if it exits.
Launching new operations in multi-window mode
When starting a new operation, you can tell the system that the window for the new operation should be shown next to the current one, if possible. To do this, use the Intent.FLAG_ACTIVITY_LAUNCH_TO_ADJACENT flag. This flag requests the following behavior.
- If the device is in split screen mode, the system tries to create a new activity window next to the window that started it to place the two activities on the screen. The system is not guaranteed to be able to do this, but if it can, the activities are displayed next to each other.
- If the device is not in split-screen mode, this flag is ignored.
If the device is in freeform mode when starting a new activity, you can set the size and position of the new activity window by calling the ActivityOptions.setLaunchBounds () method. This method is ignored unless the device is in multi-window mode.
Note. If you run an activity on the task stack, it replaces the on-screen activity, inheriting all of its multi-window properties. To start a new operation in a separate window in multi-window mode, it must be started in a new task stack.
Drag and drop support
android.view.DropPermissions A token object for specifying permissions to the application into which the data is being dropped. View.startDragAndDrop () New alias for. To enable drag and drop between operations, pass the new View.DRAG_FLAG_GLOBAL flag. If you need to grant the receiving operation permission to read or write a URI, pass a new flag View.DRAG_FLAG_GLOBAL_URI_READ or View.DRAG_FLAG_GLOBAL_URI_WRITE, respectively. View.cancelDragAndDrop () Cancels the current drag-and-drop operation. This method can only be called by the application in which the drag-and-drop operation was initiated. View.updateDragShadow () Replaces the shadow of the current drag operation. This method can only be called by the application in which the drag-and-drop operation was initiated. Activity.requestDropPermissions () Requests permissions for content URIs passed in an object to.Testing the application in multi-window mode
Regardless of whether you are updating your Android N app, you need to confirm its multi-window behavior in case the user tries to launch it in this mode on an Android N. device.
Test device setup
If you install Android N on your device, split-screen mode will be supported automatically.
If the app was built without using the N Preview SDK
If you did not use the N Preview SDK to create an application and the user tries to run it in multi-window mode, the system will forcefully resize the application window if its orientation is not fixed.
If the app is not set to a fixed orientation, you should launch it on an Android N device and try to put it into split screen mode. Make sure the app works fine after forcing the resize.
If your application is set to a fixed orientation, try setting it to multi-window mode. Make sure to keep the application in full screen mode.
If the application supports multi-window mode
If you used the N Preview SDK to create an application and did not disable multi-window support, test the application as described below in split screen and freeform modes.
- Launch the application in full screen mode and then switch to multi-window mode by long pressing the Browse button. Make sure the application switches between modes correctly.
- Run the application directly in multi-window mode and check that it works fine. You can launch an application in multi-window mode by clicking the Browse button, then long-pressing the application's title bar and dragging it to one of the highlighted areas on the screen.
- Resize the application window in split screen mode by dragging the split line. Make sure the resizing does not crash and that the necessary interface elements remain visible.
- If you specified a minimum size for the application window, try setting the size less than the minimum. Make sure it is not possible to set the size below the specified minimum.
- During all tests, monitor the performance of the application - it should be acceptable. For example, make sure that there is no long interface refresh delay after resizing the application window.
Testing checklist
To test the performance of an application in multi-window mode, follow these steps. Try them in split screen and multi-window mode unless otherwise noted.
- Switch to and exit multi-window mode.
- Switch from your app to another app and check that the app is working fine if it is visible but not active. For example, if an app is showing a video, it should continue playing while the user is using another app.
- In split screen mode, try moving the split line by making the application window larger and smaller. Try these operations with the windows of two applications side by side and on top of each other. Make sure that the application does not crash, that the required items are visible, and that resizing does not take too long.
- Quickly resize the application window several times in a row. Make sure the application is not freezing or causing a memory leak. For information on checking the memory usage of an application, see the document.
- Run the application in different window configurations and make sure it behaves as expected. The text should be easy to read, and the interface elements should not be too small.
If you have disabled multi-window support
If you disabled multi-window support by setting android: resizableActivity = "false", run the app on an Android N device and try to put it into freeform and split-screen modes. Make sure to keep the application in full screen mode.
The physical dimensions of the displays of modern mobile devices are becoming larger, while maintaining the convenience of working with them. Therefore, the problem arises of a more rational use of space on the screen. Indeed, even in Android 6.0, they still did not dare to introduce a split-screen or windowed mode function, although the capabilities of the system and the power of gadgets allow this. But when the manufacturers are in doubt, the community makes it happen.
Xposed Framework Activation
The second step is to install and activate a special module in Xposed, which is called the XHaloFloatingWindow. This can be done from the framework itself, but in this case, the program we need will be in English, which is unacceptable with an abundance of settings and capabilities.Therefore, you can download the Russified XHaloFloatingWindow here:
The module is installed as a normal android application, but for its correct operation you will need to use it and then reboot the device. To do this, go to Xposed on the "Installed Modules" tab, find XHaloFloatingWindow in the list that appears, check the box and reboot in any convenient way.
Now you can go to the program itself. You can launch it from the usual list of applications. The main screen is one of the settings tabs, at the initial stage you only need to enable the "Windowed mode" item. Next, slide to the left to switch to the "Window Behavior" tab. In the "Launch Applications" category, tap on "White / Black List Options". In the menu that opens, select the second item.
That's all, now any programs will open as windows in any number that can be dragged, collapsed or docked at the top or bottom of the screen. Minimized windows will be available from the notification bar. Having studied the XHaloFloatingWindow settings in more detail, the user can customize the behavior of applications completely to suit his needs, since the project allows you to do this in a wide range of possibilities.
XHaloFloatingWindow at this stage is in beta version, therefore it may malfunction, up to the inability to turn on the device.
In this case, you do not need to panic, but take the following steps:
- Restart the device again.
- Clear cache through recovery.
- Clear dalwick cache.
- Delete the file /data/data/de.robv.android.xposed.installer/conf/modules.list, you can do this either through ADB or through recovery.
- Remove Xposed using the appropriate archive.
After each step, you need to reboot the device, checking if the problem has been fixed.
In the new version of the operating system, Google has implemented a very necessary feature - multi-windowing in Android Nougat. This feature allows you to launch any application in windows, and not like Samsung and LG, which only allow you to use multiple windows for some applications. This means that the new feature works for almost all applications, all the time.
However, there are limitations. First, the feature probably won't work with legacy apps that haven't been updated in due time. Secondly, you cannot launch the same application in a new window. Fortunately, there is a solution for the latter: an application called Parallel Windows for Nougat.
Before we talk about how to use Parallel Windows, it's worth noting that this application is in Alpha Development and is experimental, so some bugs may occur. Keep this in mind when testing your application! Also, it goes without saying (but I'll say it anyway): you need to have Nougat in order to use this app.
So, now we can tell you how to start multi-windowing in Android Nougat. First, install Parallel Windows (it's free). After installation, launch the application.
How to install Parallel Windows
After launching the application, a warning will be displayed indicating that the application is experimental. Click on the "I have read and understood" box, then click on "Continue".

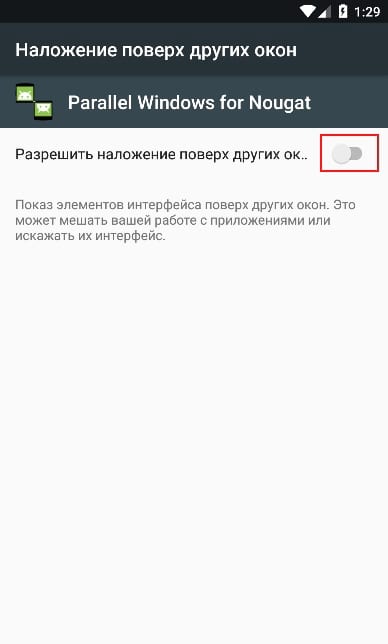
On the next screen, you need to give two permissions in order to take advantage of all the features of Parallel Windows. Click on the first switch "Permit to draw over Apps", you will be taken to the permission menu, where you need to enable it. Once you enable the permission, go back to the Parallel Windows app.

Next, in the main menu, click on the "Enable Accessibility Service" switch. You will be taken to the Accessibility menu, where you will need to enable Parallel Windows for Nougat. A pop-up window will appear, in which it will be said what the application will have access to, click "OK". Again, just press the back button to return to the main application.


Finally, you need to put "Hotspot Dimensions". This is where the Parallel Windows menu will appear. By default, it is set in the middle of the right side of the screen, which is a great place to do this. I will use this parameter throughout the tutorial.

This completes the installation of Parallel Windows. You can now use multiple windows in Android Nougat.
How to use Parallel Windows
To begin with, swipe to the middle of the right side of the screen - in the place we talked about earlier when setting up "Hotspot Dimensions". The Parallel Windows menu will open.


There are three options here, from top to bottom: open the applications menu, launch a multi-window session, and an application mirror.
The first option opens the Apps menu - a quick and easy way to open an app. Selecting an application from the application menu will automatically open the application in multi-window mode. It is also worth noting that it will take a while to display all installed applications if there are many.


The second icon launches the application in multi-window mode. A list of recently opened processes will open and you must select the application you are interested in at the bottom of the window.


The second option can be used without using Parallel Windows. The third option is the most powerful, it allows you to use the application mirror in multi-window mode. However, it can seem confusing.
To use this feature, you must first start at least one application in windowed mode. Open the Parallel Windows menu and select the bottom option. A pop-up message will appear telling you to Select an application to get a mirror.
Hidden away in Android 6.0 is an experimental option that allows you to use multi-window mode. It is relatively difficult to activate it, but if you do everything right, there should be no difficulties with this. Unlike the similar feature on Samsung smartphones, it works with all applications.
In order for the multi-window option to appear on Android 6.0, you just need to edit the build.prop file, indicating in it that you are using the userdebug assembly, and not the user. This can be done using a computer and custom recovery, and if root access is obtained on the device, using a regular text editor.
The first way
1. Install custom recovery on the device (for example, TWRP). To do this, download and install ADB from the Android SDK. Then download the recovery image for your device, rename it to twrp.img and place the ADB folder.
2. Connect your smartphone to the computer with a USB cable, open a command prompt and run three commands:
Adb reboot bootloader
fastboot flash recovery twrp.img
fastboot reboot
3. Turn off your smartphone and go into recovery by pressing a certain key combination (usually the power button and volume up and down buttons).
4. In the recovery, select the Mounts section and put a cross in front of System.

5. Connect the smartphone to the computer with a cable and on the computer in the command line, enter the following command:
Adb pull /system/build.prop
6. The build.prop file will be downloaded to your computer. Open it in notepad and replace the line "ro.build.type = user" with "ro.build.type = userdebug"

7. Download the build.prop file back to your smartphone by entering the command in the command line:
Adb push build.prop / system /
8. Set three more commands that are needed to prevent third-party applications from modifying build.prop:
Adb shell
cd system
chmod 644 build.prop
9. Restart your smartphone and enable multi-window in developer settings.
Second way
On rooted smartphones, editing the build.prop file is much easier. This can be done with the dedicated Build Prop Editor application or with a text editor built into the file manager like Root Explorer or X-Plore. The file is located at /system/build.prop and you need to replace the line “ro.build.type = user” with “ro.build.type = userdebug”.
How to activate multi-window?
1. Open in system settings, go to the "About device" section and click on the Android build number a few times.
2. A section for developers will appear in the settings. Go into it - you will see a switch that allows you to activate the multi-window.

3. Open the multitasking screen by long pressing the home button (or virtual button). You will see a new icon on the app page thumbnails. After clicking on it, the system will offer you to choose the location of the application: on half, one-fourth of the screen or on the whole screen. When multiple applications are open, the aspect ratio of their windows can be changed.

Most likely, in the future, Google will open access to this Android feature to all users. Do you think smartphones and tablets need it or is it completely useless?
The Second Screen application for Android has become available for users of the operating system. From now on, two windows can be simultaneously displayed on the device screen, regardless of their content - it can be a game and an application for reading, a browser and a social network, and any other combinations.

Multi-window mode on Android 7 allows you to use five programs at a time. To add an application to multitasking, you need to open it and swipe from any top corner of the screen in a diagonal direction and select the button that minimizes the application. With another program necessary for work, do the same. Click on the button that allows you to view all active programs (as a rule, to the left of the "Menu" button on the device, a diode icon with several windows) and select the applications that you want to run in multi-window mode.
On some devices, the multi-window is turned on by long pressing the button for viewing running programs and turned off in the same way.
The multi-window function on Android 7 is especially convenient for equipment with large displays.
On android version 8
Multi-window mode on Android version 8.0, or in other words Oreo, is called Picture-in-Picture and turns on automatically. How? When watching a video in various applications and browsers, the user can press the Home button and enable something else. In this case, the video being played will turn into a small screen that can be moved to any point on the display for convenience. Of course, this is not the multi-window mode that can be obtained by interfering with the phone's settings, but for moviegoers who do not want to bother, it is quite suitable.

Videos enabled in Picture-in-Picture mode have hotkeys. They allow you to quickly close a small window, wind the video, pause and open it in full screen mode.
You can also work with programs in the extended multi-window mode by installing a special application or using the change in factory settings.
On Android 6 version
The Android operating system version 6.0 has been able to work with several applications at once since 2015, thanks to independent software vendors. By making some changes to the open source code, the developers allow the device to display more than one window at once.
Ordinary users should take into account that the function does not always work stably on older versions of the operating system. In multi-window mode on Android 6, problems may arise with the display and use of some programs and games. Resizing of working windows is not supported.
How to enable multi-window mode Android
To work with the device in multi-window mode, you need to activate this function in the settings of your gadget. For this:
- Go to settings and select the "About device" section.
- You need to click on the build number repeatedly to bring up the "For Developers" menu.
- Find the phrase "Resize in multi-window mode" and move the plug next to it to the working position.
- Restart your gadget and enjoy the new features.

If connecting the option according to the instructions given did not lead to a result, you need to download a special Taskbar application. It's completely free. Do all the manipulations from the instructions above, after restarting the device, install Taskbar and launch it.
How to remove the second screen on Android
The easiest way to quit multitasking screen use is to restart your gadget. Most devices, however, allow you to act more logically - to close, minimize, move each of the open windows with a special shortcut on top.
If you have entered the mode of using multiple windows using a separately installed application, just turn it off.
If we are talking about the "Picture in Picture" function for Android Oreo (8.0), the small video screen in its upper right corner will show a cross. You just need to click on it.


