What is it for?
This solution is ideal for those who plan to connect a mobile gadget or any other device (for example, a TV, game console, etc.) to the Internet at home.
What do we need for this?:
1. Personal computer/laptop equipped with a Wifi module and connected to the Internet;
2. Windows operating system;
3. Straight arms!
So let's get started!
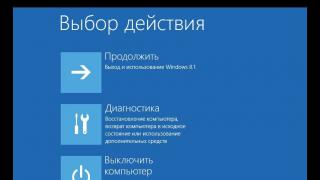
Open the command line file cmd.exe in any available way. For example, you can type cmd into the search bar located in the Start menu:

Now let's create our access point. Copy the code into the command line: netsh wlan set hostednetwork mode=allow ssid=access point name key=access password (right-click in the cmd window field and select the “Paste” function).
Attention! You must replace the “access point name” and “access password” with your data.
For example, let's create an access point with the name sm and password 1231231. To do this, we will need to enter the command into the command line:
netsh wlan set hostednetwork mode=allow ssid= sm key=1231231
That's it, the Wifi access point has been created! All that remains is to launch it.

To do this, enter the command on the command line netsh wlan start hostednetwork . This procedure will need to be performed every time you restart the computer.
Let's automate this operation a little. To do this, create a regular text file and copy the text netsh wlan start hostednetwork into it. Save and close the file. Now we rename its resolution to *.bat (instead of *, enter any name). This file can be added to the startup list and then the Wifi access point will start automatically (or you can independently launch the *.bat file every time you need to connect your gadget to the Internet).
Attention! In order to change the file permission, you must perform the following operation:
1. While in the folder where you created the text document with the contents netsh wlan start hostednetwork, click on the alt button. A menu list appears below the folder address bar.

2. Select “Tools -> Folder Options”.

3. In the window that opens, go to the “View” tab and uncheck the “Hide extensions for registered file types” checkbox.

And the last step! It is necessary to share the access of the main connection to our access point. To do this, go to “Control Panel -> Network and Sharing Center -> Change adapter settings.” Next, right-click on the main connection (in my case it’s Beeline) and select “Properties”.

In the window that opens, go to the “Access” tab, check the box next to “Allow other network users to use this computer’s Internet connection” and in the drop-down list select the access point we created (in my case it is Wireless Network Connection 2 named sm).
So, the access point has been created, but after connecting to it, you discovered that the Internet does not work? In this case, I have only one recommendation: disable all firewalls (both standard Windows and antivirus). If after this the Internet works, then add this connection to the firewall exceptions.

In the case of NOD, everything is very simple! Go to “advanced settings” and set “Filtering mode” to training.
If, after all the steps taken, the client device cannot connect to the access point you created, then your Internet-distributing laptop/computer does not have a DHCP server that provides IP addresses. In this case, you will have to assign IP addresses yourself. There is nothing complicated about this, just follow these instructions exactly.

Go to “Network Neighborhoods” and right-click on “Wireless Network Connection” (not the one we created, but the one that was originally) -> Properties -> Internet Protocol Version 4 (TCP/IPv4) -> enter the following values :
IP address: 192.168.2.1
Subnet mask: 255.255.255.0
Default Gateway: 192.168.2.1

Now go to the properties of the virtual access point we created (“Wireless network connection”) -> Internet Protocol version 4 (TCP/IPv4) -> enter the following values:
IP address: 192.168.2.3
Subnet mask: 255.255.255.0
Default Gateway: 192.168.2.1
Preferred DNS Server: 192.168.2.1
And at the end of the article, a couple of useful commands:
netsh wlan show profiles- view the names of all previously created points;
netsh wlan delete profile name="ProfileName"- deleting a previously created wireless access point profile (instead of ProfileName, of course, you need to put the name of your access point);
netsh wlan show profile name="ProfileName" key=clear- shows the security key of the specified access point;
Today we’ll talk about how to distribute the Internet via Wi-Fi from a laptop or from a computer that has an appropriate wireless adapter. Why might this be needed? For example, you purchased a tablet or phone and would like to access the Internet from it at home without purchasing a router. In this case, you can distribute Wi-Fi from a laptop that is connected to the network either wired or wirelessly. Let's look at how to do this. At the same time, we’ll look at three ways to turn a laptop into a router. Methods for distributing Wi-Fi from a laptop are considered for Windows 7, Windows 8, they are also suitable for Windows 10. If you prefer non-standard ones, or do not like installing additional programs, you can immediately go to the method in which the implementation of Wi-Fi distribution will be organized using the Windows command line.
I wrote about the free program for distributing the Internet from a laptop, MyPublicWiFi, in another article (), where it collected positive reviews: many of the users who were unable to launch a virtual router on a laptop using other utilities succeeded with this program. (The program works on Windows 7, 8 and Windows 10). An additional advantage of this software is that it does not install any additional unwanted elements on your computer.
After installing the application, the computer will need to be restarted, and it will run as Administrator. After launch, you will see the main window of the program, in which you should set the network name SSID, a password for the connection, consisting of at least 8 characters, and also note which Internet connection should be distributed via Wi-Fi. After this, all that remains is to click “Set up and Start Hotspot” to launch the access point on the laptop.

Also, on other tabs of the program, you can view who is connected to the network or set restrictions on the use of traffic-intensive services.
You can download MyPublicWiFi for free from the official website http://www.mypublicwifi.com/publicwifi/en/index.html
Video: how to distribute Wi-Fi from a laptop
Internet distribution via Wi-Fi using Connectify Hotspot
The Connectify program, designed for distributing Wi-Fi from a laptop or computer, often works correctly on those computers with Windows 10, 8 and Windows 7 where other methods of distributing the Internet do not work, and it does this for a wide variety of connection types, including PPPoE, 3G/ LTE modems, etc. Both a free version of the program and paid versions of Connectify Hotspot Pro and Max with advanced functions (wired router mode, repeater mode, and others) are available.

Among other things, the program can monitor device traffic, block ads, automatically start distribution when logging into Windows, and more. More details about the program, its functions and where to download it in a separate article.
How to distribute the Internet via Wi-Fi using the Windows command line
Well, the penultimate method in which we will organize distribution via Wi-Fi without using additional free or paid programs. So, a method for geeks. Tested on Windows 8 and Windows 7 (for Windows 7 there is a variation of the same method, but without the command line, which is described below), it is not known whether it will work on Windows XP.
Press Win + R and enter ncpa.cpl, press Enter.

When the list of network connections opens, right-click on the wireless connection and select “Properties”

Switch to the “Access” tab, check the box next to “Allow other network users to use this computer’s Internet connection,” then “Ok.”

Run Command Prompt as Administrator. In Windows 8, press Win + X and select “Command Prompt (Administrator)”, and in Windows 7, find Command Prompt in the Start menu, right-click and select “Run as Administrator”.

Run the command netsh wlan show drivers and see what is being said about hosted network support. If it is supported, then you can continue. If not, then most likely you have installed a non-original driver for the Wi-Fi adapter (install from the manufacturer’s website), or a really very old device.

The first command that we need to enter to make a router out of a laptop is as follows (you can change the SSID to your network name, and also set your password, in the example below the password is ParolNaWiFi):
Netsh wlan set hostednetwork mode=allow ssid=site key=ParolNaWiFi

After entering the command, you should see confirmation that all operations have been completed: wireless access is allowed, the SSID name has been changed, and the wireless network key has also been changed. Enter the following command
Netsh wlan start hostednetwork

After this input, you should see a message stating that “The hosted network has started.” And the last command that you may need and which will be useful in order to find out the status of your wireless network, the number of connected clients or the Wi-Fi channel:
Netsh wlan show hostednetwork

Ready. Now you can connect via Wi-Fi to your laptop, enter the specified password and use the Internet. To stop distribution, use the command
Netsh wlan stop hostednetwork
Unfortunately, when using this method, Internet distribution via Wi-Fi stops after each laptop reboot. One solution is to create a bat file with all the commands in order (one command per line) and either add it to startup or run it yourself when necessary.
Using a computer-to-computer network (Ad-hoc) to distribute the Internet via Wi-Fi from a laptop in Windows 7 without programs
In Windows 7, the method described above can be implemented without resorting to the command line, and it is quite simple. To do this, go to the Network and Sharing Center (you can through the control panel or by clicking on the connection icon in the notification area), and then click “Set up a new connection or network.”

Select the “Set up a wireless computer-to-computer network” option and click “Next.”

The next step will require you to set the network name SSID, security type and security key (Wi-Fi password). To avoid having to configure Wi-Fi distribution again each time, check the “Save settings for this network” option. After clicking the “Next” button, the network will be configured, Wi-Fi will turn off if it was connected, and instead will begin waiting for other devices to connect to this laptop (that is, from now on you can find the created network and connect to it).

In order for the Internet to be available when you connect, you will need to share Internet access. To do this, go to the Network and Sharing Center again, and then select “Change adapter settings” in the menu on the left.
Select your Internet connection (important: you must select exactly the connection that directly serves to access the Internet), right-click on it, click “Properties”. After that, on the “Access” tab, enable the checkbox “Allow other network users to use this computer’s Internet connection” - that’s all, now you can connect to Wi-Fi on your laptop and use the Internet.

Note: in my tests, for some reason, only another laptop with Windows 7 saw the created access point, although according to reviews, many phones and tablets work.
Typical problems when distributing Wi-Fi from a laptop
In this section, I will briefly describe the errors and problems that users are encountering, judging by the comments, as well as the most likely ways to solve them:
- The program writes that it was unable to start the virtual router or virtual Wi-Fi router, or you receive a message that this type of network is not supported - update the drivers for the laptop's Wi-Fi adapter, not through Windows, but from the official website of the manufacturer of your device.
- The tablet or phone connects to the created access point, but without access to the Internet - check that you are distributing exactly the connection through which the laptop has access to the Internet. Another common cause of the problem is that general Internet access is blocked by an antivirus or firewall by default - check this option.
It seems that I have forgotten nothing of the most important and frequently encountered problems.
This concludes this guide. I hope you find it useful. There are other ways to distribute Wi-Fi from a laptop or computer and other programs designed for these purposes, but I think the methods described will be sufficient.
Very often on the Internet you can find questions about Wi-Fi networks. The network policies of older OS versions are different from new ones. The design of the settings windows is also different, and sometimes it can be difficult to find the familiar old tools. Setting up a Wi-Fi access point in Windows 7 has also changed. Therefore, today I will tell you about how to create a wireless connection.
In Windows 7, the developers found it necessary to protect the network. Undoubtedly, this can protect your computer from hacking, but it also causes some inconvenience. Therefore, before setting up, you need to disable this protection in order to have access to folders and files over the network. To do this, click on the network icon on the Windows workbar and select “Network and Sharing Center.”
Pic 1. Network and Sharing Center.
In the network management window, select the sharing settings settings. And change additional sharing settings.

Fig 2. Select homegroup and sharing options.
In the window that opens, disable password protection at the very bottom of the settings and save the changes.

Fig 3. Disabling password protection.
This is followed by setting up a Wi-Fi access point in Windows 7. We return to the network control center. In the left menu of this center, select: “ Wireless Network Management" and click "Add". A window should open with a choice of two types of network settings. The first is for connecting to an access point, the second is for creating an access point.

Fig 4. Connecting to a wireless network manually.
Therefore, you need to select the second: “Create a computer-to-computer network.” Click next and start setting up. Set the name of your network, for example: “MyNetwork”. Next, let's talk about security types. WEP type - transfers the encryption key to each computer, according to Windows developers, the WEP type is easy to crack. But if you are not installing a network in a corporate company or office, then there is no point in hacking you. This type is also suitable for a regular home network. WPA requires user authentication and is more secure. The last type is Open, which comes without a password. For example, choose WEP and set the password. Save the network parameters.

Fig 5. Network setup.
After this, the work point is ready! Let's check it and try to connect from another device. I used a second laptop to connect. If you have a special button for turn on Wi-Fi, then check if it is enabled. We look at the available points and connect to the previously created one.

Fig 6. SettingsWi—Fi access points inWindows 7.
In the window that opens, enter the password that you specified during setup.
Various instructions often mention a wifi access point. Let's take a closer look at what it is and what role it plays in a wireless Internet connection.
What is a Wi-Fi hotspot
A WAP or wireless access point is a concentrator that joins an existing network. That is, it distributes Wi-Fi, ensuring the connection of devices without a cable. It works using radio waves of the IEEE 802.11 standard.
If you ask: Wi-Fi access point - what is it structurally? It turns out that it consists of a transceiver, an interface chip and, depending on the functionality provided, can be intended for:
- Home use - this is the most common application for connecting tablets and smartphones to the network;
- Accommodation in public places, in “free Wi-Fi” zones;
- Applications in large production areas.
The wide range of applications of the hub is determined by its most important advantage - it does not require a cord to connect to Wi-Fi. You can move around within the distribution area completely freely.
A wireless Wi-Fi access point can serve as a bridge between wired and over-the-air Internet distribution. And also for combining groups of PCs with adapters into separate networks.
Features of Access Point
Let's look at how a wifi access point works. This is the first mode. It connects to the router using a cord. Then it allows other devices to connect to LAN over the air. It is worth highlighting other modes of the wifi access point, the operating principle in each of them:
- Bridge – two APs are paired via Wi-Fi and each distributes the Internet on its own local network;
- Repeater – broadcasts a signal to increase coverage area;
- WISP – AP connects to the network over the air and distributes the Internet via cable or over the air;
- Router – the ability to filter incoming data and apply your own settings;
- – distributes Wi-Fi, expands the area of available Internet.
Supported modes may vary depending on the model. The AP feature is also determined by speed and frequency indicators:
- 2.4 GHz, the advantage of this range is that almost all devices support it and can connect without problems;
- 5 GHz – here the speed will be higher, but, as a rule, gadgets that receive signals in this range are more expensive. And if you try a few tricks...
Regarding the data transfer speed, it should be noted that for standard home Internet surfing, 150 Mbit/s is sufficient. If the AP works as a repeater or you need to work with large files, then you will need 600 Mbit/s.
Router and Access Point: comparative characteristics
Many people don’t think about what a wifi access point is. After all, according to the majority, this is the same router. In fact, these are different devices. Let's prove this by comparison:
- The router creates a local network for all devices that are connected via cable or via Wi-Fi - Access Point or AP (which means wifi access point) distributes the network;
- The router catches the Internet signal and distributes it over the network - the AP works with a ready-made network, making it possible to connect to it without a cord;
- The router assigns an external IP address to all devices that are paired with it - the AP does not have such functions;
- The router uses a firewall to protect the connection from unwanted connections and hacker interference - Access Point does not protect the connection;
- The router allows you to configure content accessible to children, as well as limit the time spent at the PC - Access Point cannot provide such opportunities;
- A standard router has about 4 connectors for connecting devices to the network via wire, one WAN connector for receiving data and a USB input (for a printer or modem - the AP has only one connector for connecting to the router, which means connecting with a cable to access the Internet impossible;
- The router is usually used at home, in the office (indoors) - APs can be outdoor, industrial, or home.
It should be noted that there are routers on the market with some Access Point features. And in some cases, such models are the best choice for home use.
Router or Access Point: what to choose
You should choose an AP or a router based on the specific answer to the question - what is a wifi access point for? For example, if the signal does not reach certain rooms or you need to create a hot spot zone, then it is better to prefer Access Point. If you need an Internet connection at home with good speed, then it is better to choose a router.
Let's take a closer look at typical situations and selection criteria in each case:
- If the Internet is extended into the house using a fiber optic cable, and it is connected directly to the PC, then you should purchase a wireless router. This will allow you to consolidate all devices within one local network. And the data transfer will be reliably protected;
- if the connection is established using a telephone line, then preference should be given to the router. Set the Bridge mode on it and initiate the connection from there;
- if GPON technology is used to access the World Wide Web, then the solution will duplicate the advice above. The choice should be made in favor of a wireless router and connect to the provider from it. You should also set the mode to Bridge.
Regarding the choice of a Wi-Fi access point for your home, you should highlight the moments when it will be optimal:
- A local network has already been created, but the coverage area needs to be expanded. AP will come in handy, since there is no point in buying a full-fledged router;
- It is required to implement the connection of 2 PCs, which are located at a respectful distance from each other. Here, the wireless access point acts as a link in the Point-to-Point mode;
- Connected to the network via a gateway computer. Access Point will cope with the task, but, if possible, it is better to take a wireless router;
- A local network has been created at home or in the office, you need to organize a wireless connection. AP would be a great, low-cost solution.
How to create a WiFi access point using Windows 7. Instructions, step by step with illustrations. Although people are mostly interested in the question of how to make a laptop a wifi access point, it doesn’t really matter whether it’s a laptop or a regular desktop computer. Creating a wifi hotspot is the same in both cases.
Similar articles for other operating systems:
How to create a WiFi hotspot on Windows 7
We need to create a software wifi router based on Windows 7 that will receive the Internet in some way and be able to distribute this Internet via wifi.
What do we need?
- Windows 7 Basic or higher. Windows 7 Starter (initial) will not work. More precisely, on Windows 7 Starter you will have to solve the routing issue using a third-party program ( for Windows 7 Starterseparate note at the end of the article).
- Old wifi adapter. For example, the TP-Link TL-WN722NC USB wifi adapter was used for this article.
- Internet connection. For this article, a GSM connection was used through the MTS operator (MTS USB modem). But it can be any connection - PPPoE, VPN, Dail-Up, Ethernet, WiFi.
The first step is to install the wifi adapter, if it is not already installed, and make sure that it is turned on and working.
After this, you need to check whether the “WLAN AutoConfiguration Service” service is running. Usually its launch mode is “Manual”, which means it can be stopped. If you plan to use the created access point constantly, then it is better to switch this service to the “Automatic” startup mode.
You also need to check that the Internet Connection Sharing (ICS) service also has an Automatic startup mode.
These checks are done through "Control Panel - Administration - Services".
After this, you need to open the Windows console (cmd.exe) with administrator rights. This can be done through the menu "Start - Programs - Accessories - Command Prompt", then right-click and "Run as administrator".
In the console, type and execute the command:
netsh wlan set hostednetwork mode=allow ssid="winap" key="123456789" keyusage=persistent.
Instead of winap And 123456789 enter your access point name and password:
Note. Important! The password must be at least 8 characters long, this is a requirement for the WPA2 security type that is used in Windows when creating an access point. It is better not to use the Cyrillic alphabet in your password. Letter case matters - A And A These are different symbols!
Next, check that the connection for the access point has been created. Open "Start - Run - ncpa.cpl" and after opening the "Network Connections" window, in this window find the wireless connection for which the physical adapter is not specified:
Right-click, then "Properties" and look there - it should be "MicroSoft Virtual Miniport Adapter":

At the same time, you can remove unnecessary connections and protocols.
Immediately rename this connection in ncpa.cpl - for example, to “winAP”:

Next, here, in ncpa.cpl, you need to share (enable Windows ICS) the Internet connection. Select this connection, right button - “Properties”, “Access” tab. Enable ICS and specify the connection to which the Internet will be distributed - to the wifi connection of the access point ("winAP"):

Now you need to connect to the Internet. Or reconnect if the connection was established previously.
After that, type and execute the command in the console:
netsh wlan start hostednetwork.
That's it, the access point should already be working. Now you can connect the client to this access point (this illustration is from the client’s computer):

How to connect a wifi client to:
- Laptop (or computer) under Windows - Setting up WiFi in Windows 7.
- Laptop (or computer) running Linux - Laptop (or computer) running Ubuntu.
Client connected:

On the computer where the access point is running, you can check its status. To do this, enter the command in the console:
netsh wlan show hostednetwork

It can be seen that one client is connected.
Stopping an access point with a command netsh wlan stop hostednetwork
Complete destruction of the access point by command netsh wlan set hostednetwork mode=disallow
If you want the access point to turn on automatically when Windows boots, then the start command needs to be added to autorun. It's about the team netsh wlan start hostednetwork. The command can be written into a cmd script; you must specify “Run as Administrator” in the properties of this script. Then include the script in autorun.
It is necessary that the connection to the Internet is also established when Windows starts. Otherwise, you will have an access point, but there will be no Internet through it.
Of course this is a very simple access point. But everything is at hand. No third party programs needed. Just Windows 7. And everything can be configured in a couple of minutes. Yes, there are programs like Connectify and Virtual Router. However, you need to understand that they only do the work that is done by two commands in the Windows console. These are just add-ons to the functionality of Windows 7. It’s easier to write two commands in the console than to download and install some gadgets.
Some may say that this option does not have many of the capabilities that an access point should have. Well yes, that's true. Only this is an option when you need to make a wifi router very quickly and without problems. And Windows 7 provides just such an opportunity - with a minimum of body movements, what is called “on the knee,” to create an access point.
And if your needs are broader and deeper, if you need an access point for every day, or in complex configurations, then you don’t need to use Windows, but buy a decent, or even good WiFi router. A decent WiFi router now costs less than a thousand rubles. And in such a situation, sculpting a design based on a computer and Windows is somehow absurd.
It’s another matter if you need an access point once a month, for a day or for a couple of days. Or on a business trip. Or on vacation. This is where Windows helps us out. You can quickly distribute the Internet via a tablet, smartphone or other laptops.
But if there is a need to make a permanent access point on a computer, then it is better to do it under Linux. This is how this is actually implemented in WiFi routers. For example, as in this article - Access point on Ubuntu.
Hotspot on Windows 7 does not work
There is no need to swear at Microsoft, at Windows - in general, look for the guilty on the side. The problem in such cases Always on your own computer (or laptop). It could be:
- Drivers for the WiFi adapter on which you are creating an access point.
- The WiFi adapter itself.
- You did something wrong.
- Any "left" services or drivers/programs that use the WiFi adapter or USB port (if your adapter is connected via USB).
- You have Windows 7 Starter.
- One of the necessary services has stopped, for example, see the article “Windows 7 Routing and Remote Access Service Stops”.
For example, during Windows startup, the WiFi adapter driver can put the adapter into standby mode. And when Windows starts the service hostednetwork the adapter does not wake up.
With a normal WiFi adapter and if you haven’t messed up your Windows with crooked programs and drivers, everything will work fine.
In general, always look for the source of the problem on your computer.
WiFi network protection
Access point on Windows 7 Starter (initial)
Microsoft did something weird with it. ICS is blocked on it, but you can create an access point as such. Paradox. Why do you need a hostednetwork mechanism if there is no routing? Be that as it may, you can make a wifi access point on Windows 7 Starter. You just need to find a program with which to perform routing between the Internet and winAP interfaces. There are many options here, for example you can use a proxy server, like 3proxy.
Ivan Sukhov, 2013, 2014
Do you need to distribute the Internet to several devices or create a small network to exchange data, but don’t have a router or switch at hand?
This problem can be solved with only a laptop with a Wi-Fi adapter installed.
As you know, devices in Wi-Fi networks can operate in two modes:
- Ad-Hoc mode (point-to-point) - in this case, clients interact directly, bypassing intermediaries.
- Infrastructure mode (client-server) - in this case, interaction between network hosts occurs exclusively through an intermediary - an access point.
Theoretically, simultaneous operation of one Wi-Fi adapter in two modes is impossible, just like the simultaneous operation of several operating systems on one host.

After starting the virtual AP, the built-in DHCP server is activated. In order for client devices to be able to access Internet resources, you should go to the “Network Connections” menu and right-click on the adapter through which you connect to the Internet.
In our example, this is a wireless adapter, go to the “Access” tab and check 2 checkboxes in the appropriate fields:

To disable use the command:
netsh wlan stop hostednetwork
To deactivate the access point, enter:
netsh wlan set hostednetwork mode=disallow

The use of Virtual AP organized by built-in Windows tools has a number of limitations: the creation of only one virtual adapter, which operates only in access point mode.
The maximum number of wireless client devices operating in the network is 100.
It just so happened that at work, in order to get full-fledged Internet without restrictions, I have to use a netbook and a 3G modem. Recently, having bought an iPod Touch, I really wanted to connect it to the Internet. If a smartphone could still get online on its own, it was a little more difficult with a player.
One option is to connect using a sync cable. The option is not very convenient, since there is absolutely no desire to carry a cable with you all the time, and you don’t want to install iTunes either. The second option, the one described in this article, is connecting via WiFi. Already on Habrahabr, but for Linux. Our task is to configure the same thing for Windows.
So what do we have
- Netbook, ASUS 1215B- Internet via USB 3g modem
- Player and smartphone with WiFi
Task
- Get internet on all devicesSolution
Before you start, many people advise updating the WiFi card driver on your computer. Personally, I didn’t do this, but everyone decides for themselves.Methods
- You can use graphical utilities such as Connectify and Virtual Router. They work, they even work well, but they eat up resources. Some people complained that they were eating up resources too much.You can do everything yourself via the console using netsh. This is exactly the method I chose. All actions must be performed on behalf of the Administrator.
Creating a network
First of all, you need to create a wireless network using the following commandnetsh wlan set hostednetwork mode=allow ssid="MyHomeInternet" key="pass12345678" keyUsage=persistent
where MyHomeInternet is the network name (ssid), pass12345678 is the login password.
The success of the command will look something like this:
Hosted network mode is enabled in the wireless network service. The hosted network SSID has been successfully changed. The hosted network user key passphrase was successfully changed.
Now you can go to Control Panel \
\
. I call it “Wireless Network Connection 2”.
Connection management
Since the connection is in the “No connection” status, we need to enable it. To do this, run the command:After receiving the phrase Hosted network is running, the network will be launched and we will see your network connection in the list of connections. In our example, this is MyHomeInternet.
To stop the network, you need to use the command:
netsh wlan stop hostednetwork
Connecting the Internet
The WiFi network has been created and you can even connect to it, but the Internet will most likely be absent. In order to correct this misunderstanding, it is necessary:- go to Control Panel \ Network and Sharing Center \ Change adapter settings;
- go to the properties of the connection through which you go online(for me this is Internet MTS);
- tab Access;
- check the box next to " Allow other network users to use this computer's Internet connection" and select our created network from the list - “Wireless network connection 2”;
- click OK;
- disable and enable 3g connection; (ideally restart your computer)
- disable and enable WiFi network.
What happened
Ideally, after these steps, the laptop will turn into a small WiFi point. To do this, take the iPod, turn on WiFi and see our created MyHomeInternet network. Enter the password and connect. There is Internet.Restrictions
- first of all, after each start of Windows, you will have to start the network using the command netsh wlan start hostednetwork. This can be solved by writing a small script and sending it to startup. Another option is to create a shortcut on your desktop and launch the network only when necessary.- OS must be Windows 7.
- the connected device must support WPA2-PSK/AES
Problems
Network is not created
- update the wireless adapter driver to a newer one- run the console as administrator
The network has been created, but does not start
- perhaps restarting the computer and starting the network as administrator will helpThe network has been created and started, but it is impossible to connect to it
- check password- manually specify network settings in the properties of TCP/IP connections on the “server” and client. For example, for the server: ip - 192.168.137.1, mask - 255.255.255.0 and for the client: ip - 192.168.137.2, mask - 255.255.255.0, gateway - 192.168.137.1, dns - 192.168.137.1
Connected to the network, but can’t access the Internet
- make sure that you have shared it (see the item “Connecting the Internet”)- try to go not by domain name, but by IP address. If it does, then it’s time to think about adding a DNS server to the client and/or server settings.
Bottom line
As you can see, such a simple problem can be solved without using third-party software. Nevertheless, sometimes it happens that you can’t do without it. In my case, there were problems with DNS and even by specifying the Google Public Domain server in the TCP/IP settings, I could not do anything. Therefore, I had to resort to helpYou can easily connect your phone, tablet or other device to the high-speed Internet connected to your home through a Wi-Fi router (router). However, such a device is not always at hand (for example, you went to the country, taking a laptop and a wireless USB modem with you). In such cases, you can use the Internet on a mobile gadget through a laptop computer, assigning the functions of a router to it. Let's look at how to make a laptop a Wifi access point.
Methods for creating a wireless access point
Any modern laptop is equipped with a wireless adapter, which can be used as a Wi-Fi router. To do this, you need to create a kind of virtual bridge connecting network equipment (Wi-Fi adapter and network card).
To obtain such routing, you can use the following tools:
- using standard Windows OS tools ("Network Center...", command line or bat file);
- additional software.
Whatever method is chosen, the following conditions must be met:
Creating a Wireless Access Point Using the Windows Menu
The easiest way to create a virtual router is to use the “Network Center...” function built into the OS. To do this you need:

After the virtual router has been created, in order to successfully use the Internet through it, you may additionally need to enable public access. This is done as follows:

After all the steps have been completed, turn on Wi-Fi on the mobile gadget and start the search. In the drop-down list, select the name of the network that was specified when creating the virtual Wi-Fi router, and indicate the specified key.
Creating Wi-Fi access via the command line
To connect your phone to the Internet via a laptop, that is, using a virtual router, you can also use the command line. This procedure may seem complicated to an inexperienced user, however, by strictly following the instructions, you will be able to turn on the Wi-Fi hotspot in just a few minutes.
To start distributing wifi from your laptop to your phone, you need to:

To distribute the Internet via a laptop computer to a phone or other device, you need to enable shared access to the newly created Wi-Fi point. To do this, go to the “Network Connections” section and call up the properties of the network through which the Internet is connected to the laptop. After that, in the “Advanced” tab, check the box next to the corresponding item, and in the drop-down list, select the name of the created virtual router. 
Using a bat file
Creating a Wi-Fi access point via the command line is inconvenient because every time you turn off the PC you need to re-enter all the commands. Therefore, this method of turning a laptop computer into a router can only be used for a one-time Internet connection to a phone.
The execution of the above commands can be fully automated. To do this, you need to write a small script in a standard Windows text editor, and then save the document on your laptop desktop under any name in .bat format. To start distributing Wi-Fi using a virtual router to your phone, you just need to run this document with administrator rights. An example of a script is shown in the figure, where YourSSID and YourPassword are the name of the wireless connection and the access key to it. 
Creating a virtual router using additional software
If none of the above methods helped activate Internet distribution on your phone, you can try creating a virtual Wi-Fi router using special software. There are quite a lot of similar utilities on the Internet, but among them the most convenient are:
- MyPublicWiFi;
- Connectify.
Wi-Fi distribution using MyPublicWiFi
This application is absolutely free and has a user-friendly interface, although in a foreign language. With it, you can make a Wi-Fi access point in just a few clicks:

Creating a Wi-Fi hotspot using Connectify
The MyPublicWiFi utility may experience problems if the Internet is connected to the laptop not via a cable, but via a USB modem. In this case, it is better to use the Connectify application. There is a paid and free version of this program. For periodic use, the second option is sufficient. To enable Wi-Fi distribution from a PC to a phone using Connectify, you must:

Possible difficulties when creating a Wi-Fi access point
When creating a new Wi-Fi access point, users often encounter minor difficulties. The table shows the most common problems that can prevent you from distributing the Internet from a laptop, and possible solutions to solve them.
| The essence of the problem | The reason behind this | Possible Solution |
| The phone cannot locate the Wi-Fi network, although it is running | Blocking the connection by an installed antivirus or firewall | Temporarily disable your firewall or antivirus program |
| The Internet does not work on the phone, although Wi-Fi is connected | The user forgot to enable sharing when setting up | Go to Network and Sharing Center and turn on sharing |
| The connection is blocked by a firewall or antivirus program | Disable online protection temporarily | |
| The message “The network could not be started” pops up. | The wireless adapter is disabled on the laptop | Turn on Wi-Fi in your laptop settings |
| Drivers for the adapter do not work correctly | Update drivers using the disk that came with your PC or the Internet |
Not only a router can have the function of distributing a WiFi signal. A laptop or modern computer must have a built-in module. If you don't have one, you need to purchase a special USB adapter. Otherwise, the computer will not be able to work as a WiFi access point.
In any case, the adapter will not be superfluous and will not take up much space. A laptop as a WiFi access point can be useful on business trips, as well as for creating an additional workspace in the office or at home. This option will be useful if you have a large apartment and the signal from the access point does not fully cover it.
Where to begin?
It is necessary to say a few words about WiFi adapters. In 90 cases out of 100 you will need it, since the built-in module, if present, gives a very weak signal. You can find many different devices on sale. The standard kit looks like this: the adapter itself, an antenna, an extension cable with a USB cable, and a disk with drivers. This device is suitable for home use. The second type is an adapter in the form of a flash drive. One move and the laptop will start working as a WiFi access point. It will be especially useful when traveling.

After connecting the WiFi adapter, drivers are usually installed automatically. You can also find them on the device manufacturer's website. After the adapter is working, you need to configure access. You can do this like this:
- By changing connection parameters through the Control Panel. Set up two network connections and open access to them. Connect the client device.
- By installing a special application, such as Connectify.
- Via the command line. This method is not at all as complicated as it seems.
Setting up Virtual WiFi in Windows 7
Using Windows 7 as an example, let's look at setting up a WiFi signal from a laptop. It should be noted that a virtual WiFi access point is provided by default on Windows systems older than the "seven". But in order to set it up, you will have to work hard. Go to the "Start" menu - "Control Panel" - "Network and Sharing Center". You can also go to the network settings via the tray icon.
First, change your sharing settings to disable any running network discovery features. Next we create the connection. Select "Set up a new connection or network". Essentially, we are creating a wireless connection of the “Computer - Computer” type, so we select the appropriate sub-item. In the dialog box that appears, click “Next”. So we need to create a new wireless network. First of all, we call it. The network name may also appear in the settings of different systems as an SSID.
Encryption settings and password
Let's choose the security type. If you decide to leave the network open, select No Authentication (Open). This option is suitable if you are opening the network for a short period of time. When a network is being built for long-term use, it makes sense to encrypt it.
The type of security depends on the type of encryption supported by your wireless devices (WPA2 or WPA). As a rule, the type is already automatically set in the settings - WPA2, the most modern method of data encryption, which is also the fastest. All you have to do is check to see if all your wireless devices support it. After the security parameters are set, all that remains is to set a password so as not to leave the network open.
Setting up sharing
- The laptop uses only a wireless connection.
- A wired connection is used.
- A modem is used, including 3G and 4G.
In any case, we continue creating. The WiFi hotspot is almost ready. Go to the “Network and Sharing Center” again. Finding an external connection to the Internet. For example, "Wireless network connection". Click the "Properties" button. In the dialog box that opens, find the item “Allow other network users to use this computer’s Internet connection,” as well as “Allow other network users to manage shared access to the Internet,” and check the boxes. Save the changes.
An important stage is the creation of a bridge. You will need it so that Smart TV and game consoles can easily connect to your access point. In the Network Sharing Center, select two network connections icons at once. Right click on them. The “Create Bridge” sign will appear. We confirm the action. The WiFi access point via the laptop is ready.

After successfully creating the network, we configure WiFi on the client device. In the smartphone settings, find our network by name and connect. After a lot of effort, you now have a WiFi hotspot. You will learn how to connect it faster in the next section.
Working on the command line
Most modern WiFi adapter models support the creation of a virtual access point. This makes setup much easier. If you purchased the adapter a long time ago, just in case, update the drivers on the manufacturer’s website. If you already have a WiFi adapter enabled and configured, you can create a wireless network using the command line. To enter it, select “Run” from the “Start” menu and enter the “cmd” command. In the window that opens, write: “netsh wlan set hostednetwork mode=allow ssid="Point name" key="Enter password" keyUsage=persistent", where "ssid" is the name of our access point, "key" is the password for connecting the network.
That's it, the virtual point has been created. You must enable public access to the external network through the control panel. You can also manage the virtual point from the command line. The syntax is as follows:
- netsh wlan start hostednetwork - start the access point;
- netsh wlan stop hostednetwork - stop;
- netsh wlan set hostednetwork mode=disallow - remove the point permanently.
The commands are easy to use, without wasting time opening the control panel.

Setting up an access point on Windows XP
This operating system does not have the Virtual WiFi function. To make your laptop work as a WiFi access point, you can use the Ad-hoc method. It will allow you to connect two computers to each other via a wireless network. On a device with Internet access, you will need to install a special proxy server program.
Judging by user reviews, this setup will take a lot of time and effort. Try the same using the command line. It is useful to write a boot file with a bat extension. Open notepad. Save the new file. It will have only 3 entries:
- netsh wlan set hostednetwork mode=allow;
- netsh wlan set hostednetwork mode=allow ssid="MS Virtual WiFi" key="Pass for virtual wifi" keyUsage=persistent, where we indicate our network name and password;
- netsh wlan start hostednetwork.
Change the file extension from txt to bat and save it. Right-click on the new file and select "Create Shortcut". In the "Start" menu - "All Programs" - "Startup" copy the shortcut to the bat file. Now with every boot you will have an access point enabled.
The program can do the same. WiFi Access Point (XP) is launched using Virtual Access Point. Installation is carried out with the Internet running. After entering the key in the menu, select “Share my Internet”, find your external network and click on it with the Select button. The keys and network name are set by default. The access point is started with the Start Sharing button.
If you have Linux
There are special applications for Linux operating systems, such as KDE Network Manager. In Linux mint, it is possible to configure the WiFi adapter in the network settings by setting its properties to “Use as Hotspot”. The settings are different in some versions. You can also specify the creation of an access point using commands.
Laptop as WiFi hotspot using Windows 7, 8 apps
There are quite a lot of similar programs.

- Switch Virtual Router- this program not only allows you to start and turn off the virtual point, but also displays a list of networks. A few simple steps and your laptop is a WiFi hotspot. The program has a user-friendly interface. Quick installation is available even for beginners.
- Virtual WiFi Router- a compact program with convenient and quick installation. Allows you to track connected devices. In your arsenal you will not only have a laptop as a WiFi access point, but also a full report on the activities of your guests. The network opens in a matter of seconds. Interface in English.
- Virtual Router Manager- utility for Windows 7. The application is free, supports all types of connections and types of client devices. After a simple installation, even the printer will work via WiFi. In your firewall and antivirus settings, be sure to add the application to exceptions.
Programs with additional features
- HotSpot Shield- The Internet connection through this program will be secure, since the data is transmitted via the Https protocol. The application works with wired and wireless networks. In addition, the program has other useful features. You can hide your IP address and also access a site that is prohibited by censorship. Red color - direct connection. Yellow - protected. Before proceeding, you should choose a notification method if you suspect an unsafe site. The application does have some disadvantages. Due to encryption, the connection speed will decrease slightly. The application also takes up PC resources. After installation, you can select the mode in which you want to work.
Programs that do not require installation

Although it is still necessary to change these parameters, all that remains in the setup is to select the network (if there are several connections). If all parameters are set, all that remains is to launch the application with the "Start" button. The program uses any type of Internet connection, except WiFi connection via the same adapter.
Program selection
If you find yourself in an unfamiliar city where there is no WiFi network, you will need a portable program with which you can set up WiFi in a matter of minutes. For those who like to delve into the depths of the Internet for intriguing information, an application that provides a secure connection is suitable.

Whatever program you choose, do not forget about the security of your computer. Carefully study the system requirements and instructions. Your laptop will work as a WiFi access point without the help of a computer technician.