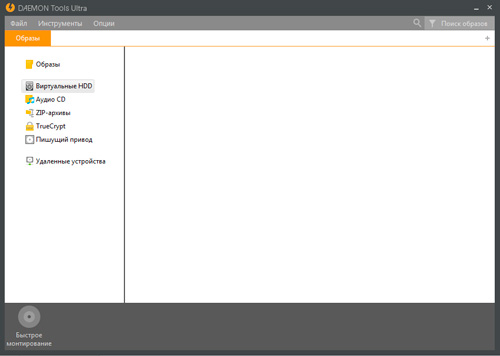
DAEMON Tools Ultra is the strongest, fastest product that genuinely works with images. Since forever our software allows you to create bootable USB for Linux and Windows, and this feature comes in hand very often. Another useful feature that was added to the latest release is Windows To Go creator wizard: it permits to make a portable Windows 10 system on a Hard Drive. A perfect solution for software testing and personal usage of workspace! Let's see, and how exactly you can tune and complete all-the-above operations.
How to make a bootable USB for Windows 10

- Choose Create a Bootable USB from Tools tab
- Insert the device that you want to make a bootable USB for Windows 10 Refresh
- Choose the image file for a bootable USB for Windows 10
- Choose Windows bootable image
- Make sure that Installation USB type is chosen
- Choose the Partition scheme. You have two options MBR and GPT
- Choose the boot type. Starting from Windows 8, UEFI became the main boot type, so that's exactly what you need to make a bootable USB for Windows 10. However, for earlier versions of Windows you need to choose BIOS (available only with MBR partition scheme)
- Enter the label choose the file system, and press start
- Wait till the process is finished, and you have your bootable USB for Windows 10 ready to use. Easy-peasy!
How to make a bootable USB for Linux

- Download, install and launch DAEMON Tools Ultra
- Choose Create a Bootable USB from Tools tab
- Insert the device that you want to be a bootable USB for Linux, pick it from the list. If you don't see the needed device, press Refresh
- Choose the image file for a bootable USB for Linux
- Choose Linux bootable image
- Choose the Partition scheme. Two options are available - MBR and GPT. MBR has size restrictions, it doesn't work with 2TB+ discs. GPT has no size restrictions, and if you are not going for BIOS, this option is recommended
- Press start and wait until the process is finished, and your bootable USB for Linux is ready-steady!
Windows To Go creator wizard: Why and how to use?
First of all, we need to make it clear, how exactly Windows 10 live USB comes in hand. This format of portable system is great for troubleshooting, for making presentations, or simply running your own personal workspace anywhere you need. That's not a rocket science, since you can easily do it with DAEMON Tools Ultra! Check the Windows To Go requirements and follow the steps from our how-to.
Windows To Go requirements:
- Your USB or Hard drive should be 32GB or more
- Mind the speed as well, use USB 3.0 or higher
- Only Windows 10 Live USB are supported now
- This feature works on Windows 10 system only
How to use the Windows To Go creator wizard?

- Download, install and launch DAEMON Tools Ultra
- Choose Create a Bootable USB from Tools tab
- Insert the device that you want to turn into Windows 10 Live USB, pick it from the list. If you don't see the needed device, press Refresh
- Choose the Windows bootable image
- Choose Windows To Go USB Type option
- Press start to run the Windows To Go creator
- After a few minutes Windows 10 Live USB will be ready. Note that Windows To Go creation may take a long time depending on the device speed.
Hope this post solved all your questions about how to make a bootable USB for Windows 10 and Windows 10 Live USB. Just in case you need to clarify something, contact us in comments below or via the support form .
Image - this is the contents of the disk, in a special way archived to the size of a single file. In this form, it is convenient to store it, record it on any media , transfer to other computers, transfer over the network, and then again restore all information from it to the size of a full disk. In order to create a disk image, you need special programs. As a rule, these same programs are able to record a virtual copy on various media. Recently, the most favorite carrier has become USB flash drive (flash drive ). And one of the most common types of computer is becoming netbook , having no DVD drive . The only way to reinstall the operating system on it may be to install it from such a flash drive. All this makes the question of how to write an image to a USB flash drive relevant.
Necessary:
One of the following programs: Alcohol120% , DaemonTools , WinToFlash , or UltraISO . You can download these programs from the following Internet sites: Alcohol120% from the website , DaemonTools - from the website , WinToFlash - from the site and UltraISO - from the website
Instruction:
- In order to write the image to a USB flash drive, open the program Alcohol120% and select the menu item " Image creation". Insert the disk from which you want to create a virtual copy into the drive, and wait for it to appear in the Alcohol120% menu. Click " Start” and wait for the disk image creation operation to complete. After the process is completed, open the folder " My documents" and find the Alcohol120% folder. It will contain the created file. Copy it and transfer it to a flash drive.
- To perform this operation using Daemon tools , run this program and select the menu item " Create an image". In the dialog box, select the " Image catalog". In section "Output image file" Specify the folder on the flash drive where the virtual copy will be written. Insert the disc to be copied into the drive, then click " Start". After creating a copy, the program will automatically write the image to a USB flash drive.
- Run the program WinToFlash . You will see a window with two tabs. Select the " Welcome", and on it - the button" Flash Transfer Wizard". In the window that appears, click " Further". Specify in the windows that appear the path to the disk that you will recreate. Specify the path to the flash drive. Click the button Proceed". Keep in mind that the flash memory will be formatted before writing, so overwrite all the files you need from it to another location. Wait for the recording to finish.
- To write a virtual copy of a disk to a USB flash drive using the program UltraISO , run it and select the menu item " Create CD Image". Select the drive that will contain the disk that will be recreated, specify the path to it and click " Do". After the end of the recording, select the menu item "", and in it - " Burn hard disk image". Specify the flash drive you are using and click " burn».
Good day, dear readers of my blog. I remember the times when we downloaded all programs, games and other software from the Internet, then to insert a disk and start the installation process. Then we learned that you can create a virtual drive. Surprisingly, all these skills are useful today.
I will tell you about simple ways to burn a bootable disk from an ISO image using four of the most popular programs.
There are different cases, for example, the need to reinstall Windows or save important programs electronically. You can't call a skill useless.
I still think that it is very important for any beginner to understand the terminology, so first I would like to talk a little about what we actually have to face today, what ISO is and why it is preferable to work with it. Computer literacy has never harmed anyone.

So, you are probably familiar with this situation. You insert a CD into the drive or stick a USB flash drive into the USB port, immediately after that the installation window automatically opens. This process is called multibooting.
In order to run this operation, we need an external device or virtual drive. I already wrote about this process on my blog and described the work in the best, in my opinion, .
Programs such as Ultraiso, Nero, Alcohol or Daemon Tools can create the illusion that there is a CD on your computer, and today we will talk about them again.
Any program needs an image, an ISO file. It saves users a lot of hassle. You do not have to look for any files, collect them from different parts of the computer and download them manually. You can create your own boot disks from any set of documents for a game or program. Roughly speaking, a single archive.

I have not yet written about this process in my blog, and if you are interested, subscribe to the newsletter and you will be the first to know about the release of a new publication. In the meantime, you can download ready-made images from the Internet.
2.DaemonTools
I really like the Daemon Tools program, with its help I always work with images. You can go to the official website www.daemon-tools.cc/rus and download a free trial. She knows how to break the write protection if you need to copy the finished disc. Creates up to 36 additional drives, edits and converts.

If you want to write images to a flash drive, then you will need the Ultra program. If enough CD / DVD, then you can get by with the PRO version.
The completely free Lite program does not have additional features and cannot burn images, but only emulates them on a virtual drive.
Personally, I use the Ultra version and by the way, very soon you will understand its advantage. To be honest, I didn't even think about it.
In the top panel, open "Tools" and select "Burn to Disc". Insert a blank CD or DVD into the drive first.

Unfortunately, I don’t have this now, but I did it a thousand times and I know that you just have to click on “Start” and drink tea until the download is completed. This takes at least three to five minutes.

If you want to make a bootable disk on a USB flash drive, then in the same place, in the "Tools" select "Create bootable USB".

And here is an unexpected discovery. I have a micro sd card inserted in my laptop. Well, you know how in the phone. Daemon Tools prompts me to create a boot disk directly from it. In my opinion, this is a great solution. No massive flash drives.

This discovery made me climb my beloved Ali. Here you can buy micro card 128 gigabytes . Here is a baby with a rich inner world.

3. Nero
Another great disc burning utility is Nero. You must have heard of her. You may even already have it installed. If not, you can download it from the official site ( www.nero.com ).

It's also designed for burning, and some versions of it can even burn HD DVD and Blu-Ray. The highest quality graphics. Perfect version for movies or games. Another interesting option, in my opinion, that the utility has is layout of covers.
You can learn how to burn bootable discs in this program from the tutorial video below.
4. Alcohol 120%
When it comes to the ISO format, one cannot fail to mention such a popular program as Alcohol 120%. This is what her official website looks like www.alcohol-soft.com ).

There is a free version of Alcohol 52% here, but it is not able to burn images, but only mounts them. But you can download Trial.
It also supports cool, high quality formats like Blu-Ray. Able to add 31 virtual drives or copy from one drive to another directly.
From this tutorial video you can learn how to use the program. It's very simple.
5. Ultra ISO
Well, another popular program that you might like is ultra iso ( www.ultraiso-ezb.ru ).
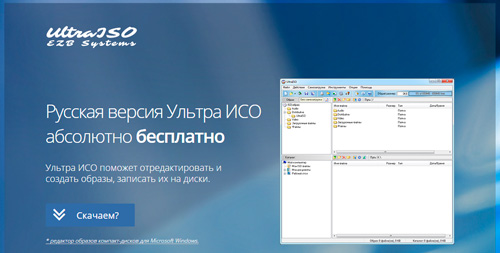
The free version is not capable of burning discs, so don't rely entirely on ads. But, despite this, the software is quite interesting. It is able to work not only with flash drives, but also with hard drives. Write images on them.
Thanks to it, you can optimize the structure to save disk space, create bootable flash drives with two modes (USB-zip and HDD) and much more.
You can learn how to use the program from this tutorial video.
It remains only to make a choice. If this article was helpful to you, subscribe to the newsletter and learn more about how to make complex things easier. Have you ever thought about a career as a web designer? Read the post about. Or maybe you might be interested in . You can move in this direction even if you don't know anything yet.
Subscribe to Vkontakte group and you will definitely succeed. See you again.
Ultra is one of the fastest and most feature rich products that works effectively with images. Each ordinary user has the opportunity to independently create a bootable USB flash drive for Windows or Linux.
How to make a bootable Windows 10 flash drive yourself?
- You need to open the Tools tab.
- Select "Create Bootable USB".
- Connect the device by selecting it from the list provided by this utility. If the program did not detect the device, you should click on the "Update" button.
- To create a bootable USB flash drive, you need to select the desired image in the "Explorer".
- After that, note which specific image you want to record. In our situation - "Windows Boot Image".
- It is important to emphasize that the "Type of USB" is "Installation". It is highly recommended to check if this item is correctly marked.
- Decide on a section. So, the MBR has certain limitations (the memory on disks is no more than two terabytes and no more than four partitions). GPT has no limits. In addition, when choosing an MBR, the user has the right to select one of the boot types: UEFI or BIOS. When choosing GPT - only UEFI.
- If necessary, you need to change the file system, add a label, and also click on the "Start" button.
- The image will be written within a few seconds. You must wait until the end of the operation.
- At the end of the image burning process, the Windows 10 bootable flash drive is completely ready for use. You can start testing and further use.
How to make a bootable Linux USB flash drive yourself?
- Open the Tools tab.
- To create a bootable USB, you must click on the appropriate button.
- Connect and select a device from the list provided by the program. In the event that Daemon Tools Ultra does not display it, it is recommended to refresh the search results by clicking on the appropriate button.
- In order to create a bootable Linux flash drive, you should mark the required image in the "Explorer".
- Mark "Linux boot image" - the image that needs to be burned at the moment.
- Decide on a section. So, the MBR has certain limitations (the memory on disks is no more than two terabytes and no more than four partitions). GPT has no restrictions.
- Click on the "Start" button.
- The image will be recorded for some time. You need to wait.
- At the end of the image burning process, the bootable Linux flash drive is completely ready for use.
On which device can I create a Live USB?
First of all, you need to figure out what Windows To Go requires, as well as how to create a Live USB. It is important to note that this method of a portable system is most effective for detecting problems and any defects, conducting tests, showing presentations, or for personal use - as a secondary workspace.
To create a Live USB in Demon Tools Ultra, it is important to make sure that the device meets the following specifications:
- the internal memory of the device was at least 32 GB;
- The USB must be the latest version (3.0) as it may take a long time to create an older version on the device;
- it is possible to record only Windows 10 OC;
- Creating a Live USB must take place on a computer with Windows 10 installed.
How to create Live USB in DAEMON Tools Ultra?
- Open the tools by clicking on the appropriate button.
- Click on the "Create Boot File" button.
- Connect the device, and then mark it from the list proposed by the program. In the event that the required device is not displayed, it is recommended to update the list by clicking on the corresponding button.
- Click on "Create Live USB" and select the desired image in the explorer.
- Put a mark on which image should be burned. In this case, you must select "Windows Boot Image".
- Select the desired USB type. In this situation, Windows To Go should be noted.
- Click on the "Start" button to start recording the image.
- Wait while Daemon Tools Ultra performs the image write operation. It is worth noting that the waiting time directly depends on such a parameter as the recording speed.
- At the end of the burning process, the Live USB is completely ready for use.
Conclusion
We hope that the article helped you solve all your questions regarding creating a bootable USB flash drive on operating systems such as Windows 10 and Linux, as well as understanding how to create a Live USB.
The idea to write a post about file came to me yesterday, when my sister asked me to install a new operating system on her laptop. The task seemed to be pretty simple. I found a disc with the latest version of Ubuntu and asked her to wait about an hour. And then I faced a tricky problem: my sister's laptop had no physical drive.
I "m sure you are familiar with this situation. Many modern laptops are thin and don" t have good old drives, and so do even some personal computers. Well, many producers think that CDs were left in the past century and USB stick can solve all problems. How to install an operating system without an optical drive? The answer is obvious. Just make a bootable USB from ISO image and use it instead.
As we know bootable USB is a USB stick that can be used when installing some operating system on a PC. To make bootable USB, one needs a flash drive, a virtual image of OS and specific software. I recommend using DAEMON Tools Ultra, which you can download at the official site or by clicking the button below. DAEMON Tools Ultra "knows" not only file, but also or . Please, install the program on your PC and let's make a bootable USB together.
How to make a bootable USB from ISO image with DAEMON Tools Ultra
Before start, make sure that your USB stick doesn't contain any necessary data, because to make bootable USB, we need to format it first. You can format the flash drive using Windows tools or DAEMON Tools Ultra.

Everything is ready! To install an operating system, I need to insert a flash drive and restart the PC.
Well, my sister was very curious about the process, so she learned file. She won't ask me to install an operating system any more, and hope this task became easier for you too.


