On Windows 7. To be honest, this is a very broad question that covers almost every element of computer graphics. Here are computer games, and pictures with photographs, and displaying web pages, and system settings. In general, there are a lot of objects subject to scaling. And that is why we will discuss each moment with you separately.
Images
So, the first thing that we can only discuss with you regarding how to adjust the screen resolution on Windows 7 is changing the scale of the picture displayed on the monitor. Everything here is very clear and simple.
The first step is to open a graphic file. Now just roll the mouse wheel. In the direction "towards yourself" - the scale will decrease, "away from yourself" - it will increase. In this case, the resolution in the system settings will not change.
In addition, you can increase the size of the picture. To do this, you will need to resort to the help of some third-party program. For example, "Picture Manager". Open a picture for her, choose "edit" - "resize". Set the necessary numbers and save the changes. That's all the problem. However, changing the screen resolution applies to Windows 7 in a slightly different sense. And now we will see with you what else we can talk about.

For games
For example, we can talk about displaying graphics in a game. After all, this is where many users think about how to adjust the screen resolution on Windows 7, without affecting the system settings. After all, this is very inconvenient. Especially when you have a lot of different shortcuts on your desktop.
Special game settings come to the rescue. They allow you to figure out how to create your own screen resolution in Windows 7 and set it only for the duration of the game in this or that application. Run the program and then select "options" or "settings" there. Next, you will have to visit the graphics settings. There you will find the item we need. It is called that - screen resolution. Set the appropriate values in it, and then save all the changes. That's all.
However, there is another trick about games. He will help you answer how to adjust the screen resolution on Windows 7, but one that is not in the toy's settings. Start windowed mode, and then just drag our game "around the corners" of the window. When you achieve the desired result, simply go to the game mode. Nothing difficult or special. But you can set the resolution that is convenient for you. But there are at least two more meanings applied to the question: "How to change the screen resolution in Windows 7?" And now we will get to know them.

Browser
Sometimes this question can be asked by users. After all, they want to change the scale of displaying pages on the Internet. This is sometimes very useful. So let's try to figure out how this is done.
There are several options for the development of events. To begin with, you can try to open and find the "scale" there, and then set the desired display numbers. They will be shown as a percentage. 100% is the norm, values lower - zoom out, and higher - increase. Save changes and all problems are resolved.
You can also press Ctrl and then the "+" or "-" located on the right numeric keypad of the keyboard. This combination serves to enlarge the image and reduce it, respectively. In addition, you can cope with the question posed using the mouse. To do this, hold down Ctrl, and then turn the mouse wheel. "Towards oneself" - decreases the resolution, "from oneself" - increases. Nothing difficult, right? Only now we have reached the most important point for a computer. Namely, we will try to figure out how to adjust the screen resolution on Windows 7 relative to system settings.

For the system
True, this question will not take much of your time. After all, the operating system is simplified to the maximum. If suddenly you need to change the screen resolution of your monitor, then just click with the mouse on the free space on the desktop. Do this with the right button.
You will be presented with a long list of available functions. Find "screen resolution" in it and select this item. In the window that appears, you should find the parameter of the same name, and then simply move the slider up or down, depending on the desired result. Want to reduce the size of your icons? Then you have to move the slider up. Increase? A downward movement will do. Save changes, confirm them - and all problems are resolved. Now you know how Windows 7 scales in every way.
The screen resolution determines how much information is shown on the display. It is measured horizontally and vertically in pixels. At low values, such as 640 × 480, fewer elements will be reflected on the screen, but they will be larger. When the resolution is 1920 × 1080, the monitor displays more elements, but they are smaller. Resolution modes for each display are different and depend on the video card, monitor size, and video driver.
How to make the resolution 1920 × 1080
On a note! Windows 10 integrates support for 4K and 8K displays.
By default, the system selects the best display settings for your computer based on its monitor.

Optionally, you can manually change the screen resolution to Full HD for each desktop.

How to change the resolution to Full HD
Below, we'll share how to change the resolution to Full HD for each individual desktop, as well as all Windows 10 users.

On a note! Sometimes an attempt to change the image display quality can lead to the fact that the tiles of applications attached to the start menu will be empty. If this happened to you, then restarting the explorer should help.
In general, the whole operation to change the screen resolution comes down to the following steps:
Step 1. To open the display settings follow point 1,2 or point 3:

Step 2. If your PC has multiple displays, select the one from the list (for example: "2") whose resolution you want to change (see screenshot below).

Note! If all of your displays do not appear, click on the Detect button. This is how Windows will try to find them.

Step 3. If you are not sure which number a particular display has, click on the "Identify" button (in the screenshot below). This will cause the system to briefly display the number of each display. However, this function appears only when multiple monitors are connected.

Step 5. Choose a screen resolution of 1920 x 1080 or Full HD.

Step 6. Select the display mode and screen resolution (custom).
- Click / click on display adapter properties (see screenshot below).

On a note! Starting with Windows 10 build 17063, you need to click on the "Graphics adapter properties" text link to change the resolution of the selected display.
- On the Adapter tab, click the List of All Modes button (see screenshot below).

- Select the display mode you want to apply to the selected display and then confirm the action.
- Click OK (see screenshot below).

- If the selected screen resolution (in our case it is 1920 × 1080) or the display mode suits you, click "OK" and go to step 7 (see screenshot below).

- You will have 15 seconds to save or discard your changes before the system automatically reverts to the previous screen resolution. This is useful if you don’t want to see this dialog after making changes.

Step 7. If you have multiple displays connected to your computer and you want to change the screen resolution for each of them, repeat the above step 4.
Step 8. When finished, you can close Options if you like.
Read the detailed instructions on how to change the screen extension for Windows 7 in the new article -
How to set the resolution to 1920x1080 if it is not in the display settings
- Go to the "Start" menu, open the "Control Panel".

- Click on the "Hardware and Sound" section.

- Select the item "NVIDIA Control Panel".

- In the window that opens, click on the item "Change resolution".

- Click on the button "Create custom permission ".

- In the fields "Pixel horizontally" and "Pixel vertically" enter the values of 1920x1080, respectively, click "Test", then confirm the action by clicking "Yes".


- In the window you will see the created permission, click "OK", then "Apply".


You have set the required resolution 1920x1080 on your computer.
On a note ! The item for creating a permit may have a different name. It depends on the video card installed on your computer.
Video - How to set the screen resolution to 1920x1080
In this article, we will tell our reader how to change screen resolution in Windows 10... The Windows 10 operating system is new, so PC users have problems with the recommended resolution, which is set automatically. Mostly, screen resolution problems are observed on older monitors and rarely on new ones. Problems are usually manifested by a highly stretched image on the display, which is very uncomfortable to work with a computer. This is due to driver support for both the monitor and the graphics adapter. In order to solve the problem with a stretched image and the wrong resolution, we have prepared examples, where we will describe their detailed solution.
We set the monitor resolution with built-in Windows 10 tools
You can set the correct screen resolution by means of Windows 10 itself. In this example, to solve our problem, we will take monitor Samsung S19D300N, which has a TN matrix resolution of 1366 × 768 pixels... Windows 10 can solve the stretched image problem in two ways.
For the first way we need to go to the new panel "".
This can be done in the menu " Start"By clicking on the item" "in it. In the opened panel "" you need to follow the link "". This action will transfer us to the point we need " Screen"In the window that opens.

Now in this window we need to go to the lowest link "".

In the window that opens, we are interested in the "" block. In the image, you can find out that this block has a resolution of 1280 × 720 pixels, and we need to set it to 1366 × 768 pixels. To change the resolution to the correct one, we will click on the drop-down list and select the correct item "1366 x 768 (recommended)". Also in this list you can see how the resolution changes from smaller to the recommended resolution.

After these actions, you need to confirm them. To do this, click the Apply button. At this stage, setting up in the first way ends.
For second way we need to go to the control panel that is familiar to many users. To quickly switch to it in Windows 10, there is a special menu that opens with the WIN + X key combination. V " Control panels"We need to follow these links" Appearance and personalization» - « Screen"-" ". These actions will open the panel window that we need.

". In the image above, you can find out that the monitor resolution is 1280 × 720 pixels, and our Samsung S19D300N supports 1366 × 768 pixels. To solve our problem, we need to increase the resolution of the Samsung S19D300N monitor to 1366 × 768 pixels. Therefore, we will click on the drop-down list and set the monitor resolution we need.

As in the first method, after the performed actions, we confirm them with the Apply button. From the examples, you can learn that setting the correct screen resolution is a snap, and any PC user can handle this task.
Setting the correct resolution using the graphics driver
In this chapter, we will look at ways to change monitor resolution using video card drivers. Driver change of monitor settings is especially important when Windows 10 does not see such ultra-high resolution formats as "Full HD (1920x1080) and Ultra HD 4K (3840x2160)". First, we will look at the video card driver. Radeon from AMD. New driver packages are now available for all current AMD graphics adapters called Radeon Software Crimson Edition... To go to the monitor settings, in this package you need to go to the desktop context menu and select the "" item in it.

After this action, we will get to the main settings panel, in which we are interested in the “ Display».


In the advanced settings, go to the item " Properties (VGA Screen)", Which will open such a window.

In this window, we are interested in the block " Monitor properties". In this block, we need to uncheck the "Use EDID" box. After this action, we will be able to independently set the size from low to ultra-high resolution of the screen.
Now let's look at setting up the monitor using the graphics driver. NVIDIA... To open the NVIDIA panel, just like in the case of the Radeon, let's go to the desktop context menu. In the context menu, select the item "".

After that, the Nvidia panel will open, where we are interested in the item " Change resolution».

In the window that opens, the item " Change resolution»You can clearly find out what resolution we can set for a given monitor model. If you want to fine-tune the monitor resolution, use the Customize… button.

In this chapter, we have covered the setup for the main video cards currently on the market. The examples show that adjusting the monitor resolution using drivers is not difficult at all.
Problem solving
Below we have compiled a list of monitor resolution issues that PC users encounter in Windows 10:
- The first most common problem is old video card drivers... Usually Windows 10 will automatically look for graphics card updates. But if the computer is not connected to the Internet, there will be no automatic update of video card drivers.
In this case, the driver discs that come with the video card package will help you. Pre-downloaded updates in the form of installers from the official websites of manufacturers of video cards Intel, AMD and Nvidia can also help.
- Another problem could be incorrectly installed drivers... Usually this situation occurs when the user downloaded the wrong driver for his video card and installed it on the system.
In this case, removing this driver and installing a new one, specially created for your video card, will help.
- Like video cards, some monitors too require the installation of their drivers in Windows 10. Usually these drivers come with the purchased monitor, they can be downloaded from the official website of the monitor.
- Often users, in order to save money, use cheap china HDMI adapters and cables... This option of connecting a monitor to a computer often causes problems in which the image is stretched, the picture becomes indistinct and its quality is constantly changing.
This problem is solved by replacing adapters and cables with better ones.
In this chapter, we have described the most common problems that lead to incorrect display resolutions and stretched images. If you adhere to all the recommendations presented in this chapter, then you will surely solve the problem.
Finally
In this article, we answered the question of how to change the screen resolution in Windows 10 in various ways. We have also described a list of issues that affect monitor resolution. We hope that our material will be helpful for you and that you can solve the problem with the stretched image and the wrong resolution.
Related Videos
Modern systems, starting with Windows 7, can independently choose the optimal value for the screen, so basically you shouldn't worry about this. It turns out that there are people, most likely beginners, asking the question, how to change screen resolution, and it does not matter what operating system is and what computer. The instruction will be individual for everyone and, I hope, will help you.
There are a couple more points that I will touch on here. Let's say you have a monitor with a resolution of 1920 x 1080 or higher. It is known that you cannot set the value 800x600 for it. Why? But because you will see screen distortion, as the values do not correspond to the physical values for the screen.
Let's start from the depths, namely the seven. Using this particular operating system, you do not have to worry that the value will not be chosen accurately. Although sometimes the value is set lower than necessary, therefore knowledge that can be gleaned from this manual comes to the rescue.
There were moments on the topic in the article, and the article itself is quite useful. If you are interested, you can read it.
To manually adjust the screen resolution, you need to right-click on an empty space on the desktop. A menu will appear where we select the option "Screen resolution".
One of the subsections of the control panel, called "Screen Settings", opens. Here we see three parameters:
- Screen;
- Permission;
- Orientation;
Naturally, we are concerned about the second point. The former is responsible for choosing an additional monitor, and the latter is already clear. Open the options tab "Permission" and select the maximum. In my case - 1366 by 768. Most likely, the corresponding word will stand opposite the maximum resolution - Recommended.

The note: it is worth paying attention to the moment when you cannot change the value of the screen. The fact is that you must install the drivers for the graphics adapter. As a result, you can change the screen value not only from the control panel, but also in the video card settings. Below I will explain how to use these settings. (Drivers are usually installed automatically).
How to change the screen resolution in Windows 10
The specified operating system has the same parameters from the control panel, but it still needs to be found. We will not bother, but see how to do it from the options menu.
As in the first case, we right-click on the desktop and select the option Screen Options.

A window opens with a subsection "System". There are many tabs, but we are interested in "Screen". On the right side of the window, we see several parameters:
- Night light mode - best for reading at night;
- Scale and layout- what we need;
- Multiple displays - we can connect additional monitors.
Find the parameter "Permission" and change to the maximum value, it will be marked with "Recommended".

In addition, you can specify the size of the text in applications. The default is 100%, but the value can be changed to 125%.
Unfortunately, this method is the only one in the top ten. In the control panel, the "Screen" section has been removed and the desired settings can be changed only through the "Parameters" menu. That's how bad they are, these Microsoft people.
Using the graphics adapter utility
I'll show it using an example of an NVIDIA video card, since I don't have AMD.
When we click on the desktop with the mouse to call the context menu, we can see the following items:
- Graphics Specifications (Intel HD Graphics);
- NVIDIA Control Panel.

Both of these sections have many settings, but only the first includes screen resolution options. Let's take an example Intel HD. If you have this software, then launch it.
The HD graphics control panel has opened. Go to the section "Display".
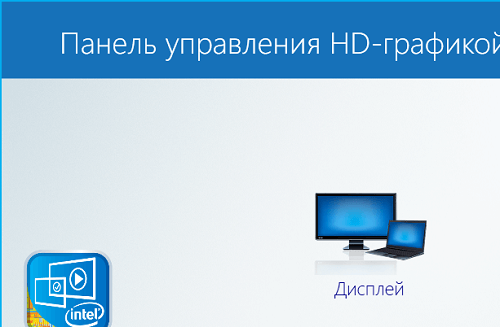
In the main settings of this miracle, we see all the options that we need. Now you know how to change screen resolution using HD graphics.

Well, that's all, now you know everything. In the game, this procedure is done in the settings. And I will not say anything about Windows 8, since there are the same parameters, why say a hundred times about the same thing. Hope this little tutorial helps you.
User question
Hello.
I had an error with the image ... One game was launched, for some reason an error occurred abruptly: "... that the work of the AMD video driver was stopped in mind ...", and then I noticed that everything on the monitor screen became large ...
Also, if earlier I could put a hundred shortcuts on the desktop, now there are already 10 - and there is not almost half of the space! How so, what needs to be done to return everything to its previous state?
Anatoly.
Good time everyone!
This happens due to the fact that the selected is not optimal screen resolution (in your case, the video driver may have "crashed", and because of this, the resolution got lost).
In general, if explained in simple words, then screen resolution- This is the number of points, which are used to build a picture on the monitor. Of course, the more dots there are, the clearer and more accurate the image contours.
Each monitor has its own optimal resolution, which, in most cases, is worth choosing (if you set a resolution higher than the recommended one - then the text and some elements will become too small and it will be difficult to read them, if less than the recommended one - everything on the screen will become large, like from the author of the question).
And so, let's get down to business ...
Screen Diagonal Ratio
In general, as I said above, each monitor has its own optimal resolution, which (usually) is installed by Windows by default (at least if you have all the necessary drivers installed). In some cases, this does not happen ...
The permission is associated with diagonal of the monitor ... The larger the diagonal, the higher the resolution, as a rule. If anyone does not know, the diagonal is measured in inches (1 inch = 2.53 cm).

What is the diagonal and how is it measured (1 inch = 2.53 cm)
Below I have given a plate in which the diagonal of the monitor and the resolution on it are linked (please note that the numbers are conditional (although most often it is) since each manufacturer sets its own parameters).
| Diagonal | Permission | Designation | Format (aspect ratio) |
|---|---|---|---|
| 15.0 | 1024x768 | XGA | 4:3 |
| 15.6 (laptop) | 1366x768 | HD | 16:9 |
| 17.0 | 1280x1024 | SXGA | 5:4 |
| 17.0 | 1440x900 | WXGA + | 16:10 |
| 17.3
(notebook) |
1600: 900 or | Full HD | 16:9 |
| 19.0 | 1280x1024 | SXGA | 5:4 |
| 19.0 | 1440x900 | WXGA + | 16:10 |
| 20.1 | 1400x1050 | SXGA + | 4:3 |
| 20.1 | 1680x1050 | WSXGA + | 16:10 |
| 20.1 | 1600x1200 | UXGA | 4:3 |
| 20.8 | 2048x1536 | QXGA | 4:3 |
| 21.0 | 1680x1050 | WSXGA + | 16:10 |
| 21.3 | 1600x1200 | UXGA | 4:3 |
| 22.0 | 1680x1050 | WSXGA + | 16:10 |
| 22.2 | 3840x2400 | WQUXGA | 16:10 |
| 23.0 | 1920x1200 | WUXGA | 16:10 |
| 24.0 | 1920x1200 | WUXGA | 16:10 |
| 26.0 | 1920x1200 | WUXGA | 16:10 |
| 27.0 | 1920x1200 | WUXGA | 16:10 |
| 30.0 | 2560x1600 | WQXGA + | 16:10 |
Also, monitors can be with different aspect ratios (in the form of a "square", elongated rectangular, etc.). The table below links the resolution to the aspect ratio.

Optimal Resolution Setting
By the way, to find out the current monitor resolution, you can use the online services:

Important!
If you do not have video driver icons in the tray, on the desktop, and in the Windows Control Panel, most likely you do not have video drivers.
Also, if they are not there, you will not be able to change the resolution (it is just that there will not be an optimal option in the list). Until you install new drivers (or update the "old" ones), the problem cannot be fixed.
On my blog there is a detailed article on updating video adapter drivers, I recommend it for review:
In IntelHD video driver (nVidia, AMD)
This is one of the easiest ways to quickly change many screen parameters: resolution, brightness, contrast, color gamut, refresh rate, and more.
If you have a video driver installed, then you just need to use the tray icon next to the clock (or right-click anywhere on the desktop). In my case, this is IntelHD, yours may also have AMD (Ati Radeon) or nVidia (GeForce).

In the settings, as a rule, you need to open the section of basic parameters (in IntelHD it is "Basic settings". In general, many parameters and menu variations depend on the version of your video driver: it is unrealistic to foresee all possible options in the article ☺).
You need to alternately change the resolution - choose the one that is most convenient and comfortable for work. Focus on what is recommended first. If the elements on the screen are too small, try moving the resolution down by 1-2 points, making it a little smaller.

On Windows 7
If you have Windows 7, then you just need to right-click on any free space on the desktop, and select "Screen Resolution" in the menu that appears, see the screenshot below.

Further, in the "Resolution" tab, you can see what you have selected at the current time, and what else can be installed. The optimal resolution is usually marked as "Recommended" (see screenshot below). Most often, they choose either the best option, or 1-2 points lower (so that the picture and text on the screen are larger, it is important for monitors with a large diagonal).

Screen customization in Windows 7
On Windows 8/10
Press the button combination Win + R then enter the command desk.cpl and press Enter. See screenshot below.

Next, the "Display" section will open and you can change many parameters: brightness, text (font) size, resolution, etc. Open additional options, see what permissions you can set (see example below).

By the way, if you do not have such a list, and the optimal resolution is not indicated at all - most likely (as I said above) - you simply do not have a video driver. Try to update it (the link to the article was given above).
Important!
If you have an old CRT monitor (these are so thick ☺, now there are few of them, but in some places they are used) - be sure to check sweep frequency (measured in HZ).
This parameter should not be less than 85 HZ (at 60 HZ - flickering of the monitor is very noticeable, which causes discomfort and). Better yet, set it to 100 HZ.


