Mobile photography is gaining momentum every day, and for an ordinary user preparing to buy a new smartphone, one of the main criteria is not only the performance of the new product, but also its photographic capabilities. So, at the end of 2014, we have two flagships running iOS: and. Both models are equipped with an 8-megapixel camera, which somewhat retraces the traditional Apple policy (tablet cameras have always been inferior to the capabilities of smartphones since the day the first iPad was released). How different are the photographic capabilities of the iPad Air 2 and the iPhone 6? Which device shoots better and who claims to be the first? Let's figure it out together.
Before any visual comparative characteristic, first, you should figure out how the camera modules of the iPad Air 2 and iPhone 6 differ at the iron level.

The aperture (aperture) of the iPhone 6 matters f / 2.2 and a slightly larger pixel size (1.5 versus 1.12 nanometers). Also, iPhone 6 equipped with flash- iPad Air 2 doesn't have it.
Normal shooting
When shooting traditional photography from the category “I walk, I see, I shoot”, there are no significant differences between a tablet and a smartphone. The tablet, in terms of photo quality, has really grown to the level of the iPhone, and this is noticeable.


In almost all photos, the iPad Air 2 shows a colder picture. iPhone 6 “sees” the world around us in warm colors. EXIF data shows a slight difference.

- Verdict: draw.
HDR photography
When I got my hands on the first digital soap box (the affairs of bygone days), I was always saddened by the impossibility of taking pictures of beautiful landscapes. There were two options: to get a beautiful photo of a house with a gloomy and gloomy sky in dull gray tones, or to enjoy a gloomy and dark house, but surrounded by a beautiful blue vault. This is how shooting appeared in HDR mode and on the iOS platform, it was possible to take advantage of its capabilities back in 2010, after the presentation of the iPhone 4 and the release of the iOS 4.1 firmware.
Since then, a lot of water has flowed under the bridge, and today the iPad Air 2 and iPhone 6 stand face to face in HDR craftsmanship.


As I said above, the iPad Air 2 has a colder color temperature when shooting, and for photos with a heavenly surface, this is a definite plus. Despite the seemingly identical shots, the texture of the sky on the iPad Air 2 is more saturated and traced, the white and gray colors are not overwhelmed.

The EXIF data clearly shows that the iPhone 6 is capable of faster shutter speeds due to the higher aperture ratio. But the aperture also plays a role in rendering the depth of field - a photo with a flower is a clear confirmation of this.
- Verdict: draw.
Macro photography
Shooting flowers, insects and other miniatures has been in demand among tens of thousands of mobile photographers over the past few years. With the introduction of the iPhone 6 and iPad Air 2, mobile macro photography takes another solid step forward.


The iPhone 6 has 0.2 more aperture than the iPad Air 2. At the same time, the smartphone has a larger pixel size (1.5 versus 1.2 nanometers), which in macro photography becomes the main weapon of the iPhone 6. Thanks to these values, A photo of the same object taken with the iPad Air 2 and iPhone 6 with a hint of macro photography looks better on the iPhone 6.

The EXIF values are almost the same, and the technical characteristics of each of the camera modules are already responsible for the visual perception.
- Verdict: iPhone 6 winner.
Shooting "at dusk"
For any photograph, one of the key metrics is the lighting level. How much light hits your subject affects the overall mood of your shot.


It is in low light conditions that the iPhone 6 shows itself in all its glory. Better light transmittance of the sensor and less noise, as well as the presence of a trump card - flash. Do not forget about optical stabilization in the iPhone 6 Plus, where at long shutter speeds (required in the absence of proper lighting) the risk of getting a blurry photo is minimized. 
The EXIF data is pretty much the same, but the iPhone 6's edge is undeniable.
- Verdict: iPhone 6 winner.
Digital zoom
The need to approach a distant object when shooting occurs quite often. Alas, as strange as it may sound, the iPhone 6 and iPad Air 2 are equipped with "fixed focal length lenses", and therefore, any approximation is possible only with the help of software tools. And while the smartphone industry is slowly moving towards optical zoom, it has to be content with digital.


Both the iPad Air 2 and iPhone 6 have their own strictly personal approach to shooting. The iPad Air 2 once again shows a somewhat gloomy and cold picture, while the iPhone 6 resorts to warmer tones. Here it is for an amateur.

- Verdict: draw
Shooting panoramas
A distinctive feature of the photographic capabilities of Apple's mobile technology is the ability to create smooth and realistic panoramic images. Both iPad Air 2 and iPhone 6 are no exception.


It is almost impossible to distinguish between panoramic shots taken by iPad Air 2 and iPhone 6. Both gadgets do a great job, expressing the unified character of Apple.
Like AssistiveTouch, the LED flash for notifications can be useful for everyone. Although this special feature was designed primarily for the deaf and hard of hearing, anyone can use it to receive visual warnings.
In cases where the Do Not Disturb feature is active, this feature makes it more convenient to know when a new notification has been received. Personally, I like to use it so that I don't miss important messages even in my spare time.
Help you enable "LED Flash for Alerts" in iOS 13 on your iPhone.
How to turn on the LED indicator on iPhone
With iOS 13, Apple has tweaked the Accessibility settings a bit. For a change, it now has a separate section and is no longer part of the general category. Considering how convenient this feature is, this is a welcome step.
The move also reshuffled the location of the LED flash. And that's why I thought that many Apple customers might be a little confused about the process of enabling LED notifications on iPhones.
1. Run settings application on your device and select availability,

2. Under the Audio section, click on Audio / Visual option,

3. In the Visual section, enable the radio button next to LED flash for alerts. Next, another switch will appear "Flash without sound"... If you want a visual notification indicator even when your iPhone is silent, be sure to leave this switch on.

Going forward, you will receive visual notifications on your iPhone. Later, if you ever want to turn off the flashlight alerts, all you have to do is go back to the same settings and then turn off the LED flash toggle at the end.
Setting up Flash Light notifications on your iPhone ...
So, this is a quick way to turn on flashlight alerts on iOS 13. While it's a fairly simple feature that might not be on everyone's favorites, I've loved using it for years.
It just became easier for me to sync with the latest notifications so that I don't miss them even in Do Not Disturb mode. Do you also find this helpful?
Unlike other models, the iPhone does not have a dedicated notification indicator for incoming calls and notifications by default. Instead, the usual vibrations are provided here. However, the iPhone has a flash function that can be used to alert you of incoming calls, messages, and other notifications coming to your device. In this article, we will show you how to turn on the flash when making a call on your iPhone.
If this function is enabled, when you receive a call or message on the iPhone, the LED starts blinking repeatedly, which is very convenient when the silent mode is set. This is a good addition to the normal vibrations that the system already has.
The LED flash alerts on iPhone are a handy feature that may not be familiar to all users. We suggest that you familiarize yourself with how to turn on the flash when calling on iPhone 5, 6, 7, 8, X and other versions.
This parameter is available on models of modern versions of iPhones with the latest version of the iOS operating system. Although this feature has been around for a long time, the methods for enabling it are slightly different on older iPhones.
Newer and iOS iPhones have flashing LEDs to alert you of incoming calls, messages, and other notifications. And later versions, starting with iPhone 4 and iOS 5, no longer support this function. Further, step by step, it is described how to make a flash on an iPhone when you call.
1. Open Settings from the home screen.
2. Click "Basic».
3. Then go to " Universal access».
5. Click " Flash alertsFlash in silent mode».
6. Switch the LED flash for notification to the “ ON» .

That's it, now the turned on indicator light blinks three times, notifying the user of incoming calls, messages and various notifications. To turn off the notification, you need to switch the setting to "OFF».
This feature is also undeniably useful for people with hearing impairments. Also, ordinary iPhone owners often turn off the loud signal and use only a blinking LED. This tells how useful this function is.
Read also:
How to turn on flash when calling on iPhone for quiet mode?
Your iPhone usually alerts you with a beep, vibration, or both. But there are situations where loud signals and vibrations fail to attract attention, for example, in such a loud environment as a nightclub. Or maybe the user just doesn't want to be bothered by sound or vibration at all.
Solution: LED light (flash) on iPhone. It starts flashing brightly whenever you receive a notification. This is the same bright flash that you use on your camera or as a flashlight. Therefore, this feature is ideal for flashing incoming calls, messages and other notifications that will be difficult to miss.
If you want the LED flash to automatically activate whenever the iPhone is muted. You need to flip the switch on the iPhone 7, be careful, this function is only available on newer models.
1. Open Settings from the home screen.
2. Click "Basic».
3. Then go to " Universal access».
4. Then scroll down to the hearing point.
5. Click " Flash alerts". On newer iOS versions “ Flash in silent mode».
6. Switch the LED flash in silent mode to “ ON» .
Now, when the sound is off, the LED flash will notify you of incoming calls.

Now when you receive messages, phone calls or any other notifications. The LED indicator (flash) on the iPhone will flash continuously to alert you.
This function is useful in the following situations:
· Prevention of missed calls, messages and any other notifications.
· Attracting attention in a loud environment, both at work and at rest in noisy places.
· Use of a light signal together with an alarm clock. (This last use case should be reserved for masochists only. Don't force your brain and go to bed on time);
Now you know what Quiet Mode is, how to use it and on which models it is available.
How to turn on flash when calling on iPhone (Video)
The video shows you how to turn on the flash for your iPhone step by step. It also explains what Quiet Mode is.
How to turn on flash for calls and notifications on iPhone
Why does the LED flash not work on iPhone?
What if the function didn't work?
This feature works only when iPhone is locked or in sleep mode. Some older devices require a reboot to activate this feature. In addition, your phone must be facing down for you to see the blinking light.
The light should flash even if the phone is in:
· Silent mode;
· With switched off vibration;
· With the ringer switch off on the side panel. (Only on newer versions of iPhone).
Visual cues can also be used perfectly in combination with the normal vibrations provided by the system.
Apple originally designed this feature for the hearing impaired. However, many users liked it. People have appreciated the great opportunity to receive visual signals instead of sound signals.
Conclusion
For some understanding, this idea originates from the old jailbreak tweak, but Apple used it as a universal access feature for iOS 5. It is preserved in all modern versions of iOS. Later versions, such as iOS 10, added a secondary "Flash in silent mode" option. Flash LED assures that this feature is very convenient for iPhone users.
To test the operation of the flash, you need to wait for an incoming call or message. You can initiate your notification, for this you need to set a short countdown timer. Either way, you will notice that the iPhone's camera flash will start blinking along with sound alerts and vibrations. The effect is very intense and the phone may appear to look dazzling, which is especially noticeable in the dark. However, you need to understand that such an iPhone signal cannot be ignored.
If you have any additions to the article “how to turn on the flash when calling on an iPhone” leave them in the comments, they will definitely be read!
In life, situations often arise when you may need a flashlight. It is not very convenient to carry its pocket version with you. Fortunately, we live in the age of digital technologies, everyone has smartphones and tablets, but even now not everyone knows about the presence of a flashlight on their gadgets and how to use it. Let's look at ways to turn the flashlight on and off on various Apple devices.
How to turn on the flashlight in iPhone and iPad
Prior to the iOS 7 firmware version, the iPhone did not have a built-in flashlight function, although even the black-and-white phones of the oldest models before the advent of the camera had a lighting device in their assets, for which they were loved by users.
It was nearly impossible to use a flashlight in Apple devices until the iPhone 4 with iOS 7. This was used by software makers. Some programs are still very popular in the market.
With the new version of the operating system, iPhone manufacturers have added a flashlight function right to the control center of the device.
Just click on this icon and you get a light source. Thanks to the diodes used for the iPhone's flash, the brightness will not drop even with prolonged use. That, of course, cannot be said about the device's battery.
There are two ways to turn off the flashlight:
Starting with iOS 10, users have the ability to choose the intensity of the flashlight's glow. To do this, you need to hold down the icon to enable it. In this case, there will be three types of intensity to choose from:
- low;
- medium;
- high.
Video: how to turn on the flashlight on iPhone
Flashing flashlight when making calls and SMS
You can make the flashlight blink as follows:
- Go to general settings and select "Basic".
- Select Accessibility.
- Go to the Flash Alerts menu.
Select the Flash Alerts menu
- Activate the necessary items: "Flash warning" and / or "Flash in silent mode".
Enable the required parameters by clicking on the corresponding buttons
In some versions of the operating system, the Flash Alerts menu is itself a button.
Video: How to enable Flash Alerts on iPhone
Flashlight programs for iOS
There are many third-party programs available to add flashlight functionality to your device. Let's take a look at some of them.
Flashlight by Rik
A good utility for old versions of iPhone 4s, 5, 6. It has a very simple intuitive interface, easy to use.
"Flashlight for iPad, iPhone, iPod touch"
The current version of the product is 3.22. Compatible with devices based on iOS 4.3 and higher. The program is free. Can use both device display and LED flash. Has an intuitive interface.
"LED flashlight"
An application that differs from the rest in that the user himself can choose the color of the backlight if it is carried out through the device screen.
The user is also free to choose the brightness level, has the ability to switch to the backlight blinking mode and some other functions. Unfortunately, this program is quite resource-intensive and is not recommended for long-term use.
Many of us are addicted to iPhoneography, buy special lenses and install many photo manipulation applications. But how to choose an interesting accessory from a huge variety of others on the market. Let's turn our attention to the best representatives of photo accessories for iOS devices.
Kit from Manfrotto
The Manfrotto set is a KLYP + case for iPhone 5 / 5s with LED flash and three interchangeable lenses (1.5x telephoto, 0.68x wide and 0.28x fisheye). All together can now be purchased at a reduced price on the company's website for 97 instead of 138 euros.
Lens by Lensbaby
Advanced Video Case by Phocus

Phocus has offered an interesting solution for those who are fond of video shooting on the iPhone. The set consists of a comfortable case, a microphone and three interchangeable lenses (telephoto, wide-angle and macro). The kit fits iPhone 5 and costs € 166.
LED Flash for iPhone 5
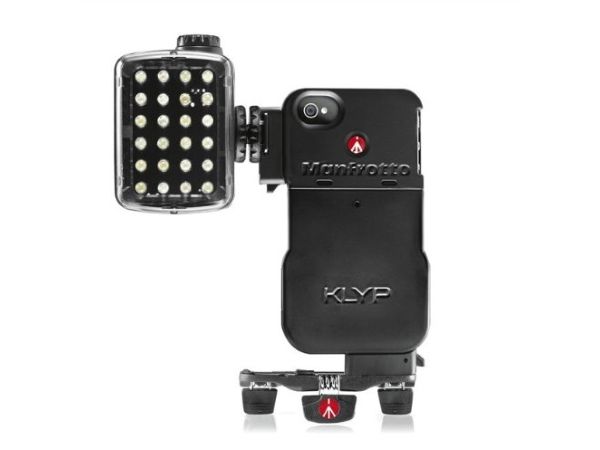
Another accessory from Manfrotto is now on sale for € 87. The set consists of a KLYP iPhone 5 case, an ML240 flash with 24 LEDs and a small tripod MP1-C01.
Lens for panoramic photos
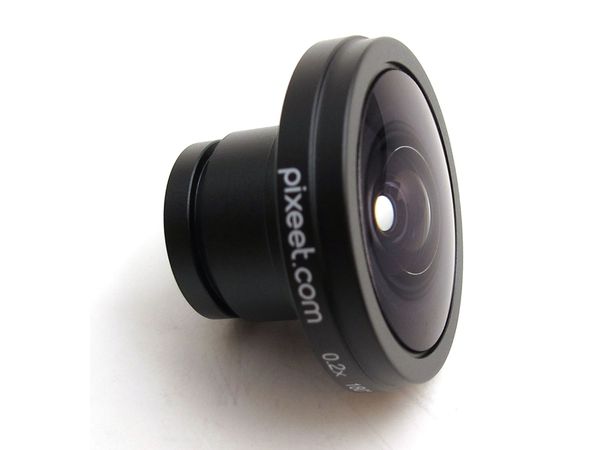
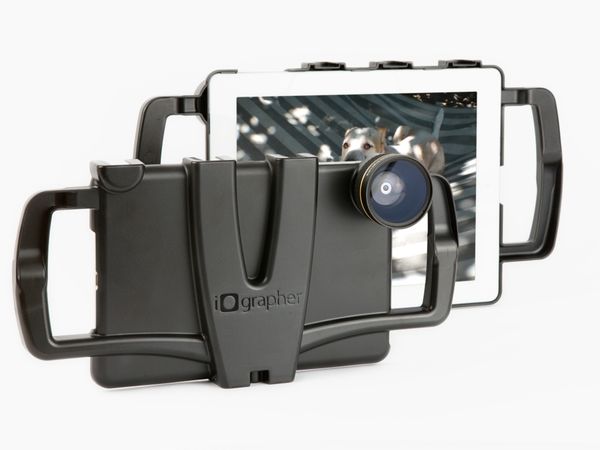
Photo case iOgrapher
Lenses from Walimex
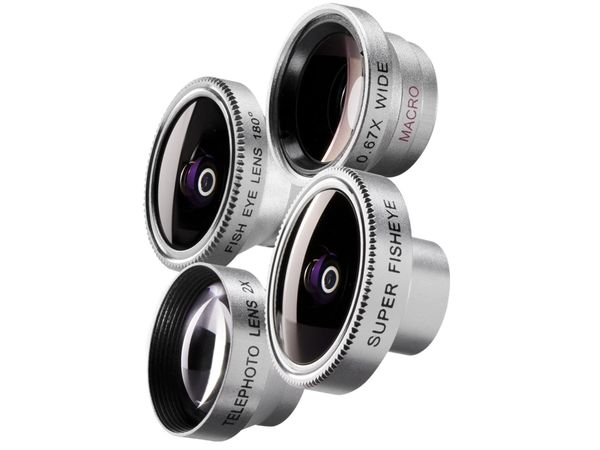
The South Korean company also presented its variants of lenses for iPhone 4, 4s, 5. The set consists of fisheye, super fisheye, telephoto, wide-angle and macro, and costs 60 euros.
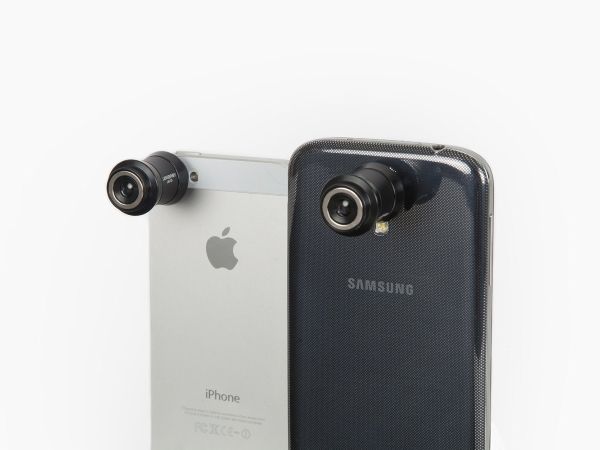
Olloclip Lenses
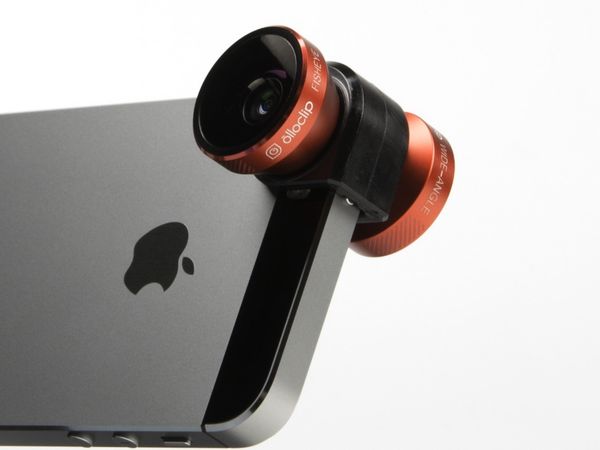
So far, Olloclip has few real competitors. For several years of their existence, these lenses have proven themselves well among users and are now in great demand. The 4-in-1 set includes a fisheye, a wide-angle and two 10x and 15x macros. The cost for the iPhone 5 / 5s is $ 70, for the iPhone 6/6 Plus - $ 80.
Telephoto lenses from Mofy
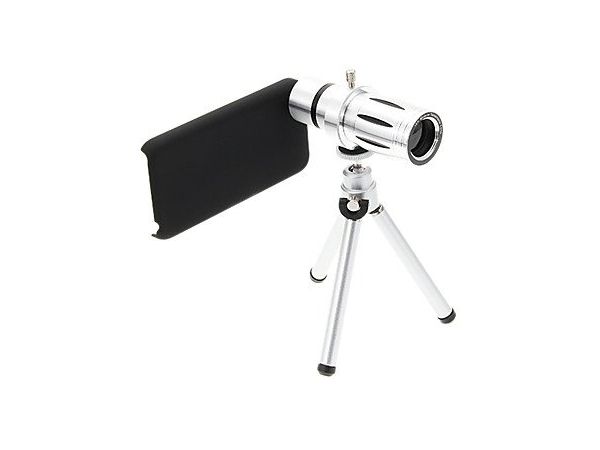
This accessory by Mofy is specially designed for the iPhone. The set for the 4S model includes a case, a 6-18x telephoto lens and a small tripod. Its cost is 133 euros. The same goes for the iPhone 5c, only here you'll find a 12x telephoto lens. And it will cost you