how to connect dvd-rom? and got the best answer
Answer from Neo[guru]
Plug an 80-pin IDE cable into a free connector on the motherboard, plug a free mollex into the power connector. If there is no free IDE connector, connect it to the free connector to the cable on which the hard drive "hangs". In this case, on the hard drive and DVD-ROM, you need to set the Master/Slave jumpers in accordance with the order of these devices on the cable.
After that, turn on the computer. Everything.
Answer from unity of command[master]
Just like a CD-rom, the main thing is that there are firewood (drivers) for it!
Answer from indifference[guru]
Write prompt
Answer from Availability[guru]
put in place of the old
and if you want that there would be 2 of them, then on the cable from the old one there is another connector you connect to it, with power, I think it’s understandable. it is impossible to turn it on incorrectly and check the jumpers (located at the back) so that one drive is master and the other is slave
by the way and check the bios section of the IDE so that you have the oyua drives enabled
Answer from Stretch[master]
Why firewood? I installed it myself without firewood. The main thing is not to get confused with the drive (if you install the second copy).
Answer from Icy[guru]
1. You open the system unit, take out the front cover of the case section where you want to put the CD.
2. Insert, fasten.
3. Connect the wire to the power connector, a signal cable (flat for 40 pins) and wires for transmitting an audio signal.
4. Turn on the computer and during the boot you look to see if Bios sees your CD.
5. If yes, insert the driver disk from the package, enter the control panel --> hardware installation --> continue as directed by the installation wizard.
Hello!
Answer from get along[active]
The market was filled with netbooks - devices that fundamentally do not provide a CD or DVD drive. Even Apple is ditching these bulky and outdated devices, but at least the company is using a USB flash drive to reinstall the system or run utility utilities. And ordinary users get a non-book with an already installed system.
All instructions for installing or reinstalling windows on a netbook without using a DVD drive (from a flash drive) are so overloaded and intricate that it is not easy to understand them. It used to be easier: drive into the drive and let's go. Now it is also possible, only an external drive is needed.
External DVDRW drives for laptops connected via regular USB are prohibitively expensive. Today the price starts from 1650 rubles, and the upper threshold reaches three thousand. A lot of money for a thing that will be needed a couple of times a year.
Therefore, today we will assemble an external USB-DVD drive from matches and acorns, which will be much cheaper. How much depends on your ingenuity and resourcefulness.
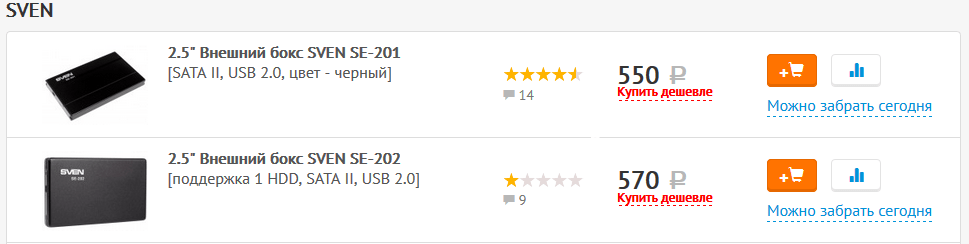
I bought the drive itself in the discounted goods section of the DNS store - one laptop drive cost me only 35 rubles. Yes, yes, yes, thirty-five rubles for a DVD cutter! Here are the models that are available right at the time of writing:
It has become a little more expensive, but you can always buy any laptop drive at a flea market or from your hands. If only it worked and had a SATA connection interface. The presence or absence of the front panel does not play a role - it is only a decorative element.
The second part that we definitely need is a USB box for the HDD. We need a box for a laptop drive with a SATA connection. A new box costs from 400 rubles, but you can find it cheaper if you search for this product from your hands.
 It is more profitable (for the price) to take the box not in the store, but at the flea market, from the hands. A store warranty is still not needed - we will disassemble the box to the screw and improve the design a little.
Why do we choose SATA? This is a more up-to-date, faster and less expensive way to connect (you have to pay extra for the retro IDE format). In addition, the IDE connector on the DVD drive is completely non-standard, and there is no need for unnecessary problems. In general, SATA!
In addition, you need two pieces of wire (MGTF will do), a clerical knife (nail clippers), one thin Phillips screwdriver, a toothpick, wire cutters, pliers, a soldering iron and the necessary soldering accessories.
Let's get started!
First you need to gut the disk box and remove the USB to SATA adapter board from there. Each model is disassembled in different ways, I will not give general advice here. We only need a fee, the rest can be thrown away.
The main problem is in the power connectors. For CDs, for some reason they made it shorter and with a different pinout. Although 12V and 3V lines are not used in laptop drives. In general, we will make food ourselves. Here is a diagram of the power connectors for the optical drive and hard drive.
 Now let's work on finalizing the drive. It needs to be disassembled to gain access to the board. There is nothing complicated in disassembling: we unscrew the screws (there are three of them) on the top cover and remove it.
 The board we need to access is securely hidden under the drive tray. But, as with conventional large drives, the tray can be pulled out mechanically. To do this on a laptop drive without a muzzle, you need to poke a toothpick into the hole just to the right of the eject button. If there is a decorative muzzle on the drive, then it also has a hole where you need to poke. Although it will probably be a little narrower, so instead of a toothpick, you will have to take an unbent thin paper clip.
 When access to the board is obtained, we will work on finalizing the file. It is necessary to gnaw out a large enough hole in the connector and in the cover so that our adapter from the box can freely enter there. Depending on the accuracy and the tools used (I gnawed with clippers, wire cutters and pliers), it should look something like this:
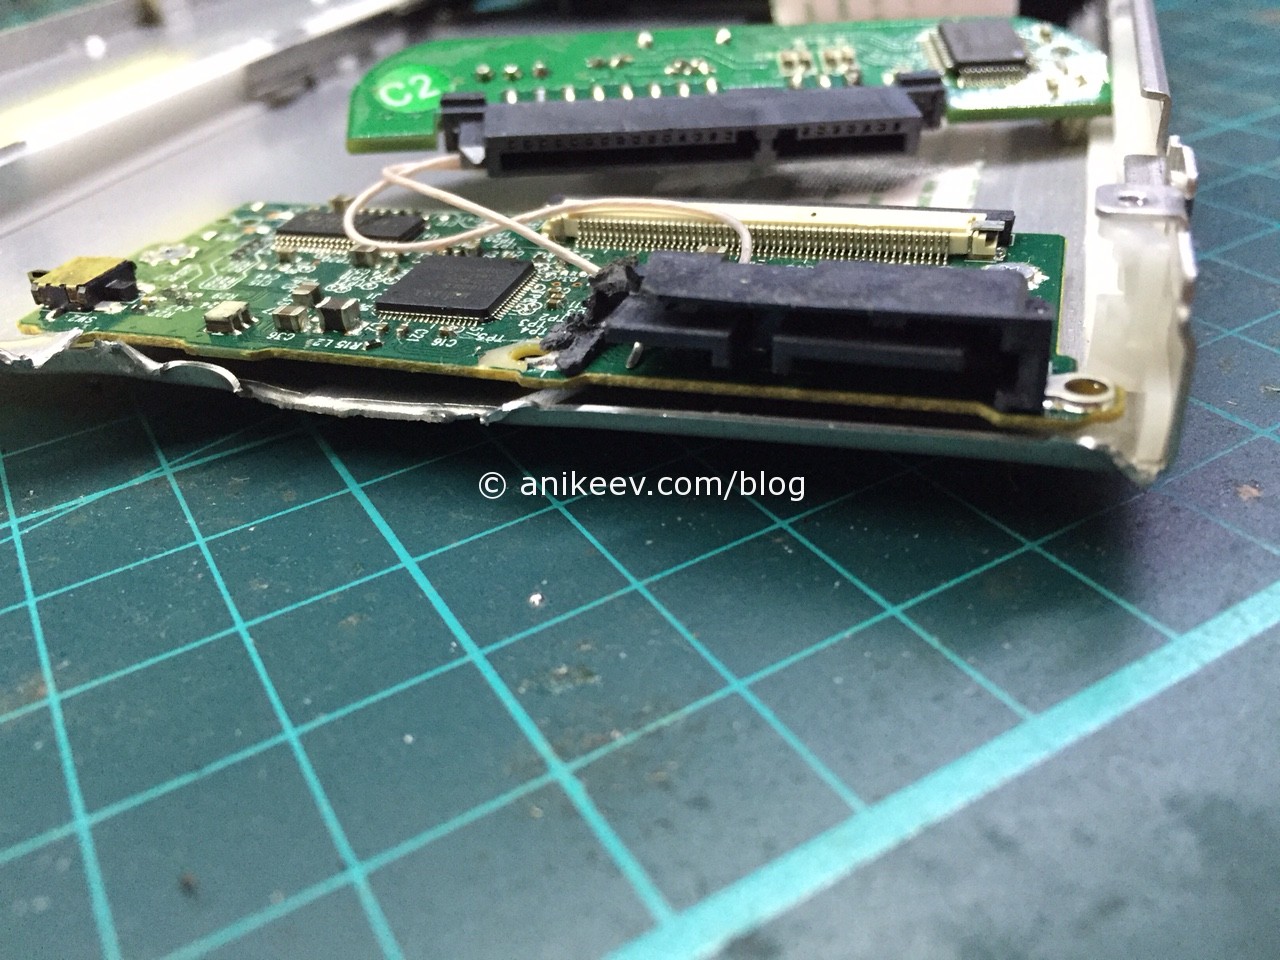 Now we take a clerical knife and cut the tracks from the back of the power connector on the drive. For reliability, you can make two cuts to cut out a whole strip and for sure open the contact. We do this because the pinout of the SATA-HDD and SATA-DVD power connector is different. Below you can see that the tracks are cut: compare with the pins of the SATA data connector (left)
 We will supply power with separate wires in accordance with the pinout of both connectors (we need one GND and one + 5V). By the way, if you want, you can add a plug-in connection to the wires to completely disconnect the drive from the board.
This is how you get an external DVD drive from which you can install windows in case of problems. And no dancing with flash drives. True, you must be able to hold a soldering iron in your hands. For whom this is not a problem, he saves.
 Need to make a USB-DVD drive even cheaper and without a soldering iron?
Thank you Chinese brothers! You can buy on Aliexpress
full-screen video than CD-ROM drives, bringing games to a new level of realism. In addition, it becomes possible to burn more entertainment or educational software onto fewer CDs. For example, the electronic version of the Complete National Geographic comes in either 30 CD-ROMs or 4 DVD-ROMs.
Third-generation DVD-ROM sets, such as the Creative Labs PC-DVD Encore 6X Dxr3 (pictured), are state-of-the-art and can read regular CD-ROMs. And with devices that include a PCI MPEG-2 decoder (such as the Encore kit), you can also watch DVD movies on both your PC monitor and TV screen. Here's how to connect a 3rd generation DVD-ROM kit that includes a drive with a widely used IDE interface.
1 Prepare the system for upgrade. Connecting a DVD drive, an MPEG decoder board and all the necessary software will significantly change the configuration of your PC. Therefore, even before starting work, in order to protect yourself, check whether the PC is working and whether the equipment is in conflict. Click the Start button and select Settings? Control Panel, double-click the System icon, or right-click the My Computer icon and select the "Properties" menu item, and then go to the "Device Manager" tab. If you see an exclamation mark next to any device, click the Start button again, point to Help, and look for the hardware troubleshooting section. In addition, make a full backup of the information from the PC hard drive.
2 Install the MPEG decoder board. Turn off your PC and unplug the power cord from the outlet. Ground yourself - this is best done with a metal wrist strap connected to a grounded metal object. Remove the PC case cover and find a free PCI slot. Remove the metal plate located behind it on the back of the PC case. Carefully insert the decoder board into the slot and, making sure that it is firmly “stood”, fasten it with screws.
3 Connect DVD drive. Modern motherboards have primary and secondary IDE channels, each with its own connector (A). One cable connects the hard drive to the primary, and the other, usually a CD-ROM drive, to the secondary. Each of them can support two devices, and if possible, connect the DVD drive to the same cable that the CD-ROM drive is connected to. If this slot is occupied by another device, such as a tape drive or a Zip drive, connect the DVD drive to the cable between the system board and the hard drive. Of course, this is only possible if one of the IDE cables has three connectors. Otherwise, use the cable that came with the DVD drive. Make sure the jumper on the back of the DVD drive is set to the "slave" (B) position. If a sled is needed to fit the drive into the PC (for example, when installing a 3.5-inch drive in a 5.25-inch drive bay), install it. Insert the DVD drive into the bay (C) and connect the IDE and power cables to the drive (D). Check if the colored conductor (usually red) of the IDE cable is connected to the first pin of the DVD drive connector (note that it is marked).
 |
 |
 |
|
4
Connect audio and video cables. From now on, you will have to master the profession of an electrician, that is, connect a lot of cables.  The connection process itself depends on the manufacturer of the kit (in this article we are talking about Creative Labs PC-DVD Encore 6X with a Dxr3 decoder). Please read the user manual included in the kit carefully and start working according to the following procedure:
connect the DVD drive and the MPEG board with an audio cable (to the Audio 1 In connector);
if the audio cable goes from the CD-ROM drive to the sound card, then disconnect it from it and connect it to the Audio 2 In connector (the second audio input connector) of the MPEG card;
connect the Audio out connectors (audio output) of the MPEG-card and Audio in (audio input) connectors of the sound card with an audio cable;
disconnect the cable going to the monitor from the graphics card and connect it to the bottom connector of the MPEG card, intended for an external monitor;
connect the MPEG video feedback cable and the graphics card with the included DVD-ROM kit;
if you want to watch DVD movies on your TV, connect one video cable from the upgrade kit (either RCA or S-video depending on your TV's specifications) to the video output of the MPEG card and the video input connector of your TV;
If you have a stereo receiver or PC speaker system that can decode Dolby Digital Surround audio, use a cable that is not normally included with the DVD-ROM to connect the MPEG board and stereo device.
5
Install DVD drivers and software.
 Connect your PC to the network and turn it on. Windows 9x systems should detect the new drive and card and prompt you to install the drivers. Insert the driver disc (floppy or CD) and follow the instructions that appear on the monitor screen. Then install the software included with the DVD Drive Upgrade Kit following the instructions in the User's Guide. You may need to restart your PC afterwards. Finally, check if the new drive will read regular CDs and DVD-ROMs. If there are problems, such as the PC cannot detect the drive or read the disc, turn off the computer and check all connections again. (With so many cables, it's easy to make the mistake of connecting one incorrectly.) If the problem persists, contact the upgrade kit developer's technical support. With all equipment working correctly, turn off the PC and put on the case cover.
Hi all! Earlier, I already wrote an article on how to connect an ide hard drive to the motherboard using a controller. Today I will share with you another great solution for connecting an ide device to a new motherboard. In addition, this solution is inexpensive and quite versatile.
While upgrading the hardware of one computer, I was faced with a choice: should I buy a new optical drive, or can I use the old one that has an IDE connector. Naturally, the new motherboard does not have this connector, and on my proposal not to install a drive at all, the computer owner firmly indicated that he uses disks often and with pleasure.
The cost of a new optical drive with a modern SATA connector is not so high - about 600-700 rubles, but then it is not clear what to do with the old device, because it works fine. And the money saved is better to put into improving the performance of a new computer.
After surfing the Internet a little, I came across this wonderful thing:
Similar adapters can be ordered from China at ridiculous prices here: aliexpress.com - a trusted reliable store with a guarantee, whose services I use quite often.
This is a SATA to IDE adapter and vice versa IDE to SATA. It has a fairly compact size and costs only 200 rubles! Obviously, buying such an adapter is more profitable than buying a new drive.
The best thing is that it works both ways. That is, we can connect an old IDE device to a new motherboard, or vice versa, a SATA drive or hard drive can be connected to a motherboard that does not have SATA connectors. In both cases, we can save a lot.

In general, connecting a device through such an adapter does not cause difficulties, but here you need to be careful. The adapter has markings for SATA outputs (see the right photo above). One SATA connector is used in case of connecting an IDE device to the motherboard, the other vice versa, if you need to connect a SATA device to an old motherboard.
In addition to different connectors, the controller has a jumper to select the mode:
- 2-3 IDE mainboard to SATA HDD;
- 1-2 SATA mainboard to IDE HDD.
Accordingly, by jumping the necessary contacts 2-3
or 1-2
, we tell the device what type of connection we need.
In any case, just by experimenting with wires and a jumper, you can achieve the desired result, and you can not be afraid that something will burn (verified by your own experience?).
Connecting an IDE hard drive or drive will look like this:

Having connected an optical drive through such an adapter, I decided to buy myself exactly the same one. Let it lie, I'm sure for such a price it will definitely come in handy.)
Here is such a simple and cheap solution for connecting IDE devices. I hope the article will help many to make the right choice)
P.S. For those who are unable to connect a hard drive through an adapter (not detected in the system or in bios), they can try setting the jumpers on the IDE drive itself to the master or slave position. Try different options. Everything will definitely work! (Thanks to Alexey Schukin for the addition)
How to connect a drive SATA or IDE interface to the computer if there is not a single free connector on my motherboard. Everything is occupied by hard drives, two SATA connectors and one IDE connector. In other words, there are three hard drives installed in the system unit and operating systems are installed on all of them and there are files, all of them are needed. But there is no space for the drive, but there is a need for it, burn movies to DVD for friends, and so on. Do not recommend an external USB drive, it is expensive. Artur Kharkov.
How to connect a drive
We have a good article with you and me, in which we connected two SATA and IDE hard drives to the motherboard using a 3-port SATA and IDE controller - VIA VT6421A, which then perfectly defined and began to work. Moreover, we have adapted to make backups of the system in the Acronis program and store them on these hard drives (from the boot disk, the program perfectly sees the hard drives connected via our SATA and IDE controller and works with them). If anyone is interested, they can read our article.
Now we have a slightly different problem, namelyhow to connect disk drive, if there is simply nowhere to connect it and I propose to solve it, use the same method.
- Take note: keep in mind, you can connect a regular floppy drive or a simple hard drive even to a laptop using !
We take a simple system unit with one SATA hard drive, on which the Windows 7 operating system is located, as we can see, there is not a single drive inside it. We perform all actions on a turned off computer.
First of all, we take our 3-port SATA and IDE controller. As we can see, our controller has three SATA connectors and one IDE, more than enough for our two drives.

Insert it into PCI controller slot our motherboard and fix it with a screw.


In our article, we will complicate our task and connect to our system unit, through the aforementioned controller immediately two SATA and IDE drives Sony Optiarc,


then we turn on the computer and see if our two different DVD roms, our operating system and the programs that work with the DVD rom see it. An IDE-SATA adapter costs about 350-400 rubles and will suit us just fine.
So we have prepared two DVD-ROMs in advance, as I said, one is SATA, the other is IDE, we insert them into the case. Try to place the drives in the system unit, NOT close to each other.
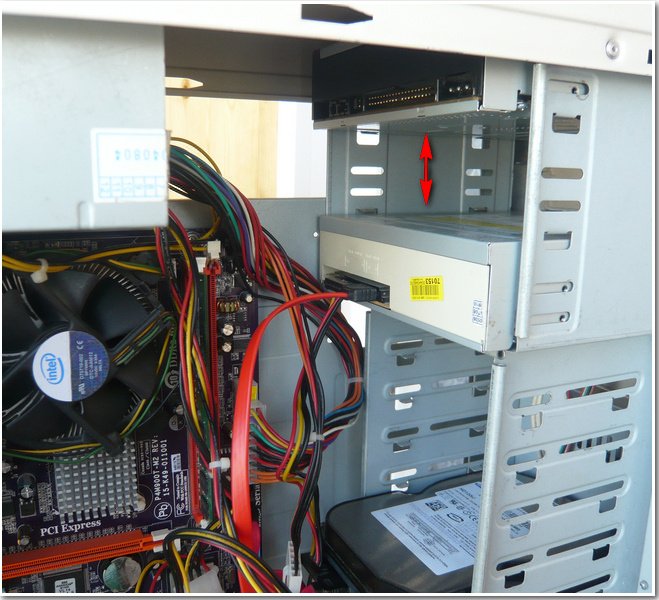
Then we connect them in turn to our adapter using SATA and IDE information cables, then we connect our two drives to the power supply with two cables.


We attach both drives to the system unit using four screws. That's all and it is ready, we will not close the lid yet.

We turn on our computer, the Winows 7 operating system starts up. We immediately open the Computer window and see our two drives.


