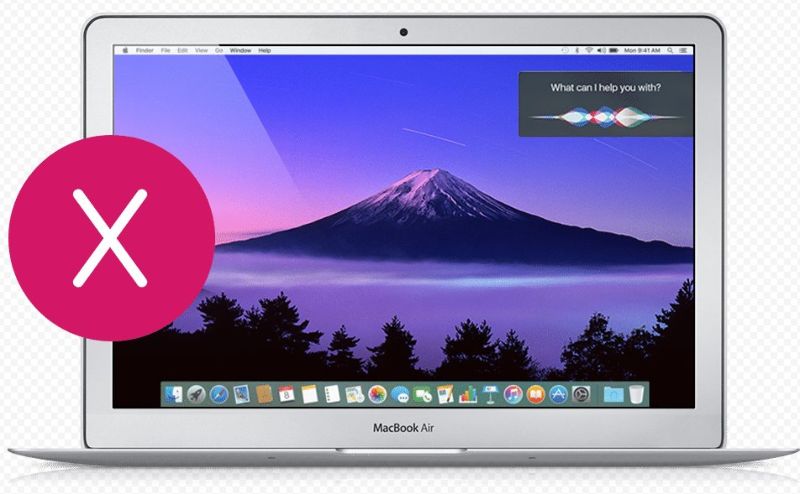
Sooner or later, the day comes when you need to reinstall the Mac OS operating system on your MacBook PC. This task is no more difficult than reinstalling Windows. This will be discussed.
operating system on macbook
The reasons for reinstalling the macOS operating system on a Mac computer are as follows:
- damage or deterioration of the built-in drive (HDD);
- selling or gifting a MacBook to another person;
- "moving" to another MacBook (newer model, but with the same version of MacOS);
- transferring data to Apple gadgets or to another computer.
What is the reinstallation of MacOS:
- "from scratch", including formatting the built-in disk;
- reinstallation "on top", with the preservation of personal data and applications (updating MacOS).
For example, using the MacAppStore, you can upgrade OS X Lion and OS X Mountain Lion to the newer OS X Mavericks.
The procedure for selling or transferring a Mac to another user is as follows. It deserves special mention.
- Backing up personal data from a MacBook to a separate media or cloud service.
- Disabling special services and functionality that manages copying and transferring data.
- Erase all personal information from the drive.
Attention! Before you start reinstalling MacOS on your MacBook PC - take the trouble to save all your data on external media! This will be discussed first.
Backing up data with Time Machine
Time Machine is designed to back up personal files from your MacBook and restore them back to it. But it requires external USB drives (HDD, SDD drives) formatted in MacOS Extended or Xsan - FAT/NTFS file systems designed for Windows and Android are not supported. If the disk was previously formatted in FAT / NTFS formats, the MacBook will not accept it if it refuses to reformat “for itself”.
Time Machine is launched from MacOS System Preferences in the Apple menu. When an external hard drive is connected, a corresponding notification will appear.
Do you really want to destroy all data written to this drive in a different format?
If the external drive has already been formatted, Time Machine will give the go-ahead to use it. Confirm the request.

Are you sure you want to copy your data to this drive?
If Time Machine does not show disk selection, do the following.

It is interesting that backups in the Time Machine program are fully automated - the backup is "refreshed" hourly, and their saving is ordered, you will not "get lost" in them. In addition, copying is also possible to an Apple server (like iCloud) and to local network storages that support the Apple File Protocol. All this often helps in case of need to reinstall MacOS not to waste precious working time.
After copying all your data, you can proceed to reinstall MacOS.
Reinstalling macOS on a Mac
There are several ways to reinstall macOS on a MacBook: a clean install from a flash drive, an over-install of a previous version (updating from the MacAppStore), and restoring macOS from a backup.
How to reinstall Mac OS from an installation flash drive
The preliminary steps are as follows.
- Download the Mac OS X installation image from the Mac App Store or third-party sites.
- When the download is complete, right-click on the downloaded file and select "Show Package Contents".
- Go to the /Contents/SharedSupport/ folder, copy the InstallESD.dmg file to a safe location on your disk, and mount it on your macOS desktop.
We need the Disk Utility app included with MacOS. These are the next steps.

Creating an installation flash drive "Disk Utility" will perform automatically, and it does this operation quite reliably. When the copy is complete, Disk Utility will notify you of this.
Congratulations! The macOS installation flash drive has been created! You can restart your MacBook. Preparing to install MacOS is as follows.

Everything! MacOS installation started. The macOS operating system will install automatically - this will take 30-100 minutes depending on the performance of your MacBook. After it, your PC will immediately be ready to work.
How to install the system without formatting the internal drive
Installing macOS without erasing a drive is all about downloading and installing macOS updates directly from the MacAppStore. The installation flash drive is not needed here. This is similar to updating iOS on smartphones and tablets "over the air". This method is good for those who once bought a MacBook - and are not going to change it, but, on the contrary, will work on it for many years, because MacBook computers, like Apple iDevice gadgets, are of very high quality, reliable and convenient.
Before updating, make sure that your MacBook meets the hardware requirements of the new version of MacOS - otherwise it will "slow down".
Not every previous version of MacOS may work to upgrade to the desired version. So, if your MacBook is running macOS Snow Leopard (10.6.8) and your MacBook is running macOS Sierra, first upgrade to macOS X El Capitan.
The macOS Sierra version is taken as an example. Other copies are searched for and "placed" in exactly the same way. Your actions are as follows.

If you have OS X El Capitan 10.11.5 (or newer) operating system, the MacOS Sierra version is downloaded silently. You will then be prompted to install this version.

Click on the install button
During the installation of MacOS, the PC restarts several times. If this version did not suit you (Macbook performance dropped) - “roll back” to the previous one (for example, OS X El Capitan), with which PC performance was very satisfactory.
Restoring macOS from a backup
For example, a “rollback” from MacOS Sierra (10.12) back to OS X El Capitan (10.11) or OS X Yosemite (10.10) is taken. Let's say there are backups made in the Time Machine application before installing macOS Sierra.
Important! You can only restore a MacOS system from a backup on the same MacBook. Trying to transfer your copy of MacOS with data to another PC in this way is useless. Use other methods.
- Connect an external drive to your MacBook and save your existing files to Time Machine, naming the new copy macOS Sierra.
- Open an old copy of OS X Yosemite from Time Machine on another drive, after connecting it to your MacBook.
- Restart your MacBook by holding Command+R on your keyboard. The familiar macOS recovery menu will open.
- From the OS X Utilities menu, select Restore from Time Machine Backup.
- Once in the "Restore from Time Machine" recovery window, click on "Continue", and then specify the source - the disk with the "backup" of OS X El Capitan.
- The saved copy should be like this: in the case of OS X El Capitan, the MacOS version should be 10.11.x. Click the "Continue" button. Specify the installation disk to restore from a copy, click on "Restore".
Ready! The OS X El Capitan version will be reinstalled.
Transferring a copy of the operating system and your data to another MacBook
Go to "Programs/Utilities" and open "Migration Assistant". The structure of your files and folders will be preserved.

Click to continue
When running, the application requires the closure of all other running programs.
If both computers are working, but you still want to duplicate your version of MacOS and all the data on the second computer, connect the computers to each other using a LAN network cable, over a wireless Wi-Fi network. Connecting directly with a Thunderbolt or FireWire cable will require your previous Mac to be running in backup storage mode, making the Assistant a little more difficult. However, both methods work well. Instead of the previous PC, you can connect an external drive with a backup to the new PC - in this case, the work of the "Assistant" on the new PC will not change significantly.
So, the procedure is the following. For example, the usual mode of operation of the old PC with the "Assistant" is taken.

Everything! Copy session started. This can take anywhere from 30 minutes to two hours, depending on the amount of data and the performance of both Macs.
Problems when reinstalling macOS
Problems during an update or "rollback" can be as follows.
- There are no recent backups. Have you turned off backups yourself? Copy your files right now so you don't lose them by starting the process manually. Turn on backup.
- An error occurred during the next backup or when restoring personal data from a previous copy. The external disk that has been written to so far is not suitable for further use. Contact an Apple Service Center or a certified computer repair shop to restore your data. This procedure is not free.
- Error during the next MacOS update. Your Mac PC may no longer be supported. This happens every few years. You are left with the current version of MacOS until you replace your Apple PC.
- The computer began to work noticeably slower than before the update. The minimum system requirements of the next new version are equal to or exceeded the specifications of your PC. "Rollback" to any of the previous versions of MacOS. Apple usually tries to prevent this from happening - it simply stops supporting obsolete computers, just as it is no longer possible to install iOS 10.x on iPhone 4x devices.
- Your PC, after a few active years, suddenly began to "freeze" despite the fact that you did not update MacOS. Maybe it's time to replace the internal HDD / SSD drive? Try to backup your important data before replacing the internal drive - while something else is being read from it.
- It is not possible to "roll back" to one of the previously installed versions of MacOS. Rollback should be done gradually. If there are no previous backups, download a new "image" and "roll back" first to this version, and only then repeat the "rollback" to an even earlier version of MacOS.
Related videos
Reinstalling MacOS - "on top" or "from scratch" - is not difficult. It is only important to secure your data. This is a real way to extend the life of your favorite MacBook for a certain number of years. You will succeed!
Today we will try to figure out how to update Mac OS. Any operating system requires a timely update. Otherwise, it will either stop working or start to fail. All this gives a lot of trouble to users. Therefore, below we will talk about how to replace the software previously installed on the computer from Apple. This operation will not cause any difficulties. Especially if you follow the suggested directions.
Update types
Thinking about how it will be necessary, first of all, to understand what exactly the user wants to achieve. Today, there are several types of renewal. What is this about?
For example, a modern user may encounter:
- software update on Mac OS;
- replacing the operating system with a new one.
We will consider both layouts. In the first case, installed programs and applications will be updated, but the OS itself will remain old. When you replace Mac OS, you actually install from scratch. During the operation, a person will acquire a new version of the operating system from Apple.
What will be required?
How to update Mac OS X 10.6 or any other OS version? To begin with, it is worth properly preparing for the process. Otherwise, the idea simply will not make any sense.

What is needed to upgrade? For example:
- original computer from Apple;
- Internet connection;
- running Mac OS;
- compliance with the system requirements of the operating system.
Everything is extremely simple and clear. Usually, no special preparation for operations from the owners of Apple equipment is needed. They will be able to bring the tasks to life without any problems.
App Store and updates
How to update Mac OS? Let's start with the simplest - downloading new software. This is a fairly convenient and effective way to update programs and applications on a Mac.
How exactly to act? The instruction in this case looks like this:
- Turn on the computer.
- Launch on Mac OS App Store.
- Open the "Updates" tab.
- Click on the "Update" button. It is located at the top of the application on the toolbar.
It remains to wait a while. The operating system will check for new versions of installed software and initialize them.

Full restart and AppStore
You can update your Mac (and not only) using the App Store. And completely.
To bring your idea to life, you need:
- Select a new Mac OS.
- Check if your computer meets the software system requirements.
- Open App Store on PC.
- In the search bar, type the name of the selected operating system.
- Click on a search result. The OS page will open.
- Click on the "Download" button.
- Wait for the download to complete. After that, the installation wizard will open automatically. If this does not happen, you must click on the "Programs" section and select the downloaded document there.
- Click on the "Next"/"Continue" button.
- Complete the update by following the installation wizard.
Now it's clear how to update Mac OS. Usually this operation takes up to 1 hour of free time. It all depends on the speed of the internet.
System Restore
Updating Mac OS 10.9 (and not only) is offered in a different way. For example, by restoring the operating system.
The thing is that new versions of the OS are becoming more demanding. And the previous software builds work much better. When initializing a new Mac OS, the user will be able to get rid of it. How to do it?

Restoring Mac OS by updating it is done as follows:
- Turn on the computer.
- Press Command + R. This must be done at the time the OS boots.
- Select "Recovery".
- Click on "Continue".
- Complete the procedure by following the instructions on the screen.
This technique takes a minimum of time and effort. Even a child can easily handle it. The main thing is to have an internet connection. Without it, the recovery procedure is impossible.
Like New
How to update Mac OS X 10.7.5? It all depends on what the user wants to do. Sometimes it is not an update that is required, but a rollback of the operating system, for example, to the "native" version. Bringing an idea to life is easy.
Every Mac OS user has the right to return the operating system that was installed when the computer was purchased. But not everyone understands how such an operation can be launched.
How to "upgrade" Mac OS 10.7.5 to a "native" build of the operating system? Just follow the instructions below:
- Turn on the PC.
- At the initial stage of loading the OS, press Shift + Command + Option + R.
- Select "Included Operating System".
- Act according to the instructions on the computer monitor.
That's all. After a few minutes, the operating system will be rolled back to the "native" version. This procedure is sometimes referred to not as a restore, but as a refresh. So we reviewed it.
Flash drive
How to update Mac OS? You can operate using the installation "from a flash drive". This is the name of the technique in which the installation is performed using flash-memory. The method is suitable for a "clean" installation.
What is necessary? Have a flash drive with a capacity of at least 8 GB and the name Untitled. How to proceed?

To update Mac OS 10.6.8 (and earlier) you will need:
- Download the operating system of your choice to your computer.
- With the help of special programs, make a boot element out of a "flash drive". For example, the regular utility "Terminal" is suitable. You need to run it and insert the inscription into the window: sudo /Applications/Install\ macOS\ Sierra.app/Contents/Resources/createinstallmedia - volume /Volumes/Untitled -applicationpath /Applications/Install\ macOS\ Sierra.app - nointeraction.
- Insert the finished USB flash drive into the PC.
- Reboot the operating system.
- Follow the instructions on the screen. The Mac OS installer will appear after reading the data from the bootable flash drive.
In fact, all of the above operations do not cause any trouble to users. And if you want, you can update the operating system from Apple at any time.
From disk
The last scenario remains. Thinking about how to update Mac OS, the user may come to the conclusion that not everyone likes initialization from a flash drive. What to do under such circumstances?
You can simply reinstall the existing operating system in the old and proven way - using the installation disk. Either buy it or create it yourself.
The algorithm of actions in this case is almost no different from initializing the operating system via a USB flash drive. It is enough to insert the installation disk into the drive and restart the computer. The system will detect the installation wizard and display it on the screen. All that remains for the user to do is to perform the actions indicated on the monitor. And in a few minutes, a new Mac OS will appear on the computer (or the old one, depending on the choice of the person).
Finally
We figured out how to update Mac OS. Now the initialization process will not cause any difficulties. We managed to find out how it is possible to update software and OS on "apple" devices.
If you want to update some OS, it is recommended to completely reinstall them. It is enough to find a new version of the application, download it and run the initialization wizard. This approach is used quite often. But the capabilities of the AppStore should not be neglected.

All of the above operations are absolutely free. The main thing to remember is that Apple products cannot be installed on regular computers. To do this, you need original devices from Apple. Otherwise, none of the update methods will help.
As practice shows, even a novice user can handle reinstalling and updating Mac OS. And the instructions we studied will clarify what is happening on the screen as much as possible.
The MacOS X operating system is Apple's own development and is installed on all computers manufactured by it. Thanks to tight integration and hardware, it has high stability and performance. Once a year, a new version of this OS is released, and updates are regularly released during its service life aimed at correcting the detected errors. How to reinstall Mac OS X on your computer, and what installation options are available, we will cover in this article.
Distribution terms
Mac OS X is a proprietary operating system, the first version of which was released in 2001. Over the next twelve years, it was distributed on a paid basis, and all its versions were "cat" names. The first in this series was OS 10.0 "Cheetah", the last one was 10.8 "Mountain Lion".
Starting with version 10.9, macOS is distributed free of charge, and code names began to be assigned in honor of geographic features located in the state of California. The first operating system in this series was released in 2013 and named Mavericks, after the popular California beach.
In 2016, Apple changed one of the clauses of the license agreement with users. MacOS has since been considered not purchased, but leased from the company for the duration of the use of its equipment. However, this change is more relevant to those users who use the so-called MacOS on a third-party computer.
Update from the App Store
The easiest way to install a new version is to download it from the App Store. Let's see what needs to be done in this case and how. You can reinstall Mac OS X in this way on any Apple computer whose hardware will support the features of the latest version of the operating system.

To download, you need a working OS and Internet access. On the App Store home page, in the "Quick Links" section, the very first one will be the current version of Mac OS available for your computer. Going to the operating system page, select the "Download" option, and in the "Programs" folder you will see its image with the name "Install Mac OS", the current build number and an indicator showing the progress of downloading it from the company's servers.
After receiving the image on the computer, it remains only to run it like a regular program. In the future, without your participation, it will take several reboots, and you will be able to use the latest Apple operating system.
Installing from the recovery partition
Over time, the requirements for hardware increase, and even if your laptop officially supports the new version, it can work more efficiently on the old one. Let's look at how on a MacBook without changing the OS to a newer one. In this case, we also need to have a connection to the World Wide Web.

At the time of loading, you must use the keyboard shortcut Command + R. With it, you get to the recovery menu and choose how to reinstall Mac OS. You will be able to upgrade to the latest supported version or the latest one in use. By choosing the second option, you will actually install back the OS on which your laptop showed great performance.
When you use the restore feature, you also have the option to return the version of the operating system that you purchased your computer with. If you decide to perform such an operation, you will need to use a more complex key combination during the initial boot phase. While holding down Shift+Command+Option+R and answering the question about how to reinstall Mac OS, select the option to install the system that came with it.
Installation from a flash drive
After the release of new versions of the Apple OS, in order to activate all available features, you may need a "clean" installation. In this case, you need to know how to reinstall Mac OS from scratch using a bootable USB flash drive. This option is not much more difficult than the previous ones, and the only thing you need is an external drive of at least 8 GB in size and named Untitled. You can rename it using the Disk Utility program from the OS.

First you need to download the boot image to your computer using the method described above. After you receive it, you can start creating your own bootable USB flash drive. We will use only the standard tools of the operating system itself and create an installation disk using the Terminal program. Copy the following command into its window:
sudo /Applications/Install\ macOS\ Sierra.app/Contents/Resources/createinstallmedia --volume /Volumes/Untitled --applicationpath /Applications/Install\ macOS\ Sierra.app --nointeraction
To run it, you will need an administrator account or knowledge of the administrative password. If before that you followed our recommendations exactly, then after no more than half an hour you will have an installation disk with the latest version of OS X Sierra in your hands.
Finally
From this material, you learned about how to reinstall Mac OS on your computer, and what options you have to complete this task. As you can see, the process of reinstalling the "apple" operating system is quite simple and it will take you the most time to download its image. Having coped with this task, you can consider yourself a real poppy driver.
Any operating system sooner or later needs a complete reinstallation. The reasons for this may be different: infection with virus programs, bugs, and so on. As a result of "pollution" with unnecessary files, processes, the device starts to work much more slowly. In some cases, it is easier to reinstall the system than to look for the cause of the problem and fix it. Let's figure out how to reinstall Mac OS and what it takes.
What do you need to reinstall?
Those users who are only familiar with computers on the Windows operating system will not be able to reinstall the OS on a Mac without additional help. To reinstall Mac OS on a MacBook, you must prepare the following:
- Macbook () that is connected to the network;
- our step by step guide.
Now let's go directly to the process of installing a clean version of Mac OS. This instruction is suitable for those who have an operating system version of 10.7 or later installed. If you have an older version, then it should be updated using standard OS tools. You can check the software version using the following steps:

How to reinstall Mac OS Sierra from scratch?
To begin with, it is worth noting that reinstalling a Mac involves completely deleting data from the computer's hard drive. Therefore, first copy all important information to third-party media.
You can do this with the Time Machine backup software. Following the instructions of the copy wizard, you can easily create a backup copy on external media. Also, Time Machine can create backups automatically. Old copies will be deleted, and new ones will be saved to disk. So you will not worry about the relevance of the data.

Now you know how to reinstall mac os x on macbook pro or air as well as iMac. Next, you need to configure the system and complete the installation process.
Final setup before use
After the installation is completed, the program will prompt you to make basic settings:
- on the first screen, select your Mac OS language. In the future, it can be changed inside the software settings;
- on the second screen, you will be prompted to connect to Wi-Fi (optional). This step can be skipped;
- The next step is information transfer. Before you reinstall your Macbook Pro, Air or iMac you can back up all your data;
- authorization via Apple ID (optional);
- acceptance of the license agreement;
- create a Mac OS account for the computer.
Ready! Now you can independently install Mac OS on a MacBook of any version or an iMac monoblock. The whole process is as simple as possible: the user only needs a few keystrokes.
In April, we briefly talked about the possibility of installing OS X 10.8.3 Mountain Lion on older Mac models that are not officially supported by the system. I used the method described in that material, and today I will talk about this in more detail.
So, since April, there has been one important change - now you can install OS X 10.8.4 on old Macs, which is Apple's most modern desktop OS today. The list of supported Mac models has not changed - just in case, I quote it again:
All models from 2006 to 2008 with a Core 2 Duo processor and Lion OS or higher installed (PPC, Core Duo and Core Solo are not supported)
- Late 2006, 2007 and 2008 MacBooks
- Early 2008 MacBook Air
- Late 2007 and mid 2007 MacBook Pro
- iMac 2006
- Mac Mini 2006
- Mac Pro 2006, 2007
- Xserve 2006 and early 2008

I installed OS X 10.8.4 on a white 2008 MacBook with a 2.4GHz Core 2 Duo processor. I will report on the results later, now let's talk about the process of installing the system on a computer (the screenshots below are taken from the utility).
So, we need the MLPostFactor utility (download) and the OS X 10.8.4 operating system, which can either be officially downloaded from the Mac App Store, or obtained by some other method that we will not describe here. There is no dependence of the operation of the MLPostFactor utility on the degree of "official" operating system, although many resources write that only an officially purchased OS is needed.

After making sure that both the utility and the OS are loaded and are on the hard disk of the computer, we proceed to partition the disk for installing a new system. We need two new sections. Let's call one Install and give it 8 GB of disk space. The second, the one in which the OS will be installed, let's call ML, its volume must be at least 10 GB, and better, of course, more. My volume of this partition is 200 GB.

Having finished partitioning the disk, we run the downloaded MLPostFactor utility and install it in the Install section we created.


We reboot the computer with the Alt key pressed, select Install as the boot disk. Install OS X 10.8.4 in the ML partition. After the installation is completed, go to the Utilities menu item, select MLPostFactor there and apply it to the ML section.
That's actually all, OS X 10.8.4 is installed on the computer. The ML partition has become bootable by default, so the next time you reboot or turn on the computer, you do not need to hold down the Alt key.
Now about how OS X 10.8.4 works on my old Macbook. In short, it works great. Compared to OS X 10.7.5 Lion), the laptop just flies, a small amount of RAM (2 GB) has practically no effect on work (unlike Lion, where brakes were observed regularly, it was only necessary to open 8-10 tabs in the browser and launch several standard applications). The Notification Center works, iMessage too, no special problems were noticed.
But small bugs are still present, although they are not at all critical during operation. First, when the laptop wakes up, Image Capture and iTunes sometimes (very rarely) start up - as if the laptop thinks an iPhone is connected to it. Secondly, “View” sometimes crashes, especially when working with large images. This also happens very rarely, I have had it two or three times in my entire time on OS X 10.8.4.
Another problem has come up recently. I use Safari as my primary browser and keep Chrome handy for YouTube and some other flash video sites. And lately, working in Chrome has become simply impossible - when you open a new tab, the browser just crashes, and this happens all the time. All this is due to the fact that the latest version of Chrome (29, it seems) does not want to work with OS X 10.8.4 installed via MLPostFactor. The solution here is simple - download (27th) and disable automatic browser updates. Chrome auto-update is disabled using the command in the "Terminal":
Defaults write com.google.Keystone.Agent checkInterval 0
You can return everything back using the command:
Defaults write com.google.Keystone.Agent checkInterval 18000
Here 18000 is the interval between checks for browser updates in seconds. This value can be set at your discretion.
To sum it up, running OS X 10.8.4 on my 2008 Macbook is fine for me, much better than running the official OS X 10.7.5 Lion. And the noticed bugs are not so significant, and they do not force me to abandon the use of the "Mountain Lion". Therefore, I safely recommend the method described above to everyone, but just do not forget that you will do all the manipulations at your own peril and risk.
P.S. The MacRumors website has an English-language MLPostFactor - where the utility developers answer user questions.


