Most users have long forgotten what a camera is - they take shots with the camera of their smartphone or phone. Why not, considering that in terms of image quality, many camera modules on smartphones will outperform some cameras?
But today we will not talk at all about how a particular smartphone takes pictures, but about how to transfer the resulting photos to a computer using a USB cable. This is not difficult to do.
What do we need?
Three things:
- Smartphone / phone

- Computer or laptop

- USB cable

What needs to be done?
Take a USB cable in your hands, connect one side to a computer to a USB port, the other to a mobile device to a microUSB port.

The phone is connected, the computer sees it. Double-click the left mouse button on your smartphone (above it is indicated by the arrow).
Next, you will see sections with memory. If you have a memory card, you will see two sections - SD card and phone storage. If the memory card is not used, there will be only one section - phone memory. We have two sections, which means that we must choose the one where the photos are saved. In our case - in the phone's memory, in yours they can also be stored on a memory card.

We see a list of folders and files, if any, in the smartphone's memory. If you shot with the default camera app on your smartphone, all photos will be stored in the DCIM (Digital Camera IMages) folder. Go into it.

Here, in turn, there may be several more folders awaiting you. In almost all cases, photos are stored in the Camera folder.

And here are our images:

What are we doing now? Now we select a photo, some of them or all, after which we press the right mouse button and select "Cut" or "Copy".

Create a folder on your hard drive in a convenient section, go to it, left-click and select "Paste" from the menu.

The photos will be transferred to your computer.

The time taken to move photos depends on the size of the images, as well as their number.
You can go the other way. Connect your device to your computer using a USB cable, then open Computer, right-click the device and select Import Pictures and Videos.

The automatic search for images and videos will start.

The search is over. Click on the "Import" button.

All found images will be moved to the "Imported Images and Videos" section. The folder with them will open automatically. Please note that in this case, the images themselves are deleted from the device and transferred to the computer.

There is one more nuance. If your smartphone is connected as a media device or external storage, all images will be found. If you connect your smartphone as a camera, images and videos will only be imported from the DCIM folder.

It is quite easy to transfer photos from computer to android phone using USB cable. In this case, your android smartphone or tablet should be displayed on the computer as a disk.
When connecting the cable, the android and the computer usually ask the user how he wants their phone to be displayed - choose: transfer media files via USB.
Then the smartphone or tablet will appear as a drive, and you can easily transfer your photos from your computer to your android device - just like transferring files from one folder to another on a PC.
However, you may have difficulties. The USB cable may be damaged, missing or when using the built-in tools, it may happen that your PC cannot detect the android phone.
What to do then? If you need to transfer photos from computer to android, then why not use a special manager.
The programs work well in transferring photos and any other files between Android and computer. In addition, they provide the ability to import contacts, SMS, music, videos and applications.
Who is interested in , download, install and, if necessary, read the instructions on how to use, and I will share some more recommendations.
How to transfer photos from your computer to your Android smartphone or tablet via USB
With such a transfer, a trivial problem may arise, so I will give some solutions that I learned from my own experience, the help of a Google search engine and reviews from other users.
The phone and computer must be unlocked. In new smartphones, you don't need to confirm anything. Once both devices are connected with a USB cable, files can be moved.
If there is no USB connection, you must do the following:
- try connecting with a different USB cable and a different USB input on your PC;
- try moving to another computer. If the other computer also does not work, then this means that the problem is most likely in the Micro USB input device on the android;
- in some devices the computer must recognize your smartphone, then you need to do this: Settings-> Memory-> Menu-> USB phone connection -> here select "Media device (MTP), or if it is possible to change it to" Mass Storage mode " ...
- Unlikely, but sometimes you may need to enable "USB debugging". To do this, go to Settings-> About phone -> 7 times quickly click on the "build number" -> a new option "Developer options" will appear in the settings and there check the box or move the slider opposite to "USB debugging".
IMPORTANT: the description above may not completely correspond to what you will see, since a lot depends on the version of the android and the manufacturer of the phone.
NOTE: each manufacturer has its own program capable of transferring photos to an android smartphone or tablet from a computer. For example, Samsung has “KIES,” Sony has “PC Companion,” LG has “PC Suite,” etc.
Move photo to android from computer via WIFI
To do this, you can install the application (if the program described above did not work) WebSharingLite. Then launch the app and enable transmission.
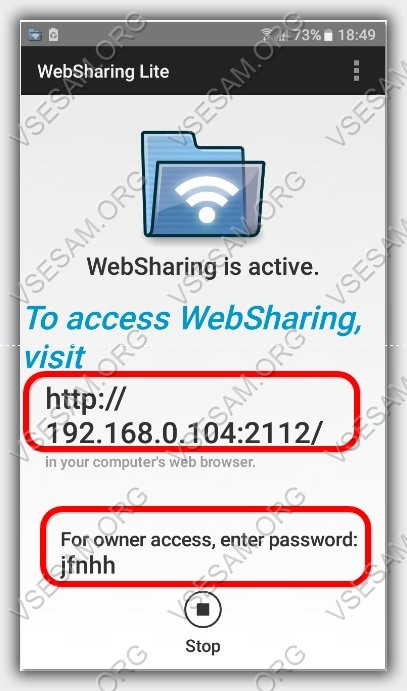
Now go to the computer at the address and enter the password.

Now you can quickly and easily copy and paste your photos into any folder or move them by dragging and dropping.

It is very easy to move photos through bluetooth. Only they practically do not put it on a computer, but you can purchase an external adapter and it will turn out just like in a laptop.
Then you just need to synchronize the computer with the android phone and move any files, including photos, without shorts. Good luck.
A large number of photos and videos take up a lot of space in the device's memory or SD drive. Also, there is a risk of losing your phone, and with it all your valuable photos.
Therefore, from time to time, photos need to be transferred from the phone to the computer.
This is done quite simply, but many users, especially adults, may have difficulties. To prevent this from happening, below in the article, I will give you step-by-step instructions.
How to transfer photos from phone to computer via USB cable
1. We connect the phone to the computer viaUSB cable.
2. When connecting for the first time, you need to wait a while for synchronization and installation of drivers. Until the "AutoPlay" window opens on your computer.
3. If the autorun window does not appear, then you need to change the priority of using USB, for this we lower the shutter on the phone, and click on the "Charge via USB" item (on different phone models, the name of the item may differ). 
4. In the window that opens, click on the "File Transfer" item.
5. Now that the "Autorun" window has opened on the computer, go to the "Open device to view files" item. 
6. Since by default, photos are saved to the internal memory of the phone, go to the internal storage.
7. Find the folder DCIM and go to it. 
8. Now, we need to go to the folder Camera, it contains all our photographs.
9. Select the photos that need to be transferred, then copy them. 
10. Paste the copied photos into any folder, preferably not on the system drive.
Now you know how to transfer a photo from your phone to your computer, that's all for me, I wish you success.
download photos and videos from a mobile phone to a computerDo you have a lot of images on your hard drive that you want to transfer to another machine? Knowing how to transfer photos from computer to computer, you can easily complete this task, no matter how much data you need to transfer.
You can give a dozen ways to transfer files, but I will focus on those that I actively use myself. All methods have been tested dozens of times, so you don't have to worry that the photos will not be transferred: the pictures will go in the direction you specify.
How to transfer photos from computer to computer
Removable media transfer
The easiest way to transfer photos is to use a regular USB flash drive. The procedure is simple:
- Connect a flash drive to a PC, drop the necessary pictures onto it by simply transferring a folder or individual files.
- Remove removable media, connect it to another PC or laptop.
- Copy pictures to the hard drive of another machine.
In my early youth, when flash drives were not so common, to transfer a large number of files, we pulled out a hard drive and connected it as a second hard drive. The copying speed was high, but now such an operation no longer makes sense: if you are going to frequently move large amounts of images, then buy an external drive.
Like a flash drive, an external hard drive is connected via a USB port. However, it is much larger than the available space on a flash drive, so you can transfer hundreds of thousands of pictures at once.
Local network creation
If you want to move photos between machines that are in the same room, then you can do without removable media. If you have a router or crossover cable, you can quickly set up a local network and copy pictures from one PC to another. Consider a typical situation: images are stored on a PC and you need to transfer them to a laptop. Both devices are connected to the Internet via a router.
The above steps must be performed on both computers. If they are connected to the same router, then this is enough for the local network to start working. It remains only to share the photos, that is, to make them publicly available.
After completing these steps, just in case, restart your computer. Make sure that the folder with photos is visible on another machine: open the explorer window and go to the "Network" item. You will see a shared directory with images inside.
Using cloud storage
If you do not have a flash drive at hand, and computers cannot be connected to a local network, because they are too far from each other, then use cloud storage for data transfer. I use Yandex. Disk, so first I'll tell you how to transfer photos from one PC to another using his example.
Now you need to repeat the procedure on another computer. Only here you will not upload photos, but download. Open "Disk", find pictures. Highlight them and click Download.
In more detail about the capabilities of Yandex. Disk I already wrote in an article on how to use this service. But it's not just Yandex that has cloud storage: if you have Google or Mail, you can also seamlessly move files between PCs. For example, use Google Drive:
On Mail.ru, the operation is repeated with minor differences. You also need to go to the mail, and then click the "Cloud" button: the storage will open, where you can upload photos and other files.
In general, if you have a mailbox on any major service, then you can use the cloud storage for free and easily move photos between different computers. Of course, these are far from all the options available: there is, for example, the BTSync program, which allows you to quickly transfer large amounts of data using the BitTorrent protocol. The transmitted information is encrypted using a key that only the user has. However, in the case of transferring photos, the capabilities of any cloud storage are sufficient.


How to upload photos, videos
from mobile phone to computer
Modern mobile phones make it possible
users to take photos and videos, and then
transfer them to your computer.
Synchronization of a mobile phone with a computer
Synchronization
mobile phone
with a computer
What is Computer Sync?
Synchronization with a computer is the ability to carry out
data synchronization between mobile phone and computer.
You can exchange phone book entries
or sync your phone organizer with your organizer
on the computer.
That is, what was saved on your phone -
transcribed to a computer, and vice versa.
Including photos and videos.
To synchronize a mobile phone with a computer -
Internet connection is required.
USB cable for synchronizing a mobile phone with a computer
USB cable
for synchronization
mobile phone with computer
USB cables are the most traditional and proven method
for communication between a computer and a mobile phone.
We will consider this method.
A USB cable is included with most modern mobile phones. However, a USB cable suitable for your brand of phone can be bought both in computer stores and in stores selling mobile phones. For little money.
USB cable appearance

Connecting a mobile phone to a computer via a USB cable
Mobile phone connection
to computer via USB cable
As you can see in the picture - at the USB cable
connectors for connection at both ends.
Bigger Connector - Plugs into a USB port on your computer.
(Like a flash drive, mouse, etc.).

On a laptop, USB connectors are mainly located
on the side panels of the bottom of the laptop.
On a stationary computer, the USB connectors may be
both on the front panel of the System unit, and on the back. To borrow
both horizontal and vertical position.
Smaller USB connector - pluggable
into the USB port of the mobile phone.
As a rule, the USB connector on the mobile phone
covered with a retractable small panel.
On the panel there is such a diagram
To connect a mobile phone to a computer, first insert
small USB-connector of the cable into the USB-connector of the mobile phone. And then
and insert the second USB connector of the cable into the USB connector of the computer
(laptop)
Software for synchronizing a mobile phone with a computer
Software
to synchronize a mobile phone
with a computer
After connecting the mobile phone to the computer -
open Windows Photo Gallery.
If your licensed Windows, Photo Gallery is not included -
you can read how and where to download for free.
Click on the picture to enlarge.
In the upper left corner, click the Import button.
The Import Photos and Videos tab opens.

This is a screenshot from my computer, and I have already downloaded the "Software" for synchronizing NOKIA mobile phones with a computer. And you, if you have never downloaded photos and videos from your mobile phone brand to your computer, then click the "Update" button in this tab to download the "Software" for synchronizing mobile phones (your brand) with a computer.
Later, after opening this tab
you can immediately click the "Import" button.
And if you download photos from different brands of mobile phones, then for each you will need to download a separate software. And the program itself will determine with which brand you entered the computer and highlight the necessary software.
Uploading photos and videos from a mobile phone to a computer through Windows Photo Gallery
Upload photos and videos
from mobile to computer
via Windows Photo Gallery
After installing the software, click the "Import" button
at the bottom of the same Windows Photo Gallery tab. A new tab will open
"Search for photos and videos ...", with a search bar.

When the search is over, a new tab will open.

This tab tells you how many photos and videos were found on your mobile phone. And initially there is a switch on the "View, arrange and group items for import" button. This means that photos and videos from your mobile will be uploaded.
You can immediately click the "Next" button in this tab.
The process of downloading photos and videos from a mobile phone to a computer will begin.
In the "Gallery" of your mobile phone, from where you download your files (photos and videos) - there are files included in the package of your phone. These are "Background Pictures" and "Screensavers" and "Graphic Clips" and so on. When, during loading, the loading program starts "infringing" on these files, you will be shown an error message.

The switch, in this message is on the "Repeat" button, and at the bottom - the active "Continue" button. Move the switch to the "Skip all files with errors" button so that only your files are downloaded to the computer, and then click the "Continue" button. If you do not move the switch, but immediately press the "Continue" button, the error message will appear again.
When the download is complete, the Select Groups to Import window will open.
All your photos and videos will be automatically divided into groups by time and date. And placed in separate folders.

Click on the picture to enlarge.
You can, if you like, preview your files first.
To do this, each group has a button "View all elements".
And in the window that opens delete unnecessary .
If you do not want to completely transfer a group
to your computer - then uncheck the boxes to the left of the groups.
First, clear the top, with "Select All",
and then from a certain group.
Or you can immediately click at the bottom of the window "Select groups to import" -
the "Import" button. All additional windows will close and you
you will see in Windows Photo Gallery all folders with downloaded
photos and videos.
I must say that photos from my mobile phone Photo Album
only imported the first time. And then - downloaded
only new photos.
Viewing photos and videos on a computer after downloading from a mobile phone
Viewing photos and videos
on the computer, after
downloads from mobile
You can view and organize, newly downloaded,
or in Windows Photo Gallery, or in folder Pictures .
Open your Pictures folder and you will see all your new folders.
They do not have an alphabetic name, and the name is a numeric set -
year-month-day-number. Where date is the time when the photo or video was created,
and the number - under what number this photo or video is indicated
on your cell phone.
Open any folder (if there are several) and if at the same time you have
both photos and videos were created at the same time - you will see them in one folder.
By double clicking with the left mouse, you can open each file.
The video will open in Windows Media Player.
The photos will open in Windows Photo Gallery.
Photos from a mobile phone are uploaded large enough.
For example, from my NOKIA - 2048 x 1536. In order to subsequently
upload these photos to some sites, for example, to a social network -
the photo must be reduced to the sizes accepted on these sites.


