Good day.
Today I have a short article on customizing the appearance of Windows - how to change the icon when connecting a USB flash drive (or other media, such as an external hard drive) to a computer. Why is it necessary?
First of all, it's beautiful! Secondly, when you have several flash drives and you don’t remember what you have on which one - the displayed icon or icon - they quickly allow you to navigate. For example, on a flash drive with games, you can put an icon from some game, and on a flash drive with documents, you can put a Word icon. Thirdly, when a flash drive is infected with a virus, your icon will be replaced with a standard one, which means you will immediately notice something is wrong and take action.

I’ll write down the steps on how to change the icon (by the way, you only need to do 2 steps!).
1) Creating an icon
First, find the picture you want to put on your flash drive.

The found picture for the flash drive icon.
Online services for creating icons from jpg, png, bmp image files, etc.:
http://www.icoconverter.com/
http://www.coolutils.com/ru/online/PNG-to-ICO
http://online-convert.ru/convert_photos_to_ico.html
I will use the first service in my example. First, upload your image there, then choose how many pixels our icon will be: specify the size 64 by 64 pixels.

Online ICO converter. Converting an image to an icon.
Actually, the icon was created on this. You need to copy it to your flash drive. .
You can also use Gimp or IrfanView to create an icon. But in my opinion, if you need to make 1-2 icons, it’s faster to use online services…
2) Creating an autorun.inf file
This file autorun.inf needed to auto-start the flash drive, including to display the icon. It is a plain text file, though with the inf extension. In order not to describe how to create such a file, I will give a link to my file:
You need to copy it to your flash drive.
By the way, note that the name of the icon file is specified in autorun.inf after the word "icon=". In my case, the icon is called favicon.ico and in the file autorun.inf opposite the line "icon=" is also the name! They must match, otherwise the icon will not be shown!
icon=favicon.ico
Actually, if you have already copied 2 files to the USB flash drive: the icon itself and the autorun.inf file, then just remove and insert the USB flash drive into the USB port: the icon should change!

Windows 8 - a flash drive with a pacman image ....
Important!
If your flash drive was already bootable, then it will contain approximately the following lines:
open=setup.exe
icon=setup.exe open=sources\SetupError.exe x64
icon=sources\SetupError.exe,0
If you want to change the icon on it, just the line icon=setup.exe change to icon=favicon.ico.
That's all for today, have a great weekend everyone!
How to change the disk icon or change the flash drive icon in Windows? In the Windows operating system, drives and connected removable devices are displayed with standard icons.
If the manufacturer has made a special icon on the device connected to the computer (flash drive or external hard drive), then in this case, Explorer will not display a standard icon, but an icon created by the device manufacturer.
Why do I need to change the icons of flash drives or disks on my computer? In the case of a hard drive or local drive, there is no special need to change the icon of the drive, and changing the icons for connected USB flash drives is in some cases desirable.
When connecting several flash drives to a computer at the same time, it can be difficult for the user to immediately distinguish one flash drive from another. Flash drives with different icons are easily distinguishable from each other, this will save a little time spent searching for the right removable device and increase work efficiency.
How to change the disk icon or change the flash drive icon from the standard image in Windows to another icon? In the article I will tell you how you can change the disk icon, how to change the flash drive icon on a computer in the Windows operating system. This method works the same in Windows 10, Windows 8.1 (Windows 8), Windows 7.
Preparing the image and autorun.inf file
To change the icon of a hard (local) disk or a flash drive (external hard disk), you will need two files: a picture and the “autorun.inf” file.
First of all, you need an image in the ".ico" format with a resolution of 128x128 or 256x256 pixels. The finished image can be found on the Internet or made by yourself in a graphics editor. Create an image in "JPG" or "PNG" format, and then convert it to "ICO" format using a converter program or an online converter.
Now we need to create the "autorun.inf" file, which will be needed to display the icon. Open Notepad or another text editor and paste the following command into it:
ICON=icon_name.ico
In this entry, replace "icon_name" with your own, which will be displayed in Windows Explorer. The icon name can consist of numbers, letters, words. Save the file to your desktop or other convenient location.
When saving the file, in the Explorer dialog box, in the "File name" field, insert "autorun.inf" (without quotes), in the "File type" select "All files", and then click on the "Save" button.
The "autorun" file has the extension "inf". The files are ready to use.
First, let's change the icon of the USB flash drive, and then I will tell you how to change the icon of the disk (hard or local) on the computer.
How to change flash drive icon
Let's see how to change the flash drive icon from a standard image to a custom image. In this image, the Windows 7 operating system Explorer displays the standard removable disk (flash drive) icon: "Removable Disk (F:)".

Prepare an image in the ".ico" format and an "autorun.inf" file for the flash drive.
Copy the files to the root of the disk (flash drive). You need to move the files to the root directory (directly to the flash drive itself), and not somewhere in a folder on the flash drive.
First, disconnect the USB flash drive from the computer (remove it from the connector), and then reconnect the USB drive to the computer.
In the Explorer window, you will see that the flash drive has changed its icon to the new one that is selected for this device.

How to change the disk icon in Windows
In order to change the icon of the hard or local disk, you must follow the same steps. Prepare an image in the "ICO" format and the file "autorun.inf", in which write down the name of the icon prepared for the hard drive.
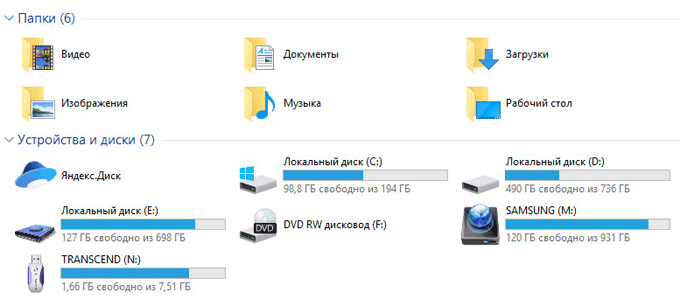
I want to change the disk icon on the Local Disk "E:" (this is a separate hard disk) of my computer in the Windows 10 operating system. Changing the hard disk icon in Windows 7 or Windows 8.1 (Windows 8) works in a similar way.
In this image, Local Disk "E:" has a standard icon. It also shows that a flash drive is connected to the computer, on which I changed the icon in Windows 7.

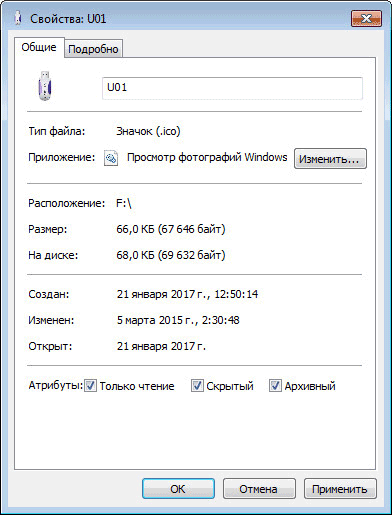
Copy the image in the ".ico" format and the file "autorun.inf" to the root of the disk (to the disk whose icon you want to change), in my case, to the Local disk "E:".

Enter the properties of these files (right-click on each file, select "Properties" in the context menu), add the attributes (check the checkboxes) "Read-only" and "Hidden".
Then restart your computer. After booting up the PC, you will see that the hard (local) disk icon has changed to a different icon.
Article Conclusions
The user can change the icon (icon) displayed in Explorer on the disk (hard or local) of the computer, or change the icon (icon) of the flash drive displayed in Explorer after connecting a removable device.
Changing disk icons is just one of many ways Windows icon settings. You can even create high resolution icons from your own images if you can't find other icons you like.
We have prepared a description of two ways changing drive icons in Windows. The first method uses a free third-party application that can be used to change the icon for an individual drive. The second method involves a few quick changes to the Windows Registry.
Change individual drive icon
The easiest way to change the drive icon is to use the free Drive Icon Changer tool. It was originally written for Windows Vista but also works effectively on Windows 7, 8 and 10.
After downloading and extracting the program, you must run it with administrator rights. Right click on the EXE file and select Run as administrator. The first time you run the tool, it may ask you to install some files - let it do it.
Once launched, you will see that Drive Icon Changer has only one screen where you select the drive you want to change the icon for and then find the ICO file you want to use. Additional settings are not available. Select the disk, find the ICO file and click the Save button. In our example, we are using icons from the IconArchive website.
You will receive a notification that the icon has been successfully changed.
![]()
You must then restart your computer for the changes to take effect if you selected an internal drive. If you have selected a removable drive, you can simply unplug it and plug it back in.

After restarting, you should see a new drive icon in File Explorer.

Drive Icon Changer works by creating two hidden files in the root directory of any drive you choose. One of them is a copy of the ICO file, which is renamed to Drive.ico, and the other is a simple Autorun.inf file containing only the following lines:
ICON=Drive.ico

So if you like, you can just create an Autorun.inf yourself with notepad, copy the ICO file to disk and rename it to match the entry in Autorun.inf, restart your computer (or unplug and replug the drive if it's removable), and the disk icon will change. However, working with the Drive Icon Changer tool is a bit easier and faster.
If you want to undo the changes you've made to the disk, all you have to do is delete these two files.
Changing the disk icon through the registry
Why extra steps if there is a Drive Icon Changer? The point is that you may have some autorun restrictions that prevent you from using the first method, or you may want to change the icon used for the optical drive. Perhaps you don't like the idea of allowing an app to do things that you can do yourself. Or maybe you're just curious to see where this is in the registry. Anyway, these changes are very easy to make and they work on Windows 7, 8 and 10.
Standard Warning A: Registry Editor is a powerful tool, misuse can make your system unstable or even render it inoperable.
Open the registry editor by clicking the search button and typing regedit. Press Enter to open the Registry Editor and give it permission to make changes to your computer.

In the Registry Editor, use the left sidebar to navigate to the following section:
HKEY_LOCAL_MACHINE\SOFTWARE\Microsoft\Windows\CurrentVersion\Explorer\DriveIcons
Then create a new key inside the DriveIcons key. Right-click the DriveIcons key and select Create → Chapter. Name the new key using the letter of the drive whose icon you want to change. In our example, we are changing the G drive icon.
Note A: As you probably noticed, this method differs from using Drive Icon Changer in that instead of using the autoplay feature, you are actually assigning the icon to a drive letter. For this reason, you will not be able to get the result for a removable drive. This is especially true if you use multiple drives and the letters change frequently. To get around this you can assign a static letter to a removable drive.
Now we need to create another new key, this time inside the drive letter we just created. Right click section G and select Create → Chapter. Name the new key DefaultIcon.

Select the new DefaultIcon key in the left pane, and then double-click the (default) value in the right pane to open the properties window.
In the Edit String Value window, enter the full path (surrounded by quotation marks) for the ICO file you want to use as the icon in the Value field, and then click OK .

The changes should take effect immediately, so you won't need to restart your computer. Open File Explorer, or refresh the window if it's already open, and you'll see the new disk icon.

If you want to undo the changes, just go back to the DriveIcons section in the Registry Editor and delete the created section.
Icons of disks and flash drives begin to become boring over time, so the question arises of changing the appearance. In this article, we will help you figure out how to easily do this.
In Windows operating systems, manually changing the icon will not be such a difficult task, even for those who have just started getting to know the computer. Below are instructions on how to change the flash drive icon, icon, hard drive and DVD in Windows 7-10 operating systems to whatever you wish.
Instructions on how to change the icon of a flash drive or disk in Windows
Now we actually start with the process of replacing the icon manually. We need the icon file itself with the .ICO extension. They can be easily found on the Internet. A huge number of such icons can be found on sites such as iconarchive.com. Or you can convert your image to ICO using an online service.
At the moment, there are 2 ways to replace icons in Windows:
- Using the registry
- Using the autorun.inf file
The method with the registry is more complicated, but with autorun.inf it will be easier.
Replacing the icon of a flash drive or disk using autorun.inf
This method involves copying two files to the media - the icon and the autorun.inf file. The icon will be assigned to this media even if you insert it into another computer.
Replacing the icon of a flash drive or disk using the Windows registry
This method has its own characteristics. The thing is that no matter what is connected under the letter - a flash drive, hard drive, or memory card, the icon that is set for this drive letter in the registry will always be displayed.
Now we reboot the Windows operating system and enjoy the new icons.
Do you have any further questions? Write them in the comments about what you did or vice versa!
Replacing default disk icons in Windows XP
Despite the pleasant and comfortable look of the graphical interface in Windows XP, sometimes you want to change the appearance of various elements of the Windows operating system, albeit a little.
Changing the icon (icon) of such elements as "Trash", "My Computer", "Network Places", "My Documents" is not difficult. It is enough to right-click on an empty spot on the desktop, select "Properties". In the window that appears, select the "Desktop" tab. At the very bottom of the window of this tab there will be a button "Desktop settings ...". By clicking it, you can see the desktop settings window. Next, select the desired element and change its icon. You can also restore the item's previous icon.
Unfortunately, the standard features of Windows XP cannot change the icon for hard drives. But using the program MicroGerakL, it becomes possible.
![]()
Program MicroGerakL was developed by a group of programmers ( LASHSOFT & UNDERGROUND WORKSHOP, Mikhail Lovikov and Alexey Nemiro) in a popular programming environment Visual Basic. The program is free.
MicroGerakL is a program for editing icons and cursors.
The procedure for replacing the standard Windows XP disk icon with your own, unique one, will be as follows.
![]()
First you need to take the archive with the program (~ 38 Mb, .rar). The program runs under Windows XP, Windows 2000 without installation.
In order to change the standard icon to a unique one, you must, firstly, find or draw the icon yourself that you want to install instead of the standard one.
For example, an icon icon could be like this
Or like this
This one looks classy too...
In the archive with the MicroGerakL program you will find a folder Icons with a small set of icons. The Icons folder must be placed in the main directory of the disk C:\, where the WINDOWS folder and others.
In addition to the program itself, the archive contains a rich selection of various icons.

This is necessary so that this folder is not accidentally deleted or moved to another location on the disk. If these icons are installed instead of the standard ones, then the operating system will "find" new icons in this folder and display them instead of the usual ones.
If you delete, rename, move this folder with new icons, then the operating system will "lose" the new icons, and they will no longer be displayed. The MicroGerakL program itself can also be placed in the folder with icons, it will definitely never be lost, and suddenly you will want to change the icons again. Therefore, it is worth putting a folder with new icons on the disk C:\ where it is less available.
You can, of course, place the Icons folder elsewhere. The name of the Icons folder may be different, the main thing is to rename it before changing the icons.
We launch the MicroGerakL program and on the toolbar we find a button with a picture of the drive.

We press the button. A window will appear "Change disk icons".

In the graph "Disk" click on the drop-down arrow and select the disk for which we want to change the icon.

In the graph "Icon" click on the button with three dots - "Review". In the "Open" window that appears, find a folder with new icons, and choosing the one you like the most, press the button "Open".

Now that everything is ready, click on the button "Change". After that, the disk icon should change to a new icon.
If a window was opened during the replacement of disk icons "My computer", the new icons may not appear. Close and reopen My Computer or select Refresh from the right-click menu. After that, new icons should be displayed.
Some discs, for example virtual, icons DVD/CD drives, the icon does not change. It has been verified that the icons of hard drives and network drives (if you have a local network) change reliably.
You can find a variety of icons on the Internet, icon files have the extension .ico. If you wish and skill, you can draw an icon yourself.
Using found or drawn new icons is easy. You need to add them to the Icons folder and replace the icon according to the above method.


