Experienced users of the Windows 10 operating system may have heard of the PowerShell command line utility. It may also be familiar to those with experience with Windows 7 and 8.1. After years of using the Windows command line application and .bat files, it's time to get to know a more powerful tool.
PowerShell is a valuable addition to the list of Windows tools, and its sheer scale may put some users off. Is it a scripting language or a command shell? Don't worry: despite the vast possibilities, anyone can master PowerShell.
Step 1: Installation
First, we need the PowerShell utility itself. If you're running Windows 10, you already have PowerShell 5 installed. The Windows 10 Anniversary Update uses version 5.1, but there's no noticeable difference. Windows 8 and 8.1 use PowerShell 4, which is also sufficient. Installing PowerShell on Windows 7 won't be a problem, but there are still a couple of extra steps to take. In particular, you need to additionally install the .Net Framework. You can install the Windows Management Framework, which includes PowerShell.
PowerShell has two interfaces. Advanced users can opt for a complete graphical interface known as the Integrated Scripting Environment (ISE). For beginners, it's best to use the PowerShell console, a simple Windows command line-style text interface, or even DOS 3.2.
To run PowerShell as an administrator on Windows 10, click on the Start button and scroll through the list of applications to Windows PowerShell. In Windows 8.1, look for Windows PowerShell in the System folder in Windows. In Windows 7, the shell is located in the Accessories folder. As a regular user, PowerShell can be launched in exactly the same way, using the left mouse button instead of the right one.
You can use search on any version of Windows. For ease of use, you can pin PowerShell to the taskbar.
Step 2: Old Windows Commands
Windows command syntax in PowerShell works in the usual way. For example, cd changes folders, dir shows a list of all files and folders inside the current folder.
Depending on how you start the PowerShell console, you can start at c:\Windows\system32 or in c :\Users\
Step 3: Installing the Help Files
Commands like cd And dir are not active PowerShell commands. These are the so-called aliases (aliases) - replacements for real PowerShell commands. Aliases are handy for those with a lot of experience with the command line. However, they do not touch the depths of PowerShell.
To get started with PowerShell, type help and the command you need. The screenshot shows the command .

Command help says that dir is an alias for a PowerShell command Get-ChildItem. If you dial get-childitem in PS C:\>, you will see the same as when using the command dir.
As indicated at the bottom of the screenshot, the help files for PowerShell are not installed automatically. To get them, run PowerShell as an administrator and type update-help. Installing the help files will take several minutes, a number of modules may be missing - for example, Help for NetWNV and SecureBoot were not installed in this case. When everything is ready, the full help system will always give the right tips.
Now type the command get-help and any command you are interested in ("cmdlet" in PowerShell language, in Russian cmdlets), its description will be shown. For example, get-help get-childitem gives a list of options get-childitem. You can also display different possible options. For example
get-help get-childitem -examples
produces seven detailed usage examples get-childitem. Command
get-help get-childitem -detailed
includes these seven examples and detailed explanations of each parameter in the cmdlet get-childitem.
Step 4: Getting help with options
On the screenshot you may have noticed two lists under SYNTAX for get-childitem. Having two different syntaxes means you can use two ways to run a cmdlet. How to keep the syntax separate from each other and what do the parameters mean? The answer is simple if you know the trick.
For details on cmdlet parameters get-childitem or any other use parameter -full:
get-help get-childitem -full
This gives a list of what you can do with the cmdlet and what will happen. Look at the screenshot.

Viewing the description of the parameters allows you to notice that get-childitem makes it possible to get an object child(such as a subfolder name or filename) at the specified location, with or without matching certain characters. For example:
get-childItem "*.txt" -recurse
returns a list of "*.txt" files in the current folder and all subfolders (due to the -recurse). Whereas
get-childitem “HKLM:\Software”
returns a list of all top-level registry keys in HKEY_LOCAL_MACHINE\Software.
If you have ever tried to get into the registry using the Windows command line or .bat files, you will be able to appreciate the functionality of this access option.
Step 5: Learning Names
There is a reason why the cmdlets shown so far look similar: get-childitem, update-help, get-help use the same verb-noun pattern. This convention applies to all PowerShell cmdlets where the verb comes before the single noun. This will appeal to those who at one time suffered from the inconsistency of command names in VB and VBA.
Take a look at the most common cmdlets:
set location: sets the current working location to a specific location
get-content: get file contents
get-item: get files and folders
copy-item: copies an object from one location to another
remove-item: deletes files and folders
: Gets processes running on the local or remote computer
get service: Gets services running on local or remote machine
invoke-webrequest: gets content from a web page on the internet
To see how a particular cmdlet works, use get-help as in the case
get-help copy-item -full
Based on the description in the help, you can understand what the cmdlet needs. For example, if you want to copy all files and folders from Documents in c:\temp, use
copy-item c:\users\ \documents\* c:\temp
By entering this command, you will see some interesting features of the PowerShell environment. For example, if you type copy-i and press the Tab button, PowerShell will fill Copy Item. If a cmdlet is mistyped and PowerShell cannot recognize it, a full description of what went wrong is given.
Try this cmdlet:
invoke-webrequest askwoody.com
You will get a short list of titles, images, links, and other web page content. Pay attention to get-help to the list invoke-webrequest, which "returns a collection of forms, links, images, and other important HTML elements" - exactly what should be shown on the screen.
Some cmdlets help manage PowerShell itself:
get-command: list of all available cmdlets
get-verb: list of all available verbs
clear-host: Clear the screen of the host program
Different parameters allow you to reduce commands and narrow the range of useful options. For example, to view a list of all cmdlets that work with Windows services, type
get-command *-service
All verbs available with a noun will be shown service. Here is their list:
Get Service
New Service
Restart Service
Resume Service
Set Service
start-service
Stop Service
Suspend Service
You can combine these cmdlets with others.
Step 6: Using Pipes
If you are familiar with the Windows command line or batch files, then you know about redirection and pipes. Redirection (the > symbol) and pipes (the | symbol) take the result of an action and attach it elsewhere. For example, you can redirect the result of a command dir to a text file or pass the result of the command ping to the team find to filter interesting results, like
dir > temp.txt
ping askwoody.com | find "packets" > temp2.txt
Here in the second team find looking for a string packets, taken from the askwoody.com address by the command ping and merges all matching lines into a file called temp2.txt.
The first of these commands works fine in PowerShell. To run the second command, you need something like
ping askwoody.com | select string packets | out-file temp2.txt
The use of redirection and pipes greatly expands the capabilities of the Windows command line: instead of endlessly scrolling down the screen in search of a text string, you can filter the desired Windows commands.
Powershell has support pipe, and it is not limited to text. PowerShell allows you to pass an entire object from one cmdlet to another, where the object is a combination of data (called properties) and actions (methods) that can use that data.
The tricky part starts when the objects are lined up. The objects supplied by one cmdlet must match the type of objects accepted by the receiving cmdlet. Text is a very simple type of object, so if you're working with text, aligning objects is a simple task. Other objects are not so elementary.
How to understand it? Use cmdlet get-member. If you want to know what type of object a cmdlet handles, run it through get-member. For example, if you are trying to understand the processes running on a computer and have narrowed down the options to cmdlets , here is how to know the result of the cmdlets:
get process | get-member
Running this cmdlet produces a long list of properties and methods for , but at the very beginning of the list you can see the type of object that creates :
TypeName: System.Diagnostics.Process
The screenshot below also shows the properties entitled get-process Handles, Name, NPM, PM, SI, VM And WS.

If you want to manipulate the result to work with this cmdlet (instead of displaying a long list of active processes on the monitor), you need to find another command that takes as input System.Diagnostics.Process. Use PowerShell again to find the right cmdlet:
get-command -Parametertype System.Diagnostics.Process
This cmdlet produces a list of cmdlets that can process System.Diagnostics.Process.
Some cmdlets are known for accepting almost any kind of data. Chief among them is . This cmdlet passes through itself each object sent through the pipe, one by one, and applies the specified selection criteria to it. There is a special marker called $_ , which allows you to use each item in the pipe, one at a time.
Let's say you want to get a list of all processes running on the computer with the name "svchost", that is, you want to match the property Name process svchost. Use command:
get process | where-object ($_.Name -eq "svchost")
Cmdlet looking at every object System.Diagnostics.Process, compares .Name this object with "svchost"; if there are matches, they are displayed on the monitor. Look at the screenshot.

Step 7: Analyze Useful PowerShell Commands
By now, you already know enough to be able to damage the computer, so be careful. Let's see, for example, frequently requested PowerShell commands.
These commands only work on Windows 10 and only when running PowerShell as an administrator. They are designed to reinstall pre-installed Windows 10 apps and can be useful for those who first uninstalled these programs and then decided to return them. The commands looks like this:
Get-AppXPackage | Foreach (Add-AppxPackage -DisableDevelopmentMode -Register “$($_.InstallLocation)\AppXManifest.xml”)
If you run this command, ignore the warnings indicated in red, and when the command is completed, restart your computer; all pre-installed programs in Windows 10 will appear in their places.
Here is how this command works. Get-AppXPackage checks all application packages in the user profile. Even if you uninstall an app, it remains in the user's profile list.
Cmdlet Get-AppXPackage returns an object TypeName Microsoft.Windows.Appx.PackageManager.Commands.AppxPackage, which includes the fully qualified application package name and the location of the corresponding XML manifest file. If you run the cmdlet get-appxpackage, you'll see a long list of app packages. The screenshot shows a description of the Xbox app.

Cmdlet Foreach cycles through each object in AppXPackage, sending them to the cmdlet Add-AppxPackage. According to get-help for Add-AppxPackage, there are two key switches:
- Switch -Register used to register existing application package installations, you can set options Disable DevelopmentMode And Register
- Switch -DisableDevelopmentMode tells Windows to re-register an existing application package that has been deactivated, unregistered, or corrupted.
Line " $($_.InstallLocation)\AppXManifest.x ml" describes where the file is located manifest.xml. If you look at the files AppXManifest.xml, you'll see a complex list of app IDs, executables, and a large number of visuals associated with the app.
After the reboot, any added app packages are downloaded and installed from the Windows Store.
More than one year has passed since the release of Windows 7 and Server 2008.
Programmers, system administrators, and advanced users have found many uses for the blue command-line-like window.
Beginning users, for the most part, do not even know what PowerShell (PS) is.
But scripts for PowerShell allow you to automate, almost 100% of the actions and scripts performed in the operating system through the command line and graphical interface.
Let's get acquainted with the main features of this program, paying more attention to the functions of creating and running scripts (microprograms).
There are a myriad of manuals and documentation on the program, including in Russian. Article objective– to give the user conceptual knowledge, put into action, and whether it is worth getting acquainted with the interpreter and the execution of scripts in it closer, everyone will decide on their own.
What is Windows PowerShell?
PowerShell- An interpreter based on the .NET Framework, endowed with its own scripting language.
The first means that it works in text mode: you enter, you run a command, and on the screen you see the result of its execution.
As it was in MS-DOS and older versions of UNIX.
The second greatly simplifies, speeds up and automates the administration, maintenance of systems, applications, processes and related services by administrators and ordinary users.
Compared to other interpreters, PS is different:
- integration with. - allows you to create powerful scripts by embedding program code in them;
- all returned data are objects, not data of the text/string type (string), which implies their transfer to other scripts and any processing.
PowerShell version 2 has the following features, some of which we will consider in more detail:
- Ability to represent commands as cmdlets- they are launched inside the interpreter, otherwise the command is executed in a separate process.
- Using pipelines- designed to transfer data from one command to another while maintaining their structure and type.
- Integrated multithreaded data transfer over the network with priority setting and connection resumption.
- Support for positional and named parameters.
- background work– asynchronous call of commands and launch of scripts on remote machines.
- Setting up limited sessions with remote clients and running scripts on them.
- Modules- a way to organize scripts when they become self-sufficient and run in their own container without affecting the module environment.
- The presence of an error handler.
- Graphical environment for the language: Syntax, debugger, highlighting, command autocompletion with Unicode support and bookmarks.
- Adding breakpoints to lines, commands, operations, and variables for script debugging.
- Block and inline comments.
- Support for creating aliases for some cmdlets, which are converted to regular commands at the time of execution.
- Create limited sessions, where you can execute a strictly specified list of commands and much more.
PowerShell source code made available to everyone: any member of the community is free to create their own extensions to increase the functionality of the command line interpreter.
You can start learning the integrated scripting language without programming skills.
It is unlikely that it will be possible to create a complex script, but almost everyone will be able to perform sequences of primitive actions.
Although, without knowledge of the basic concepts of PowerShell, it is unlikely that anything will be done in the command interpreter window. Let's start with them.
Cmdlets
Cmdlets- original PS commands, behind which are hidden a variety of functions. The commands built into the interpreter are implemented according to the “verb-noun” principle, for example, Get-Process (getting a list of processes). This solution allows you to understand the essence of the team already from its name (in English).
Some cmdlets support receiving/transferring data and arrays of information while preserving their structure and type. This works on the principle of a pipeline (this will be discussed in the next section). No matter what, the cmdlets run and process objects in a strict order.
To implement cmdlets, any supported .NET APIs created in any of the .NET languages can be used.
Thus, the user is granted access to the specific functions of the program.
Cmdlets are able to access the required information directly or through unique paths (drive letters and directory paths).
Through cmdlets, you can work with file system and certificate store objects, installed applications and services.
Conveyor
When creating not very primitive scripts or to perform any operations with the data obtained as a result of the script, sometimes you also have to perform some actions.
There is a conveyor for this. As in UNIX, it concatenates commands by passing the output of one cmdlet to the input of another, unchanged, preserving its type.
It does not require any container or character-by-character parsing of information.
The transmitted information may also include a function. After the work of the combined commands is completed, the function of converting information into a text form (converting data into strings) is called using text formatting.
Scripts
Despite the fact that the shell allows you to automate many actions, you need to enter commands manually, which is not very convenient.
Especially when the same operations should be performed constantly.
Yes, and without the human factor can not do: typos, errors, accidentally touched keys when writing lines of code, correction or typing a new line require a more user-friendly attitude.
To perform monotonous chains of actions in PS, scripts are implemented - text files with a sequence of commands understandable to the interpreter inside.
Scripts in PowerShell will further simplify and automate the work on the PC and its maintenance, especially if the script contains branches, conditions, logical operations and loops.
But here "not all that glitters is gold": writing your own script or uploading a ready-made one (albeit a little fitting it to your own goals) will not work so easily.
If inMicrosoftit was allowed no matter how much trouble made scripts forPowerShell , written by scammers and ill-wishers for selfish or hooligan purposes.
To run on Windows PS, you must pass its launch control.
If it is not passed, and the script should be executed, you will have to change the configuration of the objects responsible for the security of the macros.
Before Using Scripts
When operating VBS, there are many problems that the PowerShell developers got rid of completely if script security is not lowered to satisfy user script requests or solve problems related to the level of security of the operating system.
Running the downloaded script on the user's machine is a simple and effective way to distribute malicious software or steal personal information by intruders.
Everything happens due to elementary ignorance of the contents of the script file (ps1) and the desire to quickly solve their problems at the expense of the work of others. Objects that control the security level of script execution create an environment in which the script cannot be run.
Intentional launch of macros occurs after changing the security level, if the user gives the go-ahead, realizing what he is doing, and knowing for sure what is in the *.ps1 file.
Due to the inconvenience of the security configuration for people who need to implement and run their own scripts, it is possible to change the configuration.
Here you can both reduce protection to a minimum, and reasonably maneuver between the ability to open holes for penetration and convenience in working with PowerShell.
The shell has three levels of security:
- files with ps1 extension are not identified by the system as executable and are designated as unknown or text (double-click to open in the default text editor used on the computer);
- the shell allows you to execute scripts after specifying the full path to them, script files in the current directory are not searched, making it impossible to execute macros located in the current directory;
- running the built-in script Execution Policy, which is responsible for adding the required one to the list of allowed scripts.
Don't even think about changing the configuration, lowering it to at least the second level, without familiarizing yourself with the basicsPowerShell, until you begin to at least superficially understand the contents of *.ps1.
There is also the concept of an execution policy, which is designed to prevent accidental execution of scripts. There are as many as five launch policy settings:
- limited - installed by default, only scripts signed by Microsoft are executed that allow obtaining information about the hardware and software shell of the computer;
- signed deleted files– all macros can be executed, but files sent by mail must be signed;
- digitally signed by a trusted source– all signed scripts are executed;
- unlimited- run any macros;
- bypass- are intended for programmers who create their own security system, and do not use the one provided in the shell.
You can check the current state of the startup policy with the "Get-ExecutionPolicy" command.Whatever the security policy, the user will not be able to run a script that contains commands that he does not have enough privileges to execute.
Running PowerShell
It's time to move from theory to practice. So, to execute scripts, you need to obtain a digital signature or (the second option is simpler).
There are several ways to bring up a PowerShell window.
It is presented in two forms:
- classic console;

- PowerShell ISE - adds support for tabs, syntax, context help, context and main menus, which greatly facilitates the work in the interpreter.
Start
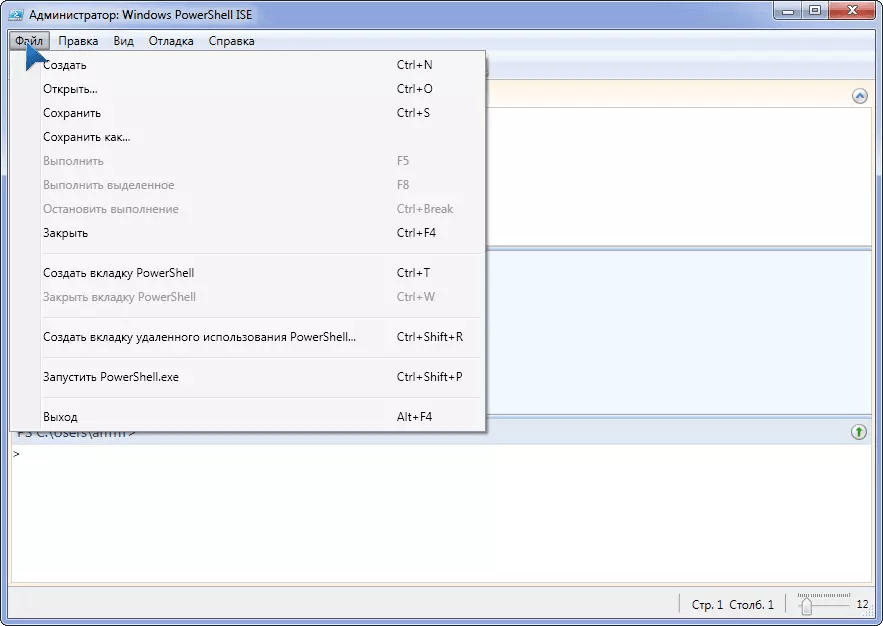
The easiest way to call PS is through Start.
- Opening the menu(in Windows 7, click "All Programs").
- Go to the Windows PowerShell directory and click on the desired icon.

Rice. 6 - Launching PS through the "Run" dialog
Win+X
In Windows 10 PS can be called from the WinX menu. The fact is that by default, by clicking on the command "Command line" open CMD. It can be replaced with PowerShell.
Open the "Properties" of the Taskbar, in the "Navigation" tab, check the box next to the only option and save the settings.

You can call PowerShell through the command line by writing "powershell" in it or by running the executable file along the path: %WINDIR%\ System32\ WindowsPowerShell\v1.0 for 32-bit systems and at %WINDIR%\ syswow64\ WindowsPowerShell\v1.0 for 64-bit Windows of any edition.
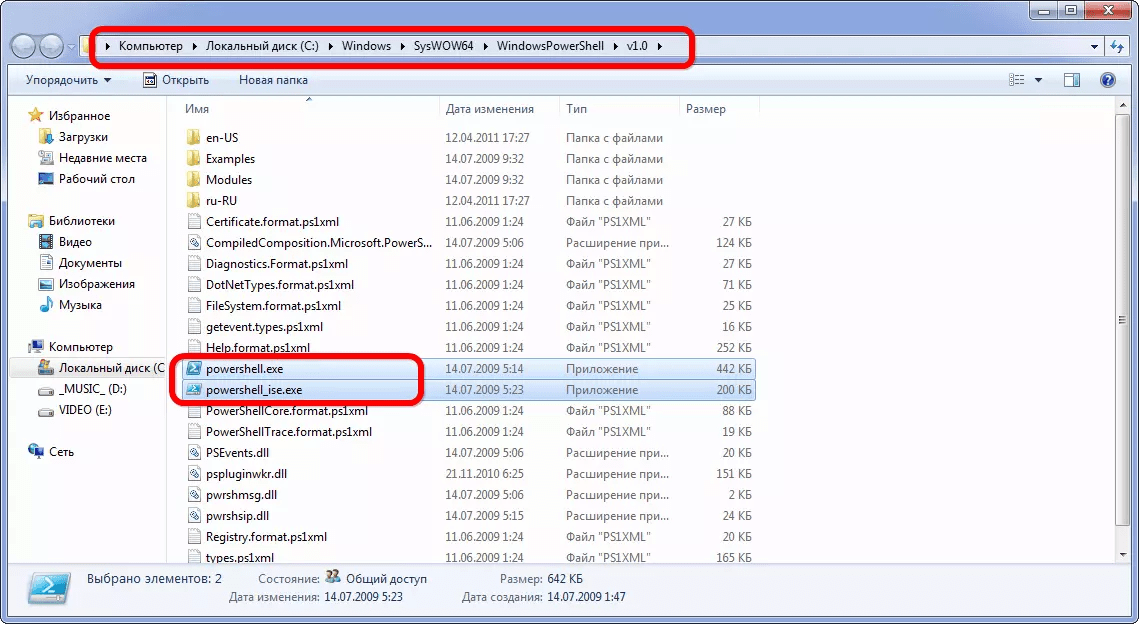
Rice. 8 - Launching PS from the directory where its executable file is stored
Learning PowerShell - Books and Resources
This article opens a series of posts dedicated to PowerShell. Yes, it's command line time!
Briefly - what is PowerShell?
- PowerShell - command line shell
- PowerShell commands run in a pipeline
- PowerShell can be extended to allow for different technologies
- and most importantly, once you master PowerShell, you'll become a better administrator.
Why PowerShell?
It is worth noting two points. First of all, PowerShell does contain a scripting language; it is a very compact language with only about two dozen keywords. But in fact, PowerShell, as mentioned above, is a command line shell, much like cmd.exe or the UNIX Bash shell.
Second point: Microsoft does not encourage the practice of using GUI-equipped consoles on servers. The fact is that servers can provide effective functioning of graphical interfaces only at the expense of server performance degradation. But using a GUI on clients, even if those clients are connected to a server, is perfectly acceptable today. So in newer versions Windows Server all functions are available first of all using PowerShell and only then (and some are not available at all) using the server GUI.
You can download PowerShell from the TechNet site - but in modern MS Winodws OS it is available out of the box.
For an easier start in learning Windows PowerShell, I present to your attention a selection of various materials. Let's start the list with a video course from the distant 2009:
- Writing the first script and getting to know Windows PowerShell
Internet resources:
- Mastering PowerShell - powershell.com
Programs:
- Script Browser for Windows PowerShell ISE. This add-on allows you to easily find the necessary scripts in the TechNet Script Center according to the specified criteria and parameters. In addition, it contains a special Script Analyzer module, which, after analysis, offers improvements / changes that increase the efficiency of the written script. This module can be obtained from the Windows PowerShell ISE bundle, which is part of the Windows OC. The catch is that Windows Server and PowerShell ISE require activation. The license itself is paid, but do not despair. You will have about 180 days to test this product.
- Dell PowerGUI- Allows you to simplify building your own PowerShell scripts down to simply selecting the necessary cmdlets that suit your task and dragging them to the right places. Ideal for those who are new to PowerShell but have a basic understanding of the concepts. PowerGUI is an easy-to-use editor that is likely to improve your understanding of assembling more complex and advanced scripts, especially if you're best at absorbing information visually.
One of the most basic sources of knowledge is the excellent help of the program:
I hope this list of resources will help you in your study. PowerShell. What books and developments did you use? Leave your answer in the comments and good luck learning new things! 😉
There are things that we do every day as Windows network administrators, but if we were asked to do them using the command line, unlike Linux administrators, it would be very problematic for us Windows administrators. Windows has always been weak when it comes to command line tools. In my opinion, everything has changed with the advent of Windows Powershell. With Powershell (or in other words PS) you can perform so many different functions that we could not perform before. In this article, we will focus on how Powershell can help us perform some common networking functions from the command line. Keep reading to find out more!
What is PowerShell?
Powershell is an installable function Windows Server 2008. To install Powershell, you must install the Powershell feature using the Add Features Wizard. The installation process takes about a minute, and once the component is installed, you have access to an amazing command line scripting language. Unlike other scripting languages in Windows, Powershell is designed exclusively for system administrators. Powershell uses .NET and commands ("cmdlets" or "command-lets") in its work. As a PS user, you can use the commands individually or chain them together to complete more complex tasks.
Once you have installed PS, you will be able to run Start -> All Programs -> Windows Powershell 1.0, and press Windows PowerShell. At this point, you should have a blue CLI window that looks like Figure 1.
Figure 1: Windows Powershell Command Window
You can always tell that you are working in Powershell, because the "PS" window always has the following line at the beginning:
PS C:\Users\Administrators
Now that powershell is installed and its window is open, let me show you some common network tasks that can be done in PS.
List the IP addresses of your server
To get a list of IP addresses on your Windows 2008 Server, you need to use the following command:
Get-WmiObject -Class Win32_NetworkAdapterConfiguration -Filter IPEnabled=TRUE - ComputerName . | Select-Object -Property IPAddress
This is what the data looks like after using this command on my Windows 2008 Server:

Figure 2: Listing IP addresses using Windows Powershell
As you can see from the figure, the initial data shows us that I have one adapter with an IP V4 address and an IP V6 address on this Windows 2008 Server. By itself, this is not surprising, but think about what you can do with it using other scripting functions.
As the powershell user manual teaches us, the resulting data is an array and you can only see the IP address by passing this data to "Select-Object" (after disabling IPV6), like this:
Get-WmiObject -Class Win32_NetworkAdapterConfiguration -Filter IPEnabled=TRUE - ComputerName . | Select-Object -ExpandPropertyIPAddress

Figure 3: Listing an IP Address ONLY with Windows Powershell
Getting list of network adapter configuration using Powershell
To view the basic configuration of your network adapter, you can use the following command:
Get-WmiObject -Class Win32_NetworkAdapterConfiguration -Filter IPEnabled=TRUE "ComputerName .
While this article focuses on using PS on Windows Server 2008, this utility can also be used on Windows XP, Vista, or Server 2003. Here is an example of the resulting command output running on my Windows XP workstation:

Figure 4: PowerShell showing network adapter configuration on Windows XP
Test Polling Your Computer Using PowerShell
While the PS command line can still execute all the usual Windows commands (such as a test poll), the strength of Powershell is that you can take the data and change it with ease.
Here is an example of how this can be done, provided by the Windows Powershell User Guide. In this example, Win32_PingStatus results are parsed using Select-Object. In this case, the data simply shows the response time and status code.
Here is the command that was used:
Get-WmiObject -Class Win32_PingStatus -Filter "Address="127.0.0.1"" - ComputerName . | Select-Object -Property Address,ResponseTime,StatusCode
And here are the results of using the command on my Windows machine:
Figure 5: PowerShell data showing the status of a poll parsed with Select-Object
Sharing a Folder Using Windows Powershell
I will be frank with you. Using Powershell commands is not always as easy as using existing Windows commands that you are already familiar with. Here is an example.
The following PS command will share the folder in C:\temp as "davidtemp" and apply a different command to it:
(Get-WmiObject -List -ComputerName . | Where-Object -FilterScript ($_.Name -eq "Win32_Share")).InvokeMethod("Create",("C:\temp","davidtemp",0,25, "David's Temp Folder"))
On the other hand, you could just use the already tried and tested command net share:
Net share davidtemp=C:\temp /remark:"David"s Temp Shared Folder"

Figure 6: PowerShell data and traditional net share command
Note that the Powershell command didn't just fail, it gave me a terrible error. I tried this command on Windows XP and Vista and I was the system administrator.
On the other hand, the team net share very simple and worked on the first try. While I'm trying to walk you through the basics of Powershell, don't forget that Powershell can use traditional Windows network commands, which are much easier to use in many cases. However, you may find yourself in a situation where these traditional commands don't do everything you need, and that's where Powershell comes in.
Other network and more advanced commands
If you're only going to use the most basic network administration commands in Powershell, you'll probably get confused and won't use them anymore, because like any other scripting language, there's a lot to learn here.
However, once you have overcome the learning curve and learned how to use the language, you will have a tool that is very efficient and can save you time.
As you may have noticed from the previous examples, one of the parameters for most Powershell commands is "computername". When we put a dot (".") instead of a computername, it will be the localhost (our computer). However, we can also replace any IP address or Windows computer name in the domain, which gives us the ability to use these commands not only on our PC, but also create powerful scripts in Powershell that can be used on all computers on the network.
For example, here is a command that sends the IP address of a Dell computer over the LAN:
Get-WmiObject -Class Win32_NetworkAdapterConfiguration -Filter IPEnabled=TRUE - ComputerName DELL9400
Here are the results of this command:

Figure 7: Powershell results of getting an IP address from a remote PC
And here is an enlarged image showing the necessary information:

Figure 8: Zooming in the Powershell Result Window of Getting the IP Address of a Remote PC
So, the ability to work with remote computers is the main feature of Powershell, but another powerful feature is the ability to filter data and combine data obtained from the use of different commands.
Take a look at the following example:
"127.0.0.1","localhost","research.microsoft.com" | ForEach-Object -Process (Get- WmiObject -Class Win32_PingStatus -Filter ("Address="" + $_ + """) -ComputerName .) | Select-Object -Property Address,ResponseTime,StatusCode
In this example, a list of IP addresses and domain names has been obtained. This list was passed to "ForEach-Object". For each of these "objects" (IP address/domain names), the "Get-WmiObject" PingStatus element was used. The polling data for each domain name was then run through "Select-Object", resulting in only addresses, response times, and status codes being displayed.
Figure 9: Test polling with a list when combining and polling data
In my opinion, this example demonstrates some of Powershell's features. As you can see, it is possible to direct and redirect input and output data in different directions while achieving your administrative tasks.
What else do you need to know?
Conclusion
Windows Powershell is a very powerful utility. It's impossible to describe everything that you can do with Powershell in this article, but I hope that I was able to give you a general picture of the possibilities of this utility and inspire you to further research in this area. Every day there are new books, courses and tons of material on the Internet about Powershell functions that can be used by Windows system administrators. With Windows administrators so deeply attached to the graphical interface, it will take time for Powershell to be adopted by companies that don't have a strong need for the tool. I'm sure administrators will use Powershell to create shorter scripts that can be used to perform more complex tasks. I hope that Powershell will gain more and more popularity around the world!
Special thanks to Microsoft for providing command examples in the Windows Powershell User Guide documentation.
In this article, we will consider such a technology from Microsoft as Windows PowerShell, we will talk about what PowerShell is, what cmdlets and the pipeline are, how to write scripts and modules, and also touch on other equally important and useful features of Windows PowerShell.
What contributed to the emergence of Windows PowerShell?
Before the advent of PowerShell, there were ( and exist) the following tools for automating and administering services: Windows command line and Windows Script Host. But these technologies have drawbacks.
The Windows command line has both the ability to perform some administrative tasks and the ability to write an action algorithm, saving it as a script (bat-file), while you can use some programming elements, for example, use variables, conditional structures, and even something like cycles.
Most software products have a console interface, i. we can control the program using the command line, while saving resources due to the lack of costs for the graphical interface. Microsoft for the server operating system Windows Server even releases editions without a graphical interface ( Server Core, Windows Server 2016 even has Nano Server), but all this is not enough, since the possibilities of the command line are limited, i.e. we will not be able to write some complex logic to automate something, and if we can, then we will need time and knowledge for this.
Also, the disadvantage of the command line is that we use various console utilities of software products to fully manage the server, and therefore it is really difficult to use the command line for administration, in terms of the fact that all these utilities have different syntax, parameters, methods of use and in order to perform typical tasks, i.e. everyday, you have to keep it all in mind, and to perform non-standard tasks, you first have to read help or documentation.
Windows Script Host technology allows you to perform all administrative tasks that the command line does, including their automation by writing WSH scripts, but here we can already use full-fledged programming languages ( VBScript and JScript), i.e. you can implement complex logic and algorithms. In addition, with the help of WSH, we manage software products through an object interface, in other words, the Windows Script Host is much " cooler' than the command line. But this technology also did not become that ideal tool for administration and automation of this administration for system administrators, since Windows Script Host required knowledge of the above programming languages, which is actually superfluous for system administrators. Administrators need only a simple administration tool with the ability to program some actions, and they do not want to delve into the object models of software products in the VBScript and JScript programming languages.
As a result, Microsoft needed to develop an administration tool for system administrators that would 100 percent satisfy all the needs of system administrators, both in terms of administration and automation capabilities, and in terms of convenience and ease of use, thus Windows PowerShell was born.
What is Windows PowerShell?
Windows PowerShell is a scripting language and Windows command shell designed to administer and configure Windows operating systems. PowerShell is based on the CRL and the .NET Framework, and unlike the command line that accepts and returns text, Windows PowerShell works with objects. Every object in PowerShell has properties and methods that you can use to manipulate those objects.
In Windows PowerShell, Microsoft developed the concept of cmdlets ( cmdlets), which is a command naming system " Verb Noun". This system allows system administrators to quickly master and simplify work with PowerShell.
With Windows PowerShell, you can:
- Get access to the file system;
- manage the registry;
- manage services;
- manage processes;
- Set up the operating system;
- Install software;
- Install server roles and components;
- Administer and configure server roles and components;
- Write and use scripts to automate management and administration;
- Perform other system administrator tasks.
Windows PowerShell contains many commonly used utilities and commands that can be run from the command line, such as ipconfig, ping, and others. This is done in order to facilitate the transition of system administrators from the command line to PowerShell.
Also, for convenience, many frequently used commands and utilities in PowerShell have synonyms ( Alias), for example cls is a synonym for the Clear-Host cmdlet, dir is a synonym for Get-ChildItem ( the full list of synonyms can be viewed by running the Get-Alias cmdlet).
To simplify the search for the desired command in PowerShell, there is a special cmdlet Get-Command, with which you can search both by verb and by noun. All commands in Windows PowerShell are grouped into modules ( e.g. Hyper-V, NetTCPIP), which also makes it easier to find the right command.
After the desired command is found, you can see the instructions for working with this command, i.e. help, there is a special Get-Help cmdlet for this purpose, for example, the following command will display help on the Get-Command cmdlet:
Get-Help Get-Command
Help in Windows PowerShell can be short, detailed ( parameter -Detailed), complete ( -Full option), and you can also display only examples ( parameter - Examples). The following command will only show examples of using the Get-Command cmdlet:
Get-Help Get-Command -Examples
PowerShell Help is updatable, i.e. it can be updated with the Update-Help command.
Versions of Windows PowerShell
The first version of PowerShell 1.0 appeared on November 14, 2006 and was released as a separate distribution that could be installed on the following versions of Windows operating systems: Windows XP Service Pack 2, Windows Server 2003 Service Pack 1, and Windows Vista.
In Windows Server 2008, PowerShell 1.0 was shipped as a component that also had to be installed.
Beginning with Windows 7 and Windows Server 2008 R2, PowerShell is shipped as an integral part of the system ( those. pre-installed, no need to install it). Below is a table of correspondence between the version of PowerShell and the version of the Windows operating system ( those. which version of PowerShell is installed by default on which version of Windows):
| PowerShell Version | Windows versions |
| PowerShell 2.0 | Windows 7, Windows Server 2008 R2 |
| PowerShell 3.0 | Windows 8, Windows Server 2012 |
| PowerShell 4.0 | Windows 8.1, Windows Server 2012 R2 |
| PowerShell 5.0 | Windows 10, Windows Server 2016 |
With each new version of PowerShell, it becomes more and more powerful administration tool, in comparison, the first PowerShell had about 130 cmdlets, and in PowerShell 5.0 there are already more than 600 of them!
You can find out the current version of PowerShell using the PSVersion property of the $PSVersionTable built-in variable, for example, run the following command:
$PSVersionTable.PSVersion
Or run the cmdlet
Get-Variable -Name PSVersionTable –ValueOnly
where, the PSVersion value will be the PowerShell version.
PowerShell language
PowerShell is an object-oriented scripting programming language. It is used to write commands to control all components of the Windows operating system in Windows PowerShell, and to write scripts to automate administrative tasks in the Windows PowerShell Integrated Scripting Environment (ISE). Although the PowerShell language was created for administration tasks, it is a full-fledged scripting programming language, as it has programming constructs that are present in every programming language, such as: conditions, loops, error handling, working with variables, objects, arrays.
The PowerShell language has a unified syntax for writing commands and a naming structure for these commands according to the principle " Verb Noun”, which makes this language intuitive for both programmers and system administrators.
Windows PowerShell shell
Windows PowerShell shell is an execution environment for commands and scripts written in the PowerShell language. This shell has the same features as the command line, such as: storing the history of command execution, customizing the appearance of the shell, completing command execution with the Ctrl + C key combination, as well as many other features that are not in the command line shell, for example, such a wonderful feature as " syntax highlighting» ( appeared in PowerShell 5.0).
You can start a PowerShell shell in several ways, for example:
- From the command line by typing PowerShell;
- Through the dialog box Run» ( keyboard shortcut Win+R), also by typing PowerShell;
- In Windows 7 - Start->All Programs ->Accessories ->Windows PowerShell ->Windows PowerShell;
- In Windows 8.1 or Windows Server 2012 R2 - Start-> All Programs -> System Tools -> Windows PowerShell;
- In Windows 10 or Windows Server 2016 - Start->All Programs -> Windows PowerShell Directory ( in group W) -> Windows PowerShell.
Example of running PowerShell in Windows Server 2016

Screenshot of PowerShell in Windows Server 2016

Cmdlets in PowerShell
Cmdlet (cmdlet) is a Windows PowerShell command that allows you to interact with and manipulate operating system objects. These commands are part of the PowerShell language. Cmdlets are built on the principle of " Verb Noun”, separated by a hyphen (-); in other words, we first indicate what to do, and through a hyphen - over what. For example, the Get-Help cmdlet, where Get is a verb meaning " Receive", and Help is a noun " Help"in the context of PowerShell" Show - Help". PowerShell cmdlets return results as objects, which is one of the main differences from the Windows command line, where commands return only text to the screen.
In addition to cmdlets for getting data (Get), there are also such types of cmdlets as:
- Add - adding data;
- Clear - clear;
- Enable - enable;
- Disable - turn off;
- New - create;
- Remove - remove;
- Set - set;
- Start - run;
- Stop - stop;
- Export - export;
- Import - import;
- And many more.
A complete list of cmdlets in Windows PowerShell can be viewed using the special Get-Command cmdlet. For example, run it with the -CommandType cmdlet parameter, as a result, you will see a list of cmdlets on the screen.
Get-Command -CommandType cmdlet
As you already understood, cmdlets have parameters with which we can specify the actions of the cmdlet. There are required and optional parameters, for example, the Get-Command cmdlet has no required parameters.
The picture below shows a way to search for a cmdlet by verb ( Verb parameter). In this case, we have displayed a list of cmdlets that can restart something.

Command
Get-Command -Verb Restart
To search for a cmdlet by noun, you must use the Noun parameter. For example, below we got a list of cmdlets that work with services.

Command
Get-Command -Noun Service
If you did not find the required cmdlet by its full name, you can use the mask in *Text* format.
Pipeline in PowerShell
One of the main features of Windows PowerShell is the ability to use a pipeline when executing commands.
Conveyor- this is the transfer of the result of the work of the cmdlet through the vertical bar (|) to another cmdlet. At the same time, as you remember, cmdlets in PowerShell work with objects and return objects, respectively, objects are also transferred along the pipeline.
Using a pipeline, you can perform complex tasks in a simple and convenient way without the need to write complex algorithms and scripts.
For example, let's find out the name of the largest file in the C:\Windows\System32 directory ( simple pipeline example).

Command
Get-ChildItem -Path "C:\Windows\System32" -File | Sort-Object length -Descending | Select-Object -First 1
- Get-ChildItem - cmdlet for getting objects in the specified directory;
- Sort-Object is a cmdlet for sorting objects, in our case we sort by file size ( length -Descending);
- Select-Object is a cmdlet for selecting the desired properties of an object, in our case we display standard fields and only the very first object, i.e. big file ( parameter -First 1).
All cmdlets are separated from each other by a vertical bar. The result of each cmdlet is passed as input to another cmdlet, i.e. first we get all the objects in the specified directory, then we sort the result and finally select the very first object.
Background execution of jobs
Windows PowerShell has the ability to run jobs in the background, it is a mechanism by which you can run a command ( for example, which takes a long time to complete) in the background, i.e. after launch, you return to the current session and can continue working without waiting for the command to finish. You will need this feature when you need to run a command that takes a long time, and as you know, during this time the PowerShell shell session is blocked until the command completes, and you need to continue working.
You can manage all tasks that are running in the background, for example, view the list of tasks, stop the task, delete the task, and, of course, view the result of the task.
Windows PowerShell provides the following cmdlets for working with background jobs:
- Start-Job - start a background task;
- Stop-Job - stop a background task
- Get-Job - view a list of background tasks;
- Receive-Job - view the result of the background task;
- Remove-Job - remove a background task;
- Wait-Job - bring a background task to the foreground in order to wait for it to finish.
To run in the background, you must write the command Start-Job, and in curly brackets () the command or set of commands that you want to run in the background.
For example, let's run some task ( show list of services) in the background, then look at the list of background jobs and display the result of our job ( those. service list).
Running a task in the background
Start-Job (Get-Service)
We look at the list of tasks running in the background
Displaying the result of the job Job1
Receive Job Job1

As you can see, we have a task with the status " Completed”, i.e. it has already been completed just Get-Service works fast).
In order to view the result of the background task, i.e. Get-Service cmdlet, we executed the Receive-Job command and passed the name of the job to it ( can and id value). As a result, we have displayed a list of services.
Remote control with PowerShell
Windows PowerShell is designed not only for local use, but also for remote command execution. This feature is necessary so that you can manage remote computers from your workplace, i.e. run PowerShell commands.
There are several ways to remote control:
- Using the parameter –ComputerName (many teams have). In other words, you pass the name of the computer on which you want to run the command as a parameter. The method has the disadvantage that it is limited to the execution of a single command;
- Through sessions. Cmdlet Enter-PSSession (interactive session). In this way, you connect to a remote computer and all the commands that you type in the PowerShell shell will be executed on the remote computer in the same way as if you typed commands directly on the remote computer. The method also has the disadvantage that the session is limited to one computer;
- Using the cmdlet Invoke-Command. Using this method, you can run commands or scripts on one computer or on several.
For example, to connect to a remote computer ( in the example below ServerName) interactive session, run the following command:
Enter-PSSession ServerName
Scripts, Functions, and Modules in Windows PowerShell
If you have written some algorithm, most likely you will want to save it in order to use it in the future. Windows PowerShell has a scripting mechanism for this purpose.
The essence of this mechanism is as follows, you write the set of commands you need and save it as a script - this is a simple text file with the .PS1 extension.
Then, to run this script, you simply run it in PowerShell. In this case, you must either specify the full path to the script file, or go to the directory with the script and call it by name.
Important!
By default, scripting is disabled on Windows! To view the script execution policy, run the cmdlet Get-ExecutionPolicy. As a result, it will return the current policy, for example:
- Restricted - blocking the execution of any scripts ( default value);
- AllSigned - execution of scripts that have a digital signature is allowed;
- RemoteSigned - execution of local scripts is allowed, all downloaded scripts must be digitally signed;
- Unrestricted - execution of any scripts is allowed ( not recommended as unsafe!).
You must use the cmdlet to allow scripts to run. Set-ExecutionPolicy with one of the above options.
For example, to allow the execution of local scripts, run the following command, and agree to the changes by pressing Y.
Set-ExecutionPolicy RemoteSigned
In a script, you can pass parameters, make them required, or set a default value.
Windows PowerShell provides a mechanism to create your own functions, which, like the built-in cmdlets, can be used in the PowerShell shell.
To do this, you need to specify the keyword Function and then in curly brackets () write the algorithm for this function, i.e. instruction set ( for example, some commonly used procedure: create a user with certain rights, clean up certain directories, and so on). Then you need to save all this into a script, but only with the .psm1 extension, since this file will already be a module.
That's not all, this file needs to be placed in the directory where PowerShell looks for modules. There are several directories a special directory in the user profile, the directory where PowerShell is installed), they can be viewed in the PowerShell environment variables. To do this, run the following command
Get-ChildItem Env:\PSModulePath | Format-Table -AutoSize
After you place the module you wrote in a special directory, you can access your functions as normal PowerShell commands.
Windows PowerShell Integrated Scripting Environment (ISE)
In order to make it convenient to write scripts, functions and, accordingly, modules, Microsoft has developed a special graphic program Integrated Scripting Environment(ISE) - Integrated Scripting Environment. It is very convenient to work in this program, besides, it has powerful functionality ( creation of many tabs with scripts, output area, built-in debugger and more).
You can run it like this:
- In Windows 7 - Start->All Programs ->Accessories ->Windows PowerShell ->Windows PowerShell ISE;
- In Windows 10 or Windows Server 2016 - Start->All Programs -> Windows PowerShell Directory ( in group W) -> Windows PowerShell ISE.
Note! ISE will not run on a Windows Server system installed in the Server Core variant.
Screenshot of the PowerShell Integrated Scripting Environment (ISE) in Windows Server 2016

That's all I have, I hope the material was useful to you! Good luck!


