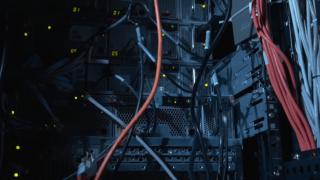
At the moment, the most common interface is . Although SATA can be found on sale, the interface is already considered obsolete, and besides, they have already begun to arrive with.
Do not confuse with SATA 3.0 Gb / s, in the second case we are talking about the SATA 2 interface, which has a bandwidth of up to 3.0 Gb / s (SATA 3 has a bandwidth of up to 6 Gb / s)
Interface- a device that transmits and converts signals from one piece of equipment to another.
Interface types. PATA, SATA, SATA 2, SATA 3, etc.
Drives of various generations used the following interfaces: IDE (ATA), USB, Serial ATA (SATA), SATA 2, SATA 3, SCSI, SAS, CF, EIDE, FireWire, SDIO, and Fiber Channel.
IDE (ATA - Advanced Technology Attachment)- a parallel interface for connecting drives, which is why it was changed (with the release SATA) on PATA(Parallel ATA). It used to be used to connect hard drives, but was supplanted by the SATA interface. Currently used to connect optical drives.
SATA (Serial ATA)- serial interface for data exchange with drives. An 8-pin connector is used for connection. As in the case with PATA- is obsolete, and is used only for working with optical drives. The SATA standard (SATA150) provided a throughput of 150 MB/s (1.2 Gb/s).
SATA 2 (SATA300). The SATA 2 standard doubled the throughput to 300 MB/s (2.4 Gb/s) and allows operation at 3 GHz. Standard SATA and SATA 2 are compatible with each other, however, for some models, you must manually set the modes by rearranging the jumpers.
Although it is correct to call about the requirement of specifications SATA 6Gb/s. This standard doubled the data transfer rate to 6 Gb / s (600 MB / s). Also positive innovations include the NCQ program control function and commands for continuous data transfer for a high priority process.
Although the interface was introduced in 2009, it is not yet very popular with manufacturers and is not so common in stores. In addition to hard drives, this standard is used in SSDs (Solid State Drives).
It is worth noting that in practice, the bandwidth of SATA interfaces does not differ in data transfer speed. In practice, the speed of writing and reading disks does not exceed 100 Mb / s. Increasing the performance only affects the bandwidth between the controller and the drive.
SCSI(Small Computer System Interface)- the standard is used in servers where an increased data transfer rate is required.
SAS (Serial Attached SCSI)- the generation that replaced the SCSI standard, using serial data transfer. Like SCSI is used in workstations. Fully compatible with SATA interface.
CF (Compact Flash)- Interface for connecting memory cards, as well as for 1.0 inch hard drives. There are 2 standards: Compact Flash Type I and Compact Flash Type II, the difference is in thickness.
firewire- an alternative interface to the slower USB 2.0. Used to connect portable . Supports speeds up to 400 Mb/s, but the physical speed is lower than conventional. When reading and writing, the maximum porg is 40 Mb / s.
A drive interface is a set of electronics that provides information exchange between the device controller (cache buffer) and a computer. Currently, IBM-PC desktop PCs, more often than others, use two types of ATAPI interfaces - AT Attachment Packet Interface (Integrated Drive Electronics - IDE, Enhanced Integrated Drive Electronics - EIDE) and SCSI (Small Computers System Interface).
InterfaceIDE designed as a low cost and high performance alternative to high speed ESDI and SCSI interfaces. Interface designed to connect two disk devices. A distinctive feature of disk devices that work with the IDE interface is that the actual disk drive controller is located on the board of the drive itself, along with a built-in internal cache buffer. This design greatly simplifies the construction of the interface card itself and makes it possible to place it not only on a separate adapter board inserted into the system bus connector, but also to integrate it directly on the computer motherboard. The interface is characterized by extreme simplicity, high speed, small size and relative cheapness.
Schemes for pairing an adapter with drives in the IDE interface
Today, the IDE interface has been replaced by Western Digital's Enhanced IDE, or EIDE for short. This is now the best option for the vast majority of desktop systems. EIDE hard drives are noticeably cheaper than SCSI drives of similar capacity and perform just as well in single-user systems, and most motherboards have an integrated dual-channel controller for connecting four devices. So what's new in the Enhanced IDE compared to the IDE?
Firstly, it is a large capacity of disks. If IDE did not support disks larger than 528 megabytes, then EIDE supports volumes up to 8.4 gigabytes per controller channel.
Secondly, more devices are connected to it - four instead of two. Previously, there was only one controller channel, to which two IDE devices could be connected. Now there are two such channels. The main channel, which is usually on a high-speed local bus and an auxiliary one.
Thirdly, the ATAPI (AT Attachment Packet Interface) specification appeared, which makes it possible to connect not only hard drives to this interface, but also other devices - streamers and CD-ROM drives.
Fourth, productivity has improved. Drives with an IDE interface were characterized by a maximum data transfer rate of 3 megabytes per second. EIDE hard drives support several new communication modes. These include PIO (Programmed Input / Output) Mode 3 and 4, which provide data transfer rates of 11.1 and 16.6 megabytes per second, respectively. Programmable I/O is a method of transferring data between a peripheral device controller and a computer's RAM through data transfer commands and I/O ports on the CPU.
Fifth, the direct memory access mode is supported - Multiword Mode 1 DMA (Direct Memory Access) or Multiword Mode 2 DMA and Ultra DMA, which support data exchange in exclusive mode (that is, when the I / O channel serves only one device). DMA is another way to transfer data from the peripheral device controller to the computer's RAM, it differs from PIO in that the PC's central processor is not involved and its resources remain free for other tasks. Peripheral devices are served by a special DMA controller. The speed in this case reaches 13.3 and 16.6 megabytes per second, and when using Ultra DMA and the corresponding bus driver - 33 megabytes per second. EIDE controllers use the PIO mechanism just like some SCSI adapters do, but high-speed SCSI adapters only use the DMA method.
Sixthly, the system of commands for device control, data transfer and diagnostics has been expanded, the cache buffer for data exchange has been increased, and the mechanics have been significantly improved.
Seagate and Quantum instead of the EIDE specification use the Fast ATA specification for drives that support PIO Mode 3 and DMA Mode 1, and those operating in PIO Mode 4 and DMA Mode 2 are referred to as Fast ATA-2.
Intelligent multi-functional interfaceSCSI was developed back in the late 70s as an interface between a computer and an intelligent disk drive controller. The SCSI interface is universal and defines a data bus between the central processor and several external devices that have their own controller. In addition to electrical and physical parameters, commands are also defined, with the help of which devices connected to the bus communicate with each other. The SCSI interface does not define in detail the processes on both sides of the bus and is a pure interface. The SCSI interface supports a much wider range of peripherals and is standardized by ANSI (X3.131-1986).
Today, two standards are mainly used - SCSI-2 and Ultra SCSI. In Fast SCSI-2 mode, data transfer rates reach up to 10 megabytes per second when using an 8-bit bus and up to 20 megabytes when using a 16-bit Fast Wide SCSI-2 bus. The later Ultra SCSI standard has even greater performance - 20 megabytes per second for an 8-bit bus and 40 megabytes for a 16-bit bus. The latest SCSI-3 has a larger instruction set, but performance remains the same. All current standards are compatible with previous versions

Pairing external devices in the SCSI interface
from top to bottom, that is, old SCSI devices can be connected to SCSI-2 and Ultra SCSI adapters. Interface SCSI-Wide, SCSI-2, SCSI-3 - standards for modifying the SCSI interface, developed by the ANSI committee. The general concept of improvements is aimed at increasing the width of the bus to 32, with an increase in the length of the connecting cable and the maximum data transfer rate while maintaining compatibility with SCSI. This is the most flexible and standardized interface type, used to connect 7 or more peripheral devices equipped with a SCSI interface controller. The SCSI interface remains quite expensive and the highest performance of the family of PC peripheral interfaces, and to connect a drive with a SCSI interface, you must additionally install an adapter, because. Few motherboards have an integrated SCSI adapter.
Have you bought a brand new hard drive for your computer and don't know how to connect it?! In this article I will try to talk about it in detail and in an accessible way.
To begin with, it should be noted that the hard drive is connected to the motherboard either via the IDE interface or via the SATA interface. The IDE interface is now considered obsolete, as it was popular back in the 90s of the last century, and new hard drives are no longer equipped with it. The SATA interface is found in all computers that have been produced since about 2009. We will consider connecting a hard drive with both interfaces.
Connecting a hard drive via SATA interface
Disconnect the system unit from the network and remove the side panel. In front of the system unit there are compartments for devices. Optical drives CD / DVD, Blu-Ray are usually installed in the upper bays, and the lower ones are designed for installing hard drives. If your system unit does not have the bays shown in the figure, you can install the hard drive in the top bay.
We install the hard drive in a free cell so that the connectors look inside the system unit, and fasten it to the case with screws: two screws on one side and two on the other.

This completes the installation of the hard drive, check that it does not hang out in the cell.
Now you can connect the hard drive to the motherboard.
If you purchased a hard drive with a SATA interface, then the drive itself has two connectors: the shorter one is responsible for transferring data from the motherboard, the longer one is for power. Additionally, there may be one more connector on the hard drive; it is useful for supplying power through the IDE interface.

The data cable has the same plugs on both ends.

We connect one end of the cable to the SATA-data connector on the hard drive.

The data cable plug can be either straight or L-shaped. You can not be afraid for the correct connection, you simply will not be able to plug the cable into the wrong connector or on the wrong side.

We connect the other end of the cable to the connector on the motherboard, usually they are of a bright color.

If the motherboard does not have a SATA connector, you need to buy a SATA controller. It looks like a board and is installed in the system unit in the PCI slot.
Finished with connecting the data cable. Now we connect the power cable to the appropriate connector on the hard drive.

If your power supply does not have connectors for SATA devices, and the hard drive does not have an additional power connector for the IDE interface, use an IDE/SATA power adapter. Connect the IDE plug to the power supply, SATA plug to the hard drive.

That's all, we connected a hard drive with a SATA interface.
Connecting a hard disk via an IDE interface
We install the hard drive in the system unit in the same way as described in the paragraph above.
Now you need to set the hard disk operation mode: Master or Slave. If you are installing one hard drive, select the Master mode. To do this, put the jumper in the desired position.

The IDE connectors on the motherboard look like this. Near each of them there is a designation: either IDE 0 - primary, or IDE 1 - secondary. Since we are connecting one hard drive, we will use the primary connector.

That's all the hard drive is now connected.
I think now, using the information from this article, you can P connect the hard drive to the computer.
And also watch the video
When buying a hard drive, various ambiguities may arise regarding any parameters. Quite often, users get confused about hard drive interfaces, although there are, in fact, only two main interfaces - IDE and SATA.
In this article, we will try to thoroughly deal with this important parameter, and also consider in detail each of the most popular interfaces. Also, let's not disregard the morally and physically obsolete, for the current 2014, IDE interface, in order to bury it completely.
So, first you need to understand the concept of an interface, specifically in the context of hard drives. Interface- this is a means of interaction, in the case of HDD, consisting of signal lines, an interface controller and a special protocol (set of rules). As you know, we insert one end of the interface cable (be it IDE or SATA) into the connector on the HDD, and the other end into the connector on the motherboard.
Now let's go through each of the most popular interfaces, but let's start with the older one, which has long gone out of mass consumption, but is still present in a number of legacy systems.
IDE interface (ATA)
IDE - Integrated Drive Electronics (electronics that is built into the drive). It is also called PATA.
As mentioned above, this interface is very outdated. It was developed back in 1986. We will not talk much about this interface and its specifications. We state the fact that it has a rather low data transfer rate compared to SATA. IDE is used only in very old systems whose motherboards do not support the SATA interface, or when an IDE drive is available. Figure 1 shows an IDE cable, and the corresponding connector on the motherboard is shown on (Figure 2).

Fig.1

Fig.2
When buying a new hard drive, you need to familiarize yourself with the interfaces that your motherboard supports ( choice of motherboard). The latest motherboards are often released without IDE connectors, but you can still find quite a few models that support both IDE and SATA interfaces. Again, if you have a SATA interface, it's better to get the appropriate drive with this interface than to go back in time and buy an IDE drive (in the case of motherboards that support both standards).
Interfaces SATA, SATA 2(II), SATA 3(III)
In 2002, the first hard drives appeared, with a progressive, at that time, interface SATA. The maximum data transfer rate of which was 150 MB / s.
If we talk about the benefits, then the first thing that catches your eye is the replacement 80-wire loop(Fig. 1), to a seven-wire SATA cable (Fig. 3), which is much more resistant to interference, which made it possible to increase the standard cable length from 46 cm to 1 m. Also, the corresponding SATA connectors were developed (Fig. 4), which are several times more compact than the connectors of the previous IDE standard. This made it possible to place more connectors on the motherboard, now on new motherboards you can find more than 6 SATA connectors, against the traditional 2-3 IDE, in older motherboards focused on this standard.

Fig.3

Fig.4
Further, the SATA II standard appeared, the data transfer rate reached 300 MB / s. This standard has many advantages, among them: Native Command Queuing technology (it was it that made it possible to achieve a speed of 300 MB / s), hot plugging of disks, executing several commands in one transaction, and others.
Well, in 2009, the interface was introduced SATA 3. This standard provides for data transfer at a speed 600 MB/s(for hard drives, "oh" how redundant).
As an asset of interface improvements, you can add more efficient power management and, of course, an increase in speed.
It should be noted that SATA, SATA II and SATA III, are completely compatible, which is very practical, due to the many upgrades of various components of the system. Also, I would like to draw attention to the fact that the SATA interface is used by SSD drives and DVD / CD drives. It is for fast SSD drives that the high speeds of the SATA interface will be very useful.
In the form of a small summary of this article, I will say again that with choosing a hard drive(specifically interface), you need to pay attention to which of the standards your motherboard supports. In light of current trends, this will most likely be one of the SATA standards. And for old motherboards and hard drives, the IDE standard always remains.
Now, doubts about which interface to choose: IDE or SATA should disappear. Good luck!
P.S. We have considered the most popular interfaces, there are a large number of more specific ones. For example, removable hard drives use the standard eSATA etc.
ATA(English) Advanced technology attachment, Advanced technology connection) - a parallel interface for connecting storage devices (hard drives and optical drives) to a computer. In the 90s of the XX century it was the standard on the IBM PC platform; has now been superseded by its successor, SATA. Different versions of ATA are known by synonyms IDE, EIDE, UDMA, ATAPI; with the advent of SATA also received the name PATA (Parallel ATA).
cable-out ATA cables: 40-wire on top, 80-wire on bottom
The tentative name of the interface was PC/AT Attachments("Connection to PC/AT"), as it was intended to be connected to the 16-bit ISA bus, then known as bus AT. In the final version, the title was changed to "A.T. Attachment" to avoid trademark issues.
The original version of the standard was developed in 1986 by Western Digital and, for marketing reasons, was called IDE (Integrated Drive Electronics, "Electronics integrated in the drive"). It emphasized an important innovation: the drive controller is located in itself, and not in the form of a separate expansion board, as in the previous ST-506 standard and the then existing SCSI and ST412 interfaces. This made it possible to improve the characteristics of drives (due to the shorter distance to the controller), simplify their management (since the IDE channel controller abstracted from the details of the drive operation) and reduce the cost of production (the drive controller could only be designed for “its own” drive, and not for all possible ; the channel controller generally became standard). It should be noted that the IDE channel controller is more properly called host adapter, because it has moved from direct control of the drive to communicating with it via a protocol.
The ATA standard defines the interface between the controller and the drive, as well as the commands transmitted over it.
The interface has 8 registers occupying 8 addresses in the I/O space. The data bus is 16 bits wide. The number of channels present in the system can be more than 2. The main thing is that the channel addresses do not overlap with the addresses of other I / O devices. 2 devices (master and slave) can be connected to each channel, but only one device can work at a time. The CHS addressing principle is in the name. First, the head block is installed by the positioner on the required track (Cylinder), after that the required head (Head) is selected, and then information is read from the required sector (Sector).
Standard EIDE (Enhanced IDE, i.e. "advanced IDE"), which followed the IDE, allowed the use of drives larger than 528 MB (504 MiB), up to 8.4 GB. Although these abbreviations originated as trade rather than official names for the standard, the terms IDE and EIDE often used instead of the term ATA. Since the introduction of the Serial ATA standard in 2003 ( "Serial ATA"), traditional ATA began to be called Parallel ATA, referring to the way data is transmitted over a 40-core cable.
At first, this interface was used with hard drives, but then the standard was extended to work with other devices, mainly using removable media. These devices include CD-ROM and DVD-ROM drives, tape drives, and high-capacity floppy disks such as ZIP and magneto-optical disks (LS-120/240). In addition, from the FreeBSD kernel configuration file, we can conclude that even FDD was connected to the ATAPI bus. This extended standard is called Advanced Technology Attachment Packet Interface(ATAPI), in connection with which the full name of the standard looks like ATA/ATAPI.
The original ATA extensions for working with CD-ROM drives were not fully compatible and were proprietary. As a result, to connect a CD-ROM, it was necessary to install a separate expansion board specific to a particular manufacturer, for example, for Panasonic (there were at least 5 specific ATA variants designed for connecting a CD-ROM). Some variants of sound cards, such as the Sound Blaster, were equipped with just such ports.
Another important step in the development of ATA was the transition from PIO (Programmed input/output, Software I/O) to DMA (Direct memory access, Direct memory access). When using PIO, reading data from the disk was controlled by the computer's central processing unit (CPU), which led to an increased load on the processor and slowdown in general. Because of this, computers using the ATA interface typically perform disk-related operations more slowly than computers using SCSI and other interfaces. The introduction of DMA has significantly reduced the cost of processor time for disk operations. In this technology, the drive itself controls the data flow, reading data into or out of memory almost without the participation of the CPU, which issues only commands to perform one or another action. In this case, the hard disk issues a DMARQ request signal for a DMA operation to the controller. If the DMA operation is possible, the controller issues a DMACK signal and the hard disk begins to output data to the 1st register (DATA), from which the controller reads data into memory without the participation of the processor. The DMA operation is possible if the mode is supported simultaneously by the BIOS, the controller and the operating system, otherwise only the PIO mode is possible.
In the further development of the standard (ATA-3), an additional mode was introduced UltraDMA 2 (UDMA 33). This mode has the timing characteristics of DMA Mode 2, but data is transmitted on both the rising and falling edges of the DIOR/DIOW signal. This doubles the data transfer rate on the interface. A CRC parity check has also been introduced, which increases the reliability of information transmission.
In the history of the development of ATA, there have been a number of barriers associated with the organization of data access. Most of these barriers, thanks to modern addressing systems and programming techniques, have been overcome. These include limits on the maximum disk size of 504 MiB, ~8 GiB, ~32 GiB, and 128 GiB. There were other barriers, mostly related to device drivers and I/O on non-ATA operating systems.
The original ATA specification provided for a 28-bit addressing mode. This allowed 2 28 (268 435 456) sectors of 512 bytes each to be addressed, giving a maximum capacity of 137 GB (128 GiB). In standard PCs, the BIOS supported up to 7.88 GiB (8.46 GB), allowing for a maximum of 1024 cylinders, 256 heads, and 63 sectors. This CHS (Cyllinder-Head-Sector) cylinder/head/sector limit, combined with the IDE standard, resulted in a 504 MiB (528 MB) addressable space limit. To overcome this limitation, the LBA (Logical Block Address) addressing scheme was introduced, which made it possible to address up to 7.88 GiB. Over time, this restriction was removed, which made it possible to address first 32 GiB, and then all 128 GiB, using all 28 bits (in ATA-4) to address the sector. Writing a 28-bit number is organized by writing its parts to the corresponding registers of the drive (from 1 to 8 bits in the 4th register, 9-16 in the 5th, 17-24 in the 6th and 25-28 in the 7th) .
Register addressing is organized using three address lines DA0-DA2. The 1st register at address 0 is 16-bit, and is used to transfer data between the disk and the controller. The remaining registers are 8-bit and are used for control.
The latest ATA specifications call for 48-bit addressing, thus expanding the possible limit to 128 PTB (144 petabytes).
These size restrictions can manifest themselves in the fact that the system thinks that the disk capacity is less than its real value, or refuses to boot at all and hangs at the hard drive initialization stage. In some cases, the problem can be solved by updating the BIOS. Another possible solution is to use special programs, such as Ontrack DiskManager, which load their driver into memory before the operating system loads. The disadvantage of such solutions is that non-standard disk partitioning is used, in which disk partitions are inaccessible, in case of loading, for example, from a regular DOS boot floppy disk. However, many modern operating systems can work with larger disks, even if the computer's BIOS does not correctly determine this size.
|
Parallel ATA Pinout |
|||
|
Contact |
Purpose |
Contact |
Purpose |
|
GPIO_DMA66_Detect |
|||
To connect hard drives with a PATA interface, a 40-wire cable (also called a flat cable) is usually used. Each cable usually has two or three connectors, one of which connects to the controller connector on the motherboard (in older computers, this controller was located on a separate expansion board), and one or two others are connected to the drives. At one point in time, the P-ATA loop transmits 16 bits of data. Sometimes there are IDE cables that allow connecting three drives to one IDE channel, but in this case one of the drives works in read-only mode.
For a long time, the ATA cable contained 40 conductors, but with the introduction of the Ultra DMA/66 (UDMA4) appeared its 80-wire version. All additional conductors are ground conductors alternating with information conductors. This alternation of conductors reduces the capacitive coupling between them, thereby reducing mutual interference. Capacitive coupling is a problem at high bit rates, so this innovation was necessary to ensure proper operation of the established specification. UDMA4 transfer rates of 66 MB/s (megabytes per second). Faster Modes UDMA5 and UDMA6 also require an 80-wire cable.
Although the number of conductors has doubled, the number of pins has remained the same, as has the appearance of the connectors. Internal wiring, of course, is different. Connectors for an 80-wire cable must connect a large number of ground conductors to a small number of ground pins, while in a 40-wire cable, the conductors are connected each to its own pin. On 80-wire cables, the connectors usually have different colors (blue, gray and black), unlike 40-wire cables, where usually all the connectors are the same color (usually black).
The ATA standard has always set a maximum cable length of 46 cm. This limitation makes it difficult to attach devices in large cases, or connect multiple drives to one computer, and almost completely eliminates the possibility of using PATA drives as external drives. Although longer cables are commercially available, please note that they do not conform to the standard. The same can be said about "round" cables, which are also widespread. The ATA standard only describes flat cables with specific impedance and capacitance specifications. This, of course, does not mean that other cables will not work, but, in any case, the use of non-standard cables should be used with caution.
If two devices are connected to the same loop, one of them is usually called leading(English) master), and the other slave(English) slave). Typically, the master comes before the slave in the list of drives listed by the BIOS of the computer or operating system. In older BIOSes (486 and earlier), disks were often incorrectly labeled with the letters "C" for master and "D" for slave.
If there is only one drive on a loop, it should in most cases be configured as the master. Some discs (particularly those made by Western Digital) have a special setting called single(i.e. "one drive per cable"). However, in most cases, the only drive on the cable can also work as a slave (this is often the case when connecting a CD-ROM to a separate channel).
The setting called cable select(i.e., "cable-driven choice", cable sampling), was described as optional in the ATA-1 specification and has become widespread since ATA-5, since it eliminates the need to rearrange jumpers on disks during any reconnections. If the drive is set to cable select, it is automatically set as master or slave depending on its location on the loop. To be able to determine this location, the loop must be with cable outlet. For such a cable, pin 28 (CSEL) is not connected to one of the connectors (gray, usually the middle one). The controller grounds this pin. If the drive sees that the pin is grounded (i.e. it is logic 0), it is set as master, otherwise (high impedance state) it is set as slave.
During the days of 40-wire cables, it was common practice to set up a cable select by simply cutting the wire 28 between the two connectors connected to the drive. In this case, the driven drive was at the end of the cable, and the leading one was in the middle. This placement was even standardized in later versions of the specification. Unfortunately, when only one device is placed on the cable, this placement results in an unnecessary piece of cable at the end, which is undesirable - both for reasons of convenience and physical parameters: this piece leads to signal reflection, especially at high frequencies.
The 80-wire cables introduced for UDMA4 do not have these shortcomings. Now the master device is always at the end of the loop, so if only one device is connected, you don't get this unnecessary piece of cable. Their cable selection is “factory” - made in the connector itself simply by excluding this contact. Since 80-wire loops required their own connectors anyway, widespread adoption of this was not a big problem. The standard also requires the use of connectors of different colors, for easier identification by both the manufacturer and the assembler. The blue connector is for connecting to the controller, black - to the master, gray - to the slave.
The terms "master" and "slave" were borrowed from industrial electronics (where this principle is widely used in the interaction of nodes and devices), but in this case they are incorrect, and therefore are not used in the current version of the ATA standard. It is more correct to name the master and slave drives, respectively. device 0 (device 0) and device 1 (device 1). There is a common myth that the master disk controls access of the disks to the channel. In fact, disk access and command execution order are controlled by the controller (which, in turn, is controlled by the operating system driver). That is, in fact, both devices are slaves in relation to the controller.