Absolutely every computer user needs good media player. With the player, you can watch video or listen to audio files on your PC. The windows xp operating system was and still remains one of the most popular in the world. Therefore, new applications are still being developed for it or existing ones are being modernized.
All players contain a set special programs called codecs. Codecs, by their very nature, are designed to encode media files. But for the player they are necessary to transcribe the recording during its playback. Most popular turntables for Windows can contain more than 200 popular versions of codecs. There are also those that are specifically designed for some kind of encoding.
When choosing a player on window xp, you should be guided by its basic purpose. Of course, a large number of programs allow reading both video and audio files. But listening to music via VLC or watching videos via AiMP is not very convenient. As a last resort, to ensure high-quality reproduction, you will have to reconfigure your player carefully.
Windows Media Player
Now let's move on to the basic windows xp player. Windows Media comes in a package standard programs when installing the operating system. It was developed back in 2008. Latest version software product- Windows Media 12.0. For use on XP, version WMP 11 is suitable.
- A large set of codecs: 192 for watching video and 84 for listening to audio (data from one of the assemblies is indicated, it can be less or more), high-quality support for DVD-format.
- A wide range of functions, from playing files to buying music online.
- Simplicity and accessibility of the interface.
- High performance for small requirements.
- Full compliance with windows XP OS.
Installing Windows Media
As noted above, usually the player goes directly to windows package XP. But if you still want to reinstall it for more modern version, we will show you how to do it step by step.
First, I will download the program on one of the free services... To find one, you can simply search for " windows media free download player 11 ".
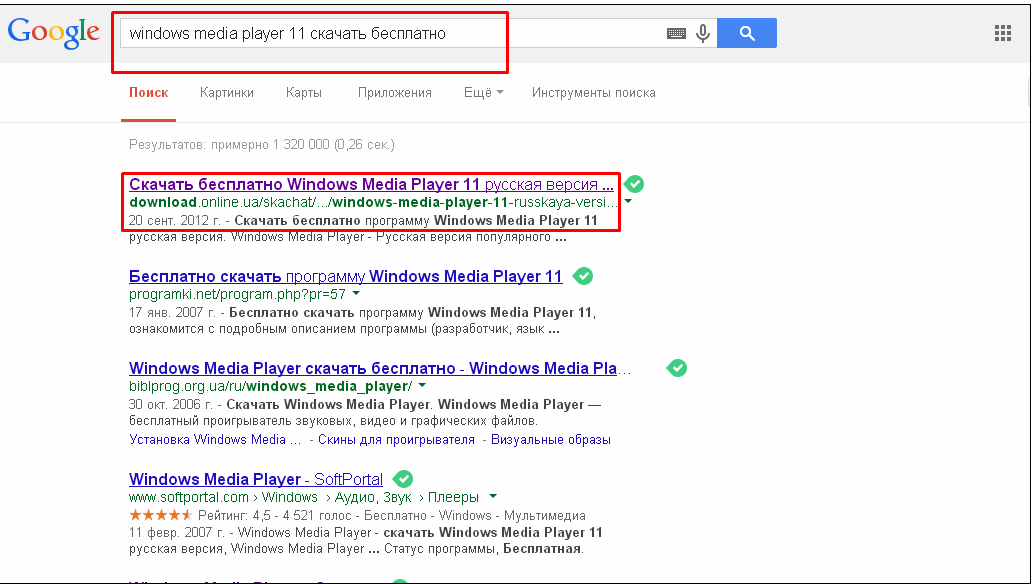
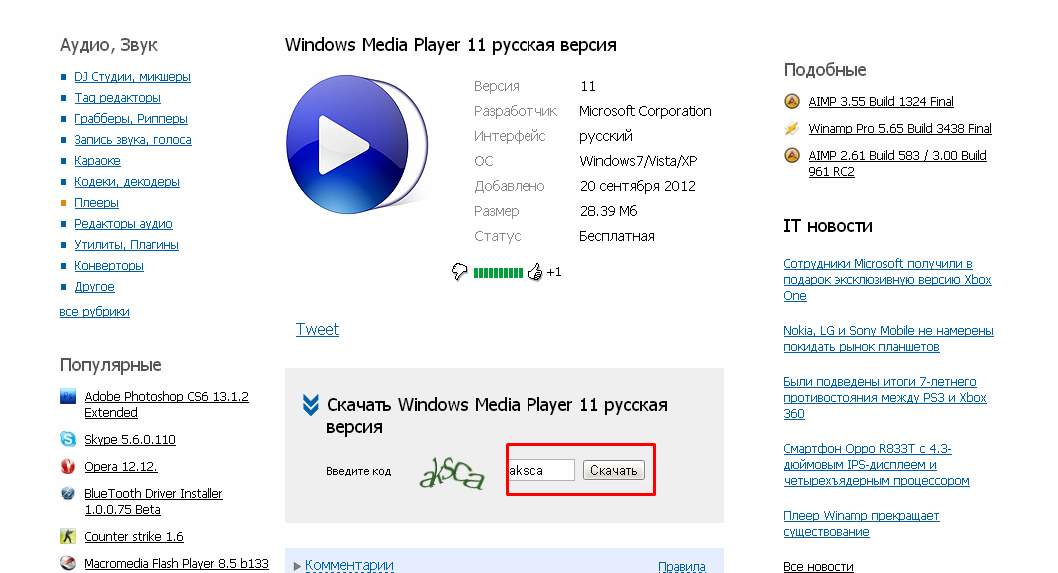
The download itself takes no more than 5 minutes, depending on the speed of the Internet. Next, we go directly to the installation. To do this, double-click the left button on the icon of the downloaded file. On a note, previous version no program is needed when installing WMP. And this, more often than not, is simply impossible. After starting the installer, we see the following window:
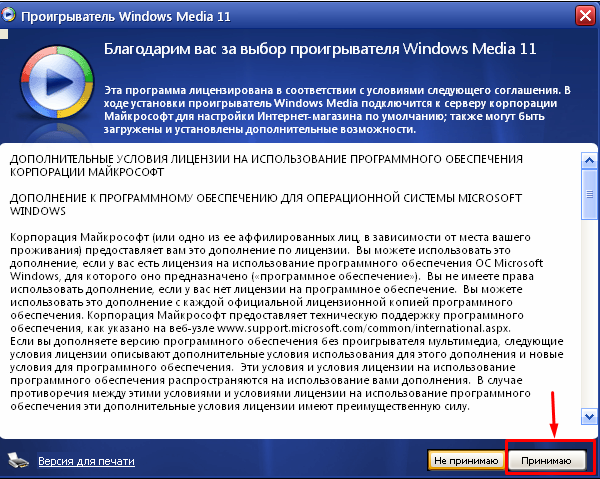
In it, we accept the terms of the agreement and move on. After that, the installation process itself begins. We are waiting for its end.
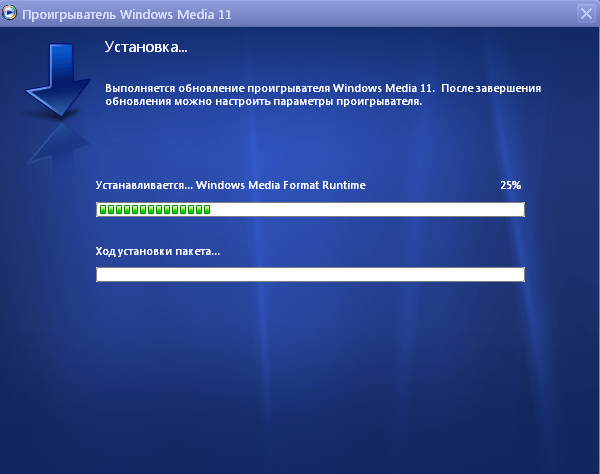
At the end of the installation, you should see the following window.
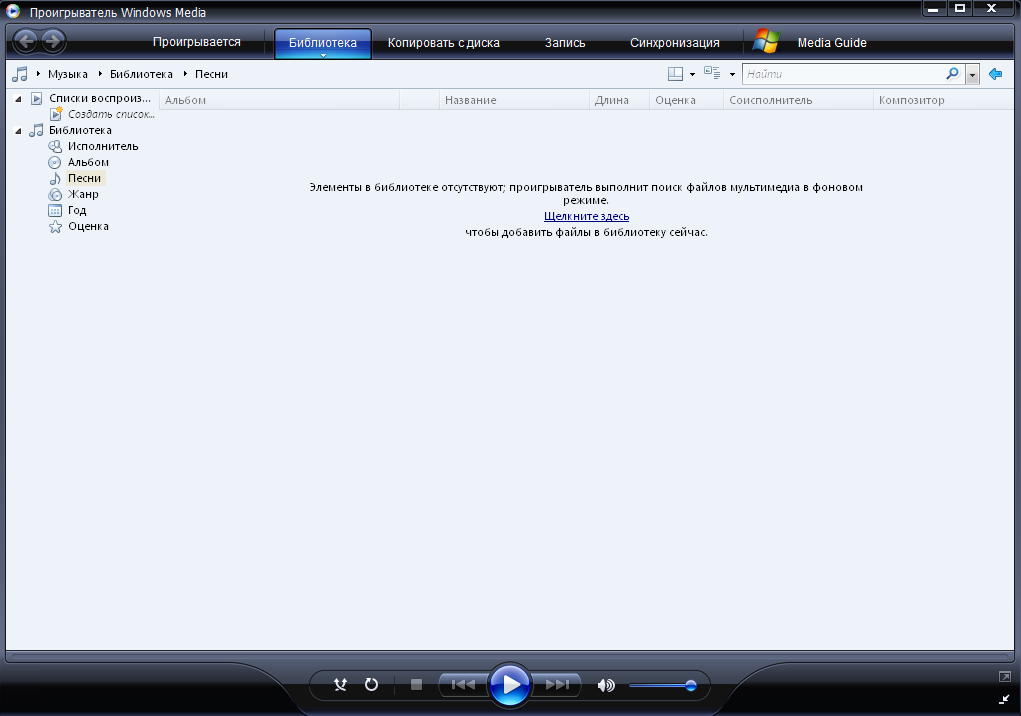
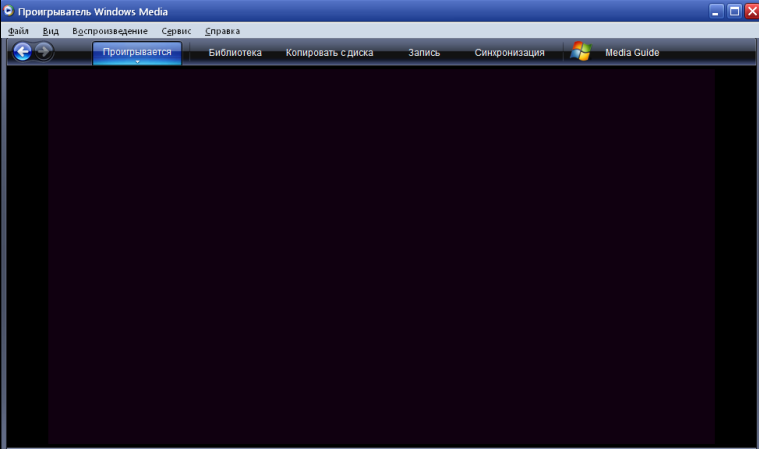
You may also receive a greeting from windows services... In this case, just click "Next". Now let's move on to setting up the player. To open working window programs, go to the "Playing" tab.

Familiarity with the programming interface
On the bottom panel, from left to right, we see the buttons:
- Random order;
- Repetition;
- Video control buttons (stop, rewind, play / pause, fast forward);
- Turns on / off the sound, followed by a slider for adjusting the volume.
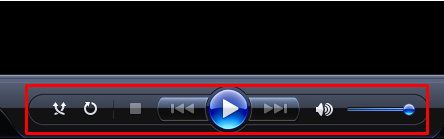
To open the video in full screen, double-click the left mouse button, or click on the corresponding button. The name of the audio file is written in the lower left corner of the player.
Key features of Windows Media Player 11
To go to program management, move the cursor to top panel and press right button mice. After that, a drop-down menu of the program will appear.
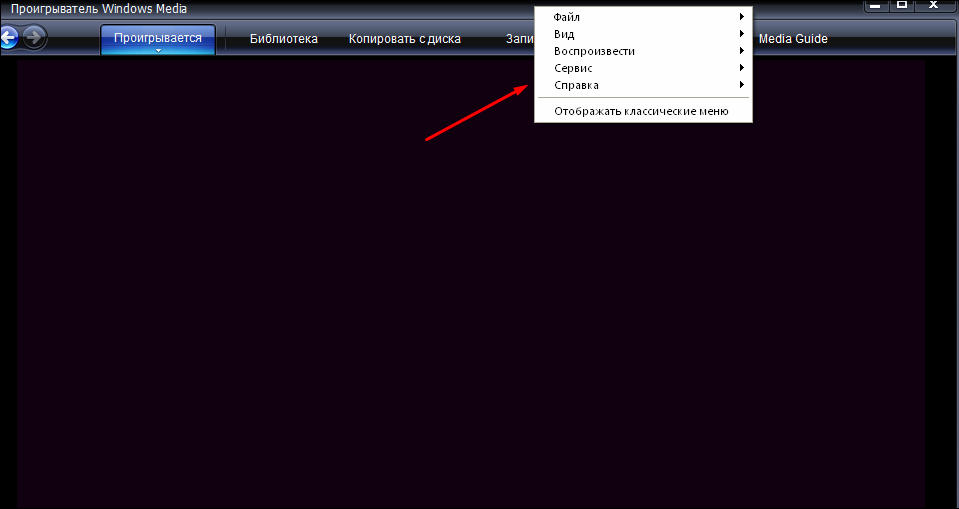
In the "View" tab, you can select the "Classic display" of the player.
You can open the list pane using the Now Playing drop-down menu.

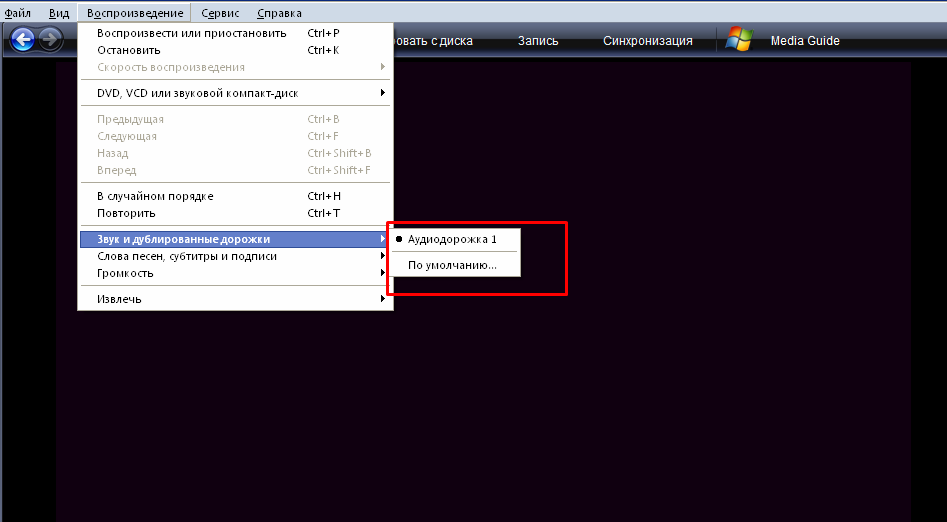
Now let's briefly go over the main functions. You can change the audio track as follows. All additional audio files will be located in the specified area.
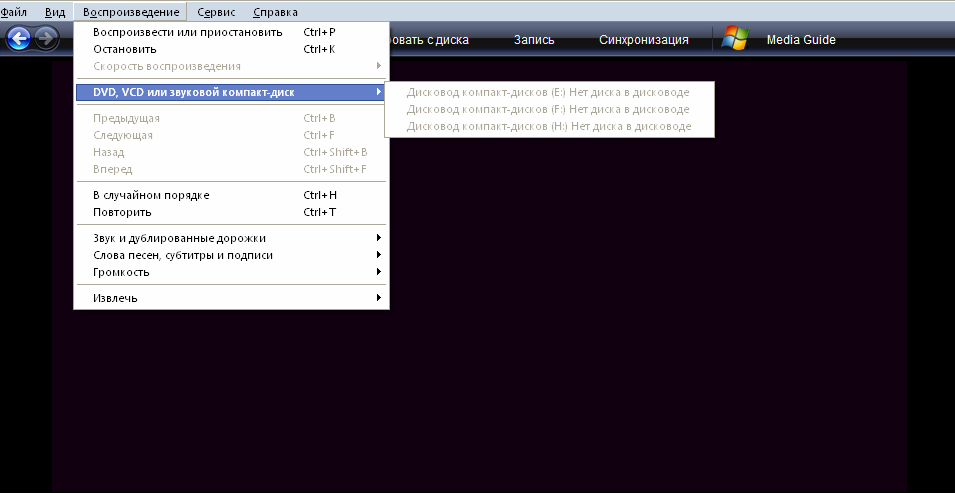
To open a DVD or other disc from an external drive, go to the next tab.
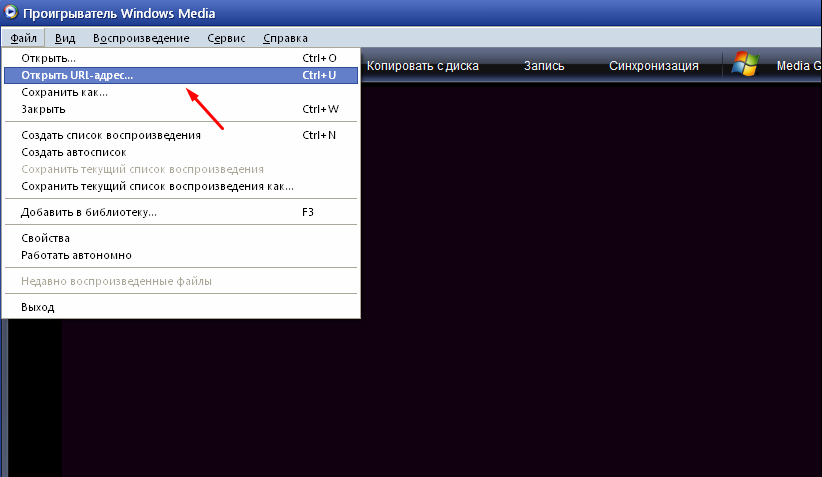
Well, one more interesting function... Through windows media player 11, you can view videos posted on the Internet. To do this, find the video you want and copy its URL. Next, you need to insert it into the following field:
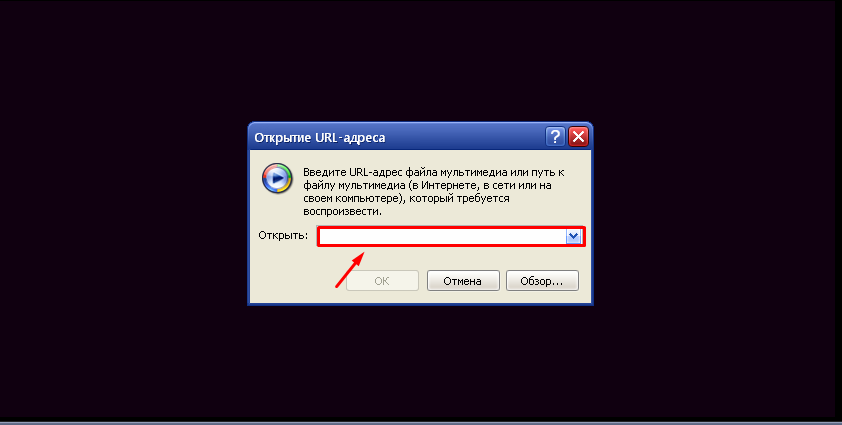
So, we examined the main functionality media player player 11. Hopefully now you can easily watch your favorite movies, videos and shows on your computer. Also, WMP is powerful convenient means for listening to music.
Windows Media Player many are accustomed to perceive as standard player for watching movies and listening to audio. Often they say about it "yes, okay" and download alternative versions with a richer, as they think, set of functions. In fact, it turns out that users simply do not know about full set capabilities of this program. At present windows time The Media Player is, in fact, a whole multimedia center. In addition to standard features audio and video playback, the application allows you to purchase media content on the Internet, sync files with another device, play Flip Video and audio from iTunes. Latest Versions applications differ from the previous ones not only in extended functionality, but also in an improved interface.
Minimalism and noble dark colors look impressive and stylish. The file library opens in the drop-down menu on the left with a single keystroke. User-generated playlists can later be converted, burned to disc, or transferred to a mobile device. The search function is perfectly implemented in the application required file... It is enough to enter the name of the file or part of it, and then select from the correspondences found by the program what you need. Working with media libraries in Windows Media Player is a breeze. To create a playlist, you can simply drag and drop files into the dedicated field. And, interestingly, the list can alternate between music, videos and images. The thumbnail viewer allows you to quickly navigate the abundance of content and choose exactly what you need. You can attach your own covers to the audio files from the images available on the hard disk.
WITH using Windows Media Player you will be able to record seamlessly own disks and convert music (among the formats available for conversion are WMA, WAV and MP3). Synchronization with mobile devices configurable in two clicks, however, testers note some instability in the recognition of connected devices. In general, if any problems arise, it is recommended to try updating the connection process by clicking on the appropriate button. Windows Media Player includes components for viewing streaming video and listening online radio stations... DVD playback function is also available provided installed DVD decoder. It is worth paying attention to the fact that at the first start the program checks the installed on the computer operating system for authenticity.
The fact that the ability to work on a computer today is necessary for everyone and everyone does not raise doubts even among skeptics.
The book you are holding in your hands will be a real friend and helper for those who wish to independently and in a short time master the wisdom of working on personal computer... Written simple and understandable language, it is accessible and easy even for beginners. A large number of concrete examples and visual illustrations contributes to the quick and easy assimilation of the proposed material.
Its consistent presentation as well as detailed step by step description key operations and procedures turn the study of this book into a fascinating process, the result of which will be the ability to communicate "you" with any modern computer.
Description based on example Windows systems XP Professional.
Book:
Sections on this page:
Despite the fact that the default settings, as a rule, are optimal for most users (especially beginners), it is often necessary to change them. In addition, before starting to use any software product, including Windows Media Player, it is recommended to view and, if necessary, edit the settings in order to "adapt" the program to your requirements.
To switch to the player setup mode, use the main menu command Service? Parameters... When it is activated, a window appears on the screen, which is shown in Fig. 8.10.
Rice. 8.10. Windows setup Media Player
As you can see in this figure, the settings window includes several tabs: Turntable, Copy music, Devices, Performance, Multimedia library, File types, Net, etc. On them, depending on the purpose and functionality, the same type of parameters are grouped. In this book, we will look at the most requested ones.
* * *
8.7.1. Customization general parameters
Setting general parameters Windows work Media Player is carried out in the tab Turntable(see fig. 8.10).
Using the parameter checking for updates selection of a suitable test mode Windows updates Media Player. The set value determines the period of time between updates - once a day, once a week or once a month.
It often happens that a video file cannot be played due to the lack of the required codec in this computer. You can turn on the mode in which in similar situations desired codec will be automatically downloaded from the Internet - for this you need to check the box Automatically download codecs.
* * *
If this mode is disabled, the codec will be loaded only after an affirmative answer to the request issued by the program. By default, the Automatically download codecs check box set.
* * *
If the checkbox is checked Launch the player from the Media Guide site, then when you start the player in the taskbar will open the section Media Guide(subject to internet connection). If this check box is cleared (or there is no active Internet connection), then the section will open. Playback(see fig. 8.1).
In skin mode, display on top of all windows- if this box is checked, then windows windows Media Player running in skin mode will always appear in the foreground (that is, on top of other application windows). If the checkbox is checked In cover mode, display the docked window, then in cover mode, a small docked window will be displayed at the bottom right of the screen (we already talked about this above).
When checked Allow splash screen display during playback playback process multimedia files will be accompanied by a splash screen according to the screen settings. Note that when playing video files, enabling this regime doesn't make sense.
Add music files to library during playback- when this checkbox is selected, the files being played will be automatically added to the multimedia library. V in this case the checkbox becomes available Include files from removable media and from shared network folder ; if it is installed, then files that are played not only from hard disk but also with removable media as well as from a network folder.
8.7.2. Configuring Copy Options
Copy settings are configured on the tab Copy music, the contents of which are shown in 8.11.

Rice. 8.11. Configuring Copy Options
In field Music copy folder the path to the directory is displayed where the music files will be copied in the mode Rip from CD... To change the value of this parameter, press the button Change- this will display a window Browse folders, in which, according to the usual Windows rules you need to choose the required path. Under the button File name you can customize the format of the music file name. Necessary actions are performed in the window that is displayed when this button is pressed (Fig. 8.12).
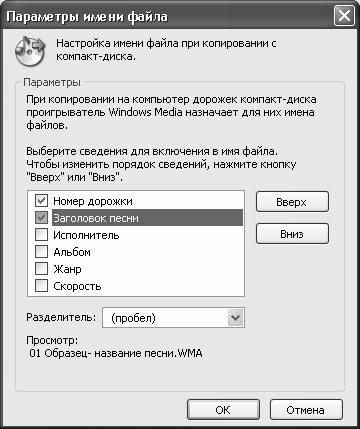
Rice. 8.12. Setting the file name format
In particular, by checking the appropriate boxes, you can specify the information included in the file name ( Track number, Executor etc.), and also in the drop-down list select the type of separator between them. Using the buttons Up and Down the order of the elements of the file name is determined. For example, you can set following formats music file name: 01-Song-Artist. WMA, or Artist_Album_Song_01.WMA, etc. (in this case 01 Is the track number).
In field File format(see fig. 8.11) contains a list of formats music files in which tracks from the CD can be ripped.
If the checkbox is checked Copy-protected music, then reproduction of licensed musical works copied to this computer from CD to Windows format Media will not be possible on other computers. This mechanism is designed to prevent infringement of performers' copyright and to combat the illegal distribution of musical works.
Using the slider Music ripping quality you can specify the optimal compression ratio for music files when copying them in Windows Media format from CD to computer. The more the music file is compressed, the less space on the hard disk it requires, but the sound quality degrades accordingly.
8.7.3. Configuring the devices used for playback and copying
As you know, playback and copying of files is impossible without the use of appropriate devices: CD- or DVD-drive, speakers or headphones, etc. The parameters of the devices used are configured on the tab Devices, the contents of which are shown in Fig. 8.13.

Rice. 8.13. Configuring device parameters
On this tab in the field Devices a list of used devices (CD- or DVD-drives, portable devices etc.) connected to the computer. To go to viewing and editing the parameters of a device, you need to highlight it with the cursor and press the button Properties.
* * *
Button Refresh is intended for updating the list of devices - when you click on it, the computer searches for new devices.
8.7.4. Setting performance parameters
Customization Windows performance Media Player is produced in the tab Performance, which is shown in Fig. 8.14.
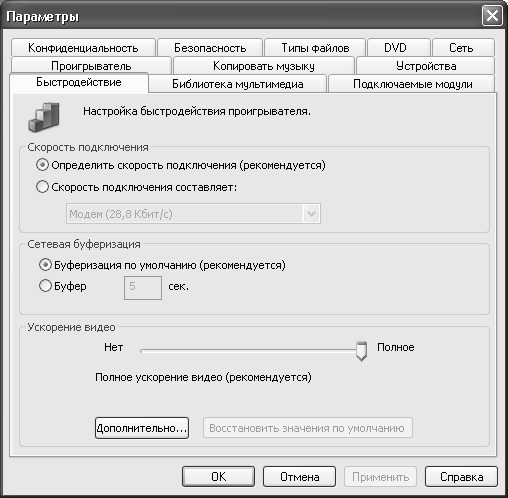
Rice. 8.14. Setting performance parameters
By switch Connection speed you can specify optimal speed modem (Internet connection). At set value Determine your connection speed (recommended) Windows Media Player automatically detects the current connection speed (this mode is offered by default). If the value is selected The connection speed is, then a field is opened for editing, in which a suitable modem speed is selected from the drop-down list.
Switch position Network buffering defines necessary way buffering. Possible values:
Buffer for… sec.- when choosing given value in the field that opens, use the counter buttons or from the keyboard to specify the required buffering time in seconds. It should be borne in mind that the maximum possible value – 60 seconds.
* * *
Using the button Additionally the transition to the setting mode is carried out additional parameters video acceleration. When you click on this button, a window opens on the screen in which the acceleration is configured digital video, mixing settings, etc. The default values of the parameters in this window depend on the position of the slider Video acceleration.
8.7.5. Configuring Media Library Options
About what a multimedia library is in Windows program Media Player and what it is for, we have already said above. However, this element of the player can be customized - for this, the Media Library tab is intended (Fig. 8.15).
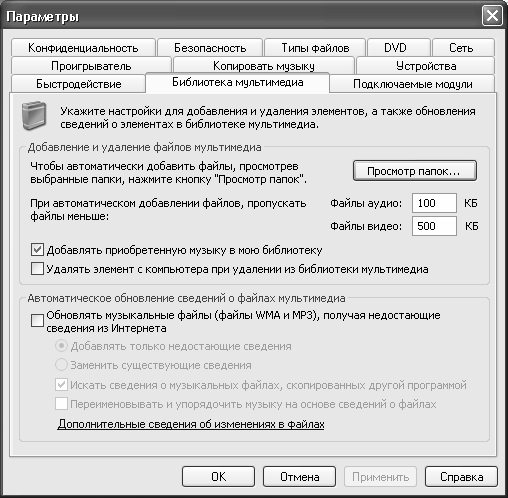
Rice. 8.15. Media Library tab
If this tab is checked Add purchased music to my library then downloaded media files from the Internet are automatically placed in the Media Library. This option is enabled by default.
You can also enable the setting under which objects deleted from the media library will be automatically deleted from the computer as well - for this you need to select the checkbox Remove item from computer when removed from media library.
8.7.6. Setting up visualizations
We have already mentioned above that Windows Media Player implements the ability to use visual images when playing music files. In the program settings mode on the tab Plugins(fig. 8.16) you can add, change or remove visualizations.
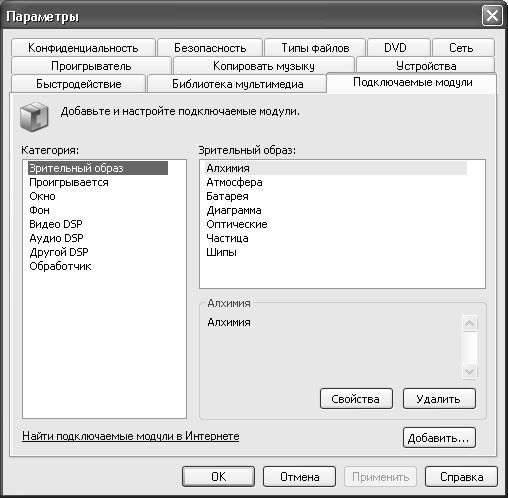
Rice. 8.16. Setting up visualizations
Here in the field Category you need to select a position by clicking the mouse Visual images- as a result, a list of the collections of visual images available in the program will be displayed on the right. The information field immediately below this list displays short description collection visual image where the cursor is positioned in the list.
You can add a new visualization or collection to the list using the button Add... The path to the file of the visual image (collection) is indicated in the window that is displayed when this button is pressed.
To remove a visual image or collection from the list, select the corresponding position with the cursor and press the button Delete... Remember that you can only delete visualizations and collections that were created using the button Add... Otherwise the button Delete unavailable.
The transition to the mode of editing the properties of the current visual image (collection) is carried out using the button Properties... When you press this button, a window appears on the screen. Properties, in which the screen size and the off-screen buffer size are selected from the corresponding drop-down lists. When choosing the required screen size, keep in mind that stretching the image by Full Screen in some cases may distort this image. When choosing the required size of the off-screen buffer, keep in mind that the larger the screen buffer, the more computer resources are required for high-quality image reproduction. In general, it is not worth changing these parameters without special need.
8.7.7. Selecting the file types that the player opens by default
You can independently define the media files that will open by default (that is, when you start double click mouse) with Windows Media Player. To do this, you need to open the tab File types(fig. 8.17).
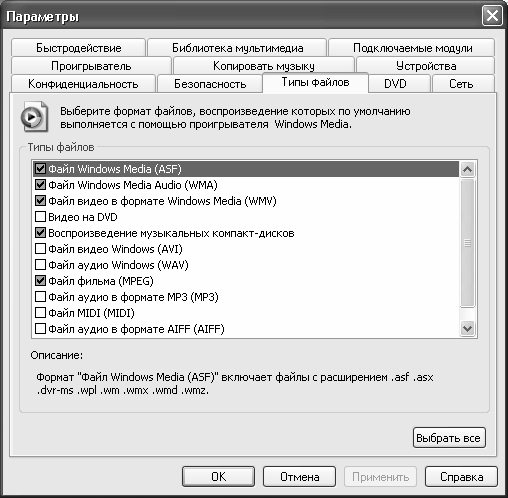
Rice. 8.17. Selecting file types
On this tab in the field File types a list of media file types is displayed, and below it is an information field Description, which provides a brief description of the file type on which the cursor is positioned in the list.
To select the required file type, mark it with the checkbox. By default, some of the selected checkboxes are dimmed - this means that Windows Media Player will be able to play only part of the files. this format... To provide the player full access to these files, you should click on this checkbox - as a result, it will take its normal form.
By pressing the button Choose all v this list all file types will be selected.
8.7.8. Configuring Networking
If you intend to use the player in local network, you can view and, if necessary, edit the contents of the tab Net(fig. 8.18). Here you define the parameters of the protocols and proxy server that will be used by the player when receiving multimedia files.
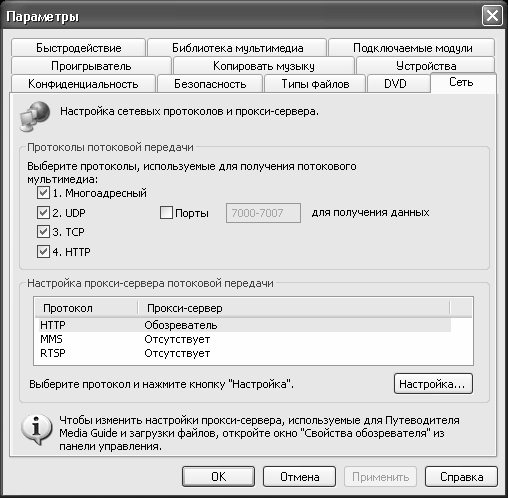
Rice. 8.18. Configuring Network Settings
In the highlighted area Protocols by selecting the appropriate checkboxes, the Internet protocols that will be used to receive streaming media are indicated. By default, all checkboxes are checked: Multicast, UDP, TCP and NTTR... When you check the box Ports in the right margin to get data specifies the port through which streaming content is directed. The use of this mode makes sense only when using the protocol UDP so if the checkbox UDP removed, parameter Ports for receiving data becomes unavailable. In the highlighted area Setting up a proxy server the parameters of interaction of each protocol with the proxy server are determined. When the button is pressed Customization a window is displayed on the screen Protocol setting, in which the proxy server is configured for the current protocol. The default settings in this window depend on the selected protocol. For example, for the HTTP protocol in this window, the mode is set Web Browser Proxy Settings where the player uses the same settings as the Internet browser to access the Internet.


