Using email to transfer large files to your friends or colleagues can be a hassle for either party. We offer you 10 services that will make the process of transferring large files easier and faster.
There is no need to reinvent the wheel, since there are already quite a lot of services created specifically for transferring large files, including the possibility of using the FTP protocol or applications for mobile devices.
1.WeTransfer
WeTransfer is a minimalist service that allows you to transfer files up to 2 GB in size. To transfer files to your friends or colleagues, you only need to upload the files, indicate your email and the recipient’s email, and write a message. After which the recipient will receive a letter stating that they have been sent files that can be downloaded by clicking on the Download button directly from the letter.
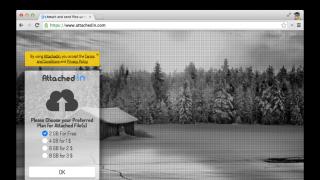
2. Attached

With this service, you can also send files up to 2 GB in size, and no registration is required. A special feature of Attachedin is the ability to send files to multiple recipients at the same time.
3. Sendspace

Sendspace was launched in 2005 and has file transfer tracking functionality. If for some reason you lose files, the service will help you find them. The service also has a mobile application, where you can send large files directly from your smartphone, for example, videos.
4. DropSend

DropSend can send large files up to 2GB in size, making it ideal for transferring images, music, and videos. The service supports 56bit AES Security technology. In order to learn more about the capabilities of the service, the developers suggest watching an introductory video about all the capabilities of DropSend.
5. WikiSend

WikiSend is a free file transfer service that does not require registration. You just need to upload the necessary files, which receive their own unique links. Files for them will be available within seven days. When creating an account on the service, you can protect your files with a password.
The disadvantage of the service is the allowable size of uploaded files - it is only 100 MB, which is very small by modern standards.
6.MediaFire

MediaFire is another service for transferring files whose size does not exceed 100 MB. It is also possible to use paid accounts, which increase the total storage size (10 GB is available in the free version). The service has both applications for Windows, Linux and Mac OS, as well as a mobile application.
7.Senduit

8. Dropbox

Dropbox is one of the most popular services for transferring and cloud storage of files. You must register to start using the service, and you can also download applications for mobile devices and desktop systems so that regular folders on your computer are automatically synchronized with your cloud.
There are no restrictions on the size of the uploaded file. In this case, only the size of your storage is affected, which depends on the type of account.
9.Box

With Box, you can share files of any size and get 5GB of free cloud storage. The service boasts enterprise clients such as Procter & Gamble, Stanford University, Skype and LinkedIn.
The article was amended on July 24. 17.
20.11.15 19.5KA file sharing service or file hosting is a service that provides users with a place to store and synchronize files and ensures constant access to them on the network. The Yandex file hosting service has an excellent reputation.
File sharing services from Yandex - history of development
The Yandex.Disk cloud service is designed to store data on servers, as well as synchronize and exchange it with other users. The Yandex.Disk file sharing service works on the principle of synchronizing data between different devices. Since 2012, registration of new users has been carried out exclusively by invitation. Today, anyone can use a file hosting service.
Before the launch of the Yandex.Disk project, Yandex People file sharing service was responsible for the safety of user files. The service allowed storing documents up to 5 GB in size. However, since January 2013 it was closed, and all tools for downloading and exchanging data became available in the Yandex.Disk cloud storage. Yandex.People itself moved to the uCoz service platform. The resource addresses remain the same and the content is preserved.
The main competitors of the service are Google Drive, Dropbox, [email protected]:
Advantages of using Yandex.Disk:
- No need to download files to your hard drive or flash drive. It is enough to save the document in the cloud, and the storage period is unlimited. After a file is posted on the file hosting service, the user will receive a link to it. This link can be left on the website, posted on a forum, social network, chat, etc. In this case, your file will be available to everyone who sees this link;
- Downloading files from a cloud drive occurs without speed limits;
- Access to files can be configured for each user individually;
- The ability to automatically download photos and video files from a smartphone, camera, memory cards, etc.;
- There are special applications that allow you to recognize scanned text, there is a file manager, a backup utility, etc.:
File sharing service Yandex.Disk - basic information
The idea of creating cloud data storage turned out to be very promising. Initially it was embodied in the product Dropbox, later [email protected] and OneDrive ( formerly known as SkyDrive) , however, the capabilities of the Yandex.Disk file sharing service are truly impressive. Several users can work with documents located in the cloud at once, no matter where they are located or from what devices they access the network. Users can view the downloaded file directly in the cloud storage without downloading it.
Operational synchronization and eliminating the risk of information loss perfectly explain the rapidly growing popularity of this service.
Note that Yandex.Disk is free, but for a fee you can increase your disk space to store large files. By default, the service provides 10 GB of space, forever. And if you invite users, your disk space can reach 20 GB.
Moreover, for each friend you are given 512 MB. For promotions with partners you can get up to 50 GB. For example, in April 2014, the campaign “ 50 GB for smartphone owners on Yandex.Kit" The end date of the promotion is April 9, 2019. By purchasing a smartphone on Yandex.Kit and logging in on the device, you automatically receive additional disk space ( 50 GB for two years from the date of activation).
There are also paid packages ( +10GB – 30 rubles per month; +100 GB will cost 150 rubles per month and 1 TB can be obtained if you pay 900 rubles per month).
It is also possible to integrate Yandex Disk into Microsoft Office 2013 and automatically download video files and photos from external media and digital cameras. In this case, the user receives an additional 32 GB of free space for a period of 6 months. Every year, the Yandex Disk file hosting service becomes more and more functional:
How to upload a file to the Yandex file hosting service. Disk?
File upload options:
The application allows you to save existing data or take photos, videos, screenshots and save them immediately to Yandex. Disk. The mobile version has acquired a certain resemblance to Dropbox, especially after it introduced the function of automatically synchronizing what the user captured on his tablet or smartphone.
When you first launch the application, you will be asked to activate auto-upload and upload the file to a file sharing service in the cloud folder “Camera", which is duplicated on your PC, which allows you to quickly download the captured photos to your computer:
Despite the fact that the installation is standard, the process suggests installing Yandex.Browser, making Yandex the main page in your browsers, and making Yandex itself the default search. All these checkboxes can be unchecked.
As a result, in the tray ( bottom right of the screen) the program shortcut will appear. A blue circle will be visible during the synchronization process. When the files are synchronized, a green check mark will appear. The location of the local Yandex.Disk folder, which is used for synchronizing and storing data, can be changed in the application settings.
How to copy someone else's file?
If you have a link to a file that is stored on Yandex.Disk, you can copy it to your Disk. To do this, follow the link and click on the button “ Save to Yandex.Disk" Immediately after this, the file will begin moving to the downloads folder of your Yandex.Disk. You can make downloaded files public or, conversely, restrict access to them.
You can make a file public by selecting an item from the right-click menu, “ copy public link».
This way you can publish any data stored on your computer. As soon as you perform the above manipulations, the files will automatically go to cloud storage, and you will receive a link that can be published on websites or sent to users:
How to share a file?
By sharing a folder, you allow others to see its contents. The moment you give selected users access to the contents of the folder, it will appear in their Yandex.Disk. To do this, you just need to select a folder and click on “ Make the folder public».
Yandex.Disk allows you to create new links to the same file. This function is useful if it is necessary for an information product to be distributed for a fee. To replace, simply delete the public link and generate it again - a new link will appear.
Before using a file hosting service, especially if you are working with large files, make sure you have free space in the cloud.
If you decide to delete a file, then after it goes to the trash, the free space in the cloud storage will not increase. To get more space, you need to empty the trash:
Is it possible to create your own file hosting service and is it worth it?
Everyone has heard that using such services you can make good money. However, before creating a file hosting service, you should carefully weigh the pros and cons. For example, not so long ago, file hosting service Turbobit, in addition to participating in an affiliate program, offered users the opportunity to create their own file hosting service.
The service will be hosted on the user’s domain, and it will be possible not only to send files via a file hosting service, but also to attract visitors. The technical part is taken care of by Turbobit.net.
Advantages of creating a file hosting service:
- Possibility of receiving additional income;
- Ability to customize the design of the file hosting service in accordance with the style of your own resource;
- Promotion of the main site.
Flaws:
- The need to moderate normal material from XXX;
- The need to purchase a powerful server, which can cost several thousand dollars.
You may also need the services of a programmer or even a lawyer ( for example, in case of disputes regarding content rights).
How to send a large file via the Yandex.Disk file sharing service?
Before transferring a large file via a file hosting service, check the amount of free space remaining on the virtual disk. To do this, go to the Yandex.Disk settings and then to “Account”.
You can also get to the cloud storage folder through “My Computer”. Archiving will speed up the process of downloading large files. Archiving will make it possible to reduce the weight of a file, reduce the time it takes to upload it to a cloud service and then download it to a computer.
Good bad
The essence of the question “How to send a large file?” boils down to the fact that we have to send a file, the size of which may exceed the maximum allowable limit of the service (or program) with which we are sending the “heavy” file.
Counting on the Russian “maybe”, you can try to send a large file in any way known to you. If the file can be sent, then everything is great!
Otherwise, you will have to try other services (or programs) in order to send a large file. First we need to decide how big our file is.
If you right-click on the file icon, a context menu will appear, which will list everything that can be done with the selected file (Fig. 1):
Rice. 1 File properties
We are interested in the file properties, so click on the “Properties” command:

Rice. 2 Determine the file size
Thus, we determine that the Fotoknigi file size is 17.1. This is a small file in size and you can use regular email to send it.
How to send a large file (up to 50 GB) using DropMeFiles?
DropMeFiles is a free instant file sharing service:
Advantages of the dropmefiles service:
- Free
- Without registering
- You can send files up to 50 Gigabytes
Disadvantages of the dropmefiles service:
- File storage period limit – 14 days
But DropMeFiles is designed to share files, NOT store them, so you can send and receive large files within 14 days.

Rice. 3 DropMeFiles – free instant file sharing service
- 1st method. We reduce the window with the DropMeFiles service to about half the screen. On the second half of the screen, open a window with the folder in which our file is stored. Grabbing the file with the left mouse button, drag it (almost like a cat drags its kitten “by the scruff of the neck”) to the DropMeFiles service and release the mouse inside the circle with the inscription “Drag files here.”
- 2nd method. On the DropMeFiles service, move the mouse cursor to the inscription “Drag files here,” after which this inscription turns into another: “or click to select files.” Click on it and in the window that appears, we will use the opportunity to find a file to transfer on your computer (steps 1-3 in Fig. 4):

Rice. 4 Open file for upload to DropMeFiles
We find our file, click on the file icon (number 1 in Fig. 4), after which the file name automatically appears in the “File name” line (number 2 in Fig. 4). Click on the “Open” button for the selected file and the file is immediately uploaded from your computer to the DropMeFiles service.

Rice. 5 File uploaded to DropMeFiles
Fill in fields 1 and 2 in Fig. 5:
- In field 1, enter the email address of the person to whom the file is being sent. Instead of an email, you can send an SMS message (within Russia).
- In field 2, enter your name or your e-mail so that it is clear who the message came from. When fields 1 and 2 in Fig. 3 are filled in, click on the arrow (circled in a red frame in Fig. 5).
When sending by e-mail, we receive the following message on the screen (Fig. 6):

Rice. 6 Message about sending a file from DropMeFiles
How can a friend receive a file from you that was transferred to them using DropMeFiles?
Your friend will receive an email from you with the subject “You have been sent files to DropMeFiles” with the following content:
"Your files have been sent to DropMeFiles
Sender: Nadezhda
To download them follow the link:
http://dropmefiles.com/UCYzv
Link expires 01/29/2013 10:08"
A friend follows the link specified in the letter and sees the same picture as in Fig. 7:

Rice. 7 Download file from DropMeFiles
By clicking on the “Download All” button, a friend downloads a file (or files) from the DropMeFiles service to his computer, and the files are downloaded at high speed.
How to send a large file (up to 20 GB) using Yandex?
As of October 2014, the maximum allowable size of one file that can be attached to one Yandex letter is 30 Megabytes.
If you need to attach several files to a Yandex letter, then their total maximum allowed size is also 30 Megabytes. Technical aspects of attaching a file are outlined in the article “”.
Below is information from the official website help.yandex.ru/mail/letter/attachments.xml:
The maximum size of attachments for one letter is 30 MB.
If the size of attachments exceeds the allowed size, the files will be automatically uploaded to your Yandex.Disk (folder Mail attachments → Sent as links to Disk).
Since January 2013 The Yandex People file hosting service was closed. If you have an account (mail) on Yandex, now use Yandex Disk: with its help you can upload files up to 20 Gigabytes, the storage period of files is now NOT limited.
How to send a large file (up to 10 GB) using Mail.ru?
When writing a letter, you can attach up to 100 files to the letter, each of which is up to 2 GB in size. How to attach a file to a letter is described.
To send files when using Mail ru mail, you can use the Mail ru Cloud, more about the Cloud
The developers of the Mail ru project followed the same path as the Yandex developers in the sense that almost all of their users are forced to use cloud services, in particular the Mail ru Cloud.
MailRu developers write the following about large files that users attach to their letters:
When you send files larger than 25 MB, they are uploaded to the cloud and sent to the recipient as a link. Such files are marked with an icon and have a certain storage period - 30 days from the date of posting if they are more than 5 MB, and a year if they are 5 MB or less.
When you attach several files to an email, Mail calculates their weight. Some files with a total volume of up to 25 MB are attached to the letter itself - they are stored in Mail while the letter is stored. The remaining files that are not included in this limit are uploaded to the cloud, marked with an icon and received as a link. They have a limited storage period: if all files not included in the limit are up to 5 MB, they are stored for a year, more than 5 MB - 30 days.
Receive the latest computer literacy articles directly to your inbox.
Already more 3,000 subscribers
Online sizes. In fact, there are several ways here. They are all good in their own way. Some, however, depend on the characteristics of your connection and the recipient. However, this is not a hindrance for us. We will try to cover all the methods that can be taken into account.
Via Skype
Well, if you are thinking about how to transfer a large file over the Internet, then you can use a relatively convenient and fast method. For example, if your friend is online, and your World Wide Web speeds are quite fast, then you can try making a transfer via Skype.
To do this, simply drag the required object into the field where you are writing a message, and then wait for your interlocutor’s response. It will accept the request and the sending will begin. True, this method is not particularly popular. Different types of files take different amounts of time to transfer. If you are going to transfer about 10-15 GB, or even more, then you can leave this scenario and not think about it at all.
If you are thinking about how to send a large file to your interlocutor (for example, a photo or video), then you can still try this method. When it comes to toys or anything else, it's best to stay away from it. Instead, we will offer you a couple more ways.

Archiving
Well, now it’s worth considering with you such an option as archiving. He can help answer you how to transfer a large file over the Internet. Moreover, you can put several documents into one archive. This will allow you to transfer several objects at once.
The thing is that archiving can compress the size of transferred documents. You can then, for example, download the resulting file into an email and send it to a friend. True, here we are talking about medium-sized documents. That is, it is useless to download the game.
Just select the files you need and then right-click. Click on "Add to Archive", and then specify the desired name of the result, as well as its location. This way you can combine different types of files in one object. After the process is completed, upload the resulting archive to Skype or email. That's all. True, the listed methods are somewhat similar. Let's look at more effective options.
File sharing
Well, now let's look at a more interesting way. Moreover, it is one of the most popular. If you are thinking about how to transfer a large file over the Internet, you can try using a variety of file storage services.

In order for the user to have this opportunity, he needs to register on a special “exchanger” website. The most popular now: “Deposit Files”, “Mega”, “Rapidshara”, “Lightbeat”, “Turbobit”. Once you have decided where exactly you will go, all you need to do is complete a short registration. You will receive an account in which you will be able to upload documents. All you need to do is upload a large file and receive a link to access it. Next, you send the address to your friend, and he downloads the document.
It is best to use data archiving before uploading. This will help speed up the process of downloading the final document and make it a little smaller. Sometimes this approach can save 1-2 GB.
True, this method has a number of disadvantages. The first is a bunch of advertising when downloading a document. Unfortunately, there is no escape from it. The second disadvantage is the low speed of downloading a file from a friend when choosing a free method. So let's see what else we can do.
Cloud
Another rather interesting way is to use so-called cloud services for For example, you can use Google. Files from there, as users have noticed, are downloaded quite quickly. However, you can use Yandex.Disk as a “learning place”. It is with him that we will now work.

If you are thinking about how to send a large file to your friend, then you can completely use this service. To do this, you will have to register an account, and then “upload” the object we need there. As a rule, there are also small restrictions here. For example, a large size is available for free, not exceeding 10 GB. This is enough for a small toy. In addition, you will not be able to store many documents. Each cloud has its own limits on the total volume. In principle, for paid services you can increase the limit to 1 TB.
When you upload the document, you will receive a special link. Your friends and acquaintances will be able to download the file using it. You just need to give the download address. Nothing complicated. But how quickly the transfer to a friend’s computer takes place depends on his Internet connection. However, these are not all the ways. Let's see how to quickly transfer a file over the Internet without clouds.
Special programs
Now progress has reached the point that each user has the opportunity to use a variety of services for their own purposes. If you are wondering how to transfer a large file over the Internet (up to 5 GB inclusive), then you can use an interesting utility. It's called "File Dropped".
This service is something like our usual “Rapidballs”. It’s just that working here is several times easier. Moreover, you will not have to register. First of all, go to the main page of the site. A window will appear in front of you, in which you will be informed that sending large files (up to 5 GB) is carried out in literally 2 steps. The first is uploading the document to the server, the second is receiving the final link for you and your friends.

Click "Upload". Now find the required document and download it. When the process is complete, in a special window you will receive an address where you can find your file. Then you can copy it and pass it on to your friends. They will figure out how to get the document. However, things are not always that simple. And, not everyone is happy with the constant exchange of links. Thus, we have to think what else can be done.
Torrent
So we have come to perhaps the most popular and widespread method, which will allow us to quickly transfer and receive large files. This is nothing more than a torrent. The point is that we will pay special attention to this option. We will analyze in detail how and what needs to be done to get maximum efficiency.
In general, now this particular method is used everywhere to transfer huge and weighty documents. Professional programs and new computer games are especially popular here. The download speed increases with the number of users who download the file. That is, you may not even have time to blink your eyes before the document is already in the operating system. Very convenient and simple.
In order for you to be able to work with torrents, you will need a special program. You can find several such applications on the World Wide Web. We will try UTorrent in action. Thus, let's begin our work.
Preliminary work
Well, now we will prepare our file for sending and, in fact, for receiving. First of all, we will need to download and install the torrent program. As we have already said, we will review Utorrent with you. We “get” it from the World Wide Web and install it on our computer. Now you just need to launch the application.

You'll find yourself in a program where there's nothing special on the right side right now. This is where the documents that we have “uploaded” and downloaded will be displayed. Let's start working with you as soon as possible. Click on "file" and then "create new torrent". An object selection menu will open in front of you. Here you can either add a specific document or folder. There are separate buttons for this idea.
Next, when you find the required file, simply click on “Create and save to...”. A window will open in front of you, where you just need to click “yes” and then select the location where the so-called torrent file will be placed (we will learn how to work with it later). Once you have completed this task, you can move on to the next stage.
We make you work
Now we’ll see how to transfer a large file over the Internet using the torrent we just created. Let's start the Utorrent client again. Click on "File" and then click on "Add New Torrent". Next, a familiar window will appear in which we will have to find the previously created document. Found it? Then select it and click on "Open".
Look at the program window. On the right side there will be a line with the name of your document, as well as the inscription “Distributed”. This is a sign of right action. Now right-click on the line and select “Force Run” from the list that opens. All you need now is to transfer the created small torrent file (which we just downloaded) to your friend. He will save it for himself, and then use the same torrent client to download it.
For the lazy
True, if you yourself downloaded a game or program using a torrent tracker, then most likely the most convenient and fastest option would be the following move: find the address from which you downloaded the torrent, and then pass the link to a friend.

Ultimately, your friend will download this or that document faster than you could imagine, especially if we are talking about a toy. Each downloader gives others a little download speed. Due to this, users do not have to wait for several days in front of the computer waiting for the result.
If you are used to using the Mail ru service, you have mail there, then it will be “more convenient” for you to upload files to Mail. Until 2015, the Mail ru file sharing service was intended for this purpose. Since October 2014, the rules of the game with files on Mail.ru have changed.
Mail ru file sharing service is CLOSED. Instead, the Mail ru Cloud now works.
To work with files, I suggest using any of three services:
- Cloud Mail ru,
- dropmefiles.com
- Yandex.Disk.
Let's talk about each of them in order.
1. Cloud Mail ru
You can use the Mailru Cloud to, for example, exchange files with other users. You can also store your files (videos, photos, etc.) in the Cloud. For this you need Mail ru mail.
I wrote in detail about how to use the Cloud Mailru service here:
The Mail ru file hosting service was always located at the following link: files.mail.ru.
Rice. 0 Mail ru files are moving to the Mail ru Cloud
If you previously had your own files in the Mail.ru File Sharing Service, then in Fig. 0 it is clear that they have not disappeared anywhere.
number 1 in Fig. 0 – reports that previously downloaded files are still located in the “My Files” folder.
Number 2 in Fig. 0 – redirects Mail.ru to the Cloud, offering “Upload file to the Cloud”:
2. Service dropmefiles.com
Yandex also previously had its own File Sharing Service - it was convenient for those who have Yandex.Mail. was closed even earlier than the Mail ru file sharing service; more precisely, it has been closed since January 2013.
Instead of the closed Yandex File Sharing Service, you are now welcome to the Yandex cloud service, which is called . You will need mail in Yandex.
Everything below is now HISTORY
File sharing service Mile rukut into oblivion . I left the material about him (below) simply as a chronicle of IT history. Perhaps someone will be interested in finding out what happened before (there was the Mail ru File Sharing Service), and, if desired, compare it with what appeared in its place (now the Mail ru Cloud).
Attention! Below are instructions on how to use the Mail ru File Sharing Service, which is now NOT relevant in connection with the move of the File Sharing Service to the Mail ru Cloud.
Who am I: an authorized or unauthorized MailRu user?
First, let's define who we are:
- authorized (that is, registered on Mail.ru. Such “law-abiding” users are considered to be those who have their own mailbox on Mail.ru) or
- unauthorized users (that is, unregistered ones, those about whom in Moscow they say “have come in large numbers”).
What's better:
- authorized user or
- unauthorized?
First of all, it depends on what tasks you set for yourself. If you need to “quickly” upload a file to Mail and urgently send a link to it, then the option of an unauthorized user is quite suitable.
If you are serious, you are going to upload files to Mail, store them for more or less a long time, manage files, including deleting unnecessary files - such a serious approach requires, of course, the option of an authorized user with his own mailbox on Mail.ru.
1 (KB)=1024 bytes,
1 Megabyte (MB)=1024kb,
100 MB=1024x100= 102400 KB,
1 Gigabyte (GB) = 1024 MB,
10 Gigabytes = 1024x10 MB = 10240 MB.
Let's compare 100 MB and 10 GB, that is, in megabytes it is 100 MB and 10240 MB, the difference is almost 100 times.
Now the facts on shelf life:
- for an unauthorized user, files on the Mail ru file sharing service are stored for 5 days, and then “look for the wind in the field” - the files will be automatically deleted;
- For an authorized user, files are stored for 30 days and you can then renew them every month if you don’t forget.
How to access the Mail ru file sharing service?
To access the Mail ru file hosting service, you can:
- In the search bar of your browser, type “mail file hosting service” and click on the first link;
- or type files.mail.ru in the address bar of your browser.
As a result, you are taken to the Mail ru file hosting service:

Rice. 1 Go to the file sharing service Mail ru
If you enter the login (red number 1 in Fig. 1) and password (red number 2 in Fig. 1) from your Mail ru mail, then you will become an authorized user on Mail ru, and the file hosting service will look like this for you:

If you are an UNauthorized user on Mail.ru, then the file hosting service will look like this for you: 
There is a children's game: find as many differences as possible between two pictures. Let's play it. The fundamental difference in using the Mail ru file hosting service for an authorized and unauthorized user, as can be seen from the two screenshots above, is:
- in the file size that can be downloaded,
- in the top menu, where you can immediately send files by mail using the “Send/Receive Files” button,
- as well as in those opportunities that are provided in the left column. The authorized user, judging by the left column, can manage his files, and the Unauthorized user is invited to register in the left column.
How to upload files to Mail?
- click on the “Upload file” button,
- the “File Upload” window will open, in which you need to find the file to download on your PC,
- click on it with the mouse, after which the name of the desired file will appear in the “File name” line,
- Finally, click on the “Open” button:

Then the file is uploaded to the Mail ru file sharing service and the “Get link” button becomes active, that is, clickable. By clicking on the “Get link” button, we will receive a link like: files.mail.ru/SS3TPO.
- highlight the link (as they sometimes say, color it blue),
- press CTRL+C, the link goes to the clipboard (outwardly this does not appear to the user in any way, he does not notice anything on his PC),
- go to the letter or comment on the forum, click the mouse to place the cursor at the desired insertion point,
- press hot keys CTRL+V. The link to download the file has been inserted.
Everything that is described below is available only to registered (authorized, that is, having their own mail) Mail ru users.
After you click on the “Get link” button, the link automatically goes to the “Sent” folder with the heading “Public sending”:

How do I know that a file has been deleted from the Mail ru file sharing service?
If you uploaded your file as a registered Mail.ru user, then at the end of 30 days you will receive a letter in your mail with approximately the following content:
“Hello, dear Nadezhda Shirobokova.
Due to the expiration of the storage period, your files hosted on the [email protected] project:
- At the start of computer literacy.pdf
will be automatically deleted after 1 day.
You can extend the storage of files for another 30 days by restoring them from the “Deleted Items” folder.
Sincerely,
Project administration [email protected]"
What can you do with files on the Mail ru file sharing service?
As I already mentioned, a registered user can manage his files. By clicking on the “Downloaded” button in the left column (below), you can select the file with a checkmark in the right window, and then:
- rename it (click on the pencil icon next to the file name),
- download the file (click on the floppy disk next to the file name),
- delete a file (click on the red cross next to the file name and the file will be moved to the “Deleted Items” folder):

How to recover a file from the Deleted Items folder?
To restore a file from the “Deleted Items” folder, click on the “Deleted Items” button, the deleted file appears and next to it click on the small blue “Recover” arrow to the left of the cross.
Still have questions? He who seeks will find!
Of course, I haven’t covered all the issues related to working with the Mail ru file sharing service. Registered user Mail, if necessary, can find answers to many questions in the left column of the file hosting service “Frequently Asked Questions” or ask me in the comments to this article.
Computer Literacy Exercise:
Theory without practice goes out of your head as quickly as the morning fog. I offer you, dear reader:
- put theory into practice and
- upload the file from your PC to the Mail ru file hosting service,
- get a link to your file on a file hosting service and .
Already more 3,000 subscribers.