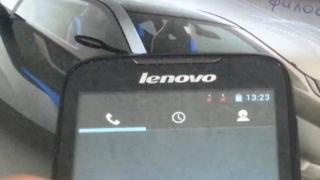
Android is a popular operating system for smartphones and tablets. Like any other OS, it requires cleaning the memory, resetting, and restoring some applications and items. The operating system of the phone already has a program for performing these functions. It's about the Android System Recovery 3e menu. The instructions contain a description of it, as well as information on how to use the application.
Recovery Android menu (translation: Android recovery) - BIOS (BIOS) of a smartphone or tablet. That is, this is a basic I / O system that works even if the main OS is damaged, and therefore it is very important to master the use of Recovery. Even if other applications are installed to clear the memory of a mobile device, as well as restore it, if the basic elements of the system are damaged, you can only restore the device using this function.
The BIOS menu includes a huge number of items and makes it possible to both update the smartphone and correct errors in the operation of the device, reset the settings to factory settings, etc. However, for many users, the problem will be that the interface of the Recovery system is completely in English. Therefore it is important to know, how to enable BIOS, and also study the instructions on how to use System Recovery.
How to enable BIOS mode
The first difficulty that many users will face is how to enter BIOS mode. On most devices, for example, Samsung, Lenovo, Nokia, you need to enter Recovery Mode by simultaneously pressing and holding the power and volume keys of the device.
In order to enter BIOS mode, you must turn off your smartphone or tablet, then press and hold the indicated buttons. On some devices, you can go to the Recovery menu only when the device is connected to a charger. After pressing the keys, the logo of the manufacturer of the device should appear on the screen. When this happens, you can release the buttons. After a few seconds, the BIOS menu should appear.
As for the buttons for turning on the mode, it is mainly necessary to hold down the volume up key, but on some devices, either the volume down or both buttons can be used. In older models of smartphones, sometimes you need to hold down the power key and the Home button.

If none of the proposed options worked, then you need to study the instructions for the device. Usually, non-standard ways to enable BIOS mode are found only in unpopular smartphone models, as well as in Chinese-made devices. All modern devices from well-known manufacturers are manufactured according to certain standards, and therefore the method of turning on and working with System Recovery on them will be similar.
Main functions
Through the BIOS menu, you can perform many actions with the device. Usually the Android System Recovery menu consists of 9 sections, including sub-items. Let's consider the main ones with translation into Russian.
Reboot now is one of the main commands that allows you to reboot the device without additional steps. This item is not divided into subsections. By executing the command, the smartphone will reboot without any changes in the system operation.

Install from SD-card is one of the large sections of the BIOS menu, which includes 5 commands. 
The main task is CWM (Clockwork Mod) - installation of the necessary packages with an arbitrary file name. The main functions of CWM:
- installation of custom (official and unofficial) firmware and kernels;
- additions and correction of errors in the operation of the OS, installation of factory updates;
- creating a full-fledged backup copy of the current firmware of the device;
- system recovery from a previous backup.
In this section of the Android menu in Russian, you can see several commands. Each of them allows you to perform one of the above functions:
- choose zip from SD-card - install a package from a memory card;
- check md5sum of a file - check the hash sums of the file;
- apply / sdcard / update.zip - installation of the CWM package to the root update folder. zip from the memory card directory;
- toggle sigrature verification - verification of the Clockwork Mod package signature to verify the authenticity of its contents, this function is disabled by default;
- toggle sclipt assert - verification of the script's compliance with the device's settings, must be performed before flashing the device.
Toggle usb storage - this mode allows you to connect a memory card to a smartphone to use the device as a USB storage for a PC or laptop.
Wipe (Format) - section dedicated to Wipe. You can either completely reset the data, or delete only some files, for example, the cache, format a specific section of the device.

Let's consider the main options of this function:
- Wipe data (may also be called factory reset) - an option that allows you to reset the smartphone in the based (basic) factory settings;
- Wipe cashe - a function for formatting a section with a cache;
- Format system is an option that allows you to completely remove the system, that is, all system files are formatted and the installed firmware is reset.
Backup (restore) - a section where you can back up the firmware and restore the system. The backup function is used to create backup copies of the main software sections. Selecting the restore option will restore the system from previously created backups. Sections Advanced Restore and Advanced Backup are designed for more advanced users, as they allow you to selectively back up and restore the main software partitions.
EXT3 - 4EXT - a section that allows you to convert the system, as well as its individual elements from EXT3 to EXT 4 and vice versa.
Mouts | strage is a function for mounting and unmounting system partitions. Thanks to this option, you can perform operations with the following sections: cache, data, sdcard, and also system.
Advanced - a section with advanced settings, which includes various unclassified functions. The Advanced option includes the following items:
| Function |
Description |
| File System Check | a function that allows you to check all system files |
| Print Partition Info | system analytics and displaying view logs on the screen |
| Copy recovery. log to sdcard | option to copy the recovery log and write it |
| Fix Permission | a function that allows you to change the rights to files in the / data section |
| Partition SD Card | option to form ext and ext2 partitions on the memory card. Here you can either create partitions (for this you need to enter Remove all partitions and start from scratch), or go back to the main Recovery menu without saving changes (for this you need to go to the No - save my fat32 partition section). |
Power menu - literally translated as "power menu". Here you can perform the following operations: completely turn off the device (power off), reboot the smartphone (reboot), reboot in the Recovery mode (reboot recovery).
All these functions are present in the Recovery section of almost every device. Depending on the smartphone or tablet model, the functionality of System Recovery may expand or contract.
Step by step instructions
Let's take a look at the main features of Android System Recovery 3e:
- how to flash a mobile device,
- how to reset the settings,
- clear part or all of the memory of the device,
- make a backup.

Basically, the Recovery mode is used in extreme cases. For example, when a smartphone needs to be flashed after some damage to the internal files of the system, which makes it impossible to turn on the device. Here is a short instruction in Russian Android System Recovery 3e.
If you need to reflash the device, then you need to go to the Install from SD-card section (may also be called Apply Update from External Storage). Here you can install the firmware from the memory card. To do this, you need to enter the Choose Zip from SD-card sub-item, if the new system is saved in the archive, or select the firmware image using the Apply Update from SD-card item.
If the firmware is being installed for the first time or if you are not sure about the compatibility of the new system version with the device, then it is recommended to use the toggle sclipt assert option before installation. It will allow you to verify the serviceability, authenticity and compatibility of the firmware and the smartphone.
After updating the system, you need to use the Reboot now function, which will reboot the smartphone. Before restarting, make sure that all the necessary operations have been done, since after resetting the version will be updated and all changes will take effect. With the help of Reboot now, you can also reboot if the user got into recovery mode by accident and you need to make a backup (return to the main menu of the system).
Additional features
Another important option for recovery mode is Wipe Data. Thanks to this function, you can restore the system without using firmware and resetting system settings. The option works on the principle of resetting the phone settings to factory settings. This will remove all files (images, video and audio files, downloads, etc.) from the phone.
It is also necessary to use the Wipe Data function before flashing the device, since before reinstalling the system, all settings of any device must be reset to their original values. If this is not done, then after the firmware the smartphone may not turn on at all.
Wipe Cache Partition is an equally useful function of the Recovery mode that allows you to clear the system cache. It will help to remove all the trash from the phone's memory, which will speed up the operation of the device.
After all the necessary actions have been performed, you can reboot the system using the Reboot Now function described above. With the correct flashing, the Android updates will take effect.
Every novice user of an Android tablet or phone, traveling to thematic sites and forums, sooner or later comes across a mention of the mysterious, which is especially often mentioned in the instructions for firmware, replacing the system kernel and other "hacker" things.
So what is it, what is it for, and how to properly handle it? I will try to answer these questions in this article, which contains complete instructions for working with ClockworkMod Recovery.
In a nutshell, or ClockworkMod or simply CWM Is an alternative recovery for Android devices. The instructions for working with ClockworkMod Recovery contain the following sections:
What is recovery?
Every Android tablet or phone has a factory recovery that can be loaded when the device is turned on by pressing a specific key combination. Factory recovery, usually knows how to install system updates from the update.zip file and clean up the system.
An introduction to alternative recovery ClockworkMod
- this is a much more powerful, compared to the factory, system recovery utility (menu), which allows you to make full backups of the entire device system, install software, firmware, kernels and much more on it, which usually does not allow factory recovery. ClockworkMod, is installed in a special system partition of the internal memory of a tablet or phone, in place of the factory recovery menu.
ClockworkMod Recovery can help you out in some seemingly hopeless situations. Even if your tablet or phone cannot boot, in many cases, using CWM, you can restore the system with all its settings and applications.
Here is a rough list of what you can do with ClockworkMod Recovery:
Install custom firmware and unofficial kernels
Install factory system updates, add-ons and fixes
Connect to a computer via USB in removable storage mode
Connect to a computer via USB to work with the ADB program
Create a full backup of the current firmware and its individual parts (system, settings, applications)
Recover a device from a previously created backup
Reset to factory settings (Wipe - data / factory reset), clear cache (wipe cache), clear dalvik-cache (wipe Dalvik-cache), clear battery statistics (wipe battery stats)
Create partitions on the memory card and format them
Created by developer Koushik Dutta (also known as Koush) and there are versions of CWM for most Android phones and tablets.
Installing ClockworkMod Recovery
For many smartphones and some tablets, installing ClockworkMod Recovery is a very simple procedure, you just need to install the program from the Market ROM Manager and the first item in its menu will be the ClockworkMod installation item. For other devices, there may be separate utilities similar to the application Acer Recovery Installer for the Acer Iconia Tab tablet, or ClockworkMod Recovery is installed on them using the program adb .
Launching ClockworkMod Recovery
There are several ways to load your tablet or phone into ClockworkMod Recovery.
1.
Using the ROM Manager program, selecting the item "Load Recovery Mode" in its menu.
2. By pressing a certain key combination when turning on the device. This combination depends on the device model. On many devices, you can get into recovery by pressing the volume down and power on buttons at the same time when they are turned on.
Installing firmware, updates, kernels and more on an Android device using ClockworkMod
All alternative firmware, custom kernels, crackers, add-ons, decorations, application packages that can be installed on a tablet or phone using ClockWorkMod recovery are packed as a zip file.
Before installing anything on your device, do not forget to make a full backup of the current firmware, so that later you can painlessly return your tablet or phone to its original state.
Make sure your device's battery is fully charged and disconnect it from your computer and charger.
Copy the file you want to flash to the memory card, best of all to its root, NOT UNPACKING IT... Make sure that the file name consists only of Latin letters and numbers and does not contain spaces or special characters.
If you are installing a new firmware, be sure to do a full clean using the item " wipe data / factory reset"
Getting started with the firmware :
Insert the memory card into the device
Reboot the device to ClockWorkMod recovery
We select the item " install zip from sdcard".
We open the item " choose zip from sdcard".
In the window that opens, we find our file, it will be at the bottom, after the list of folders (if they are on the memory card)
We confirm the choice by going to the item " Yes".
Every Android tablet or phone is equipped with Recovery Mode. It refers to the system part of the mobile operating system and allows you to perform specific procedures on the device that are inaccessible in the usual menu. Let's take a look at what Android Data Recovery is, how to enter this mode and how to work with it.
Purpose of the Reanimation area of Recovery
Recovery Mode is an indispensable tool for developers and engineers dealing with programming or customizing the Android OS. However, it is often used by ordinary users of mobile devices.
Considering what the Recovery mode is, it should be noted its main features:
- Resetting the gadget to factory settings (Hard Reset), when this cannot be done from the standard menu;
- Installation of custom firmware;
- Superuser rights activation;
- Creating a backup of the system with all user data and settings;
- Restoring Android using a previously mounted backup;
- Allocation of system partitions on an external micro sd memory card;
- for working with debug bridge ADB, etc.
It should be noted that one cannot do without Recovery on Android if it is impossible to enter the graphical menu of the operating system, as well as if the smartphone or tablet turns into "".
How to enter the Recovery environment
Transferring a mobile device to the Recovery mode can be done in several ways:
- With a combination of mechanical keys;
- Through the ADB debug bridge;
- Through special software, which is installed directly on the phone.
In the first case, to enter Recovery Mode, a specific combination of the Power, Home buttons (if any) and the volume rocker are used. However, this combination may differ from manufacturer to manufacturer. So, in almost all smartphones of the Nexus series, the resuscitation area is loaded with the Power + Volume Down keys. For Samsung, the actual set is "Power" + "Home" + the volume rocker, squeezed in the middle. The above actions are performed on the switched off device.
If it was not possible to find the required combination, you can open Recovery on Android using the ADB debug bridge or its automated version ADB Run:

You can also get into recovery mode using additional software that is installed directly on the mobile device. One such application is Quick Boot. It is enough to install it from the Play Market and after launching it, click on the corresponding button. 
How to work in the Recovery Mode environment
In the area of Recovery, there is no graphical interface that all owners of smartphones and tablets on the Android OS are used to. And touch control does not work there either. Therefore, it will not be superfluous to consider how to use Android Data Recovery mode.
The main window of Standard Recovery is a list of functions. Moving between the menu items is carried out using the mechanical keys Volume Up / Volume Down, and the choice of one or another item is done with the Power button. 
Once in stock Recovery Mode, the following tools will be available to you:
- Reboot system now. Used to reboot the mobile device and enter the Android GUI.
- Wipe data / factory reset. Cleans the internal memory of the device from installed applications, notes, contacts, etc. At the same time, personal photos, videos and documents will remain intact. This function allows you to get rid of various operating system failures.
- Wipe cache partition. Clears all information from the system cache. It is used when the installed software does not work correctly, as well as before flashing the gadget.
- Backup and restore. Creates a system backup and restores the phone using previously created points.
- Mounts and storage. Allows you to clear one of the system partitions.
- Advanced. Opens additional options for Recovery (restarting this mode, erasing the dalvik cache, etc.).
You should work very carefully in the Recovery environment, since all actions performed are irreversible and can lead not only to the irreversible deletion of all user information, but also to the transformation of Android into "".
Using custom recovery
The stock recovery mode has several limited capabilities, which in some cases are simply not enough. So, you will not be able to reflash your smartphone with it or install the required application from a memory card. Therefore, advanced users replace the standard Recovery with a custom one (CWM or TWRP), which is endowed with more advanced functionality.
As an example, consider the installation procedure and subsequent use of ClockWorkMod (CWM) Recovery:

The Android CWM Data Recovery installation will begin. This process will not take long. After its completion, you can enter the custom recovery environment using the same keys that were used to load the stock Recovery. 
Recovery is also called Recovery Mode for android. It is a special mode through which the android simultaneously boots and restores the system or updates it.
Recovery starts when you press a certain key combination. It is different for each device. For example, for Samsung it is “Home” + “Power” + “Volume Up”, and for Nexus it is “Volume Down” + “Power”. You can find out the exact combination of your android via the Internet.
Recovery types and capabilities
Since this is software, someone is writing it. Depending on the creator, the recovery is divided into two types:
1. Stock Recovery - created by the native manufacturer for the device.
2. - an alternative version, which is created by individual programmers. Has more features than the official one.
The "basic" features of this mode are as follows:
1) restart android;
2) install updates to android;
3) flash the phone, that is, reset the data to factory settings;
4) copy and restore the system;
5) delete the cache from the device;
6) install the archive from the memory card;
7) enable USB-MS mode for data transfer to SD.
Custom Recovery, in addition to the above, has many more features. For example, you can, but selectively, by saving the files you want.
There is also Photo Data Recovery - a program that we will talk about below.
Custom Recovery Navigation and Menus
You can "move" through the Custom mode using the keys:
"VolDOWN" - down, "VolUP" - up, "POWER" - back, "CAMERA" - item selection.
Below are the main menu items to make it easier for you to understand the English language:
2) formatting the internal partition - wipe data / factory reset;
3) installing the firmware from a memory card - install zip from sdcard;
4) saving and restoring - backup and restore;
5) advanced recovery mode - Advanced Restore;
6) formatting the "boot" section - format boot;
7) formatting the "system" section - format system;
8) formatting of the "date" section - format data;
9) formatting of the "cache" section - format cache;
10) formatting the memory card - format sdcard;
11) formatting the Linux partition - format sd-ext;
12) connection to a computer in the form of a flash drive - mount USB storage;

Installing Recovery
Installing recovery on your android is quite simple. Follow the step by step instructions:
Step 1. Through the Market, you need to install "Rom Manager 4.2" or "Rom Manager 4.0".
Step 2. Run the program and give root rights.
Step 3. Click on Install clockworkmod recovery, which is the first item.
Step 4. We are waiting for the message about the successful completion of the installation.
A little about Photo Data Recovery
Photo Data Recovery is a program for recovering deleted files on Android.
The main functions as well as the features of Photo Data are as follows:
1) easy to use and user-friendly interface;
2) quick installation and small volume of the installer;
3) a filter to find the desired remote file;
4) the ability to select the time intervals after which the android's memory will be cleared;
5) permanent removal of unwanted files.
Photo Data Recovery is a must-have for those who like to store important information on their phone. You can install this program by following the link.
Finally
Recovery is used in case of problems with the smartphone: it stopped turning on, the operating system "flew", the android began to glitch. Through this mode it is convenient to control your device and "treat" it.
You should download and install it absolutely free so that you can be the master of your device, and not vice versa.
Good day! Today our story will be about ClockworkMod. As usual, we will tell you what it is and why it is needed. In short, ClockworkMod is a third-party recovery, which is designed to install custom patches and firmware on android devices.
Let's look at the functions of CWM in more detail, as well as get acquainted with the method of its installation and the list of supported devices. And so, let's talk about CWM in detail. What is it for and what functions does it perform? CWM, or in other words, ClockworkMod is a kind of program that is stored in a special section of the phone memory, inaccessible without extended rights and designed to install a variety of user and original firmware, various patches that directly affect the system part of your device on android. However, the functionality of the program does not end there. In addition to installation, the program has many diverse functions, such as wipe data (clearing user data or resetting data), wipe cache (clearing the cache), etc. There are a lot of functions and sometimes they are very helpful in restoring your phone. Let's take a closer look at the functionality of a particular ClockworkMod, using screenshots from the program itself:
Thus, the program menu itself looks like on the Samsung Galaxy SIII phone. As you can see, there are 7 points. Let's consider them in more detail:
- Reboot system now
- Install zip from sdcard
- Wipe data / factory reset
- Wipe cache partition
- Backup and restore
- Mounts and storage
- Advanced
First point in the menu just reboots your phone.
Second point the menu has the following settings:
- Choose zip from sdcard (choose zip from sd card)
- Apply /sdcard/update.zip (apply automatically /sdcard/update.zip)
- Toggle signature verification
- Toggle script asserts
The first item in the current menu allows us to select the required installation file in * .zip format. When you click on the item, the file manager opens.
The next item allows you to automatically select the required update if it has the correct name (update.zip) and is located in the root directory. The last two points are unnecessary for the average user. They are needed in order to interact with various scripts that are usually used when creating firmware installation files.
Third point in the main menu allows you to perform a factory reset. This will destroy all your apps, reset all settings, and return your phone to its original state. However, user information on the memory card and in the phone memory will not be affected.
Fourth point in the main menu allows you to clear the cache. This is necessary in the event that you have started some "glitches" in the applications.
Fifth point extremely useful, with the help of it you can restore your system at the time of creating a backup. We will consider it separately in a separate article:
Sixth point the most voluminous in the main menu. By clicking on it you get to the following menu:
- Mount / efs (mount the efs directory)
- Unmounts / cache (unmounting the cache directory)
- Mount / system (mount the system directory)
- Unmount / data (unmount the data directory)
- Mount / preload (mount the preload directory)
- Mount / extsdcard (mount an external sd card)
- Format / cache (formatting the cache directory)
- Format / system (formatting the system directory)
- Format / data (formatting the data directory)
- Format / preload (formatting the preload directory)
- Format / extsdcard (formatting external sd card)
It makes no sense to describe all these points, their purpose is already clear. Let's move on to the last item in the main menu.
Seventh point in the main menu contains some additional settings that are not included in any section. Here's a screenshot from that section:
The first item allows you to reboot the recovery without completely rebooting the phone. The second and third points allow you to clear the dalwick cache and battery statistics, respectively. With the fourth step, you can send an error message to cwm. Key test will allow you to test hard keys. When you click them, the program will display their code. With the help of the next item, you can read the entire log of your operations. The following items in the menu are not recommended for ordinary users, as you can make a "brick" out of your phone.
And so, these are all the settings that ClockworkMod contains. There is one unanswered question, how to install it? To do this, you need to go to the official website: www.clockworkmod.com or go straight to the play market. After you download, install and open this application, you will see the following screen:
Just click on the "Install ClockworkMod" item and the whole process will automatically flash in your eyes. Now it remains to find out exactly how CWM is turned on on your phone. Check this information with the manufacturer or on the appropriate forums.
The most important thing in installing CWM is not to "ruin" your mobile phone. To do this, you need to be sure that the kernel, firmware and model of your android smartphone are fully compatible with the program. To check compatibility, visit the xda-developers forum, your device section.
Good luck in your endeavors!