Bulleted list is defined by adding a small marker, usually a filled circle, in front of each list item. The list itself is formed using a container
- , and each list item starts with a tag
- as shown below.
- First point
- Second point
- Third point
The end tag must be present in the list.
Example 11.1 provides HTML for adding a bulleted list to a web page.
Example 11.1. Create a bulleted list
- Cheburashka
- Crocodile Gena
- Shapoklyak
- Rat Larissa
Result this example shown in fig. 11.1.
Rice. 11.1. Bulleted list view
Notice the padding at the top, bottom, and left of the list. Such indents are added automatically.
Markers can be of three types: circle (default), circle, and square. The type attribute of the tag is used to select the marker style.
-
. Valid values are given in table. 11.1
- First
- Second
- Third
- First
- Second
- Third
- First
- Second
- Third
- change in religious belief (optional: Buddhism, Confucianism, Hinduism). Special offer- Judaism and Islam together;
- a change in belief in the infallibility of the beloved party;
- the belief that aliens exist;
- preference for the political system as the best of its kind (optional: feudalism, socialism, communism, capitalism).
- First line
- The second
- The last element
- - filled circle (default);
- - open circle;
- - square
- A marker in the form of a filled disk
- Marker in the form of an unpainted disk
- Square
- First line
- Second point
- Third line
- - numbering will be carried out in ordinary Arabic numerals (the same option will be used by default, in the absence of the “Type” attribute);
- — capital letters as numbering;
- - lower case;
- - capital Roman numerals;
- - lowercase Roman numerals;
- with numbering in large roman numerals
- Numbering in small latin letters
- Small Roman numerals
- The first element whose number is specified in the OL tag by the start = "23" attribute
- The next item, with a number one higher
- One more one more
- First item with number one
- This element will receive the number specified in the value = "32" attribute
- Item with a large number
- First point
- Second
- Last
- First term
- Description
- Second term
- His description
- The first paragraph of the main numbered
- Second point
- The first element of the nested bulleted
- Second
- The third and last paragraph labeled
- Third item numbered
- Badminton
- Baseball
- Chomolungma
- Chogori
- Kanchenjunga
- Summit plummet
- Tantrum alley
- Insano
- Philippine sea
- Arabian Sea
- Coral sea
- Red
- Green
- Blue
- List item
- Unique list
- Original Lists
- ZORNET.RU - For Webmaster
- Another list
- List item
- Unique list
- Original Lists
- ZORNET.RU - For Webmaster
- Another list
- Scripts for uCoz
- Templates for uCoz
- Website design
- Styles for the site
- CSS styling
- The first element for the site
- Second element for the site
- Third element for the site
- The fourth element for the site
- The fifth element for the site
- marked with a marker,
numbered list —- - each element of the list
- marked with a number,
definition list- - consists of pairs of term- —
- definition.
Each list is a container that contains list items or term-definition pairs. List items behave like block elements, stacking one under the other and taking up the entire width of the container block. Each list item has an additional box on the side that does not participate in the layout.
Generating HTML Lists
1. Bulleted list
Bulleted list is an unordered list (from English Unordered List)... Created with paired tag
... The marker of a list item is a label, for example, a filled circle.Browsers add the following formatting to the list box by default:
Each list item is created using a pair tag
- (from English List Item).
- available.
- Microsoft
- Apple
2. Numbered list
Numbered list is created using a paired tag. Each list item is also created using the element
- marked with a number,
- ... The browser numbers the elements in order automatically, and if you delete one or more elements of such a list, then the rest of the numbers will be automatically recalculated.
The list box also has default browser styles:
- the value attribute is available, which allows you to change the default number for the selected list item. For example, if for the first item in the list you set
- , then the rest of the numbering will be recalculated relative to the new value.
For tag
- the following attributes are available:
- Microsoft
- Apple
- and
- available.
- Director:
- Petr Tochilin
- Cast:
- Andrey Gaidulyan
- Alexey Gavrilov
- Vitaly Gogunsky
- Mariya Kozhevnikova
 Rice. 3. List of definitions
4. Nested list
Often opportunities simple lists not enough, for example, when creating a table of contents, you can't do without nested items... The markup for the nested list would be as follows:
- Paragraph 1.
- Point 2.
- Subclause 2.1.
- Subclause 2.2.
- Subclause 2.2.1.
- Subclause 2.2.2.
- Subclause 2.3.
- Point 3.
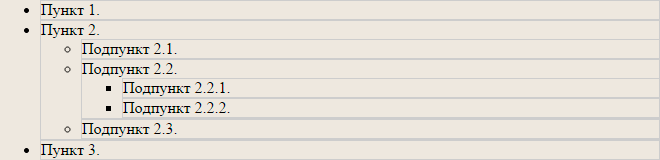 Rice. 4. Nested list
5. Multilevel numbered list
A multilevel list is used to display list items on different levels with different indents. The markup for a multilevel numbered list would be as follows:
- paragraph
- paragraph
- paragraph
- paragraph
- paragraph
- paragraph
- paragraph
- paragraph
- paragraph
- paragraph
- paragraph
This default markup will create a new one-based numbering for each nested list. To nest numbering, you need to use following properties:
counter-reset resets one or more counters, setting a value to reset;
counter-increment specifies the value of the counter increment, i.e. with what step each subsequent item will be numbered;
content - the generated content, in in this case is responsible for displaying the number in front of each item in the list.Ol (/ * remove the standard numbering * / list-style: none; / * Identify the counter and give it the name li. The counter value is not specified - by default it is 0 * / counter-reset: li;) li: before (/ * We define the element to be numbered - li. The before pseudo-element specifies that the content inserted using the content property will appear before the list items. This is also the counter increment value (default is 1). * / Counter-increment: li; / * The content property displays the number of the list item counters () means that the generated text is the value of all counters with that name. A quoted period adds a separating period between numbers, and a period with a space is added before the contents of each list item * / content: counters (li, ".") ".";)
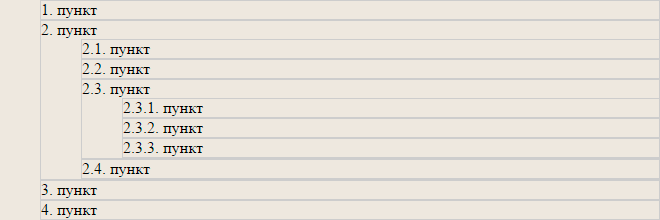 Rice. 5. Multilevel numbered list
Table 1. Tag Attributes
Attribute Description, accepted value reversed The reversed attribute specifies the display of the list in reverse order(for example, 9, 8, 7 ...). start The start attribute specifies initial value, from which the numbering will start, for example, the construction - the first item will assign serial number"10". You can also set the numbering type at the same time, for example,
- .
type The type attribute specifies the kind of marker to use in the list (as letters or numbers). Accepted values:
1 - default value, decimal numbering.
A - numbering the list in alphabetical order, capital letters (A, B, C, D).
a - numbering the list in alphabetical order, lowercase letters (a, b, c, d).
I - numbering in Roman capital numerals (I, II, III, IV).
i - numbering in Roman lowercase digits (i, ii, iii, iv).3. List of definitions
Definition lists are created using the tag
The definition list box has the following default browser styles:
For tags
- ,
| List type | HTML code | Example |
|---|---|---|
| List with bullets in the form of a circle | ||
| List with bullets in the form of a circle | ||
| List with square markers |
The type of markers may vary slightly in different browsers, as well as when changing the font and text size.
The creation of a list with square markers is shown in Example 11.2.
Example 11.2. Marker type
Changing beliefs
The result of this example is shown in Fig. 11.2.
Hello dear readers of the blog site. Today, within this heading, I want to talk about a variety of Html lists that can be created based on specially designed tags UL, OL, LI and DL. With the help of the pair UL and LI, bulleted lists are created, with the help of OL and LI - numbered, and with the help of the elements DL, DT and DD, so-called listings of definitions are created. We will also look briefly at the principles of creating nested structures.
I want to remind you that we have already managed, managed to talk about the basics of modern, as well as table layout (). In addition, we touched on the basics, well, we learned through.
Bulleted lists based on UL and LI tags
The UL tag is used to create bulleted lists, and OL is used to create numbered lists. These tags are paired and block, just like the LI element.
Separate list items are located between the opening and closing tags, which in turn are enclosed in an opening and closing LI element. At the top and bottom of Html lists, the browser adds one-line indentation, similar to the indentation created by a paragraph tag.
Let's see, for example, a bulleted variant that might look like this:
Only LI elements can be inside the opening and closing UL tags, and already inside these elements (items) themselves, you can insert any content (text, pictures, headings, paragraphs, links, and even other lists).
Those. UL serves only to organize a labeled (unordered) listing, and everything that you will see on web page inside it, implemented using the contents of the LI elements.
For UL, you can change the type of marker by writing in it different meanings for the "Type" attribute. If "Type" (control of the appearance of markers) is not specified for the UL element, then the default marker type will be displayed (disc - a circle filled in the color of the text):
In the above examples, we wrote the "Type" attribute in the UL element, using given type markers for all items. But the "Type" attribute can be assigned for each individual LI tag by setting its own marker type for this item.
An example of a bulleted list with different types marker for each item:

Numbered Lists in Html Based on OL Tag
To create a numbered listing, OL tags are used, inside which, again, LI elements will be located. OL and LI, as I already mentioned, are block (that is, they tend to occupy all the space available to them in width) and inside OL it will not be possible to place anything other than LI elements.
It turns out that OL and UL are service tags that are needed only to tell the browser what kind of list we are generating (bulleted or numbered). In the case of a numbered one, to the left of each item we will see not a marker, but a number and a dot behind it:

As I mentioned just above, the UL, OL and LI elements have the ability to use the TYPE attribute. It allows you to customize the type of bullet or to specify which numbers or letters will be numbered items in the listing. For a numbered list, the parameters of this attribute can take the following values:
An example of a numbered list with different types of numbering for each item:

When creating numbered lists, it is also possible to start numbering not from one, but from the number specified in the START attribute. For instance:
For OL, you can also start a new numbering from any value, starting from any item, by writing the VALUE attribute with the required number in the opening LI of this item. For instance:
Styling Lists in CSS (Style Sheets)
But usually now appearance markers are set not through the TYPE attribute, but for which the corresponding properties are assigned.
Here I will just give an example of various bullets for unnumbered lists, the appearance of which is specified via separate file with cascading style sheets.
But we'll talk about in subsequent articles. This is how the appearance of the UL markers on this blog is set. Pictures are used as markers: for ordinary items of an unnumbered list -, for nested items of an unnumbered list -.
Special and nested lists in Html code
The third and final type is called "definition lists" and they are specified using three tags - DL, DT and DD. The DL tells the browser that a list of definitions will follow.
Usually this kind is used (well, or it was assumed that it will be used) for writing dictionary entries, consisting of terms (enclosed in DT tags) and their descriptions (enclosed in DD tags).

If you look at the example above, you will notice that the DD (term description) element is offset (by 40 pixels) relative to the DT element (term itself).
Generally DL, DT and DD are block tags, moreover, inside the DT element you can only insert content with inline tags(it turns out that inside the DT it will not be possible to use block elements of headings and paragraphs). And inside DD tags, you can insert any elements, both inline and block.
Nested list in Html it is created by analogy with a simple one, but inside the main list, some of the items are once again enclosed in the opening and closing UL or OL tags.
Please note that the closing LI of the item in which the nested item will be created is placed only after the entire code of the nested list (this is very important for its correct display on the web page). The nested list might look something like this:

Good luck to you! See you soon on the pages of the blog site
you can watch more videos by going to");">

You may be interested
 How to insert into HTML link and a picture (photo) - IMG tags and A
  Html forms for the site - tags Form, Input and Select, Option, Textarea, Label and others for creating elements of web forms Select, Option, Textarea, Label, Fieldset, Legend - Html tags of the dropdown form and text box
 How colors are set in Html and CSS code, selection of RGB shades in tables, Yandex and other programs
  Embed and object - Html tags to display media content (video, flash, audio) on web pages
  H1-H6 heading tags and attributes, horizontal line Hr, line break Br and paragraph P according to Html 4.01 standard
  Tables in Html - Table, Tr and Td tags, as well as Colspan, Cellpadding, Cellspacing and Rowspan to create them
Good day!
In this article, you will learn about all the possibilities of lists, understand how to make a numbered list, master the tags that will help make a simple bulleted list more interesting and noticeable with arbitrary bullets. After completing the lesson, you will have an understanding of where lists are used and under what circumstances they can be used.
This article is the third in this short course on HTML basics... Before reading this lesson I recommend going through the previous two:
The article has just begun, and you may already notice the use of a standard bulleted list. On my website, it looks quite simple: on the left there is a small indent with a line and a square marker. Further in the article, we will take a closer look at what markers are, how to make numbers, and also how to make your own marker.
In each part of the article, the creation of certain lists will be accompanied by detailed explanations for inserting a particular list.
1. Bulleted lists in HTML
This type of lists is used to enumerate a set of elements similar in meaning in the text. This can be a listing of links that are related to the same topic, detailed explanation for separate parts text. But let's see how bulleted lists look like in the code:
And this is how it looks in the browser:
Rice. 1.1. Standard view of HTML bulleted unordered list in browser1.1 Standard bullets for bulleted lists
In the image above (Fig 1.1.), You can see the circles at the beginning of each menu item. This is the marker. By default, it is a filled circle in the browser. There are several types of markers in HTML: filled circle, empty circle, and square. They don't require CSS or third-party images:
1.2 List marker as an empty circle
You know the attribute values, but now let's see how to make an HTML bulleted list in the code. From the table above, we have selected the second value "circle" for type attribute and gave it to our bulleted list:
| <html> <head> <title> An example of a bulleted list with an empty circle marker</ title> </ head> <body> <p> Stars:</ p> <ul type = "circle"> <li> Sirius</ li> <li> Arcturus</ li> <li> Pollux</ li> <li> Betelgeuse</ li> <li> The sun</ li> </ ul> </ body> </ html> |
Let's see how this code will look in the browser:
Rice. 1.2. Bullet view for a list in the form of a circle in the browser1.3 List marker in the form of a square
Let's also see the last example with a square bullet for the HTML list:
Notice the marker, it has become square:
Rice. 1.3. Marker for a list box as a square in a browserImportant note: this is no longer used for styling bulleted lists. Exists clear division CSS (read what CSS is) and HTML. HTML is for markup and CSS is for good looks.
Code that contains given attribute, when specifying the type current document like HTML5 (""), will give an error during validation. If you have not heard what validation is, then you should go here -.
The error will be as follows:
Rice. 1.4. Error on the validator when using the "type" attribute of the listWe figured out the bulleted lists. Now let's move on to numbered lists, and then consider nested lists and several ready-made examples which are used most often on real sites.
2. Numbered lists in HTML
Unlike the previous type of lists, numbered lists have one important feature: they auto-number. This is useful when numbering needs to be done. big list... It will take a very long time manually, but you can still get lost. A numbered list is specified using a tag. How it looks in practice:
An example of a numbered list:
| 1 2 3 4 5 6 7 8 9 10 11 12 13 14 15 | <html> <head> <title> Example of a standard numbered list</ title> </ head> <body> <p> One to five:</ p> <ol> <li> First</ li> <li> Second</ li> <li> Third</ li> <li> Fourth</ li> <li> Fifth</ li> </ ol> </ body> </ html> |
This is how a numbered list looks like with standard settings in the browser:
Rice. 2.1. Numbered list in a browser with standard settingsLike its predecessor (bulleted list), it has its own styles for displaying numbers. Plain numbering is not the only kind of bullets for a numbered list in HTML.
2.1 Standard bullets for a numbered list
Here we have a choice not of three types of markers, but of five:
| Marker name | The value of the "type" attribute | List example |
|---|---|---|
| Arabic numeral markers | 1 | |
| Lowercase markers Latin letters | a | |
| Markers in the form of capital Latin letters | A | |
| Lowercase Roman numeral markers | i | |
| Uppercase Roman numerals | I |
2.2 Custom numbering in the HTML list
In addition to the usual output of a numbered list, we can also start our numbering from any digit. To do this, you need to set the additional "start" attribute. This numbering works for all types of bullets for numbered lists. How it looks in practice:
| 1 2 3 4 5 6 7 8 9 10 11 12 13 14 15 | <html> <head> <title> Random numbering for a numbered list</ title> </ head> <body> <p> We start numbering at twelve:</ p> <ol type = "a" start = "12"> <li> Twelve</ li> <li> Thirteen</ li> <li> Fourteen</ li> <li> Fifteen</ li> <li> Sixteen</ li> </ ol> </ body> </ html> |
This is how it will display on a live site:
Rice. 2.2. Numbering from arbitrary number in a numbered listIn the image above, we numbered the list starting from twelve, while making markers in the form of lowercase Latin letters. Now, I think, it became clear how to use these attributes in your projects.
For now, let's move on to nested HTML lists.
3. How to make a multilevel (nested) list in HTML
Multilevel lists are used on the site in building the menu. This menu most often looks like a drop-down either down (lesson on), or drop-down to the left or right. Such menus allow you to store other menu items in a compact form.
Using car models as an example, we will build a multi-level list in HTML:
| 1 2 3 4 5 6 7 8 9 10 11 12 13 14 15 16 17 18 19 20 21 22 | <html> <head> <title> HTML nested bulleted list</ title> </ head> <body> <ul> <li> Citroen<ul> <li> Berlingo</ li> <li> C1</ li> <li> C2</ li> <li> C3 Picasso</ li> <li> C4 Grand Picasso</ li> </ ul> </ li> <li> KIA</ li> <li> Toyota</ li> <li> Audi</ li> <li> Lexus</ li> </ ul> </ body> </ html> |
Notice what a multilevel list looks like in a browser:
Rice. 3.1. An example of a multilevel list in HTMLWe made a multilevel list using a bulleted (tag
- ). The tiered list with Citroen models came with other markers. The main list with filled bullets, and the 2nd level list with empty circles. But, remember, with the "type" attribute we can override the markers (it's better to set them).
But we can combine tiered lists with numbered and labeled as follows:
| 1 2 3 4 5 6 7 8 9 10 11 12 13 14 15 16 17 18 19 20 21 22 23 | <html> <head> <title> Numbered, Bulleted and Numbered Lists in HTML</ title> </ head> <body> <ul> <li> The first group of tulips<ol> <li> First grade<ul> <li> Simple early tulips</ li> </ ul> </ li> <li> Second class<ul> <li> Double tulips</ li> </ ul> </ li> </ ol> </ li> </ ul> </ body> </ html> |
In the example above, we have double nesting (2 levels). First, we put in a list of two classes of tulips, we have it numbered. Then, a bulleted list is nested into each of the items in the numbered list.
We look at its appearance in the browser:
Rice. 3.2. An example of a multilevel numbered list in a bulleted list in a browser4. Useful Resources for HTML Lists
It contains information that requires an understanding of CSS properties. To do this, I recommend that you study the following lessons:. All examples will be immediately with source code and are broken down into HTML (structure), CSS (styles) and Result (result) tabs.
4.1 How to make an HTML list into a string
Make HTML list into string may be needed when creating horizontal menu... It's very simple to make it:
4.2 How to make an HTML list without an icon
Responsible for this list-style-type property in CSS (more details):
4.3 How to make a list in HTML centered
The list item is a block element, so it needs to be centered with margins... But there is one important point- we have to explicitly specify the width for the alignment to work:
4.4 How to make a list in HTML with pictures
Just one property is enough CSS list-style-image... Inside url, specify the address before the icon. I just want to note that it is better to select a small image right away, because the height of the list line depends on it:
4.5 HTML Bulleted List Your Marker
In this case, it is necessary to connect font icons (for example, FontAwesome) in advance. Then you can make any icon instead of the standard marker:
4.6 How to make a list in HTML with multiple columns
To make a multi-column list we will use CSS property column-count (this property is only supported in the following browsers: IE 10+, Chrome 1.0+, Opera 11.1+, Safari 3.0+, Firefox 1.5+). You also need to set the height for the list in order to see the split into multiple columns:
5. Practice of working with lists
In the video below you can see all the work with HTML lists on practice:
If you decide to change standard lists ul and li, then this topic will interest you. Since here you will learn several original solutions. Which will certainly help you change standard view to the unique one, where the CSS styling goes, for the design of the lists. The plus is that we will use only one class in everything, which will radically change the look. In addition to these parameters, you can specify at which number the list should start, here you can do everything yourself. The initial default for numbered lists is on the first or letter A.
Based on the basics, we will now take a closer look at the elements used to provide structure and meaning for different parts design. If anyone does not know, then ul and li, this is much the best way than simple text text because when the text is wrapped, especially in mobile phone, it indents perfectly and doesn't wrap around the marker.
It is believed that lists are great way presenting information on pages because they are easy to read and look good. A lot of people seem to think that bullet points are small images, but in reality they are all created through rather simple HTML the code. You can insert different types lists into each other, if you like, just remember to close them properly. You can play with the text you want in all of these list commands.
You also need to know that lists initially contain several elements:
1
... Disordered information.
2
... Ordered information.
3
... Definitions.
Getting started with the installation:
1. Option:
CSS
Ksangelopan (
margin: 19px 0 0;
padding: 0;
list-style: none;
counter-reset: li;
}
.ksangelopan li (
border: 2px solid # 3575ad;
background: # d7dee4;
position: relative;
margin-bottom: 17px;
padding: 15px 9px;
}
.ksangelopan li: hover (
z-index: 1;
}
.ksangelopan li: before (
border: 2px solid # 2270b3;
position: absolute;
top: -14px;
padding: 3px 9px;
font-size: 11px;
font-weight: bold;
color: # 246eaf;
background: # f2f4f7;
counter-increment: li;
content: counter (li);
-webkit-transition-duration: 0.4s;
transition-duration: 0.4s;
}
.ksangelopan li: hover: before (
background: # 2672b3;
color: # f7f9fb;
-webkit-transform: translate (-11px, 0);
-ms-transform: translate (-11px, 0);
-o-transform: translate (-11px, 0);
transform: translate (-11px, 0);
}
.ksangelopan li: after (
content: "";
position: absolute;
transition-duration: 0.3s;
-webkit-transition-property: width;
transition-property: width;
z-index: -1;
background: #FFF;
height: 100%;
left: 0;
top: 0;
width: 0;
}
.ksangelopan li: hover: after (
width: 100%;
}
This is the whole installation.
2 Second option:

CSS
Beleduzlopamges (
margin-bottom: 8px;
padding: 0;
list-style: none;
counter-reset: li;
}
.beleduzlopamges li (
position: relative;
border: 2px solid # 195588;
background: # eff3f7;
padding: 15px 19px 15px 27px;
margin: 12px 0 12px 40px;
-webkit-transition-duration: 0.3s;
transition-duration: 0.3s;
}
.beleduzlopamges li: hover (
background: #FFF;
}
.beleduzlopamges li: before (
line-height: 32px;
position: absolute;
top: 4px;
left: -39px;
width: 39px;
text-align: center;
font-size: 16px;
font-weight: bold;
color: # f9f5f5;
background: # 275b88;
counter-increment: li;
content: counter (li);
transition-duration: 0.2s;
}
.beleduzlopamges li: hover: before (
width: 46px;
}
.beleduzlopamges li: after (
position: absolute;
left: 0;
top: 4px;
content: "";
height: 0;
width: 0;
border: 16px solid transparent;
border-left-color: # 275b88;
-webkit-transition-duration: 0.2s;
transition-duration: 0.2s;
}
.beleduzlopamges li: hover: after (
margin-left: 6px;
}
The center scale can be independently set to match the main style of the site.
3 Third option:

CSS
Nizualisanelag (
padding: 0;
list-style: none;
counter-reset: li;
}
.nizualisanelag li (
position: relative;
padding: 9px 17px 17px 25px;
margin-left: 39px;
transition-duration: 0.2s;
cursor: pointer;
font-weight: bold;
color: # 343638;
}
.nizualisanelag li: before (
border: 3px solid transparent;
line-height: 35px;
position: absolute;
top: 0;
left: -29px;
width: 41px;
text-align: center;
font-size: 14px;
font-weight: bold;
color: # 619dce;
counter-increment: li;
content: counter (li);
transition-duration: 0.3s;
box-sizing: border-box;
}
.nizualisanelag li: hover: before (
color: # 337AB7;
}
.nizualisanelag li: after (
position: absolute;
top: 0;
left: -29px;
width: 41px;
height: 41px;
border: 5px solid # 468bd0;
border-radius: 50%;
content: "";
opacity: 0.5;
-webkit-box-sizing: border-box;
-moz-box-sizing: border-box;
box-sizing: border-box;
}
.nizualisanelag li: hover: after (
animation: 500ms ease-in-out 0s bounceIn;
opacity: 1;
}
@keyframes bounceIn (
0% {
opacity: 0;
transform: scale3d (.3, .3, .3);
}
20% {
transform: scale3d (1.3, 1.3, 1.3);
}
40% {
transform: scale3d (.9, .9, .9);
}
60% {
opacity: 1;
transform: scale3d (1.03, 1.03, 1.03);
}
80% {
transform: scale3d (.97, .97, .97);
}
to (
opacity: 1;
transform: scale3d (1, 1, 1);
}
}
Comes with beautiful animation.
4 Fourth option:

CSS
Padding: 0;
list-style: none;
}
.kudezamuden li (
padding: 6px;
}
.kudezamuden li: before (
padding-right: 11px;
font-weight: bold;
color: # 4979a0;
content: "\ 2606";
transition-duration: 0.4s;
}
.kudezamuden li: hover: before (
color: # 235e90;
content: "\ 2605";
}
Is similar previous versions, only the icon itself is changed.
In general it is small selection lists, will give the webmaster to make a beautiful list on the portal, where he himself can arrange it more, as he wants to see it.
If you need to put items in a numbered list instead of a bulleted list, then ordered HTML will be used here. This list is created using the ol tag. The numbering starts from one and increases by one for each subsequent ordered list item with an li tag.
HTML lists are used to group related pieces of information together. There are three types of lists:
bulleted list —
- - each element of the list


