How to enter windows safe mode? This question is undoubtedly asked by every user who switched to windows 10. In view of the big changes that have occurred with the release of dozens, many users even thought that the safe mode was completely removed by the developers of the microsoft company. But of course this is all nonsense, because this tool plays a big role in helping in case of problems with the computer.
If in windows 7, when the system was booted, it was possible to switch to this mode by pressing the f8 key without any special problems, then in windows 10 this will no longer work, because the system boot speed is very fast. But don't worry, as there are many ways to go to safe mode windows 10, with the same ease as in the seven. Let's take a look at some of them.
Safe Mode with Shift Key
The simplest way is to jump by pressing the reset button while holding down the key shift. To do this, respectively, go to the start menu and click
The computer will enter the so-called blue window mode, where you need to select an action, namely

Once on the page diagnostics, go to.

In this window, click the tab

And press the button reboot.

After that, the system will load the boot selection parameters, where we can switch to the mode that interests us by pressing the corresponding number keys.

As you can see from the picture, everything works great.

Entering Safe Mode Using System Configuration
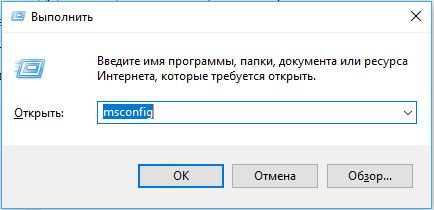
The next way I want to introduce you is through windows 10 system configuration... Go to the application execute, by pressing the + R keys, enter the command in the line msconfig and click ok.

Here we select the mode from which we want to boot.
- Minimum- normal mode
- Another shell- with command line support
- Net- with loading network drivers.
And push OK.

Now, on subsequent reboots, the computer will always go into the safe mode that you have chosen. In order to boot from the main system, you just need to uncheck the box in the system configuration settings.

Starting Safe Mode Using Command Prompt
And of course, in windows you cannot do without using the command line, the next method will be carried out in it. This method is very useful because it can be used even in case of operating system failures. So, click on the search icon (in the form of a magnifying glass) located next to the start menu and enter the command cmd... The command line was found, it must be run as administrator.

Enter the command bcdedit /set (current)safebootminimal, it enters safe mode with normal parameters. We press enter.
In addition, for a quick reboot, you can use the command shutdown /r /t 0.

To enter the mode with loading network drivers, use the command:
- bcdedit /set (current)safebootnetwork.

But as we already know, when these modes are activated, so as not to enter there constantly, they need to be deactivated, for this there is also a command:
- bcdedit / deletevalue (current) safeboot.

And to enter safe mode with command line support, you need to enter two commands:
- bcdedit /set (current)safebootminimal
- bcdedit /set (current)safebootalternateshellyes

Also, to remove the permanent entry into the command line mode, you need to use the same two commands:
- bcdedit / deletevalue (current) safeboot.
- bcdedit /deletevalue (current)safebootalternateshell.
And to reboot use shutdown / r / t 0.

For the return login, which is familiar to windows 7 users, using the active F8 key when the system boots, there is also a command:
- bcdedit / set (default) bootmenupolicy legacy

Now, when the system boots, try pressing this key many times and you may be taken to additional boot options. Why is it possible? The fact is that loading windows 10 is much faster than in the seven, so it is possible that you simply do not have time to get there.

Well, you guessed it, there is a command to cancel this configuration:
- bcdedit / set (default) bootmenupolicy standard

And at the end I would like to show how to implement a constant boot of the system, with the choice of boot parameters, to implement it, we enter the line:
- bcdedit /set (globalsettings)advancedoptionstrue

Now, at startup, a window will always appear with the selection of the desired parameters.

If this does not suit you, you can always remove this option with the command :
- bcdedit / deletevalue (globalsettings) advancedoptions

Oput your opinion on this article, and of course ask your questions if something suddenly went wrong with you.
Thank you for your attention!
Many users who have switched to Windows 10 from Windows 7 (bypassing the eighth version) are at a loss: why did the developers remove the safe mode from the system? Previously, as it was: I pressed F8 before starting "Windows" - and booted into a safe one. And now it doesn't work.
In fact, no one thought to deprive us of such a useful tool. And there are even more opportunities to download it than there were. Let's take a look at how to enter Windows 10 Safe Mode and what to do if it won't open.
The simplest way to boot your computer into Safe Mode is to press the Shift key along with the "" button on the Start menu or at the logon screen.

After restarting, we will be offered a choice of 3 actions:
- Continue working in Windows 10 - return to normal mode, from which we just exited.
- Turn off computer.
- Perform troubleshooting. Even if we haven't broken anything yet, this item should be selected.

In the next menu, select the section " Extra options».

Later - " Boot options».

To enter safe mode, you must restart the machine again. Let's click on the next screen button ""

After the restart, another menu will open - the last one. In it, we have to choose one of three types of safe mode: simple or minimal (the minimum required set of system components will be loaded), with support for network drivers (will allow us to access the Internet) and command line (in the form of a command console interface without a graphical shell).
Each item has a specific key associated with it. It should be pressed to move to the desired environment.

Special download options in the Settings app
The second method is no more difficult than the previous one. Just a little longer.
- Go to Start and open the system utility " Parameters».

- Click " Updates and security».

- Go to the group " Recovery"And near the item" Special download options"In the right half of the window, click" Reboot now».

Windows restarts and the monitor displays the same menu with a blue background as shown above. You already know what to do next.
Configuring Boot in System Configuration (MsConfig) Application
With the application " system configuration»Many are familiar from previous Windows releases. This is one of the administration components with which you can control the computer's startup. Including - switch it to safe mode.To quickly open the utility, press the Windows + R combination on the keyboard or run the application " Execute»From the Start menu. Enter the name of the application executable file in it - msconfig, and click OK.


In the window with a proposal to restart the PC now, click "".

After setting the "Safe Mode" flag in the MsConfig utility, the computer will start in it by default. To restore normal boot (normal mode), you must uncheck the box.
Use this method only if you are sure that safe mode works. Otherwise, you have every chance of getting an unbootable car!
BootSafe program
Free software BootSafe designed to make it as easy as possible for the user to switch between different Windows boot modes. It has only one window, 4 switches and a couple of buttons.
The switches are designed to set the type of boot of the operating system. Including:
- normal mode (normal startup);
- safe mode minimal (minimal safe);
- safe mode with networking (network);
- safe mode width command prompt only.
Button " Configureonly"Saves the setting for later start-up of the computer, and" RestartWindows"- immediately reboots it into the selected mode.
Using BootSafe before you verify that Safe Mode is working has the same consequences as checking a check box in Msconfig!
Command line
You can also switch between Windows 10 boot modes using the command line. This method will help you out not only when the graphical shell malfunctions, but also when the system has completely rebooted, since the command console is among the tools of the recovery environment.We looked into the Windows 10 recovery environment when we opened Safe Mode by rebooting with the Shift key pressed. If you have forgotten what it looks like, please rewind this page to the top.
So, to boot the machine in one of the safe mode options, type the necessary instruction into the command line (launched with administrative rights):
- Minimal (simple) safe mode : bcdedit /set (current)safebootminimal
- With network driver support: bcdedit /set (current)safebootnetwork
- With a console interface: first the first command in this list, then - bcdedit /set (current)safebootalternateshellyes
To restart the computer immediately, in the same window, follow one more instruction - shutdown /r /t 0

As in the previous cases, all 3 commands determine how Windows starts by default, that is, the system will boot in the specified mode all the time. To cancel the setup and return to normal boot, follow these instructions: bcdedit / deletevalue (current) safeboot.
If you switched to the command line interface, in addition run the command bcdedit /deletevalue (current)safebootalternateshell.
How to bring back the menu of different boot options
If you want to regain the ability to quickly switch to safe mode by pressing F8 before starting the system, as it was in Windows 7, execute the following instruction in the console:bcdedit / set (default) bootmenupolicy legacy
The window for additional ways to boot Windows 10 will look the same as in the "seven":

However, due to the fact that the duration of the launch of the "ten" in comparison with the "seven" has noticeably decreased, it will be extremely difficult to catch this menu. After all, the time interval when the system reacts to pressing F8 has also decreased several times.
I don’t know about you, but I don’t really like this method. Modern computers with disks marked according to the GPT standard boot up in a matter of seconds. On them it is impossible to have time to press any key before the start of "Windows", since it starts almost simultaneously with turning on the machine. In this case, there is another solution: we can make the menu open itself and not close until you tell it exactly what you want to download.
You will need the command line again to enable this option. Follow the instructions in it:
bcdedit /set (globalsettings)advancedoptionstrue and reboot.
Before each new start of Windows 10, you will see the following picture:

However, this menu is already familiar to you. To enter normal mode, you will have to press Enter each time, in safe mode - F4, F5 or F6.
Experimenting? Did not like? Then we will return everything to its place. To mark the first command (black screen of additional startup options, as in Windows 7), execute the following instruction:
bcdedit / set (default) bootmenupolicy standard
To mark the second one (Windows 10 startup options on blue screen), do another one:
bcdedit /deletevalue (globalsettings) advancedoptions
After restarting the PC, no extra menus will open.
How to restore Windows 10 Safe Mode if it doesn't work
The reasons for the failure to boot a computer or laptop in safe mode are various "tweaks" to speed up or decorate Windows, as well as user experiments with the system registry. It is in the registry that the keys responsible for starting the safe mode are located. Even their partial damage leads to the fact that the latter stops opening, while the normal one continues to work properly.Safe mode keys are stored in a registry key HKLM / SYSTEM / CurrentControlSet / Control / SafeBoot... This section is divided into two subsections: Minimal and Network. I think you understand what each of them is responsible for. When you select the minimum (normal) safe mode, the system reads data from the first. When choosing the option with loading network drivers - from the second. An additional parameter, AlternateShell, is responsible for opening the command line interface instead of the explorer; Windows takes the rest from the Minimal section.

The fact that all safe mode parameters are stored in one place, and are not scattered throughout the registry, allows them to be easily and quickly restored in case of damage. To do this, you will need a copy of them, made on another, serviceable PC, where Windows 10 of any version is installed.
How to get it:
- Start Registry Editor ( RegEdit.exe) in a "healthy" system. For this, it is convenient to use the system application " Execute».

- Find the above-mentioned branch (HKLM / SYSTEM / CurrentControlSet / Control / SafeBoot), right-click on the SafeBoot folder and select the command “ Export».

- Save the file under any name without changing the default extension (.reg), and then transfer it to the "sick" system.

- Double click on this file and confirm your intention to add data to the registry.

After clicking OK in the confirmation window, the SafeBoot keys are imported into the system and Safe Mode will restore its work.
That's all. Happy experiments!
More on the site:
How to enter Windows 10 Safe Mode. What to do if Safe Mode won't load updated: March 2, 2017 by the author: Johnny mnemonic
Is a great tool for solving various problems with the Windows operating system. If your system does not boot or is unstable, then you can try to enter Safe Mode and fix the problem. In many cases, this approach allows you to revive even a badly damaged system.
Before the advent of Windows 8, in order to enter Safe Mode, you just had to restart the computer, and at the time the boot started. After that, a list of possible Windows operating modes appeared, among which was Safe Mode. But, with the advent of Windows 8, this method stopped working. Now you need to enter Safe Mode in a different way.
In this article, we will talk about how to enter Windows 10 Safe Mode. Moreover, we will consider two possible situations: when Windows 10 boots normally and when Windows 10 does not boot. Let's start with the first situation, as it is simpler.
How to enter Windows 10 Safe Mode using MSCONFIG
If your Windows 10 is still loading, then you can use the MSCONFIG utility. To do this, open the Run menu (Windows-R) or the Windows 10 search bar and enter the command "".
After that, the "System Configuration" window will open in front of you. Here you need to go to the "Boot" tab and enable the "Safe Mode" function. After that, you need to close the window by clicking on the "OK" button and restart the computer.

The next time you restart, your computer will automatically boot into Safe Mode. But, you need to consider one important point. After enabling the Safe Mode function in MSCONFIG, the computer will boot into Safe Mode each time. In order to return to normal operation mode, you need to go to MSCONFIG again, uncheck the "Safe mode" checkbox and reboot.
How to enter Windows 10 Safe Mode using a boot disk
If your Windows 10 won't boot at all, then the above method won't help you. In this case, you need a bootable Windows 10 disk (or a bootable USB stick). Insert the bootable disc into the floppy drive and boot the computer from it as you did before.
At the very beginning, you will see a window with a choice of language parameters. Here you can not change anything and just click on the "Next" button.


In the "Diagnostics" section, select the "Additional parameters" item.


After that, will appear on the screen. Here you need to enter the command " bcdedit / set (globalsettings) advancedoptions true»And press the enter key. Then close the command line by clicking on the button with a red cross.

After closing the command line, select the "Continue" menu item.

As a result, the computer should restart. We do not boot the computer as a boot disk, but as usual. If everything is done correctly, the "Boot Options" menu should appear on the screen.

Using this menu, you can enter the safe mode of Windows 10, as well as activate other special modes of the system.
It should be noted that after the above steps, the computer will display the Boot Options menu each time it is turned on. In order to disable this function, you need to boot from the boot disk again and use the command line to execute the command “ bcdedit / deletevalue (globalsettings) advancedoptions».
Microsoft engineers have implemented a boot store, also known as Boot Configuration Data (BCD), and a boot menu on Windows. The first contains the identifiers of the loaders of all operating systems available on the PC, and the second reads them and displays them in the form of a list of operating systems available for launch. This makes life much easier for a user on whose computer there are several systems. He doesn't need to be smart to switch between them. It is enough to restart your computer and select the one you need from the list provided. Like other parts of Windows, the boot menu is customizable. This guide lists the available ways to edit this section.
Note: almost all the actions described in this guide must be performed under an account with administrator rights. Otherwise, you must know the password from it.
Editing the Windows 10 boot menu in the bootloader window
The Windows 10 boot menu has a small settings section. It provides a minimal set of options - changing the value of the automatic start-up timer of the main system, changing the OS loaded by default, as well as an additional section with system start modes and the function of shutting down the computer.
Editing the Windows 10 boot menu in system settings
In the additional parameters of the system, which can be accessed through the properties of the OS, there is a section. It contains a small list of functions for editing the boot menu, which is suitable for undemanding users. So with its help, you can choose which operating system will be loaded by default, set the display time for the list of installed systems or turn off the timeout altogether, and also activate the output of recovery options.

To get to the specified section, you need to do the following:

Editing Windows 10 Boot Menu in System Configuration
If you need a little more customization options, you can try the utility system configuration... In addition to the settings mentioned, it offers the function of deleting operating system boot records, an option for displaying information about the OS, the ability to start Windows without a graphical shell, select safe mode boot options and a few more minor functions.
You can edit the boot menu using System Configuration as follows:

How to Edit Windows 10 Boot Menu with EasyBCD
EasyBCD is a free utility that provides a wide range of options for editing the boot menu. In comparison, all standard system tools (except for the Command Line) look very primitive.
This compact program allows you to:
- Remove OS from the list of available to run.
- Add new entries Windows (including obsolete ones), Linux / BSD, Mac.
- Add entries for installing systems using ISO images or individual hard disk partitions.
- Rename operating system entries.
- Set the system by default.
- Change the position of entries in the list.
- Set the boot menu language.
- Select the boot loader interface skin (Metro or earlier from Windows Vista / 7).
- Set the duration of the timeout.
- Back up and restore Boot CD (BCD) settings.
- View BCD content and boot menu.
The program interface is completely localized into Russian, and it itself is quite simple to use and does not require any supernatural abilities from the user.


How to rename a system entry in the boot menu

How to move a system entry to the boot menu

How to choose a system to boot by default

How to change the display time of the boot menu

How to change the boot menu language

How to edit Windows 10 boot menu using command line
If you do not trust third-party programs and are trying to use exclusively system tools, then you should try out ways to edit the Windows 10 boot menu using the command line.
Create or restore a Windows Boot Store backup
Before proceeding with all the steps, back up the boot store so that you can restore it if necessary. You can create a BCD backup as follows:

How to add a system entry to the boot menu

How to remove a system entry from the boot menu

How to change the order in which systems appear in the boot menu
To edit the position of records in the loader, use the command bcdedit / displayorder (ID2) (ID1) (ID3)... Instead of all ID specify the real codes of the entries in the sequence in which you want to see them during computer startup. 
When you are having problems with your Windows computer, one of the first troubleshooting steps is to boot and start in Windows Safe Mode. Safe Mode is a simple, stripped-down version of the operating system, loading only the most important files and drivers. In safe mode, you can fix a number of errors with drivers, cure your computer from viruses that prevent the system from starting stably. If earlier you could enter the Windows 7 familiar to everyone using the F8 button when starting the computer, then Windows 10, 8 this function is no longer there, but there is a trick that will help you return the F8 button to enter Safe Mode when you turn on your Windows 10 computer. In this guide, we will analyze how to enter and launch Safe Mode in Windows 10 from the desktop and return the familiar F8 button to enter through it all the time, and consider how to disable Safe Mode to avoid a cyclic boot.
Note: Easy ways are at the bottom, assuming you can boot to your desktop.
How to start Safe Mode when Windows 10 boots
If the Windows 10 system does not boot to the start screen and you need to enter or start Safe Mode when you turn on Windows 10 through the "BIOS", as for example in Windows 7, with the F8 key, then you will need or get into the Windows 10 recovery environment by other methods. which are described below. It can be created on another work computer or when yours was still working.
Note: If you can boot to the desktop, then run Command Prompt as administrator and proceed to step 3.
Step 1... When you started from the installation flash drive, then go to the point installations and below click on the link " System Restore".
Step 2... You will be thrown into the advanced settings of windows 10. Next, go to the settings Troubleshooting> Advanced Options>Command line.

Step 3... Enter the following code into the command line (you can copy the whole code, you can specify each command via Enter):
c:
bcdedit / set (default) bootmenupolicy legacy
exit

Step 4 . You can now start in safe mode with the key F8 in Windows 10, press the button F8 continuously on system boot until the menu appears with download methods. If you want to return back to how it was, then enter instead of legacy> standard. There will be the following kind of command bcdedit / set (default) bootmenupolicy standard .
- Press the restart button on the computer itself many times in a row to provoke an error and bring up a process diagnostic menu.
- Turn on the computer, wait until it boots up to the maximum before the error. Next, press and hold the power button on your computer to turn it off completely. Repeat the procedure 3 times, 4 times you should have a recovery menu.
- If you fail, then follow Step 1.
How to add Safe Mode to the OS boot selection menu
Windows 10 now has advanced startup options. It will look the same as if you have multiple OS versions installed on your computer. If you often use Safe Mode, then setting the menu when choosing an OS will be very excellent and convenient. In the picture below I have configured some parameters for myself. Let's take a look at this method.

Note: Before performing this method, read it first to the end, and you will understand the meaning.
Step 1... There will be three commands for the three menus you have created. Maybe you don't need three, but you only need one safe mode menu. Run Command Prompt as Administrator and enter the following commands of your choice.
- bcdedit / copy (current) / d "Safe Mode"- Let's create a safe mode boot.
- bcdedit / copy (current) / d "PSU with network"- Create a safe mode boot with a network (Internet access).
- bcdedit / copy (current) / d "BP CMD"- Create a safe mode boot with command line.

Step 3... You will see the system configuration, go to the "" tab. We will see the list that was asked through the command line above. Let's customize each menu.
1) ... Select "safe mode" from the list at the top and click on the checkmark below and select " Minimum"Next, check the" "box and click apply. You can also set the menu timer, for example, after 10 seconds it will automatically load just windows 10. Thus, the boot menu will appear in safe mode.

2) ... Select "PSU with network" from the list and select "Network" from the bottom and check the box " Make these boot parameters permanent". Click apply and this way we can load Safe Mode with the network, ie with the ability to access the Internet.

3) ... Highlight "BP CMD", below select " Another shell"and check the box" Make these boot parameters permanent. " Click Apply and OK.

How to enter Windows 10 Safe Mode

Step 2... You will be taken to the windows 10 recovery environment. In this environment, you can perform a factory reset, system restore, and more. In the recovery environment, click on Search and elimination of malfunctions.

Click the button Reboot.

Click on the keyboard F4 to start the procedure for starting windows 10 system in safe mode.

How to enter Windows 7 Safe Mode
Method 1... Windows 7 starts when a button is pressed F8... Once you turn on or restart your computer, press the F8 button at 1 second intervals. The method is also suitable for Windows XP. After the menu of additional settings has been called up, select the boot option.