Installing a web server on Linux:
- If you have Ubuntu, then the article "How to install Apache web server with PHP 7, MariaDB/MySQL and phpMyAdmin (LAMP) on Ubuntu 16.10" will suit you.
- If you have Arch Linux, then the article "Installing LAMP (Linux, Apache, MySQL/MariaDB, PHP7 and phpMyAdmin) on Arch Linux / BlackArch" will suit you.
The local server is a very useful tool. It will definitely come in handy for webmasters, PHP programmers, penetration testers. All of the programs included in a typical web server installation are free, and all are open source. A local web server consumes a minimum of resources and, in fact, it is not difficult to install and configure it at all.
This guide will tell you how to install a local web server without using ready-made builds. This method has its advantages. The most important of these are: full control over what you install; the ability to use the latest software versions.
If you follow the instructions exactly, then everything will work for you! Except for those who have Windows XP - if you have this operating system, then a special instruction has been made for you.
I will show an example of installation on Windows 10, but if you have a different version of Windows, then do not be embarrassed - the procedure is identical everywhere. I will download the latest (most recent) at the time of writing the versions of the programs. If there are new versions coming out by the time you're reading, then download those.
Installation steps:
You may also find it useful:
1. Preparation (downloading the programs included in the server, creating the server structure)
We need:
- Apache(directly web server)
- PHP– an environment for running PHP programs (required by almost all websites)
- MySQL– database management system (required by most websites)
- phpMyAdmin– very handy database management tool
The official website of the Apache developers is httpd.apache.org . You can download Apache from this site. But the official version is built using the old compiler, for this reason it does not work with new versions of PHP. The PHP authors recommend Apache from apachelounge.com/download. Therefore, for this instruction, we download Apache from the site apachelounge.com/download.
If you have a 64-bit version of Windows, then you can choose both 64-bit and 32-bit versions of the components. The main rule is that all components must be of the same bit depth. If you have a 32-bit version of Windows, then all components must be 32-bit. This does not apply to phpMyAdmin, which is written in PHP. For PHP programs, the concept of bitness is not applicable.
The free version of MySQL is called MySQL Community Server. It can be downloaded from the page. The same page has an executable installer, but I recommend downloading the ZIP file. On the download page, we are prompted to register or log into an existing account - but this is not necessary. Just click on the link " No thanks, just start my download". Pay attention to bitness.
We also need a C++ Redistributable Visual Studio 2017 file, i.e. The Visual C++ Redistributable for Visual Studio 2017 (or any other later one), you can download it on the official Microsoft website at the link (direct download link for the 64-bit version; direct download link for the 32-bit version). This file is needed for the web server. And MySQL requires the Visual C++ Redistributable Packages for Visual Studio 2015. You can download it from .
So, I have downloaded the following files:
- httpd-2.4.29-Win64-VC15.zip
- php-7.2.0-Win32-VC15-x64.zip
- mysql-8.0.11-winx64.zip
- phpMyAdmin-4.7.6-all-languages.zip
- vc_redist.x64.exe
- vcredist_x64.exe
Install files vc_redist.x64.exe and vcredist_x64.exe.
2. Create the structure of the web server
Let's create the directory structure of our server. The main idea is to separate executable files and site files from databases. This is convenient for server maintenance, including backup.
At the root of the disk C:\ create a directory server. In this directory, create 2 subdirectories: bin(for executable files) and data.
Go to directory data and create subfolders there D.B.(for databases) and htdocs(for websites).
Go to directory C:\Server\data\DB\ and create an empty folder there data.
3. Installing Apache 2.4
The contents of the downloaded archive (more precisely, only the directory Apache24), unzip to C:\Server\bin\.
Go to directory c:\Server\bin\Apache24\conf\ and open the file httpd.conf any text editor.
In it, we need to replace a number of lines.
Define SRVROOT "c:/Apache24"
Define SRVROOT "c:/Server/bin/Apache24"
#ServerName www.example.com:80
servername localhost
DocumentRoot "$(SRVROOT)/htdocs"
DocumentRoot "c:/Server/data/htdocs/"
DirectoryIndex index.html
DirectoryIndex index.php index.html index.htm
# AllowOverride controls what directives may be placed in .htaccess files. # It can be "All", "None", or any combination of the keywords: # AllowOverride FileInfo AuthConfig Limit # AllowOverride None
# AllowOverride controls what directives may be placed in .htaccess files. # It can be "All", "None", or any combination of the keywords: # AllowOverride FileInfo AuthConfig Limit # AllowOverride All
#LoadModule rewrite_module modules/mod_rewrite.so
LoadModule rewrite_module modules/mod_rewrite.so
We save and close the file. That's it, Apache setup is complete! A description of each modified directive can be found on this page.
Open a command prompt (this can be done by pressing the Win + X keys at the same time). Select Windows PowerShell (Administrator) there and copy there:
C:\Server\bin\Apache24\bin\httpd.exe -k install
If there is a request from the firewall against Apache, then click Allow.
Now enter on the command line:
C:\Server\bin\Apache24\bin\httpd.exe -k start
And press Enter.

Enter root as the username. Leave the password field blank. If everything is done correctly, then everything should look like this:

7. Server usage and data backup
In catalog c:\Server\data\htdocs\ create folders and files, for example:
c:\Server\data\htdocs\test\ajax.php - this file, respectively, will be available at http://localhost/test/ajax.php, etc.
To create a full backup of all sites and databases, just copy the directory C:\Server\data\.
Before updating modules, make a backup of the folder bin- in case of problems, it will be easy to roll back to previous versions.
When you reinstall the server or upgrade it, you must reconfigure the configuration files. If you have copies of these files, then the process can be greatly accelerated. It is recommended to back up the following files:
- c:\Server\bin\Apache24\conf\httpd.conf
- c:\Server\bin\mysql-8.0\my.ini
- c:\Server\bin\PHP\php.ini
- c:\Server\data\htdocs\phpMyAdmin\config.inc.php
All settings are stored in them.
8. Additional PHP setup
PHP is currently a very powerful, flexible, user-friendly tool. On a local computer, it can be used to perform a variety of tasks that are not necessarily related to the generation of Web pages. When solving extraordinary tasks, you can run into the restrictions set in the settings. These settings are contained in the php.ini file (c:\Server\bin\PHP\php.ini) Let's look at some of them:
memory_limit = 128M
sets the maximum amount of memory the script can use
Post_max_size = 8M
sets the maximum amount of data that will be accepted when sending using the POST method
;default_charset = "UTF-8"
sets the encoding (by default, the line is commented out)
Upload_max_filesize = 2M
the maximum size of the file uploaded to the server. Initially set to a very small size - only two megabytes. For example, when loading a database in phpMyAdmin, it will not be possible to load a file larger than 2 megabytes until this setting item is changed.
Max_file_uploads = 20
maximum number of files to upload at one time
Max_execution_time = 30
maximum execution time for one script
It is not necessary to change these settings, but it is useful to know about them.
9. Additional configuration of phpMyAdmin
We have already configured phpMyAdmin and most of the basic functionality is enough. However, on the phpMyAdmin start page, there is an inscription: "Additional features of phpMyAdmin are not fully configured, some features have been disabled."
New features are:
- showing relationships between (related) tables;
- adding information about tables (since version 2.3.0 you can describe in a special table 'table_info' which column will be shown in the tooltip when moving the cursor over the associated key);
- creation of a PDF schema (starting from version 2.3.0 you can create PDF pages in phpMyAdmin showing relationships between your tables);
- display column comments (since version 2.3.0 you can make a comment describing each column for each table. And they will be visible in the "print preview". Since version 2.5.0, comments are used on native table pages and in view, showing as tooltips above columns (property tables) or embedded in the table header in view mode (they can also be shown in a table dump);
- create bookmarks (since version 2.2.0, phpMyAdmin allows users to bookmark queries. This can be useful for frequently used queries);
- history of SQL queries (starting from version 2.5.0 you can save your history of all SQL queries that were made through the phpMyAdmin interface);
- designer (starting from version 2.10.0, the Designer tool is available; it allows you to visually manage the relationships between tables);
- information about recently used tables;
- customizing the interface of frequently used tables;
- tracking (starting from version 3.3.x, a tracking mechanism is available. It helps you trace every SQL command that was executed by phpMyAdmin. Recording work with data and recording commands is supported. Once enabled, you can make versions of tables);
- user settings (since version 3.4.x, phpMyAdmin allows users to set most of the settings and save them in the database);
- custom menus (starting from version 4.1.0 you can create user groups that will only have access to assigned menu items. A user can be assigned to a group and will see only menu items available to his group);
- hide/show navigation items (since version 4.1.0 you can hide/show items in the navigation tree).
- and others
Now we will configure these additional features in full. Go to http://localhost/phpmyadmin/chk_rel.php and click "Create Database". After that, all new features will be activated.
Some screenshots of new features:
1) Designer

2) Tracking

10. Installing a mail stub
In the C:\Server\bin\ directory, create a new directory called Sendmail. Now in this directory create a sendmail.php file with the following content:
#!/usr/bin/env php
Open the PHP configuration file, it is located here C:\Server\bin\PHP\php.ini. And add one line there:
Sendmail_path = "C:\Server\bin\PHP\php.exe C:\Server\bin\Sendmail\sendmail.php --dir C:\Server\bin\Sendmail\emails"
Save the file and restart the server. Great, now all sent emails will be stored in the directory C:\Server\bin\Sendmail\emails\

Letters will have the extension .eml and they can be opened, for example, by the program Thunderbird. Or a regular text editor.
11. Adding PHP Directory to PATH on Windows
If this is not done, then there may be problems with some PHP modules, including php_curl.dll, php_intl.dll, php_ldap.dll, php_pdo_pgsql.dll and php_pgsql.dll. At least when the server is started, the following appears in the logs every time:
PHP Warning: PHP Startup: Unable to load dynamic library "C:\\Server\\bin\\PHP\\ext\\php_curl.dll" - \xef\xbf\xbd\xef\xbf\xbd \xef\xbf\ xbd\xef\xbf\xbd\xef\xbf\xbd\xef\xbf\xbd\xef\xbf\xbd\xef\xbf\xbd \xef\xbf\xbd\xef\xbf\xbd\xef\xbf\xbd\ xef\xbf\xbd\xef\xbf\xbd\xef\xbf\xbd\xef\xbf\xbd\xef\xbf\xbd \xef\xbf\xbd\xef\xbf\xbd\xef\xbf\xbd\xef\ xbf\xbd\xef\xbf\xbd.\r\n in Unknown on line 0 PHP Warning: PHP Startup: Unable to load dynamic library "C:\\Server\\bin\\PHP\\ext\\php_intl.dll " - \xef\xbf\xbd\xef\xbf\xbd \xef\xbf\xbd\xef\xbf\xbd\xef\xbf\xbd\xef\xbf\xbd\xef\xbf\xbd\xef\xbf\xbd \xef\xbf\xbd\xef\xbf\xbd\xef\xbf\xbd\xef\xbf\xbd\xef\xbf\xbd\xef\xbf\xbd\xef\xbf\xbd\xef\xbf\xbd \xef \xbf\xbd\xef\xbf\xbd\xef\xbf\xbd\xef\xbf\xbd\xef\xbf\xbd.\r\n in Unknown on line 0 PHP Warning: PHP Startup: Unable to load dynamic library " C:\\Server\\bin\\PHP\\ext\\php_ldap.dll" - \xef\xbf\xbd\xef\xbf\xbd \xef\xbf\xbd\xef\xbf\xbd\xef\xbf\ xbd\xef\xbf\xbd\xef\xbf\xbd\xef\xbf\xbd \xef\xbf\xbd\xef\xbf\xbd\xef\xbf\xb d\xef\xbf\xbd\xef\xbf\xbd\xef\xbf\xbd\xef\xbf\xbd\xef\xbf\xbd \xef\xbf\xbd\xef\xbf\xbd\xef\xbf\xbd\ xef\xbf\xbd\xef\xbf\xbd.\r\n in Unknown on line 0 PHP Warning: PHP Startup: Unable to load dynamic library "C:\\Server\\bin\\PHP\\ext\\php_pdo_pgsql .dll" - \xef\xbf\xbd\xef\xbf\xbd \xef\xbf\xbd\xef\xbf\xbd\xef\xbf\xbd\xef\xbf\xbd\xef\xbf\xbd\xef\xbf \xbd \xef\xbf\xbd\xef\xbf\xbd\xef\xbf\xbd\xef\xbf\xbd\xef\xbf\xbd\xef\xbf\xbd\xef\xbf\xbd\xef\xbf\xbd \xef\xbf\xbd\xef\xbf\xbd\xef\xbf\xbd\xef\xbf\xbd\xef\xbf\xbd.\r\n in Unknown on line 0 PHP Warning: PHP Startup: Unable to load dynamic library "C:\\Server\\bin\\PHP\\ext\\php_pgsql.dll" - \xef\xbf\xbd\xef\xbf\xbd \xef\xbf\xbd\xef\xbf\xbd\xef\ xbf\xbd\xef\xbf\xbd\xef\xbf\xbd\xef\xbf\xbd \xef\xbf\xbd\xef\xbf\xbd\xef\xbf\xbd\xef\xbf\xbd\xef\xbf\ xbd\xef\xbf\xbd\xef\xbf\xbd\xef\xbf\xbd \xef\xbf\xbd\xef\xbf\xbd\xef\xbf\xbd\xef\xbf\xbd\xef\xbf\xbd. \r\n in Unknown on line 0
To avoid these warnings, you need to add the path to PHP to the system environment variables.
Click the Start button (or whatever it's called on Windows 10?), start typing " Changing System Environment Variables” and open the corresponding settings window.

There click " Environment Variables»:

In the window " System variables» find and click on Path, then press " Change»:


Move the entry to the very top:

Close all windows and save your changes.
Restart the server.
12. Hang, traffic slowdown and/or server error Asynchronous AcceptEx failed
If your server even without load “freezes” - it does not show web pages until it is restarted, and in the server logs there are errors Asynchronous AcceptEx failed:
AH00455: Apache/2.4.9 (Win64) PHP/5.5.13 configured -- resuming normal operations AH00456: Apache Lounge VC11 Server built: Mar 16 2014 12:42:59 AH00094: Command line: "c:\\Server\\ bin\\Apache24\\bin\\httpd.exe -d C:/Server/bin/Apache24" AH00418: Parent: Created child process 4952 AH00354: Child: Starting 64 worker threads. (OS 64) The specified network name is no longer available. : AH00341: winnt_accept: Asynchronous AcceptEx failed. (OS 64) The specified network name is no longer available. : AH00341: winnt_accept: Asynchronous AcceptEx failed. (OS 64) The specified network name is no longer available. : AH00341: winnt_accept: Asynchronous AcceptEx failed. (OS 64) The specified network name is no longer available. : AH00341: winnt_accept: Asynchronous AcceptEx failed. (OS 64) The specified network name is no longer available. : AH00341: winnt_accept: Asynchronous AcceptEx failed. (OS 64) The specified network name is no longer available. : AH00341: winnt_accept: Asynchronous AcceptEx failed.
Then in the Apache configuration file add:
AcceptFilter http none AcceptFilter https none EnableSendfile off EnableMMAP off
13. Setting up cURL in Apache Web Server on Windows
If you don't know what cURL is, then you don't need it. Those. Feel free to skip this step.
cURL is a console utility that allows you to communicate with remote servers using a very large number of protocols. cURL can use cookies and supports authentication. If the web application requires cURL, then it must be specified in the dependencies. Many popular applications do not require cURL, for example, phpMyAdmin and WordPress do not need to set up cURL.
If cURL is configured incorrectly, then you will get errors:
Fatal error: Call to undefined function curl_multi_init() in ...
curl error: SSL certificate problem: unable to get local issuer certificate
For cURL to work in Apache on Windows you need:
1) Be sure to add PHP directory to PATH (system environment variables). How to do this is described just above:
2) In file C:\Server\bin\PHP\php.ini the line should be uncommented extension=curl
This is not usually required, but if you wish, you can make a backup copy of the binary (executable) files of the server. All these files are in the folder C:\Server\bin\. These are Apache, MySQL and PHP - i.e. programs that are responsible for the operation of the server, but which we can download at any time from official sites and reconfigure.
If you want to backup them (for example, before updating the server), then stop the services:
C:\Server\bin\Apache24\bin\httpd.exe -k stop net stop mysql
And copy the folder to a safe place C:\Server\bin\.
By the way, you can copy the entire server, ie. folder C:\Server\- in this case, you will simultaneously get a backup copy of both executable files and data (databases, sites).
When the copy is complete, restart the services:
C:\Server\bin\Apache24\bin\httpd.exe -k start net start mysql
15. Server update
All components that make up the web server are actively developed and new versions are released regularly. When a new version is released, you can update one component (for example, PHP), or several at once.
Removing a server
If you no longer need the server, or you want to install it again, stop the services and remove them from autostart by executing in the command line:
C:\Server\bin\Apache24\bin\httpd.exe -k stop c:\Server\bin\Apache24\bin\httpd.exe -k uninstall net stop mysql c:\Server\bin\mysql-8.0\bin\ mysqld --remove
Delete the server files, to do this, delete the folder C:\Server\. Attention, this will remove all databases and your sites.
How to protect the Apache web server from being hacked on Windows
With PHP (with a choice of versions), with MySQL and phpMyAdmin. This site is hosted on it: responsive and qualified technical support, installation of WordPress and other web applications in one click, as a gift when paying for a year, free site transfer. When ordering hosting + 1 month for free (promo code b33e0e2f).
This article is a step by step guide to creating a local web server. It describes how to install the Apache 2.4 web server on a Windows OS platform. Installation testing was performed on Windows XP SP3.
The composition of the web server: 
- Apache 2.4 (version 2.4.10);
- PHP 5.4 (version 5.4.34);
- MySQL 5.5 (version 5.5.23).
This working environment will suit:
- experienced webmasters to test their projects;
- novice webmasters to create their first sites.
Apache 2.4 and PHP 5.4 distributions are compiled in VC9 (Visual Studio 2008).
Apache version 2.4 VC9 works with almost all current versions of Windows (7/8/Vista/XP SP3).
For VC9 applications to work, the Visual C++ libraries must first be updated.
Installing the Visual C++ Libraries Update Package
Download the vcredist_x86.exe update distribution kit from the Microsoft website, run the file and perform the update.

Installing and configuring the Apache 2.4 server

The Apache distribution does not have an installation file. Therefore, the installation will be done manually.
Create a folder and extract the archive httpd-2.4.10-win32-VC9.zip .
In the configuration file httpd. conf routes are set to C:\ Apache24 by default. Therefore, there will be much fewer edits in the configuration file if you unpack the archive into this folder.
We will extract the distribution to the C:\TestServer folder.
We make changes to the configuration file C:\ TestServer \ Apache24\ conf\ httpd. conf. When writing paths, instead of the "\" (backslash) character, use the "/" (forward slash) character. This is how paths are written in Linux and Unix operating systems. But originally Apache was developed specifically for these operating systems.
We perform a group replacement of the text C:/ Apache24 with C:/ TestServer / Apache24 .
Set the value of the ServerName parameter. 
ServerName localhost:80
Set the value of the ServerAdmin parameter (administrator's e-mail).
ServerAdmin [email protected]
Set the value of the DocumentRoot parameter (the location of the site's documents).
DocumentRoot C:/TestServer/Apache24/htdocs
You may want to keep site documents separate from the server. For example, in the C:\MySites folder. Then this setting can be changed.
DocumentRoot C:/MySites
The Apache executables are located in the C:\TestServer\Apache24\bin folder. Add this value to the Windows PATH environment variable.
PATH=C:\TestServer\Apache24\bin ;
Install Apache as a service.
httpd.exe -k install
 If , then when installing the service, a message will appear about blocking the program from external connections. For the service to work, you must give permission to unblock.
We start the Apache server.
httpd.exe -k start
Checking the health of the server. In the browser command line, type the address: http://localhost . If the installation of Apache was successful, the screen will display the text It works! . Otherwise, we will see a blank screen.

If the server does not start, you should check if port 80, which Apache uses by default, is busy.
This is done with the command
netstat -anb
Most often this port is used by Skype or Firefox. In this case, either free the port or move Apache to port 8080 .
To do this, in the file httpd . conf we change the values of the ServerName and Listen parameters. ServerName localhost:8080
Listen 8080
After that, we restart the service with the command
httpd.exe -k re start
and again try to go to http://localhost
For the convenience of working with the Apache server, you can install a shortcut in the menu that points to C:\TestServer\Apache24\bin\ApacheMonitor.exe
Installing PHP 5.4
 We go to the developer's website http://windows.php.net/download/ . Find the PHP 5.4 distribution in the VC9 x86 Thread Safe section and download the php-5.4.34-Win32-VC9-x86.zip archive.
Create a folder on the local computer, let it be C:\TestServer\PHP54 , and unpack the archive.
We return to the site with the Apache distribution. In the Additional + VC9 section, find the php5apache2_4.dll-php-5.4-win32.zip archive with Apache PHP modules and download it.
In the archive we find the folder with the latest version of the php5apache2_4.dll module and place it in the C:\TestServer \PHP54 folder.
In the httpd config file. conf add the lines:
LoadModule php 5_ module « C :/ TestServer / PHP 54/ php 5 apache 2_4. dll"
AddHandler application/x-httpd-php. php
# configure the path to php . ini
PHPIniDir "C:/TestServer/PHP54/php"
In folder C:\TestServer\Apache54\htdocs create a test.php file.
echo "Hello Apache!";
?>
Restart Apache.
In the address bar of the browser, type http://localhost/test.php . If the text Hello Apache! , PHP installation completed successfully.
php.ini setup
To work with the MySQL database, we need to configure php. ini is a PHP configuration file.

There are two templates in the C:\TestServer\PHP54 folder: development and php.ini-production .
Rename the php.ini-production template to .
The MySQL database libraries are located in the C :\ TestServer \ PHP 54\ ext folder. This path must be specified in the extension_dir directive in the php.ini configuration file.
We find this parameter, remove the comment character at the beginning of the line (this is a semicolon) and write the path.
extension_dir = "C:/TestServer/PHP54/ext"
There are two libraries for working with MySQL database in PHP: php _ mysqli . dll is newer and it is recommended to use it in your work; php_mysql. dll is old but used by most sites.
It is better to register both libraries in the php.ini file.
extension=php_mysql. dll
extension=php_mysqli. dll
After completing the edits, be sure to restart the Apache server.
Installing and configuring MySQL
![]() We go to the page http://www.mysql.ru/download/ . Choose the version for Win32 or Win64. We will be downloading the mysql-5.5.23-win32.msi installation package.
We go to the page http://www.mysql.ru/download/ . Choose the version for Win32 or Win64. We will be downloading the mysql-5.5.23-win32.msi installation package.
Run the file mysql-5.5.23-win32.msi .
We agree to the license terms, select the Typical installation type.
Let's move on to setting up the MySQL server.
Select Detailed Configuration - detailed configuration settings.

We select the server type with the minimum memory requirements - Developer Machine.
Now we need to decide which databases (InnoDB, MyISAM) our server will work with.

Multifunctional Database - InnoDB and MyISAM are supported.
Transactional Database Only - supported by InnoDB.
Non-Transactional Database Only- myISAM is supported.
If you choose to support InnoDB , the next step is to choose where to store your InnoDB tables.
The maximum number of simultaneous connections is better to choose Manual Setting (manual setting) and accept the default value (15).

At this step, the Enable TCP / IP Networking parameter enables support for TCP connections, selects the port through which these connections will be made. The Enable Strict Mode parameter is also set - the mode of strict compliance with the MySQL standard.
Now you need to select the default encoding. The best option is UTF-8 encoding. Therefore, we choose Best Support For Multilingualism.
In order for MySQL to run as a Windows service, install Install as Windows Service . If you need to autostart this service - install Launch the MySQL Server automatically.

Now set the administrator password and turn off the Modify Security Settings option.
After pressing the Next and Execute buttons, the installation of MySQL can be considered complete.
To check the performance of MySQL, press the Windows Start button, find the MySQL utility (MySql Server 5.5 MySQL Server Command Line) and run it.
After entering the administrator password, we get to the MySQL command line.
We enter the command
show databases;

If we see a list of databases, this will mean that the server is working correctly.
Exit command line mode:
exit;
This completes the server installation. Successful work!
Apache is the most popular free web server. As of 2016, it is used by 33% of all Internet sites, which is approximately 304 billion sites. This web server was developed back in 1995 as a replacement for the popular NCSA server and fixed many of its problems. Rumor has it that his name comes from a patchy since he corrected NCSA errors. Now, it is a cross-platform program that supports Windows, Linux and MacOS and provides sufficient flexibility, customization and functionality. The program has a modular structure, which allows you to expand its functionality almost indefinitely with the help of modules.
You can install Apache on Linux with a few commands, but the program provides a very large number of settings that you can change, as well as modules, after enabling which it will work better. This article will cover the installation and configuration of Apache, we will use Ubuntu as the main system, but you can repeat these steps in any other distribution. Not only the installation of the program itself will be considered, but also ways to configure it, configure apache virtual hosts, as well as the most useful modules.
At the moment, the newest version of the program is 2.4, so the apache 2.4 setting will be considered. As I said, in Linux, the program is installed in just a couple of commands. To install on Ubuntu, first update the system to the latest version:
sudo apt update
$ sudo apt upgrade
Then install apache2:
sudo apt install apache2
In other distributions, the program package is called either that, or httpd, and you will have no difficulty installing it.
After the installation is complete, you need to add the web server to startup so as not to start it manually after turning on the computer:
sudo systemctl enable apache2
Apache setup
Gone are the days when Apache configuration was stored in a single file. But it is correct when everything is distributed in its directories, it is easier to navigate in the configuration files.
All settings are contained in the /etc/apache/ folder:
- File /etc/apache2/apache2.conf responsible for basic settings
- /etc/apache2/conf-available/*- advanced web server settings
- /etc/apache2/mods-available/*- module settings
- /etc/apache2/sites-available/*- virtual host settings
- /etc/apache2/ports.conf- ports on which apache is running
- /etc/apache2/envvars
As you can see there are two folders for conf, mods and site. These are available and enabled. When a module or host is enabled, a symbolic link is created from the available folder to the enable folder. Therefore, it is better to make settings in the available folders. Generally speaking, it would be possible to do without these folders, take everything and dump it into one file the old fashioned way, and everything would work, but now nobody does it.
First, let's look at the main configuration file:
vi /eta/apache2/apache2.conf
timeout- indicates how long the server will try to continue the interrupted transmission or reception of data. 160 seconds will be enough.
Keep Alive On- a very useful parameter, allows you to transfer several files, for one connection, for example, not only the html page itself, but also images and css files.
MaxKeepAliveRequests 100- the maximum number of requests per connection, the more, the better.
KeepAliveTimeout 5- connection timeout, usually 5-10 seconds is enough to load the page, so you don’t need to set more, but you don’t need to disconnect before all the data has loaded either.
user, group- user and group on behalf of which the program will run.
HostnameLookups- log domain names instead of ip addresses, it's better to disable it to speed up the work.
LogLevel- error logging level. By default, warn is used, but to make the logs fill up more slowly, just turn on error
Include- all include directives are responsible for including the configuration files discussed above.

Directory directives are responsible for setting access rights to a particular directory in the file system. The syntax here is:
Parameter value
Here are the main options available:
allowoverride- specifies whether to read .htaccess files from this directory, these are the same settings files and the same syntax. All - allow everything, None - do not read these files.
DocumentRoot- sets from which folder you need to take documents to display to the user
Options- Specifies which features of the web server should be allowed in this folder. For example, All - allow everything, FollowSymLinks - follow symbolic links, Indexes - display the contents of the directory if there is no index file.
Require- sets which users have access to this directory. Require all denied - ban everyone, Require all granted - allow everyone. you can use the user or group directive instead of all to explicitly specify a user.
Order- allows you to control access to the directory. It takes two values: Allow,Deny - allow for everyone except those specified, or Deny,Allow - deny for everyone except those specified..ru.
Here, all these directives are not used, since we are satisfied with the default values, but in .htaccess files they can be very useful.
We are left with the /etc/apache2/ports.conf file:
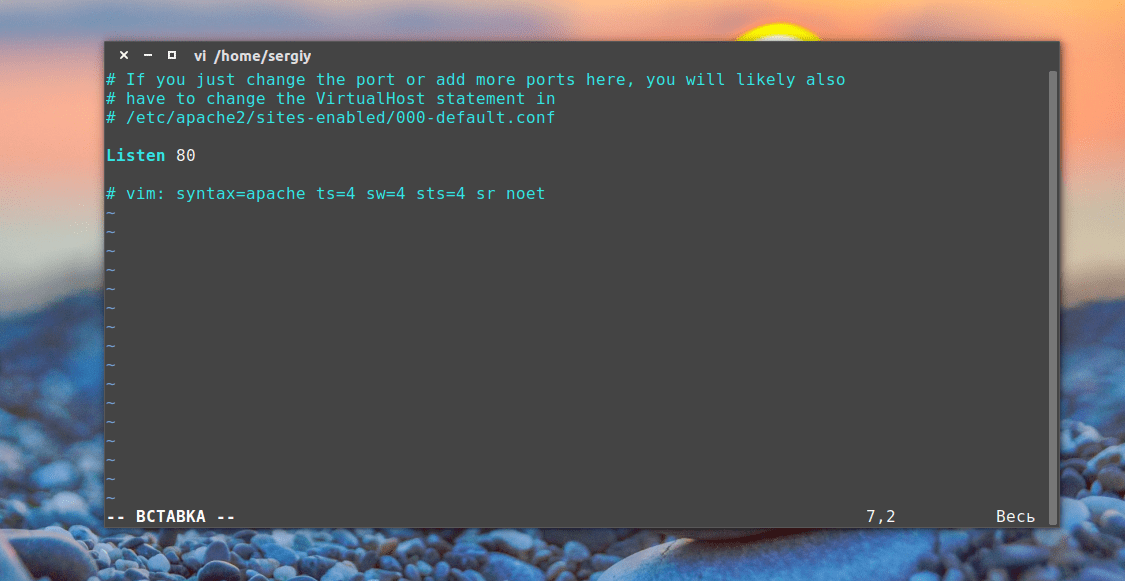
It has only one directive, Listen, which tells the program which port to work on.
The last file is /etc/apache2/envvars, which you are unlikely to use, it contains variables that can be used in other configuration files.

Apache server setup via htaccess
.htaccess files allow you to configure a web server on Ubuntu to behave in a specific directory. All instructions specified in this file are executed as if they were wrapped in a tag
It is important to note that in order for the server to read instructions from .htaccess, the settings for this folder in the main file or virtual host file must not contain AllowOverride None so that all settings can work, you need AllowOverride All.
Otherwise, any configuration of the apache server can be performed here, from enabling modules to simply changing folder access. Since we have already considered all the parameters, we will simply give a couple of examples:
Order Deny,Allow
Deny from all
Denies everyone access to this folder, it is important to apply for configuration folders. Most often, .htaccess is used to work with the mod_rewrite module, which allows you to change requests on the fly:
Rewrite Engine on
RewriteRule ^product/([^/\.]+)/?$ product.php?id=$1 [L]
But this is a very broad topic and beyond the scope of this article.
Configuring Apache Modules
As I said, Apache is a modular program, its functionality can be extended using modules. All available module loaders and module configuration files are located in the /etc/apache/mods-available folder. And those enabled in /etc/apache/mods-enable.
But you don't have to parse the contents of these folders. Setting up Apache 2.4 by adding modules is done using special commands. You can view all running modules with the command:
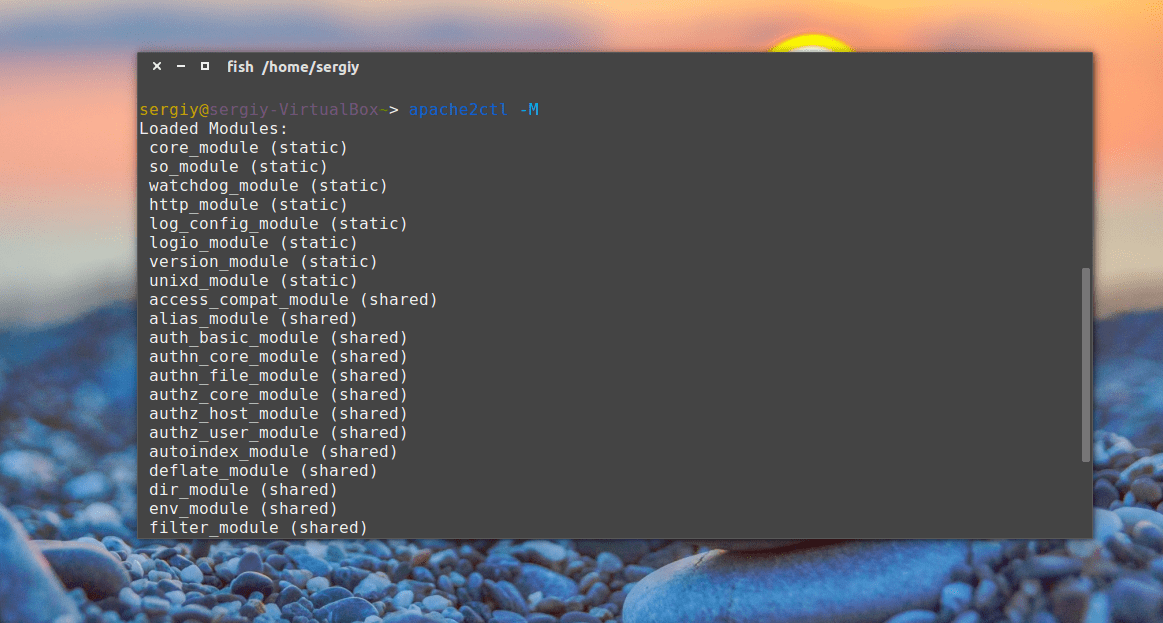
You can enable the module with the command:
sudo a2enmod module_name
And disable:
sudo a2dismod module_name
After enabling or disabling modules, you need to restart apache:
sudo systemctl restart apache2
During the execution of one of these commands, a symbolic link is created or removed to the module file with the extension load in the mods-available directory. You can see the contents of this file, there is only one line. For example:
vi /etc/apache2/mods-available/deflate.load

This means that the module could be activated simply by adding this line to the apache2.conf file. But it is customary to do just that to avoid confusion.
The module settings are in the same folder, only in a file with the .conf extension instead of load. For example, let's see the settings of the same module for deflate compression:
vi /etc/apache2/mods-available/deflate.conf

The files in the conf-available folder are the same modules, only they are installed separately from apache, these can be configuration files to enable the php module or any other programming language. Everything works exactly the same here, only the commands for enabling and disabling these modules are slightly different:
a2enconf module_name
a2disconf module name
As you have seen, enabling modules is very easy. Let's enable a few required but not enabled by default modules:
sudo a2enmod expires
$ sudo a2enmod headers
$ sudo a2enmod rewrite
$ sudo a2enmod ssl
The expires and headers modules reduce server load. They return a Not Modified header if the document hasn't changed since the last request. The expiries module allows you to set the time for which the browser should cache the received document. Rewrite allows you to change the requested addresses on the fly, very useful when creating CNC links, etc. And the last one is for enabling SSL encryption support. Don't forget to restart apache2 after finishing the settings.
Setting up Apache virtual hosts
It would not be very convenient if only one site could be hosted on one physical machine. Apache can support hundreds of sites on a single machine and serve up the correct content for each one. For this, virtual hosts are used. The server determines to which domain the request comes and gives the necessary content from the folder of this domain.
Apache hosts settings are located in the /etc/apache2/hosts-available/ folder. To create a new host, it is enough to create a file with any name (better finished with the host name) and fill it with the necessary data. Wrap all these parameters in a directive virtualhost. In addition to the parameters discussed here, the following will be used:
- ServerName- primary domain name
- ServerAlias- additional name by which the site will be available
- ServerAdmin- administrator email
- DocumentRoot- folder with documents for this domain
For example:
vi /etc/apache2/sites-available/test.site.conf

Self-hosted or installing Apache on a Windows platform
This article is a step by step guide to creating a local web server. It describes how to install the Apache 2.4 web server on a Windows OS platform. Installation testing was performed on Windows XP SP3.
The composition of the web server:
- Apache 2.4 (version 2.4.10);
- PHP 5.4 (version 5.4.34);
- MySQL 5.5 (version 5.5.23).
This working environment will suit:
- experienced webmasters to test their projects;
- novice webmasters to create their first sites.
Apache 2.4 and PHP 5.4 distributions are compiled in VC9 (Visual Studio 2008).
Apache version 2.4 VC9 works with almost all current versions of Windows (7/8/Vista/XP SP3).
For VC9 applications to work, the Visual C++ libraries must first be updated.
Installing the Visual C++ Libraries Update Package
Download the vcredist_x86.exe update distribution kit from the Microsoft website, run the file and perform the update.

Installing and configuring the Apache 2.4 server
The apache.org site does not have a version of Apache 2.4 for Windows. Therefore, we will take the distribution kit on apachelounge.com. At the time of writing, the latest release is Apache 2.4.10.
In the Additional + VC9 section, you can choose two distribution options - with and without ssl support. We choose the second option and download the archive httpd-2.4.10-win32-VC9.zip .

The Apache distribution does not have an installation file. Therefore, the installation will be done manually.
Create a folder and unpack the archive httpd-2.4.10-win32-VC9.zip.
The httpd.conf configuration file defaults to C:\Apache24 routes. Therefore, there will be much fewer edits in the configuration file if you unpack the archive into this folder.
We will unpack the distribution into the C:\TestServer folder.
We make changes to the configuration file C:\TestServer\Apache24\conf\httpd.conf. When writing paths, instead of the "\" (backslash) character, use the "/" (forward slash) character. This is how paths are written in Linux and Unix operating systems. But originally Apache was developed specifically for these operating systems.
We perform a group replacement of the text C: / Apache24 with C: / TestServer / Apache24.
Set the value of the ServerName parameter. ServerName localhost:80
Set the value of the ServerAdmin parameter (administrator's e-mail). ServerAdmin
Set the value of the DocumentRoot parameter (the location of the site's documents). DocumentRoot C:/TestServer/Apache24/htdocs
You may want to keep site documents separate from the server. For example, in the C:\MySites folder. Then this setting can be changed. DocumentRoot C:/MySites
The Apache binaries are located in the C:\TestServer\Apache24\bin folder. Add this value to the Windows PATH environment variable. PATH = C:\TestServer\Apache24\bin;
Install Apache as a service. httpd.exe -k install
 If the Windows Firewall is enabled, then when installing the service, a message will appear about blocking the program from external connections. For the service to work, you must give permission to unblock.
We start the Apache server. httpd.exe -k start
Checking the health of the server. In the command line of the browser, type the address: http://localhost. If the installation of Apache was successful, the text It works! will be displayed on the screen. Otherwise, we will see a blank screen.

If the server does not start, you should check if port 80, which Apache uses by default, is busy.
This is done using the netstat –anb command.
Most often this port is used by Skype or Firefox. In this case, either free the port or move Apache to port 8080.
To do this, we change the values of the ServerName and Listen parameters in the httpd.conf file. ServerName localhost:8080 Listen 8080
After that, restart the service with the command httpd.exe -k restart
and again try to go to http://localhost
For the convenience of working with the Apache server, you can install a shortcut in the Windows startup menu that points to C:\TestServer \Apache24\bin\ ApacheMonitor.exe
Installing PHP 5.4
 We go to the developer's website http://windows.php.net/download/. Find the PHP 5.4 distribution in the VC9 x86 Thread Safe section and download the php-5.4.34-Win32-VC9-x86.zip archive.
Create a folder on the local computer, let it be C:\TestServer\PHP54, and unpack the archive.
We return to the site with the Apache distribution. In the Additional + VC9 section, find the php5apache2_4.dll-php-5.4-win32.zip archive with Apache PHP modules and download it.
In the archive we find the folder with the latest version of the php5apache2_4.dll module and place it in the C:\TestServer\PHP54 folder.
Add the following lines to the httpd.conf configuration file:
LoadModule php5_module "C:/TestServer /PHP54/php5apache2_4.dll" AddHandler application/x-httpd-php .php # configure the path to php.ini PHPIniDir "C:/TestServer /PHP54/php"
In the C:\TestServer\Apache54\htdocs folder, create the test.php file. echo "Hello Apache!"; ?>
Restart Apache.
In the browser address bar, type http://localhost/test.php. If the text Hello Apache! appears on the screen, the PHP installation has completed successfully.
php.ini setup
To work with the MySQL database, we need to configure php.ini - the PHP configuration file.

The C:\TestServer\PHP54 folder contains two templates: php.ini-development and php.ini-production.
Rename the php.ini-production template to php.ini.
The MySQL database libraries are located in the C:\TestServer\PHP54\ext folder. This path must be specified in the extension_dir directive in the php.ini configuration file.
We find this parameter, remove the comment character at the beginning of the line (this is a semicolon) and write the path. extension_dir = "C:/TestServer/PHP54/ext"
To work with the MySQL database in PHP, there are two libraries: php_mysqli.dll is newer and it is recommended to use it in your work; php_mysql.dll is old but used by most sites.
It is better to register both libraries in the php.ini file. extension=php_mysql.dll extension=php_mysqli.dll
After completing the edits, be sure to restart the Apache server.
Installing and configuring MySQL
We go to the page http://www.mysql.ru/download/. Choose the version for Win32 or Win64. We will be downloading the mysql-5.5.23-win32.msi installation package.
Run the mysql-5.5.23-win32.msi file.
We agree to the license terms, select the Typical installation type.
Let's move on to setting up the MySQL server.
Select Detailed Configuration - detailed configuration settings.

Select the type of server with the minimum memory requirements - Developer Machine.
Now we need to decide which databases (InnoDB, MyISAM) our server will work with.

Multifunctional Database - InnoDB and MyISAM are supported. Transactional Database Only - supported by InnoDB. Non-Transactional database Only - supported by myISAM.
If you choose to support InnoDB, the next step is to choose where to store your InnoDB tables.
The maximum number of simultaneous connections is better to choose Manual Setting (manual setting) and accept the default value (15).

At this step, the Enable TCP / IP Networking parameter enables support for TCP connections, selects the port through which these connections will be made. The Enable Strict Mode parameter is also set - the mode of strict compliance with the MySQL standard.
Now you need to select the default encoding. The best option is UTF-8 encoding. Therefore, we choose Best Support For Multilingualism.
In order for MySQL to run as a Windows service, install Install as Windows Service. If you need to autostart this service, install Launch the MySQL Server automatically.

Now set the administrator password and turn off the Modify Security Settings option.
After pressing the Next and Execute buttons, the installation of MySQL can be considered complete.
To check the performance of MySQL, press the Windows Start button, find the MySQL utility (MySql Server 5.5 MySQL Server Command Line) and run it.
After entering the administrator password, we get to the MySQL command line.
Enter the show databases command;

If we see a list of databases, this will mean that the server is working correctly.
Exit the command line mode: exit;
This completes the server installation. Successful work!
WindowsTune.ru
WAMP and XAMPP Not Working on Windows 10?
– October 10, 2015Categories: Miscellaneous
If you did a “clean” installation of Windows 10, you may not have the Web Application Service (Eng. Word Wide Web Publishing Servic) at all. In this case, after installing WAMP / XAMPP, the web server should work fine without any problems.
If it doesn't, try installing Visual C++ Redistributable and then reinstall WAMP / XAMPP.
As soon as the official upgrade from Windows 7 to Windows 10 became available, I did not fail to take advantage of this opportunity. The update went well, everything was fine, but when I tried to run my XAMPP already under the new OS, I was disappointed: the Apache web server did not start. I note that problems with XAMPP / WAMP have become an unpleasant tradition with every Windows update. I found two ways to solve this problem.
Option #1: How to Run Apache on Windows 10
As I managed to find out, port 80, occupied by the "Web Application Service", was the culprit. Stopping this service and restarting XAMPP solved the problem. Below I give how to find this service and stop it from running.
- Press the "Start" button and type the word "Services" (or services.msc).
- In the window that appears, go down, where we find the line "Web Publishing Service".
- Right-click on the service and select the "Stop" option.
 How to start Apache on Windows 10: Stop the "Web Application Service"
 After that, we restart XAMPP / WAMP and Apache should work for you.
Also Read: Windows 10 Keyboard Shortcuts - Key Keyboard Shortcuts Guide
Option #2: How to run Apache on Windows 10
After a “clean” installation of Windows 10, as mentioned above, you may not have the “Web Application Service” at all. If in this situation, WAMP / XAMPP still does not work for you, try the next solution. You need to change the port that WAMP will serve. Here's how to do it.
- open WAMP/XAMPP.
- Go to the Apache settings, where select the http.conf item
- In the text document that opens, find the line Listen 80.
- Change the number 80 to whatever suits you, for example - 8090.
- Restart WAMP/XAMPP.
Everything must work. However, now you will have to constantly use this port number when accessing the server. For example, if earlier you just wrote http://localhost/ then now you will need to add http://localhost:8090/
If you find another solution to this problem, write in the comments about your experience.
itdistrict.ru
Installing Apache on Windows 7
There are a lot of articles on the net where the authors provide detailed instructions with screenshots, thanks to which not a single user was able to install the Apache server for PHP and MySql DBMS. But most of them leave a lot of questions for the user, to which he cannot find an answer for a long time. Consider what Apache, MySql, PHP are, what they are for and how to install these products.
A bit of theory
Apache is a free http server named after the Apache Indian tribe in North America. It is widely used on all platforms, including Windows, and has become a de facto standard in the development of web applications and services. In addition to it, we need to install the MySql DBMS, which is also a standard in its field, and one of the most common and universal scripting languages - PHP.
Apache (as users called it) differs from other servers in that all applications and services are guaranteed to work on it, without requiring the user to perform additional configuration. Compared to its counterparts, Apache does not have high performance and low consumption of computer resources, but any application is guaranteed to function on its basis. You can also add ease of setup, work on virtually all modern platforms and excellent documentation.
Now let's look at how Apache is installed on a computer running Windows 7 (in later editions, the process is almost identical), so that the server is installed on a real hosting.
Apache installation
- We go to the official Apache support resource and download its latest edition.
In fact, there is practically no difference between the versions of the product for the developer, unless the old Apaches are supported by the latest versions of the PHP scripting language.
- Run the downloaded installation file.
- We fill in the first two fields, as in the screenshot: enter "localhost" in both lines.
- We set absolutely any mailbox.
- the first is responsible for installing the product as a Windows service, which will use port number 80;
- the second will connect the server to port number 8080, after which you will have to automatically start it every time.
Product developers recommend stopping at the first option, and therefore, we will consider it a little lower. When installing Apache, pay attention to the path where its files are stored. It is best to install to the "public" directory located in the "users" folder on the system partition of your hard drive.
After closing the installation wizard, make sure Apache is running. To do this, we go down to the tray and check for the presence of the icon shown below.
If it does not work, run the command line. This is done by entering "cmd" into the text form of the command interpreter (Win+R).
On the command line, write "net start Apache2.2" to start the server.
This entry is valid only for product version 2.2, in other versions the numbers will be appropriate.
The server is stopped by typing a command with the following parameters: "net stop Apache2.2".
Let's look at a few more methods for starting, shutting down, and restarting Apache. With regular work, using the command line to control the operation of the server is inefficient - it will take a lot of time. The way out of the situation is to use the context menu of the tray icon: right-click on it and select what action to perform.
The same is done by managing the service of the same name through the appropriate utility that opens access to Windows services, or the Services snap-in. It is launched through the search line or "Administration" in the "Control Panel".
Setting up Apache
When choosing the first server installation method, you can specify the method to start it. If you use it regularly and have free resources on your PC, use Apache autorun. Otherwise, choose to start it manually via the context menu of the service.
After manually or automatically starting the server, open a convenient browser and go to the address: http://localhost. A blank page will appear with the same address.
To get started, do the following.
- We go to the "htdocs" directory located in the folder with the software product files.
- We delete the html file from it and create a directory with the name of the site (mysite).
- You can visit the future site by entering http://localhost/mysite.
- Go to the "conf" folder and open the "httpd.conf" file in a text editor (preferably with syntax support).
- Go to line number 227 and replace "none" with "all". The result should be "AllowOverride All".
See also: How to clean your computer from garbage Windows 7
Performing such an action will allow the use of the "htaccess" document. It is an extended Apache configuration file.
- We are looking for a line with the text "#LoadModule rewrite_module modules/mod_rewrite.so" and remove the "#" symbol.
This action activates the module responsible for the creation and operation of NC links.
- We save the changes made and be sure to restart Apache.
Installing PHP
- We go to the PHP download page and download the latest stable version of the scripting language.
Attention! You will have to download not an executable file of the msi or exe format, but a biz archive.
- Create a directory and decompress the archive into it using 7zip or Winrar.
- Open "httpd.conf" if closed, and add the following text to the end:
"LoadModule php5_module "C:\Users\Public\php\php7Apache2_2.dll"
AddType application/x-httpd-php .php"
The numbers in the first line and the address will change depending on the versions of the products used and the paths to the directories and PHP.
- Again, save the changes and restart Apache.
If an information dialog box appears, signaling an error during the operation, restart Windows.
All configuration settings for PHP when installed are stored in the "php.ini" file. Instead, there are documents whose name starts with "php.ini".
- Rename any to "php.ini" to create a configuration file.
- Then we copy this document to the directory with Windows, for example, "C:\Windows".
- We restart the server through the context menu of its icon.
This completes the installation and configuration of PHP. It remains to check the performance of the server. We go to "htdocs" and create a file in the folder with any name (better in Latin) and a php extension (for example, file.php). Open it with a text editor and enter the following code snippet:
Now open or expand the browser window and enter the path to the created file in the address bar. In our case, this is: http://localhost/mysite/file.php
See also: What to do if your Windows 7 computer takes a long time to boot
If everything went well and without errors, you will see a similar image.
Pay attention to the line "Loaded configuration file". The path to the "php.ini" configuration file should be specified there.
This completes the installation of Apache with PHP on a Windows machine. If you need to install any CMS, the DBMS is installed.
DBMS installation
- Download the latest version of MySql for your version and bitness of Windows.
- After clicking on the “Download” button, click on the link highlighted in the screenshot to download MySql without registration.
- We launch the installer, the operation of which will require the .NET Framework version 4.5 library.
- We accept the terms of use of MySql on Windows.
- Move the switch to the "Server only" position.
- Click on the "Execute" button to start installing MySql after checking the requirements.
- Set the password for MySql, which will be used to grant access to the database.
Server installation with scripting language and MySql is completed. It remains only to connect the last two components so that they can interact.
To do this, open the already known configuration file "php.ini" and remove the ";" in lines with the following data:
extension=php_mysql.dll
extension=php_mysqli.dll.
Find the text "; extension_dir = "ext"" and replace it with the following "extension_dir = "C:\Users\Public\php\ext"", where after the "equal" sign we set the path to the PHP directory.
To check if MySql is working, we create a file with the php extension (for example, file.php) in the "htdocs" directory with the following content:
mysql_connect();
If, after opening the document, you see a picture on the screen, as below, then everything is set up correctly, MySql is connected and Apache is ready to work.
(Visited 6 008 times, 6 visits today)
windowsprofi.ru
My experience of setting up Apache x64 under Windows 8.1 x64
Folder preparation
I really don't like to have everything lying around, so for starters, let's create folders where we will have programs and sites. Let's create a "Server" folder on the "C:\" drive (or wherever it is more convenient for you):We will create 2 folders in it:
C:\Server\web - this is the folder in which we will have programs
C:\Server\domains - and our sites will be in this folder So, in the \web\ folder, we will create 3 folders for apache, php, mysql:
C:\Server\web\apache\
C:\Server\web\php\ C:\Server\web\mysql\ Next, go to the domains folder and create the \localhost\ folder
C:\Server\domains\localhost\
Inside the folder, we will have 2 subfolders: public_html - for site files; logs - for text files that record "who" accessed the site and what errors appeared in the site.
C:\Server\domains\localhost\public_html\
C:\Server\domains\localhost\logs\ This completes the folder structure, let's move on to configuring Apache.
Apache setup
To install Apache, we need Apache itself (Cap). Since we have Windows 8.1 x64, we will install Apache x64. To download follow the link:www.apachelounge.com/download/win64
And download "httpd-2.4.6-win64.zip". We also need the "Microsoft Visual C++ 2010 Redistributable Package (x64)" for normal operation. To do this, download it from this link:
www.microsoft.com/en-us/download/details.aspx?id=14632
And we install. After downloading our archive with Apache, open it. Having opened the archive, we will see the Apache24 folder, let's go into it. A lot of folders and program files will appear, we unpack everything into the previously prepared folder:
C:\Server\web\apache\
It should turn out like this:
C:\Server\web\apache\bin\
C:\Server\web\apache\cgi-bin\ C:\Server\web\apache\conf\ C:\Server\web\apache\error\ C:\Server\web\apache\htdocs\ C:\Server \web\apache\icons\ C:\Server\web\apache\include\ C:\Server\web\apache\lib\ C:\Server\web\apache\logs\ C:\Server\web\apache\manual \ C:\Server\web\apache\modules\ We do not need folders such as \cgi-bin\, \htdocs\, \icons\ and \manual\ - you can delete them. Let's go to the folder:
C:\Server\web\apache\conf\
And open the Apache configuration file - "httpd.conf" with any text editor. In this file, each line contains directives for configuring Apache, and lines starting with a # sign (pound sign) contain a comment and an explanation. Let's get started: Apache configuration file # Apache ServerRoot directive “C:/Server/web/apache” # Listen on the local IP port (80 by standard) Listen 127.0.0.1:80 # then connect the extension libraries for Apache LoadModule rewrite_module modules/mod_rewrite .so LoadModule php5_module "C:/Server/web/php/php5apache2_4.dll" # tell Apache that files with php extension should be treated as php scripts AddHandler application/x-httpd-php .php # set the location of the php settings file PHPIniDir “C:/Server/web/php” # change server name ServerName 127.0.0.1:80 # change access to Options Includes Indexes FollowSymLinks AllowOverride All Allow from all # directory with our sites DocumentRoot “C:/Server/domains” # index files, by priority. DirectoryIndex index.php index.html index.htm index.shtml
# folder for log files
ErrorLog “C:/Server/domains/logs/error.log” CustomLog “C:/Server/domains/logs/access.log” # add alias for phpMyAdmin, and fix alias for cgi Alias /pma “C:/Server/ domains/phpMyAdmin” ScriptAlias /cgi-bin/ “C:/Server/web/apache/cgi-bin/”
# edit path for cgi
AllowOverride None Options None Require all granted
# file types
… AddType text/html .shtml AddOutputFilter INCLUDES .shtml AddType application/x-httpd-php .php AddType application/x-httpd-php-source .phps
# Other configs:
Include conf/extra/httpd-mpm.conf Include conf/extra/httpd-autoindex.conf Include conf/extra/httpd-vhosts.conf Include conf/extra/httpd-manual.conf Include conf/extra/httpd-default.conf Browser Match "MSIE 10.0;" bad_DNT RequestHeader unset DNT env=bad_DNT This completes the httpd.conf setup. Additional configs have been included in the Apache httpd.conf configuration file:
Include conf/extra/httpd-mpm.conf
Include conf/extra/httpd-autoindex.conf Include conf/extra/httpd-vhosts.conf Include conf/extra/httpd-manual.conf Include conf/extra/httpd-default.conf Open the file “C:\Server\web\ apache\conf\extra\httpd-mpm.conf" and quickly run through it.
# specify where we will store the pid file:
PidFile "C:/Server/web/apache/logs/httpd.pid" Leave the rest of the parameters unchanged. Let's open the file "httpd-autoindex.conf", change only the lines with the path there:
Alias /icons/ "c:/Server/web/apache/icons/"
Options Indexes MultiViews AllowOverride None Require all granted Next, go to the "httpd-vhosts.conf" file, delete its contents. After we have done this, we begin to fill it again: Apache hosts file .log" CustomLog "C:/Server/domains/localhost/logs/access.log" common # add phpMyAdmin for the future (do not forget to create a folder) DocumentRoot "C:/Server/domains/phpmyadmin/public_html" ServerName localhost ErrorLog "C :/Server/domains/phpmyadmin/logs/error.log" CustomLog "C:/Server/domains/phpmyadmin/logs/access.log" common This completes editing the file. Further, in the remaining files, only the paths are edited: File "httpd-manual.conf":
AliasMatch ^/manual(?:/(?:da|de|en|es|fr|ja|ko|pt-br|ru|tr|zh-cn))?(/.*)?$ "C:/ server/web/apache/manual$1"
No changes are made to the "httpd-default.conf" file. This completes the Apache configuration setup.
PHP setup
Since we have Windows 8.1 x64 and Apache x64 installed and configured, then php must be x64. Let's go to the site:www.anindya.com/tag/php
And download the latest php archive. We need php as a module i.e. To do this, download Thread Safe. After the archive has been downloaded, open it and transfer the contents to the "C:\Server\web\php\" folder. Let's create two empty folders "tmp" and "upload". Next, in this folder, look for the file "php.ini-development" and rename it to "php.ini". Open the file in a text editor and change the directives (line comments in the file start with a semicolon). extension_dir = "C:/Server/web/php/ext" upload_tmp_dir = "C:/Server/web/php/upload" upload_max_filesize = 64M extension=php_bz2.dll extension=php_curl.dll extension=php_gd2.dll extension=php_mbstring. dll extension=php_mysql.dll extension=php_mysqli.dll extension=php_pdo_mysql.dll extension=php_sockets.dll extension=php_sqlite3.dll ; in the section we specify the time zone of our server (http://php.net/date.timezone) date.timezone = "Asia/Yekaterinburg" session.save_path = "С:/Server/web/php/tmp/" This is the php setting ends.
MySQL setup
We put MySQL x64 as a socket under windows. Download the archive with the latest version of MySQL x64:dev.mysql.com/downloads/mysql
At the bottom of the page we find Windows (x86, 64-bit), ZIP Archive and click on the "Download" button. You will be redirected to the registration page on the site. Click at the bottom of the page "No thanks, just start my download", the download of the MySQL archive will start. After the archive has been downloaded, open it and transfer all the contents of the folder to "C:\Server\web\mysql\" Now open the MySQL settings file - "C:\Server\web\mysql\my-default.ini". We delete all its contents and enter our data there.
port=3306 host=127.0.0.1 port=3306 bind-address=127.0.0.1 enable-named-pipe basedir="C:/Server/web/mysql/" datadir="C:/Server/web/mysql/data/ " sql_mode=NO_ENGINE_SUBSTITUTION,STRICT_TRANS_TABLES That's it. In the configuration file, we specified that scripts can access the server both by local IP and by socket connection. It remains the case for the small. Let's add the paths to Apache and MySQL to the "PATH" system variable, for this:
- Drag the mouse cursor to the lower right corner of the screen
- Click the search icon and type: control panel
- Select System -> Advanced
- Select Environment Variables, from the System Variables menu, find the PATH variable and click on it.
- Write down the paths to Apache and MySQL:
httpd -k install
To install MySQL:
mysqld.exe --install MySQL --defaults-file=”C:\Server\web\mysql\my-default.ini”
Set a password for the MySQL user. To do this, start the MySQL service with the command:
After the service has started, set the password:
mysqladmin –u root password YourPassword
We registered two sites in the “httpd-vhosts.conf” file, in order for the browser to see them, the names of the sites must be added to the “hosts” file. Let's go to the folder:
C:\Windows\System32\Drivers\etc\
Open the "hosts" file with any text editor (run as administrator) and add to the end of the file:
127.0.0.1 localhost
127.0.0.1 phpmyadmin Save the file. For the convenience of starting and stopping the Apache and MySQL services, let's create the start-server.bat and stop-server.bat files. To do this, go to the "C:\Server\" folder and create these two files. Contents of "start-server.bat":
NET start Apache2.4 NET start MySQL Contents of "stop-server.bat":
NET stop Apache2.4 NET stop MySQL Setting up Apache, PHP and MySQL is now complete. In order to test the server, let's create a file "index.php" in the folder "C:\Server\domains\localhost\public_html" with the content:Installing PhpMyAdmin Download the latest version of PhpMyAdmin from here:
www.phpmyadmin.net/home_page/index.php
Open the downloaded archive and transfer the contents of its folder to the folder for our domain "C:\Server\domains\phpmyadmin\public_html\". We find the file "config.sample.inc.php", make a copy of it and rename the copy to "config.inc.php". Open the file with a text editor and change the data:We save and close the file. Open the site "http://phpmyadmin" in the browser and enjoy.
The article turned out to be voluminous, but I hope it is useful.
Tags:
- windows 8.1
- apache
- mysql
- phpmyadmin
habrahabr.ru
How to install Apache 2.4 along with PHP 5.6 and MySQL 5.6 on Windows 7 - 10
This material will become an indispensable guide for novice web developers when installing the Apache web server with new versions of the PHP interpreter on their Windows computer. Usually, a simpler solution is used for this task - installing the assembly. This eliminates the need to fiddle with settings. But it is precisely understanding the specifics of the web server, how to properly install and configure it, that is one of the essential skills of a web developer. Therefore, we will understand.
Please note that these versions of VC11 will be very difficult, if not impossible, to run under Windows XP.
Preparation process.
First you need to make sure that the version of Windows on your computer is not older than the seventh. Also, the instructions in this article for Apache 2.4 will not work for Windows XP.
The first step is to uninstall any web servers that were installed before. Next, you need to go to the services and make sure that Apache or IIS are not among them. If you have any other web server, there is a good chance that the one installed in parallel will not work.
If you use Skype on this computer, then in its settings you need to disconnect from port 80.
You will need a file manager or code editor to create files of various resolutions.
As for the folder structure, it may be different, but it was this instruction that was developed for a specific structure, which should be taken into account so that everything works 100%.
Before proceeding with the installation procedure, you should create a separate USR folder on drive D. You need to create apache, php, tmp, www, log folders there, without specifying version numbers. Using a file manager or code editor, create the following files in the www directory:
- index.html , which contains: It works!
- index.php which contains:
If you don't have a file manager or a code editor, you can download them here. These tools are a must-have for every developer on a PC.
In the PATH system variable we write:
| ;D:\USR\apache;D:\USR\apache\bin;D:\USR\php; |
Important! The numbering of lines in the configuration files for different versions of apache and php may differ from the one shown.
Any commands are executed only on behalf of the Admin, and editing files is no exception.
Apache 2.4 installation process
By and large, the development process in PHP does not imply a separate web server, since there is a built-in web server and, as a rule, it is enough to develop 1 project. However, we recommend installing and configuring the Apache web server as a minimum to learn all the intricacies of working with this web server and its configuration. This skill will surely come in handy in the future.
- First, let's download the Apache 2.4 VC11 binaries for our system by going to: http://www.apachelounge.com/download/VC11/. We believe you have a 64-bit operating system, where you will need a file called: httpd-2.4.16-win64-VC11.zip
- All additional modules, if necessary, download there. But to perform a basic installation, this is not necessary.
- Unzip the contents of the Apache24 folder from the previously downloaded archive to D:\USR\apache and note that it is the contents of the Apache24 folder that must be placed in D:\USR\apache, not the folder itself. Installation is not required.
- In the D:\USR\apache\conf\httpd.conf file, change the ServerRoot value to "d:/USR/apache" on line 37 and the DocumentRoot (and Direcroty) value to "d:/USR/www" on line 242 and 243. Uncomment line 218 and change it to ServerName localhost:80.
- The log storage parameters in this file must be found and changed as follows:
- Installing the Ahache service. Do not forget that it is executed only on behalf of the Admin. Open a command prompt and paste:
D:\USR\apache\bin\httpd.exe -k install - During the installation process, you must carefully consider the pop-up error messages. With the correct installation process, they should not be. If the next line does not appear again at the end of the execution, it indicates that a mistake has been made. To avoid errors, use the copy/paste functions.
- The next step is to create a shortcut on the desktop for D:\USR\apache\bin\ApacheMonitor.exe and place it for automatic loading. The autoload window is called like this: in WIN8, press WIN + R, then type shell:Startup and click Ok.
- Start Apache Monitor. The shortcut should show up in the system tray. Left-click on it and then select Apache24 -> Start.
- Go to http://localhost/ in a browser. Here the inscription It works! If it is not there, then something was entered incorrectly. To identify and fix an error, you need to read the logs, google, etc.
PHP 5.6 installation process
- To install PHP 5.6, download the latest version of VC11 x86 Thread Safe or VC11 x64 Thread Safe from http://windows.php.net/download/. This is where VC11 and Thread Safe are needed. Specify that the bit depth is identical to that of Apache. The desired file will probably have a name like this: php-5.6.11-Win32-VC11-x86.zip or php-5.6.11-Win32-VC11-x64.zip
- Next, you need to extract the contents of the archive to D:\USR\php. Installation is not required.
- In the file D:\USR\apache\conf\httpd.conf we write:
- The value of DirectoryIndex needs to be changed to index.html index.php on line 276.
- Next, run the Apache24-> Restart command in Apache Monitor to restart Apache.
- In the browser, we type http://localhost/index.php, go and see if PHP works.
- Copy the file D:\USR\php\php.ini-development, which is called D:\USR\php\php.ini
- Go to search to find, uncomment, and then change options like this:
- We set php-m on the command line and look at the list of modules that have been connected.
- Through the Apache Monitor, we restart Apache.
Virtual hosts in Apache
- In a situation where several projects are postponed on one PC, there is a need for virtual hosts. For example, we use two: s1.localhost and s2.localhost. In order not to get confused, we start folders with identical names, but in real life this is not necessary.
- Be aware that when using a virtual host, the DocumentRoot parameter of the Apache configuration file becomes meaningless. Now the main host of the server, which is located at http://localhost/ , will be the main virtual host in the configuration file.
- First, add these lines to the c:\Windows\System32\drivers\etc\hosts: file (again, on behalf of the admin)
127.0.0.1 s1.localhost 127.0.0.1 s2.localhost - At this stage, after the work done, it will not hurt to reboot. If the lack of access rights does not allow you to change the file, you can make a copy of it on the desktop and change it there, then return it back.
- Next, you need to make folders for virtual hosts D:\USR\www\s1.localhost and D:\USR\www\s2.localhost, where the files will be placed. In all folders, you need to create files with index.html, which will contain S1 and S2. This will allow you to control the correct operation.
- Next, you need to make separate folders for the logs: D:\USR\log\s1.localhost and D:\USR\log\s2.localhost - they will contain the logs of all sites. It is more convenient to store logs in separate folders, but you can also store them in one shared folder.
- In the D:\USR\apache\conf\httpd.conf file, uncomment the Include conf/extra/httpd-vhosts.conf line to enable virtual host support.
- After that, we edit in d:\USR\apache\conf\extra\httpd-vhosts.conf. Each virtual host has a separate VirtualHost block:
- From now on, the first virtual host s1.localhost will become the main host of the system, because its block is the first one in the configuration file and is available when you get to http://localhost/
- Through the Apache Monitor, we restart Apache and go first to http://s1.localhost/, and then to http://s2.localhost/.
Let's summarize.
To add a new virtual host, you only need to create a separate folder for its files in D:\USR\www, for logs - in D:\USR\log, indicate its name in the hosts file and add the VirtualHost block to the virtual hosts configuration file.
Below I wrote instructions on how to set up an Apache server on a local computer with Windows 7 and install PHP, MySql and phpMyAdmin on it.
Installing Apache
Download distribution package with Apache server from http://httpd.apache.org/download.cgi site. We select version 2.2.22 and download the installer for windows. On your home computer, you are unlikely to need SSL, choose - " Win32 Binary without crypto (no mod_ssl) (MSI Installer)«.
Disable Skype before installation, or disable the use of port 80 in the Skype settings, as this will interfere with the installation.
Install Apache by running the installation file. All installation steps are standard.
Click Next.

We agree to the license.


We enter data in all three text fields. You can enter a non-existent domain like test.test or example.com. This data is needed to create a basic configuration file. Below the text fields, one of the most important settings is to install Apache as a service or as a regular program. Select "for All Users, on port 80, as a Service - Recommended" - install as a service.

Select Custom (custom installation).

Choice of components and installation location. You can leave all default values.

Click Install.

We complete the installation.

Installation completed. An Apache icon will appear in the tray, with which you can quickly stop / start.

We check the functionality. Go to the browser at http://localhost/ If everything is done correctly, you will see the inscription "It Works!". Congratulations, the first step is completed successfully.
Note.
I recommend that you immediately enable support for CNC links, for this, uncomment the line LoadModule rewrite_module modules/mod_rewrite.so in file httpd.conf. It is in the folder conf where you installed Apache.
It was like this:
(codecitation)#LoadModule rewrite_module modules/mod_rewrite.so(/codecitation)
It should become like this:
(codecitation)LoadModule rewrite_module modules/mod_rewrite.so(/codecitation)
Here and in the future, uncommenting means removing the comment sign - #, which is located at the beginning of the line.
To be continued.